The dramatic, unique look generated by Lensbaby lenses can be created—sort of—with Photoshop. Here’s how to do it.
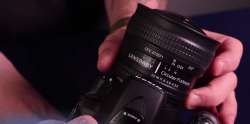
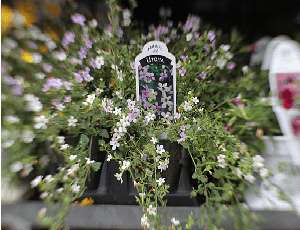
I love the soft background (and foreground) achieved by very wide lens apertures. A somewhat similar but more dramatic effect can be obtained by the Lensbaby series of lenses. I own a Lensbaby 3 and love to play with it. Here’s an example of what it does. I can change aperture rings to give a stronger or weaker blur effect, and I can distort the lens barrel to move the sweet spot around. I move the lens bellows in and out and/or turn a ring to focus. Its great to be able to produce these dramatic effects in-camera!
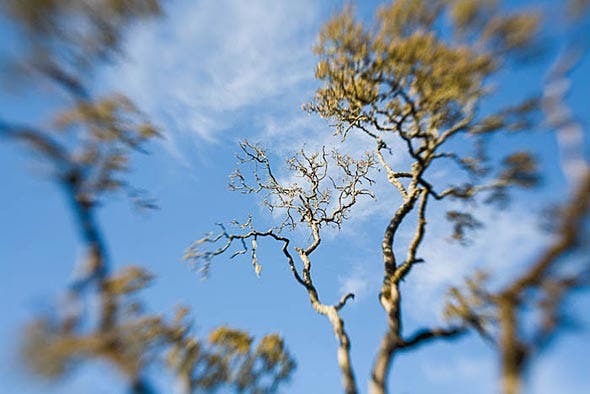
But Lensbabies have a limited focal range. You can get accessory kits that stretch the focal reach from 20mm to 80mm, and also a macro adapter, and that covers a lot of ground. [Also read: “How to use a Lensbaby“] However, every so often, I want the effect on something I can only shoot with a much longer focal length lens.
I thought it would be fun to see if I could achieve a faux Lensbaby effect in Adobe Photoshop for those occasions when I’m using a longer lens. No, it isn’t quite the same, but it’s close. The faux effect isn’t quite as “organic” and doesn’t mimic the oval highlights you get at the edges of a real Lensbaby image with bright lights. But it is still fun to play with, even if it isn’t quite the real thing.
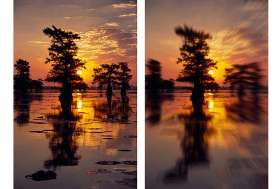
Much of the charm of a Lensbaby lies in the way it simplifies an image, sometimes to the point of drop-dead elegance, by eliminating distractions and focusing attention where you want it. Even if you don’t care for faux effects, playing with this method can be a worthwhile exercise in seeing. It will have its best effect for images with distracting elements near the periphery. Here is a before and after example:
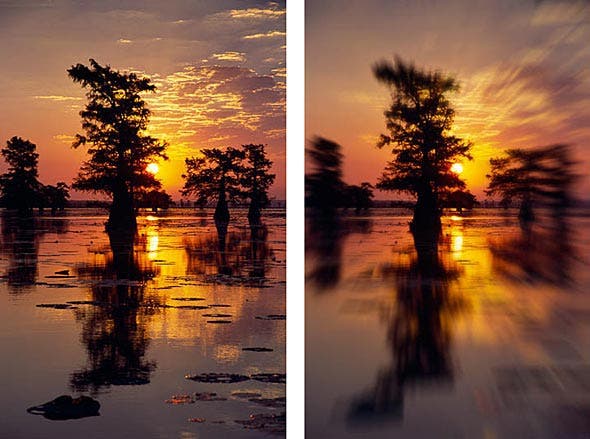
There are several ways to get this effect. I’ll show you two. I’m using Photoshop CS4 but you can do the first method below in versions that go way back, and probably in some other image editors.
The easy way:
This is the simplest and most obvious method, but you have no control after the fact except to redo it until you get what you want:
- Flatten the image if you had adjustment or additional pixel layers other than the Background. (If so, leave your master file intact by doing a Save As and giving the new “Lensbaby” file a new name.)
- An optional step is to duplicate the Background to make a new layer and work on that duplicate layer. Leaving the original Background is simply an easy “out” in case you don’t like the effect you get; you can delete the duplicate layer you worked on and duplicate the Background again and start over.
- Make a very soft edged selection centered where you want the sharpest focus. If you are not familiar with the wonderful tool of quick masking (which should actually be called quick selecting), see my tutorial on Virtual Fill Flash. It is a technique I use on almost every image.
- Inverse the selection if necessary, so everything else but this central area is selected. This would be necessary if you had the quick mask defaults changed to Selected Areas instead of Masked Areas, as I suggested in the tutorial.
- Do a radial blur: Filter > Blur > Radial Blur. Choose Zoom and use your cursor to move the midpoint in the grid box where you want it. This mimics distorting the lens of the Lensbaby. (It’s too bad the grid doesn’t overlay the image itself.) The quality isn’t critical. Experiment with the amount until you like the result.
- Do another selection or reload the same one (Select > Load) and then do a blur (Filter > Blur > Gaussian Blur or Lens Blur). You may want to make a slightly different selection for the two blurs.
The most sophisticated way:
This method uses Smart Objects, which allow incredible flexibility to alter many adjustments. They first appeared in Photoshop CS2. If you have never used them, here’s an easy way to learn the basics.
- Convert the background to a Smart Object (Layer > Smart Objects > Convert to Smart Object or Filter > Convert for Smart Filters).
- Do the radial blur and then the Gaussian blur as above, but with no selection.
- You will see that a mask has come for free on the Smart Filters layer, as shown circled in red below. Use a brush of the appropriate size and hardness (set the foreground color to black) and paint out the middle of the mask to give a sharper area where you want it. Try a very soft-edged brush and maybe several passes with a 50% opacity brush.
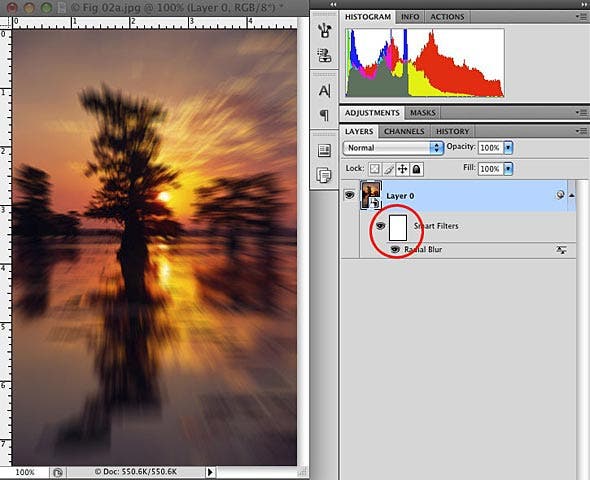
In this figure I have only done the Radial Blur. When I do the Gaussian or Lens Blur there will be another “mini-layer” above the Radial Blur “layer.” I can adjust the settings of either filter by double clicking its name. The image is not degraded by multiple changes and you can tweak the mask any time after the fact.
In the “after” example in the second figure above, I have already added the mask which makes the central area is relatively sharp, as it is with a Lensbaby. There is only one mask for both filters.
Always save your master file with all adjustment layers and smart objects intact and you can tweak things next week or next year. How cool is that?
PS: If you like what you can do with Smart Objects, you should know that you can open a file from Adobe Camera Raw as a Smart Object. Just hold the Shift key and the Open Image button changes to Open Object. This allows you to go back and tweak the RAW adjustment parameters after the image is open in Photoshop and has adjustment layers added. How cool is that?
Diane Miller is a widely exhibited freelance photographer who lives north of San Francisco in the Wine Country and specializes in fine-art nature photography. Her work, which can be found on her web site, http://www.DianeDMiller.com, has been published and exhibited throughout the Pacific Northwest. Many of her images are represented for stock by Monsoon Images and Photolibrary.
