Getting the best possible image quality out of your lens is not just a matter of getting the subject in focus and holding the camera steady. As you probably already know, there are many aspects of image quality beyond just sharpness! For example, you’ve probably already heard about things like vignetting and distortion. These are two rather common and visible aspects of image quality that may affect your buying decisions. In this article, I will explain one of the most troublesome, pesky aspects of all: chromatic aberration. Also, however, I will teach you how to either avoid or fix it!
What Is Chromatic Aberration?
What is chromatic aberration? Simply put, “chroma” means color, and “aberration” is a type of optical distortion. Chromatic aberration is the term used to describe the color fringes or halos that can happen in the corners of your images, or sometimes even in the center of your image.

Chromatic aberration, also known as “CA”, is often used as a blanket term to describe all different types of color aberrations that a lens can create. For the purpose of this article, we’ll talk about them all, and more importantly, again, I’ll show you how to fix them all.
Keep in mind that under this blanket, you’ll find multiple general terms used. These include “color fringing” or “purple fringing”, and more technical terms like longitudinal chromatic aberration, astigmatism, coma, and others.
Examples Of CA
First and foremost, what do chromatic aberrations look like? There are various kinds, and here are some excellent examples:


When you zoom in to review your images at 100% or 200%, it’s pretty obvious that there are some unwanted colors creating a ghost or halo around the subject. These aberrations are not actually there. They are caused by the lens’ optical glass elements not being able to create a truly perfect image on the sensor.
If you’ve ever seen sunlight hit a prism, you know that glass can turn white light into a rainbow of colored light.
The above examples feature common types of chromatic aberration. Those specific colors (magenta/aqua) often appear at the edges and corners of a lens. You can usually find them when your image contains high-contrast edge detail, whether or not it’s in focus!

Of course, there are other forms of CA, and some of them can appear almost anywhere in the image, not just the edges. There are many other forms of aberration, such as blooming, (see below) astigmatism, and other color fringing.
Before we go any further, I want to mention how important it is (or isn’t?) to care about this. Honestly? If you only share your images on social media, then chromatic aberration is really not something to worry about.
Remember, we had to zoom in to 100% magnification on 20-40 megapixel images in order to see these faint aberrations. When zooming out to view a whole image on a computer display, let alone on a phone display at ~1080p resolution, you just won’t see these issues.
In other words, you probably just don’t need to worry that much about CA, compared to a lens’ sharpness, bokeh, distortion, and vignetting. If you like all of those aspects of your favorite lens, then don’t let a faint aberration stop you from enjoying that lens.
How To Avoid Chromatic Aberration
With that said, if you want to learn how to remove chromatic aberration, it’s actually very easy. First, there are two ways to ensure that you never even see any chromatic aberration in your images in the first place. If you follow both of these steps, and if you have a half-decent, modern lens, you’ll eliminate it completely.
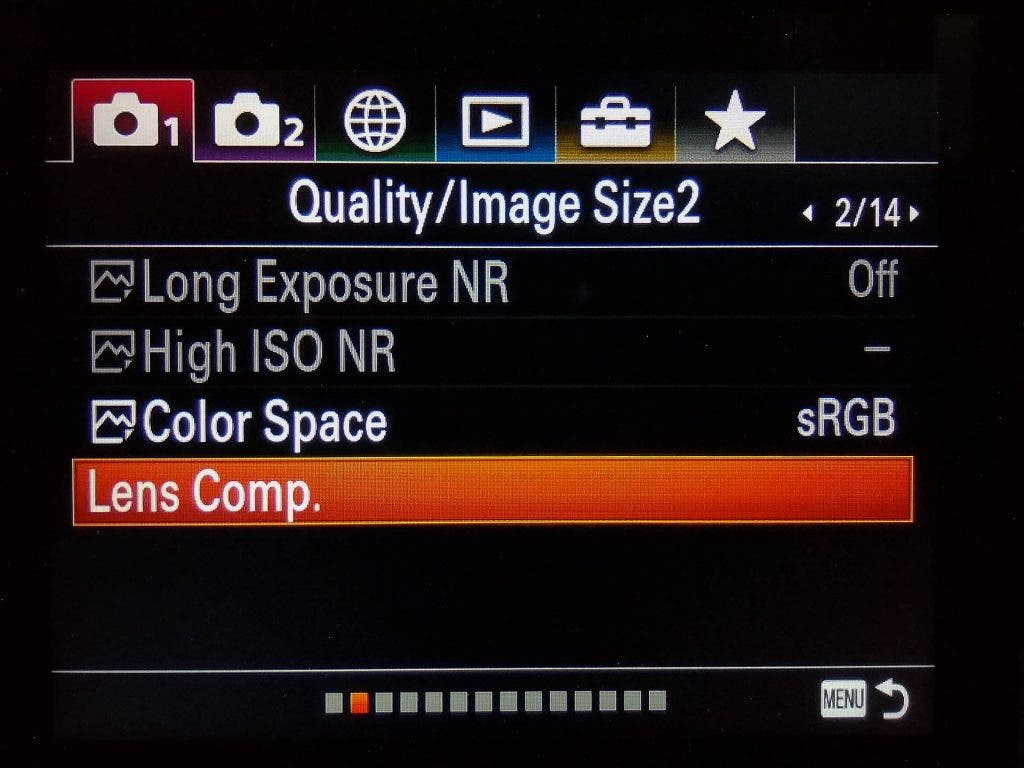
Start by turning on the in-camera lens profile. Then, make sure that you stop down your aperture at least one or two stops. If you can do this, then I can almost guarantee your problem will be solved!


This is because virtually all modern lenses don’t exhibit many aberrations at all when they are stopped down, say, from f/2.8 to f/4 or f/5.6. Furthermore, the lens manufacturers all carefully measure any aberrations that may be present, at every aperture, and they create corrective profiles that can make all sorts of color fringes almost vanish.
Of course, I am going to assume that many of you actually want to use your lens at its fastest, wide-open aperture! I’m also going to assume that some of you own lenses that are a little older, lenses that might not have a correction profile automatically applied. For this reason, as “perfect” of a solution as these two tips are, we definitely need to talk about how to reduce or completely erase chromatic aberration in post-production.
How To Get Rid Of CA
Let’s say you’ve captured some images at f/1.4 or f/1.2 on a prime lens. This is where many lenses are prone to chromatic aberration. What can you do after the fact?

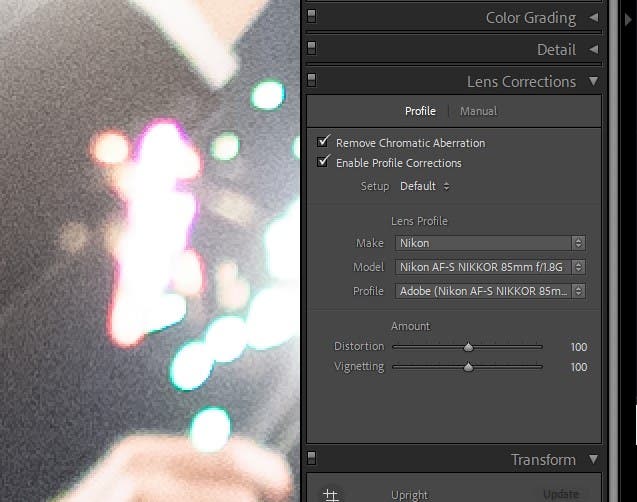
Once you get your images on your computer, you can still turn on/off the lens profile. However, this usually only affects distortion and vignetting. The in-camera option for removing chromatic aberration, unfortunately, may not be a part of the “Enable Profile Corrections” option.
In addition to the embedded lens profile, your raw processing software will also have its own Chromatic Aberration removal tool. This tool, regardless of the lens used, works wonders at removing most color fringing around the edges of your image. However, there may still be other types of CA in the central part of the image. We’ll get to that next!
Manual Chromatic Aberration Removal

If you still see faint traces of color fringing or other colored aberration, then take manual control over your correction. For all the easy, almost effortless tools we’ve used so far, this one gets complicated!
In Lightroom’s same Develop Module tab for your lens profile, there is a Manual tab. In this section, you will see a few sliders, a couple of which have two slider points on one slider!

These sliders allow you to greatly fine-tune your aberration removal, and it’s a little easier of a learning curve than you might think at first glance. Simply start by noticing which color is creating a fringe; do you see purple, blue, magenta, green, orange…?
Look at the colors on the sliders, and start by dialing up the Amount slider for whichever slider most closely matches your color fringing. Then, if the color of your fringing isn’t a perfect match to that main color, (purple or green), you can expand the range of the hue in whichever direction you need in order to include that color in your correction.

This last step can take some practice. However, you’ll find that whichever lens is giving you a problem will exhibit the same type of color fringing. You can fine-tune these sliders and eventually save them as a preset. You could even save them as the default to be applied to that lens. I recommend against that, however. You’ll risk eliminating or significantly reducing all types of color fringing whenever you stop your lens down a couple/few stops.
Can CA Removal Harm Your Images?

One final note. You may wonder if there’s any harm in leaving this custom manual correction applied to images captured with certain lenses. The answer is, unfortunately, yes. Look closely at the animations above and below. You can cause harmful desaturation effects to some images that don’t have any noticeable chromatic aberration (above). You can also overdo it with images that have various types of chromatic aberration (below).

Thus, you do need to be careful. Try to only use CA removal when it is absolutely necessary. Plus, always zoom in to double-check for any unwanted desaturation artifacts.
Conclusion
I hope you found this article useful, especially those of you who are interested in pixel-peeping, of course! Truth be told, as I mentioned early on, you may not ever need to worry about chromatic aberration if you’re only ever sharing web-resolution images, or maybe making one or two “normal size” prints here and there. However, now you know how to properly deal with this issue, should the need arise!


