Have you ever wondered how your favorite photographer can seemingly have perfect light in every photo? If so, you may have just found the answer. Whether you photograph portraits, landscapes, sports, or even your pet at home, you can shape the light in ways you never thought possible with Lightroom Classic. Welcome to the world of dodging and burning, where you can selectively brighten or darken any size area in your images. If you’re looking for the next steps to improve your post-processing techniques, learning how to dodge and burn photos in Lightroom might be for you.
What is Dodging and Burning?
Dodging and burning is a technique that has been around since the darkroom days that essentially describes the process of darkening or brightening certain areas of your photos selectively. This process gives photographers more control over their scenes, helping them shape the light and contrast in specific areas.
With digital photography, the technique of dodging (brightening) or burning (darkening) is now more accessible than ever with a slew of different editing techniques, tools, and software. Whether your goal is to bring more attention to the model in your photo or add light to your landscapes, learning how to dodge and burn photos in Lightroom will allow you to work with all manner of images. That’s because dodging and burning techniques are nearly identical among photography mediums. In this post, we’ll cover how to dodge and burn your photos in Lightroom Classic.
How to Dodge and Burn in Lightroom Classic
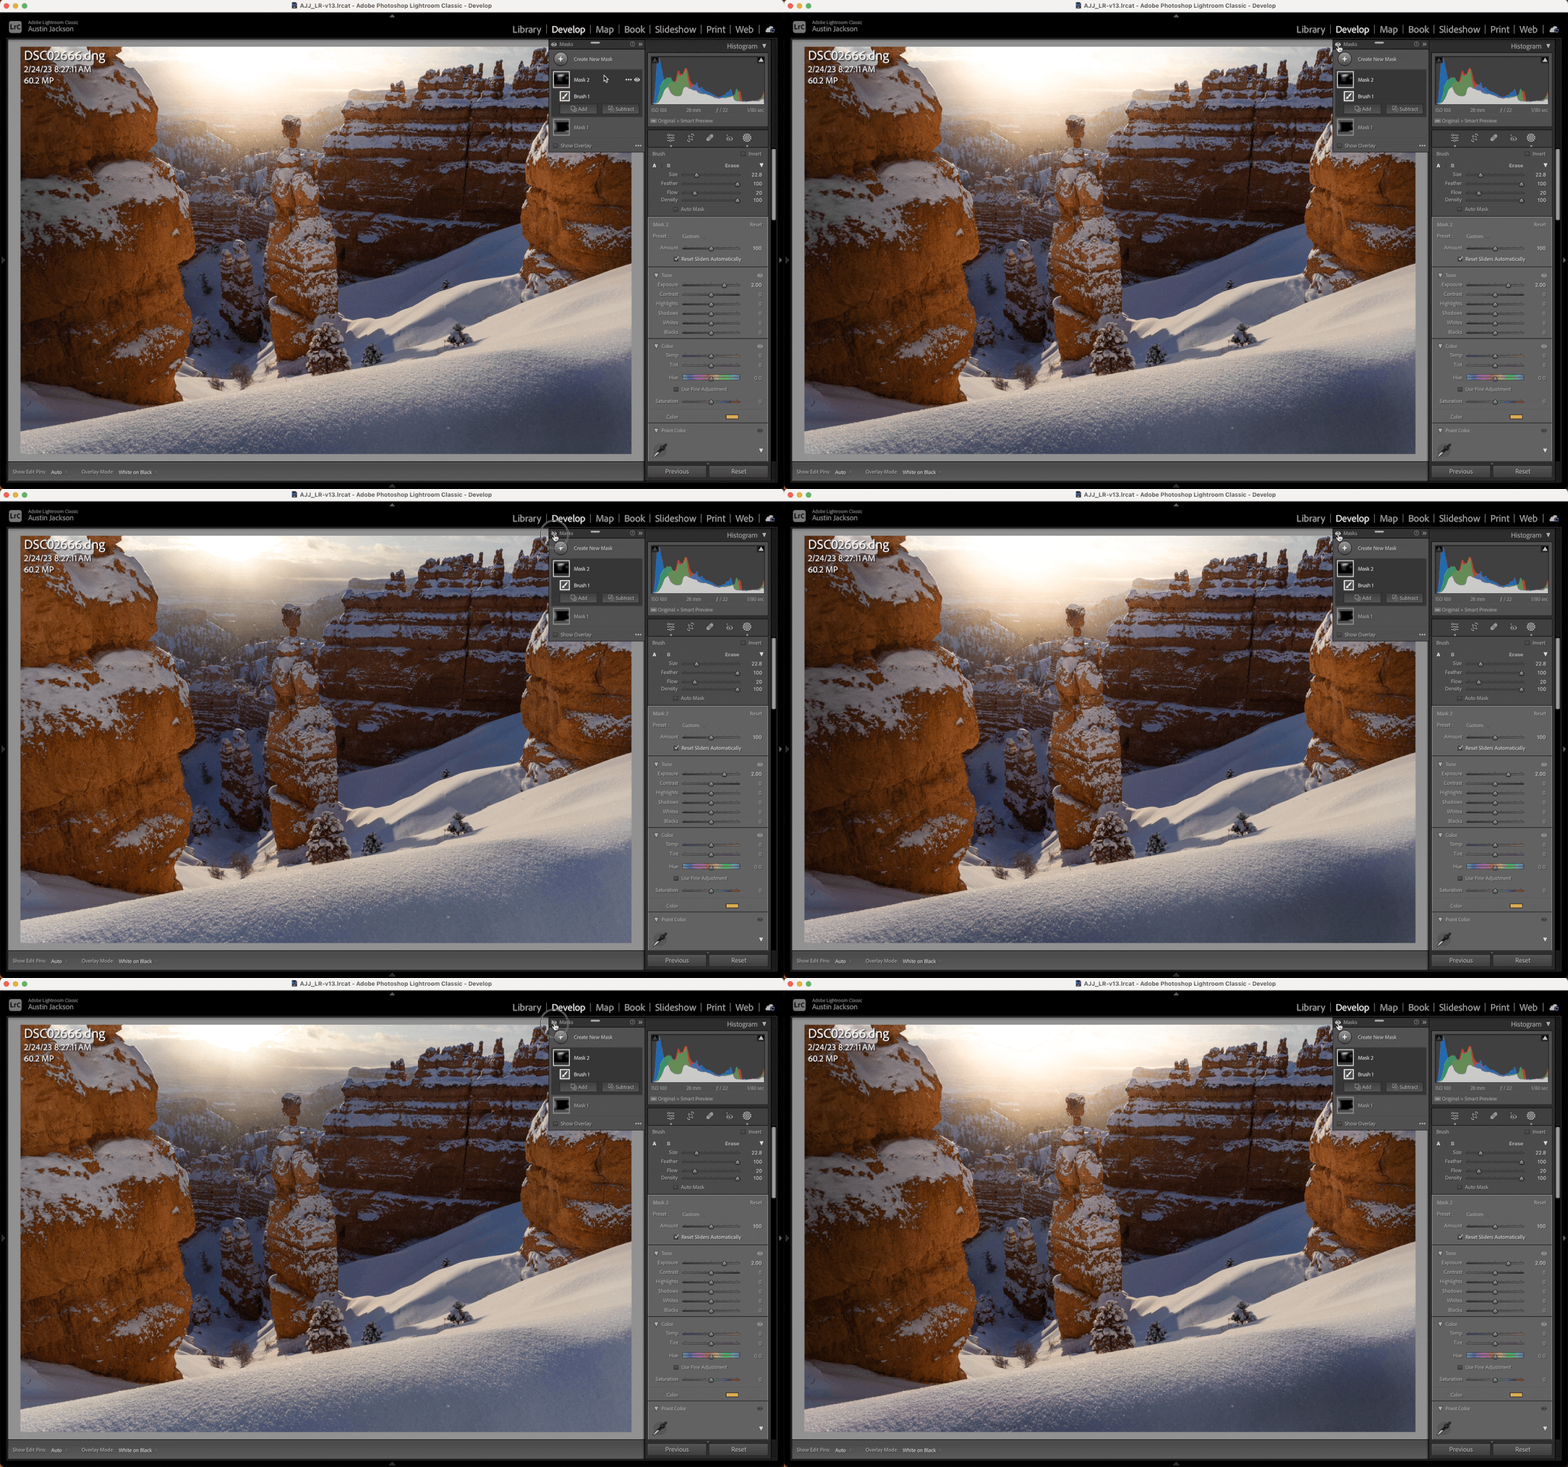
First, navigate to the Develop Module of Lightroom Classic. This module is where you can apply edits to your photos individually. Then, click on the masking icon just below the histogram. This icon will open the masking dialog box, allowing you to create a new mask.
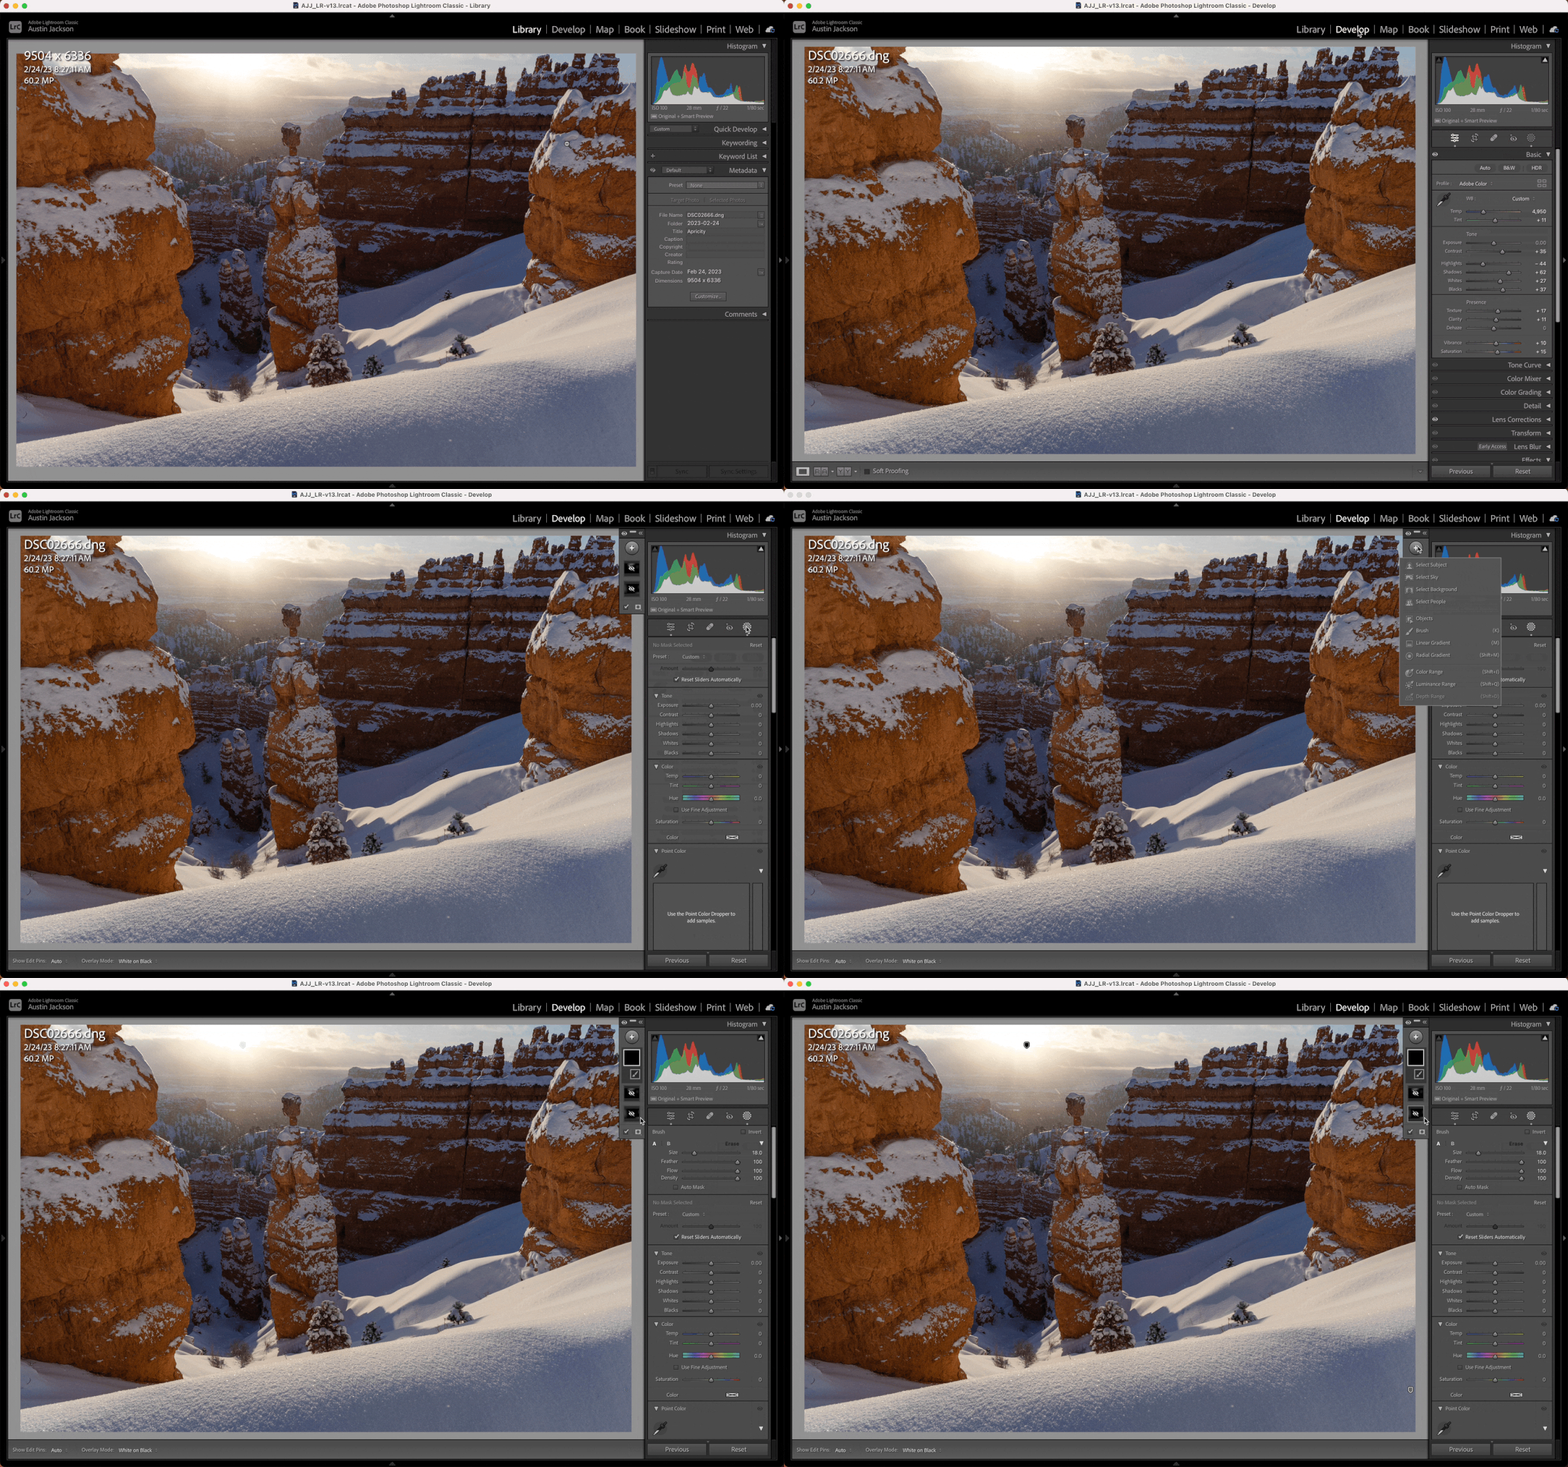
While you can use any mask you’d like to dodge and burn your images, we’ll use the brush for simplicity. Click the button to create a new mask, then choose brush. There are virtually unlimited different possibilities of ways to dodge and burn using the masking tool. Still, I prefer to adjust the exposure by -2.0 or increase the exposure by +2.0 for most of my edits.
Adjust Your Brush
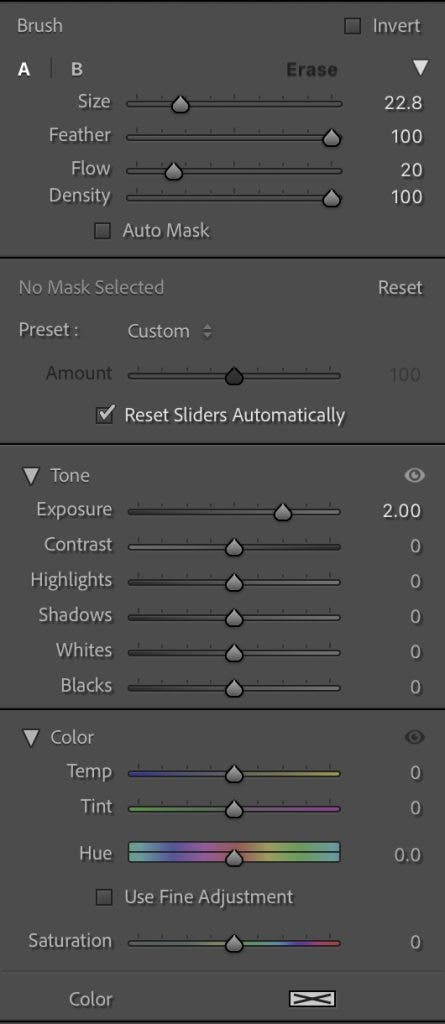
Adjust your brush size according to the area you’re attempting to dodge or burn to get the best results. Then, set the feather to 100, the flow between 10-30, and the density to 100. The feather at 100 gives the brush the softest edges, perfect for dodging and burning. A feathered edge will help to hide the adjustment so it isn’t apparent. The flow affects how quickly the brush will work. At 100, the brush will apply 100% paint and 100% of your effect. I like to use a value between 10 and 30, so I can paint multiple times to help work my effect slowly. Density is very similar to flow but controls the maximum amount of mask to be painted in. I prefer to leave this value at 100 and paint in effect using a lower-value flow.
Once you have set up your brush and you’ve adjusted the exposure slider to -2.0 or +2.0, you can begin painting the image. Paint in as many or as few areas as you’d like. The beauty of this method for dodging and burning is that you can easily adjust the exposure slider after you paint to increase or decrease the amount of dodging and burning. If you make a mistake, click “Erase” and paint over the area you’d like to remove.
Dodge and Burn with Color
As a bonus, you can dodge and burn with color if you want to add a particular color to your image. After you have finished painting, scroll down and select the color box. Choose a color and watch how it affects the desired area in the image. This technique generally works best for areas you’ve dodged but can occasionally work well for burning.
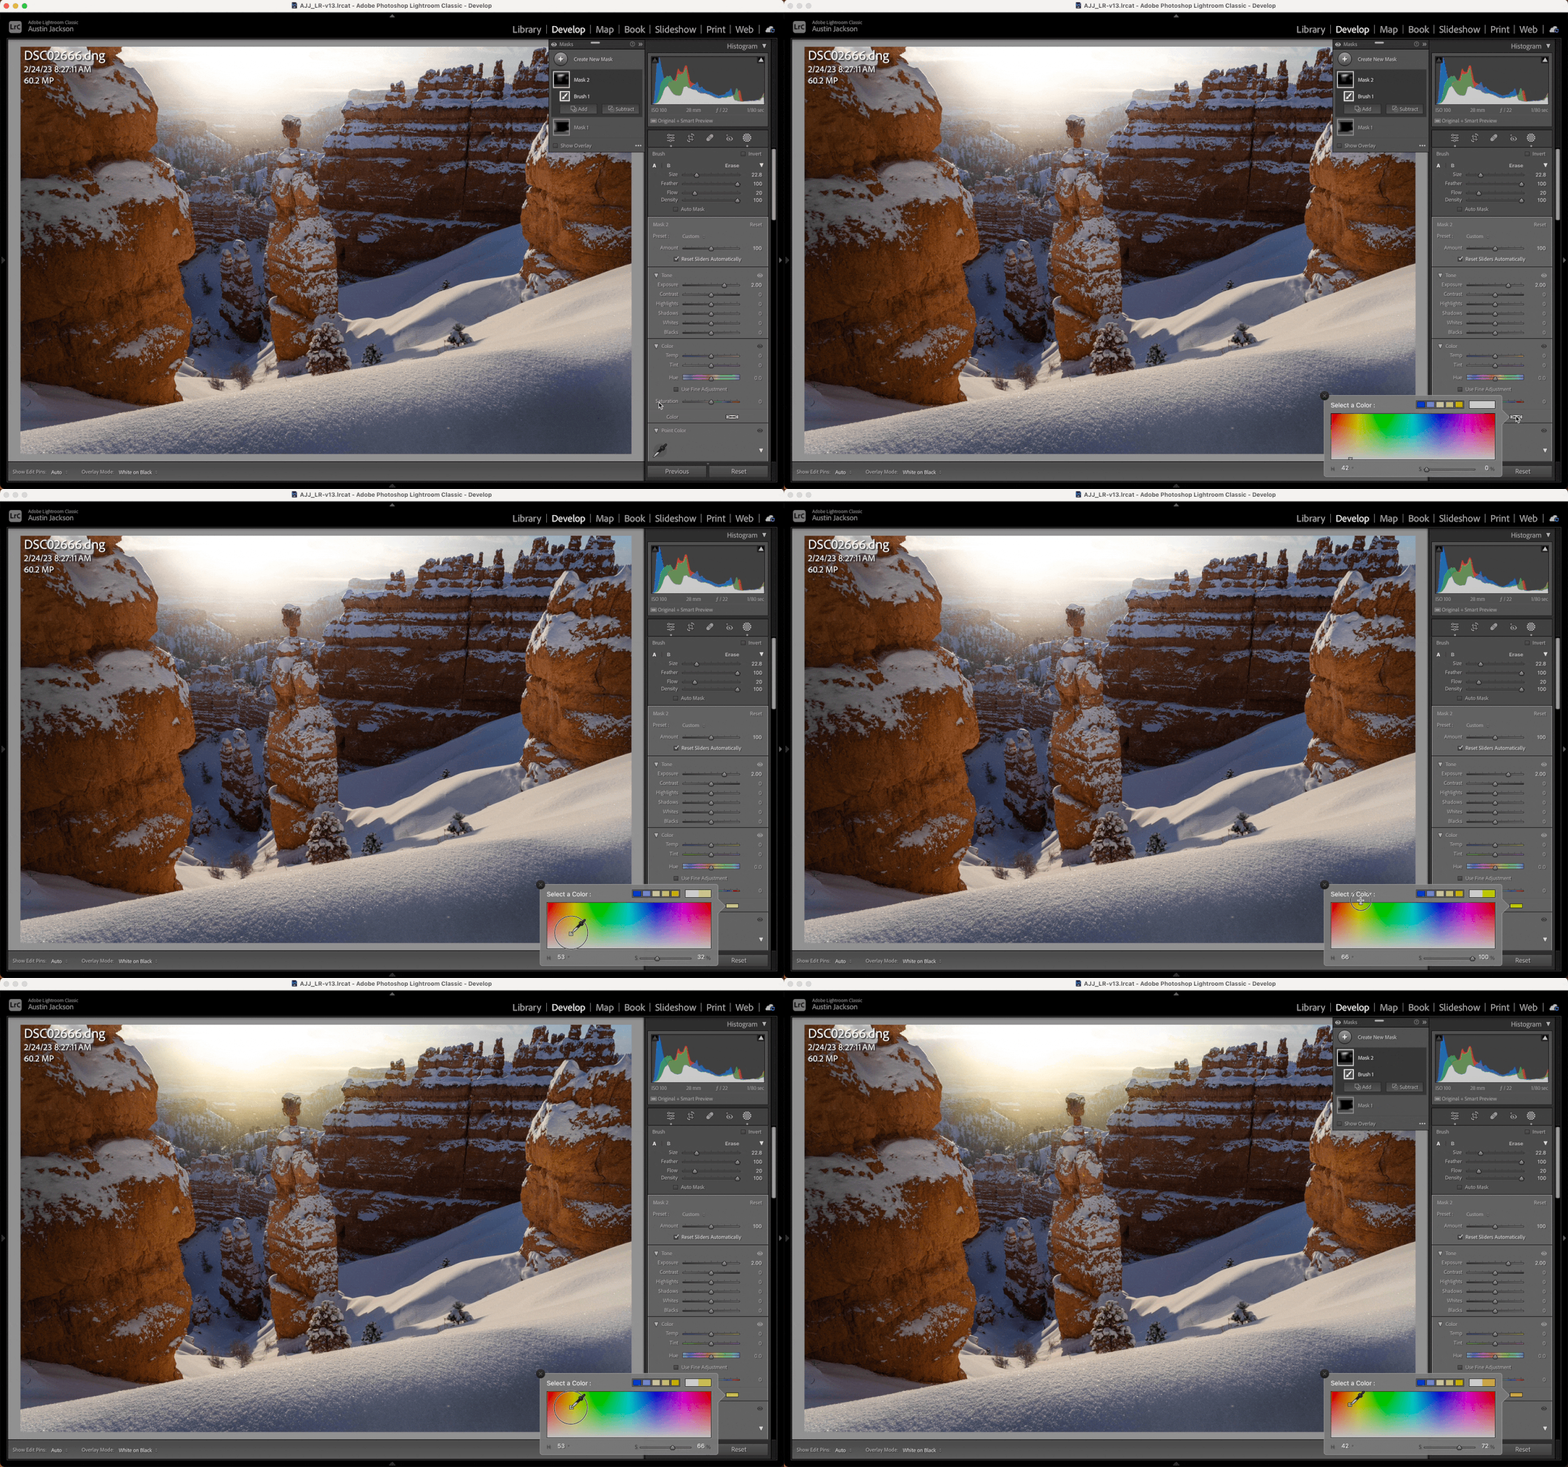
After you’ve applied enough dodging and burning masks to your photo, be sure to click on the eye icon to toggle the masks off and on. It’s essential to toggle the effect before and after to ensure you’re satisfied with the edit. If you need to make additional changes, you can click on each mask individually and adjust the amount to increase or decrease the dodging and burning you’ve applied.
What to Avoid When Dodging and Burning
While dodging and burning can help you create stunning images, this process can also ruin an image quickly. We’ve all seen photos where the subject is far too bright, and the photographer has used a far too obvious circle right over the subject’s face. Avoid overdoing this effect. The purpose of having a highly feathered brush and using a low flow value is to work in the effect slowly and very softly so that it’s impossible for your viewer to tell it’s been made. Still, your adjustments will be evident if you crank on the exposure slider too much. As a good rule of thumb, always use the eye icon that toggles the effect off and on. The effect should positively impact your image, but you don’t want it to be so strong that it doesn’t look realistic.
Additionally, you should avoid too much with dodging and burning or making a far too selective mask. Dodging and burning techniques are fantastic for accentuating light, but it may be difficult to make detailed selections. Use dodging and burning to strengthen sunlight on a tree or contour your model’s facial features. Don’t try to cut out your subject to make major adjustments, or you won’t get the most realistic-looking results.
Conclusion
Regardless of how much time you want to spend dodging and burning your images, it’s a skill that anyone serious about taking better photos should know how to do. With recent updates to Lightroom, it has never been easier to apply dodging and burning quickly and efficiently while also seeing excellent results. As with any other adjustment, remember that practice makes perfect, and learning all the best techniques to dodge and burn your images takes time to master.
