Actually, Photoshop Actions are a form of software, and the reason they speak so loudly to many photographers is their time-saving abilities and convenience.
Photoshop Actions are not applications or even plug-ins; they are simply a series of instructions that direct the host program to produce a desired effect. Adobe (www.adobe.com) Photoshop Actions palette lets you record a sequence of image editing steps that can be applied to a selection in an image, another image file, and to a batch operation to hundreds of different image files.
Mac? PC? Doesn’t matter
Actions are cross-platform and can be shared with others. If you create an Action on your Mac OS computer, anyone using the Windows version of Photoshop can load and apply your original Action to his or her images. In Mac OS or Windows form, Actions files use the .ATN More and more software is Actions-aware. One example is Extensis Intellihance Pro (www. a Photoshop-compatible plug-in that’s Actions Palette aware and gives users the ability to batch process multiple images in a single step without leaving Photoshop.
Let’s get right to the Action(s)
The Actions Palette (Windows>Actions) is your key to creating and using Photoshop Actions. The palette has two modes: List View and Button. List mode lets you create and edit Actions starting with the New Action command that’s accessed from the fly-out menu in the upper right-had corner of the palette. Choosing “Button Mode” from the same menu activates playback or Button Mode.
Before you can record an Action, the palette must be in List View. To do that, access the Action menu and deselect Button Mode. To play an action, no matter where it came from, the Actions palette must be in Button Mode.
To create a New Action, click the Record button from the fly-out menu. The circle icon at the bottom of the Actions palette will now turn red.
At that point, work through a series of manipulations on an image or portion of an image. When you’re finished, click the Stop button (the square icon) at the bottom of the palette. Afterwards, the order in which tasks are executed can be edited by dragging-and-dropping in any order you wish.
Although Actions apply creative effects, they are not filters and don’t have to be treated like plug-ins. Some pundits recommend you store Actions in a folder or directory and load them as you need them. I don’t think that’s a good idea. One of the main attractions of Actions is that they’re convenient.
Since the Actions palette is scrollable, you should keep all of your favorite actions stored there, ready for use. The trick is not to blindly accumulate Actions, but to explore and test to find ones that fit the way you work. If you uncover a marginal Action, you can store it in an “Inactive Actions” folder or dump it in the trashcan or recycling bin.
This is a recording
Prerecorded Actions can be found on the Photoshop CD-ROM. Some of them include downsampling images to 72 dpi for use on the World Wide Web, saving GIF and JPEG files with optimal Web settings, and adding drop shadows to t On versions released before the current Photo CS you could even find “secret” Actions on the CD-ROM stored in the “Goodies” folder or directory.
The best source for pre-recorded Actions is the Adobe Studio Exchange (http://share.studio.adobe.com). Since most actions require less than 10K, you don’t have to be worried about download time (or hard disk space). This well-produced site has a section that lists all of its Actions that are available for download, along with a sample image showing what the effect looks like. To install pre-recorded actions, use the Load Actions command in the fly-out menu.
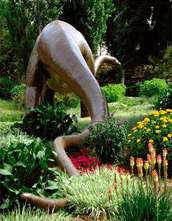
While poking around Adobe Studio Exchange I found the Waterscape Action that was created by Lisa Tam. It’s designed to turn any image into a reflective water scene and automatically creates a mirror image on the bottom of your original photo, then adds “water” t on top. It works best for images in the range of 600×1200 pixels and turned my brachiosaurus shot made in Vernal, UT into a watery scene with single button click.
An Action that’s actually a suite is Paint Master by Bronto Bronto that, as the author states, “turns your photos into cool paintings.” This action will only run on Adobe Photoshop CS. To ensure compatibility with previous versions, it’s suggested you remove the Shadow/Highlight command (something not present in earlier versions.) Here you can see one of my most widely published stock images on the left, and the right-hand image with Paint Master applied. If the effect is too subtle for your screen’s resolution, download a copy of the Action and give it a try on your own photographs!
Have fun in the digital darkroom.
All photographs ©2004 Joe Farace
Joe Farace is Colorado-based photographer/writer who has written or edited 24 books and 1400 magazine stories. Look for his new book on digital infrared photography this Fall. In the meantime, visit www.joefarace.com and www.joefaraceshootscars.com.
