
Valentine’s Day calls for some festive images, and that’s exactly what I have in store for you in this video using three lights, creative gels, stickers, and a star filter!

I love to scour the local dollar store before every holiday because I’m always certain to find a wide range of cheap, DIY styling options. You never know when a tree topper can become a headpiece, a table cloth becomes a headwrap, or window decoration becomes a stylish prop!
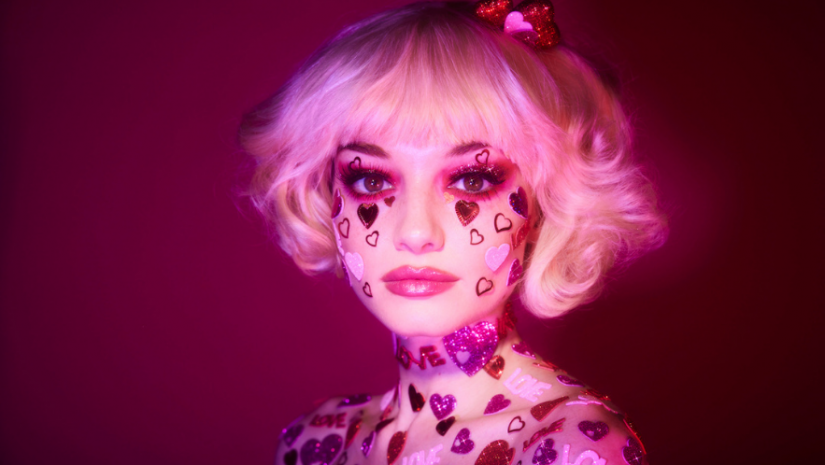
In mid-January I took a trip to the dollar store and it was packed with fun, kitschy stickers, table decor, and more—all with a Valentine’s theme! After a $9 collection of goodies, I had just what I needed for a Valentine’s day beauty look.

I sent pictures of the stickers and sequins to my hair stylist and makeup artist for inspiration, and on the day of the shoot they were excited to create a holiday look. My fabulous team adorned my subject in the stickers plus some beautifully complimentary hair and makeup. The resulting look was extremely playful and kitschy, so then it was up to me to make it really shine with my lighting!
Let’s walk through that photoshoot setup, which included the Profoto D2, Profoto 5-degree grid, Rosco Creative Gel Kit , the Hoya Star Filter, and my Canon EOS R5 and Canon RF 24-105mm 4.0.
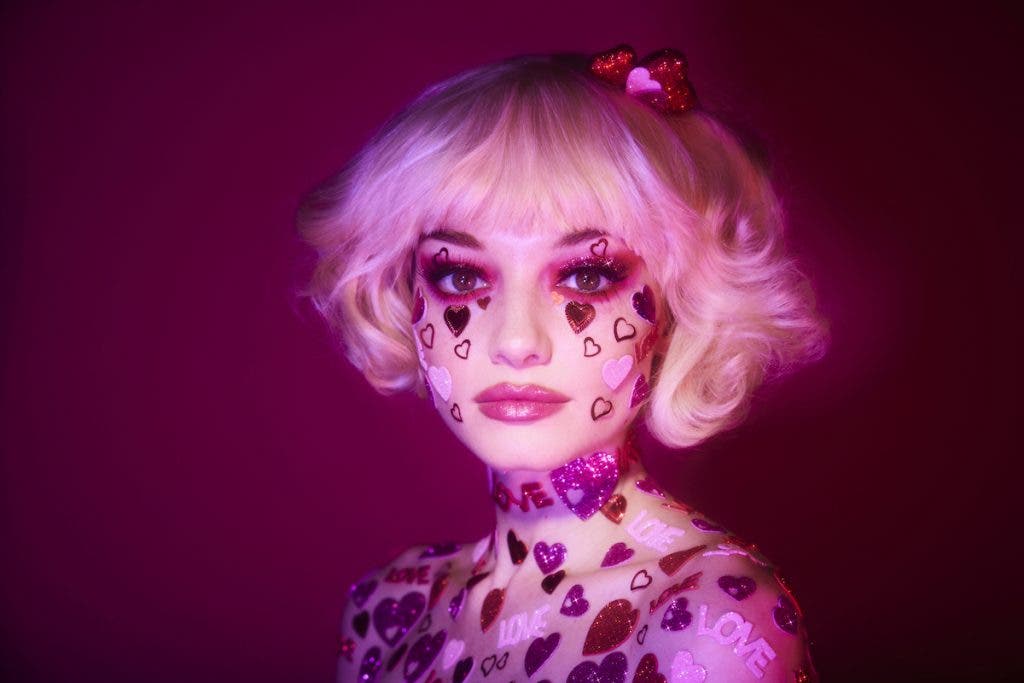
I began by placing a 5-degree grid on the subject’s face. Grids are modifiers (or modifier add-ons) that allow you to create a narrower beam of light. By selecting a very tight grid, I can concentrate the light mostly on the subject’s face, leaving the rest of the shot in shadow. This is exactly what I wanted to achieve.
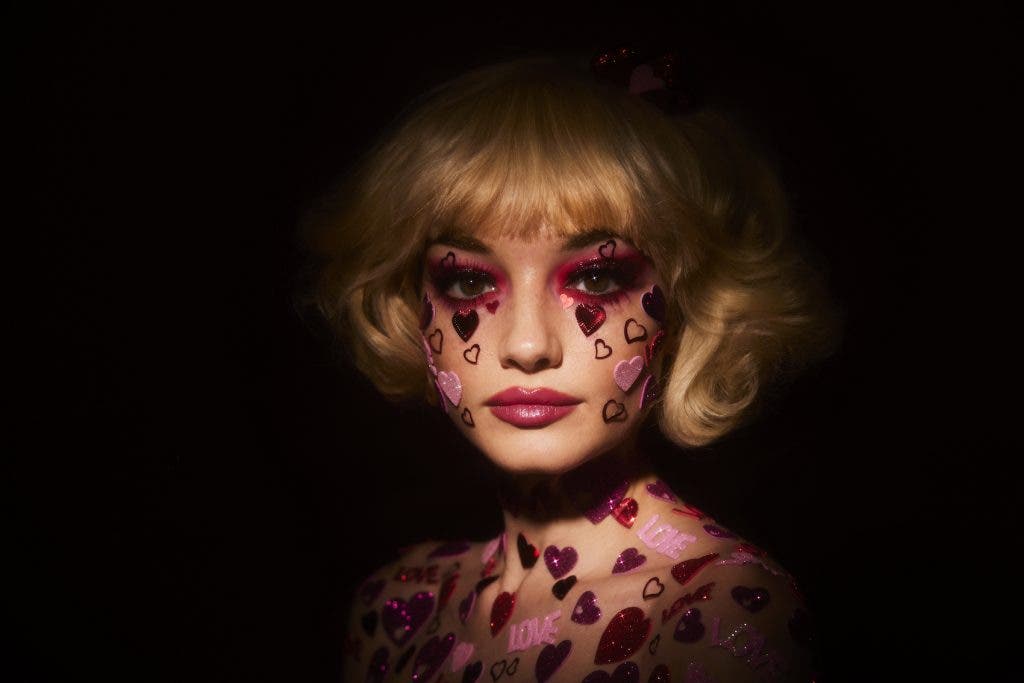
Why did I only want my main light to hit her face? I know from my extensive use of gels that gel color shows up most in the shadow areas of a photograph. White light that spills everywhere tends to wash out the saturated colors from the gels. In this shot, I wanted it to be a mix of pink and purple gels, so restricting the spread of the main light was a very important element of this shot. If you want to learn more about gels, be sure to check out my course The Magic of Gels.
Once the main light was in place, it was time for the first dash of color. I began by adding a strobe (no modifier) to the left of the frame with a purple gel. Notice how the purple of the gel now shows up dramatically in the shadow areas of the shot.
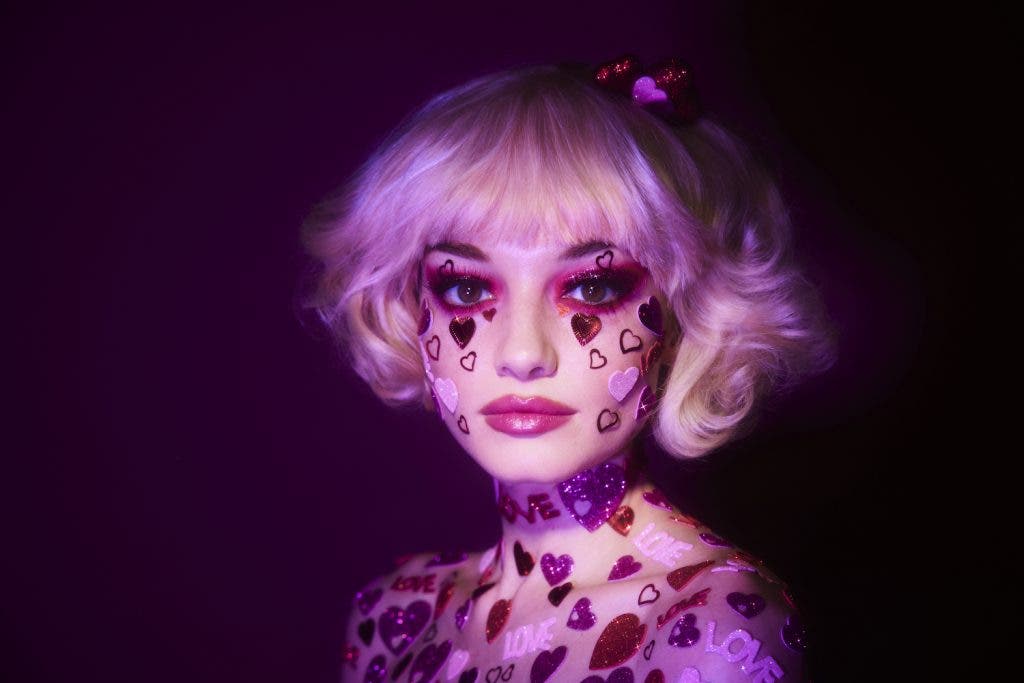
Lastly, I added a third strobe to the right of the frame with the magenta gel. You can see how this strobe eliminated the remaining shadows on the face and helped to create a beautiful pink wash over the entire scene. This was exactly the color palette I was looking for in my Valentine’s Day shoot!
Speaking of color, I wanted my entire shot to be an analogous color scheme of pinks and purples. This helped me to decide upon my gel selection as well as my background choice: Savage Universal Tulp seamless paper.
I also wanted to explain my choice of bare bulbs for the two fill lights. Using no modifiers at all achieves two things. First, not using restrictive modifiers allowed the lights to spill across the entire scene, including the background. Yes, I could have added a strobe specifically for the background but in this instance having a bit more spill of light allowed me to limit the setup to only three strobes. More importantly to my concept, however, is that the hard light sources (from no modifier) created specular highlights on the sequins on my subject’s face.
This hard light was essential to emphasize the creative in-camera effect of adding a star filter! I wanted to emphasize the playful and kitschy vibe by adding a star filter to create starburst effects on specular highlights in the image. As my subject turned and tilted her face, the sequins caught the light and I could see (in camera) the playful effect from the 4-Point Star Filter.
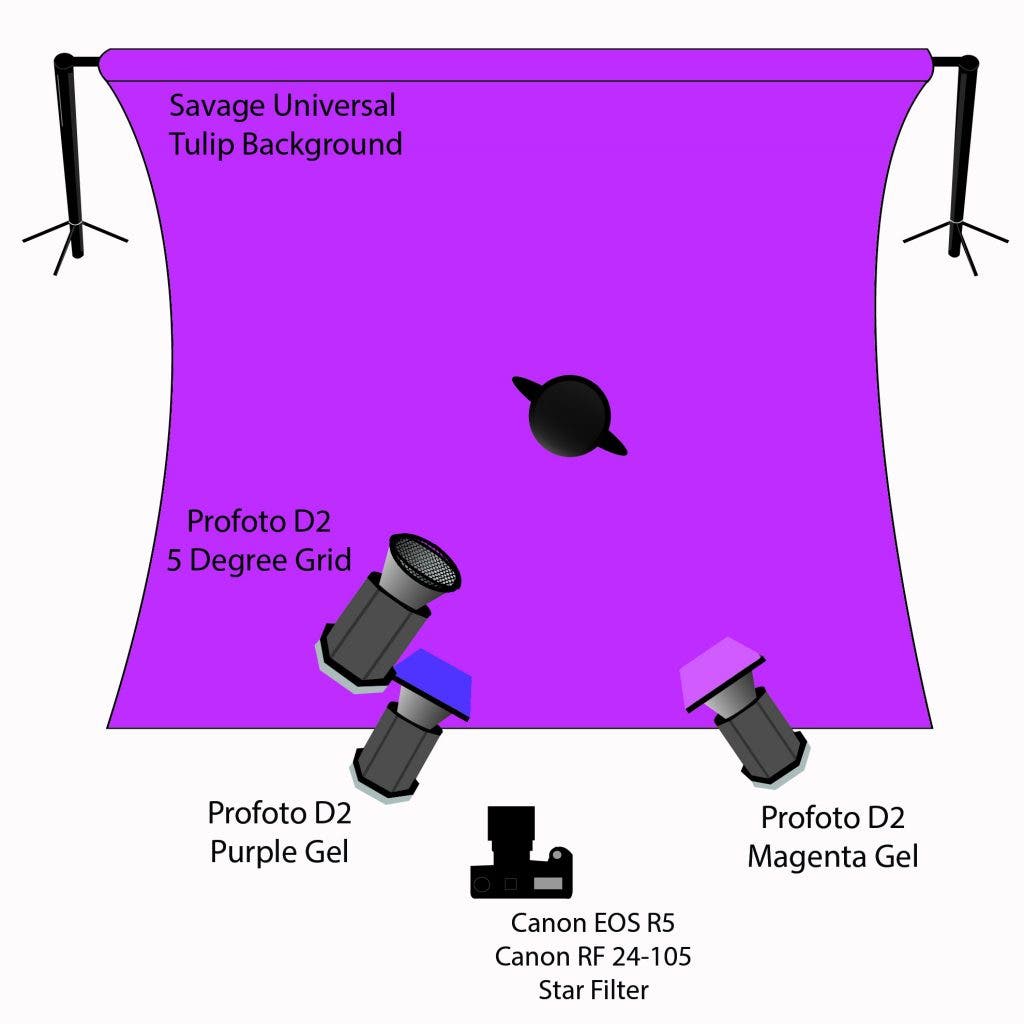
For this shoot, I utilized my go-to setup for studio photography– the Canon EOS R5 and Canon RF 24-105mm 4.0. This camera-lens combo gives me the flexibility to capture wider shots of her entire torso and then crop in for tighter shots of just her face.
Once I had the lighting, the color, and special effects, it was all about getting the right expressions. I decided to go for a mixture of innocent and playful to bring the look to life. I had the model blow kisses at the camera, wink playfully off-camera, stare down quietly away from the camera, and just a wide range of different expressions.
I originally thought of introducing hands into the shot, but we’d used up all the stickers, and bare hands would have ruined the concept. I focused instead on expression and camera angle.
How much of this shot was done in post-processing, aka how much retouching, was needed? I think I spent about 30 seconds adding a bit of contrast and removing a freckle. When you have great lighting, model, and hair and makeup, you can get it in camera even without soft light!
Hope you love the results as much as I do! Be sure to check out Adorama’s Youtube channel for a full behind-the-scenes video from this shoot!
Feature image by Lindsay Adler