Did you ever want to remove distracting background elements from an image? If they are in very dark areas, you can encounter problems because monitors often don’t show subtle differences in dark tones.
The cloned areas may look great on your monitor, but you may in for a surprise when you print the image, because small differences in dark tones often show much better in a print. Here’s an example.(Note: To accomplish the effects in this article, you’ll need an image editing program that allows Levels adjustment layers. Of course, menus will be different in different programs and versions.)
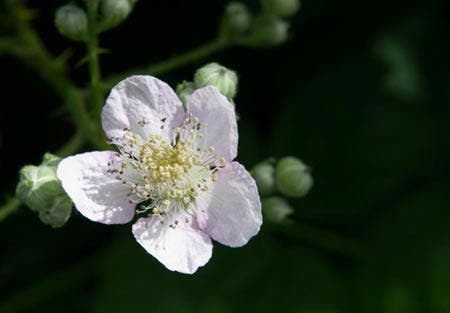
I wanted to clone out the light areas in the top portion of this image, to give the result below.
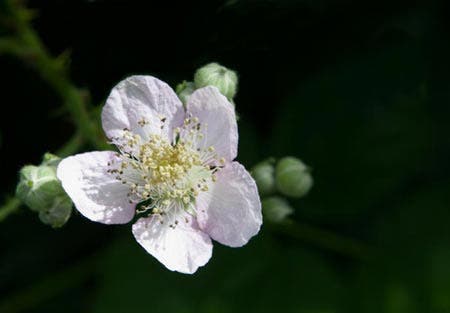
Case Study 1: An enlightened approach
Looks great, right? Well, my cloning job looked wonderful on the monitor, but when I checked it with a trick I discovered, I saw I had done a sloppy job. To do a neat clone job, you need to choose a source point that closely matches the tonality of the area you want to paint over. When all the dark tones look the same, that isn’t possible.In order to “peer into” the detail in the dark areas without spending the time and expense to make a print, I lightened the image dramatically. I made a Levels adjustment layer by going to the Layers palette and clicking on the icon at the bottom that is a half-black half-white circle, and choosing Levels. In the dialog box that came up I moved the middle slider under the histogram to the left until the image became very light, as shown below. This exaggerates the tonal detail in the dark areas. (You might also want to move the right-hand slider to the left.)
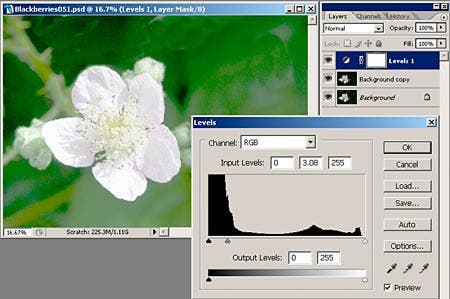
Whenever I am doing extensive cloning I work on a duplicate of the Background layer. (Making the duplicate layer is easy. Just click on the Background layer and drag it to the icon at the bottom of the Layers palette that looks like a piece of paper with one corner bent down.) So I was able to start over with my cloning by deleting the Background Copy layer (by dragging it to the trash can icon at the bottom of the layers palette) and making a new copy of the original Background.I left my lightening Levels layer in place and this time I was able to do a much better job of cloning because I could choose a sample point for each cloning brush stroke that matched the area I wanted to “paint over.” When I was through cloning I deleted the Levels layer.
Case Study 2: The dark side
The same principle works in reverse for cloning in very light areas. An image I shot recently captured a lovely moment but, due to its grab-shot spontaneity, had distracting elements in the background. If I had tried to compose the shot better I would have lost the magic of the moment.
I wanted to clone out the plant shown at right, but encountered a problem because the background isn’t as even-toned as it appears. When you are cloning out dark objects in a light area, but one that isn’t completely even in color, it is very difficult to get a smooth result. It may look good on your monitor, but flaws can show up if you later darken the area, or they may show on printing. I don’t want to do a marginal job when I can just as easily do a good one. I cloned from nearby areas to “eat into” the leaves and got a result that looked ok, but when I darkened the image very strongly with a temporary Levels adjustment layer, as in the figure below, I saw I hadn’t done such a great job.
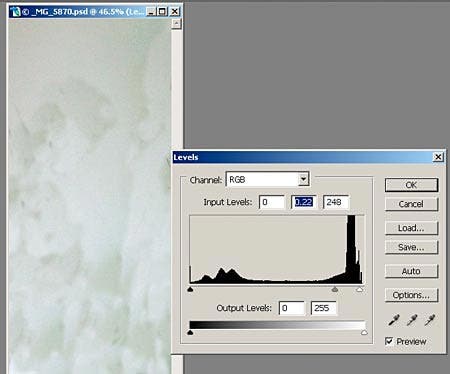
I made the Levels adjustment layer the same way I did above, but in the dialog box I moved the middle slider under the histogram to the right until the image became dark enough to reveal any flaws in the light tones.As in the example above, I deleted the Background Copy layer on which I had cloned and made a new copy of the original Background. I left my darkening Levels layer in place and was able to do a much better job of cloning, as shown below.
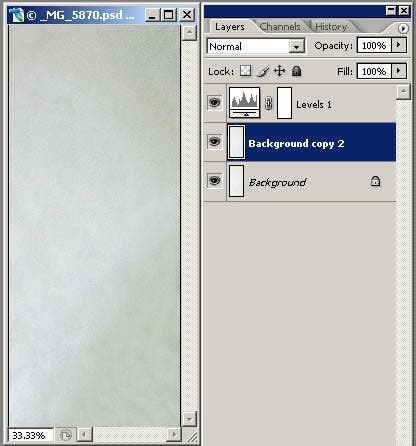
When I was done I deleted the Levels layer, and I had a very smooth almost-white area instead of the plant.
Case study 3: A Hard Day’s Night
This technique is also valuable when you are compositing another element into an image and both are on very light or dark backgrounds. Here’s an example. I had turned a shot of the Washington Monument into a faux-nighttime scene by darkening the sky, and wanted to add a full moon. The easiest way was to drag it in surrounded by some of its black background, since it would be placed over another black area.
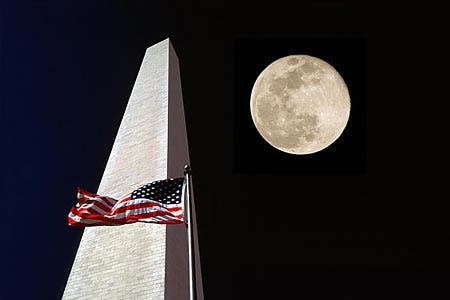
My faux night sky looked completely black on my monitor, and the moon seemed to fit in very well. But lightening the image as above showed the background of the moon layer was darker than the sky, and also reveals a reddish cast in the right part of the sky and a blue cast in the left third of the image. This could show on printing, and needs to be fixed.In this case I put my lightening layer above the moon layer. I needed to lighten both it and the Background layer equally in order to detect any mismatch in tones.
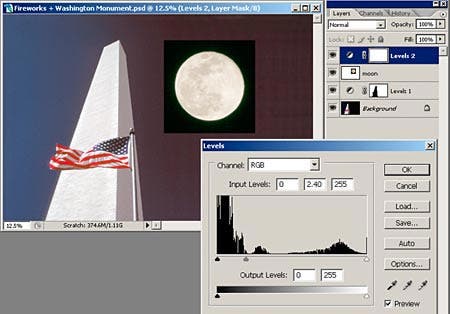
I went back to the masked Levels layer which I used to darken the sky (you can see it immediately above the Background layer) and darkened it further, to pure black. (I had made this masked layer by selecting the sky with the magic wand, and feathering its edges to match the softness of the edge of the building and flag. Then, with the selection in place, I made a Levels layer and everything but he sky was automatically masked.)I left the moon on its black background because cutting it out would look artificial unless it was done with a very careful soft selection. It looks better, and it is easier, to match the backgrounds instead. As a last touch I used a layer mask (you could also use a soft-edged eraser) or to soften the edges of the moon layer, just to make the edge even more inconspicuous. This is another case of wanting to do a slightly better job that the minimum necessary.
Diane Miller is a widely-exhibited freelance photographer who lives north of San Francisco, in the Wine Country, and specializes in fine-art nature photography. Her work, which can be found on her web site, www.DianeDMiller.com, has been published and exhibited throughout the Pacific Northwest. Many of her images are represented for stock by www.MonsoonImages.com.

