
When most photographers use the term “strobe,” they’re talking about electronic flash. But they’re wrong.
A “strobe” is repeating flash that can be set to flash at a selected rate. If you’re old enough to have spent any time at a disco, you’ll know what I mean. True stroboscopic flashes are widely used in science and industry for the study of rapidly moving machinery and other objects in motion. The electronic strobe has been a useful diagnostic tool since about 1925.
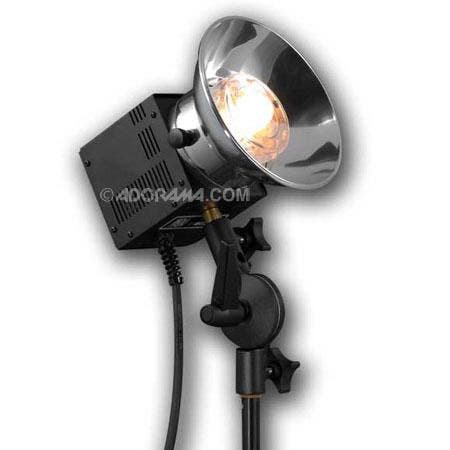
Professional scientific stroboscopes, such as the unit from my collection of vintage scientific instruments shown below, have the advantage of being able to be set to flash at precise rates for periods. However, they are basically designed for direct visual evaluations, since most have insufficient light output for photography unless you use very fast film or are working quite close to your subject.
 Vintage strobe:
This classic General Radio strobe is very popular in industrial, scientific and academic labs. I have used them for years in my career as an engineer. Fortunately, I was able to get a used one for my home lab. Kids (and photographers) of all ages love to play with it!
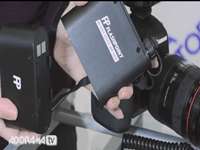
If you want to make your own stroboscopic photos, you can use any regular portable flash that has a repeating flash function. Nikon’s SB-28 does nicely with Nikon cameras, but similar flashes are available for other cameras. The SB-28 will deliver from 1 to 50 flashes per second!
Pop like “Doc”
The most obvious thing you can do with a stroboscopic flash is get some really neat multiple-image shots of moving subjects like those pioneered by the late Dr. Harold “Doc” Edgerton. Here’s how.
Step 1: To begin with, load your camera with an ISO 400 film such as Kodak Tri-X, or an equally fast color film. Let’s say the action you want to photograph will last about half a second. Set your shutter speed for one-half or one full second. Figuring that your photo will look best with four repeating images, set the number of flashes to four.
Step 2: Set the manual power selector to the highest power which will give you at least four multiple flashes. Consult your manual for this information. For example, the SB-28 will give 10 shots at 1/8 power. At this power setting, with ISO 400 film, if your main subject is about 10 – 12 feet away indoors, the correct-exposure aperture is f/8.
Outdoors, open up a stop to compensate for the non-reflective environment. The actual f/stop you use will, of course depend on the power output (guide number) of your particular strobe, so check your unit’s calculator dial and/or instruction book
If much of your subject is likely to be overlapping with each flash, close your lens down by one or two stops to prevent overexposure.
Step 3: Put your camera on a tripod so the background doesn’t get jumbled during the multiple exposures. Of course, some actions are less predictable than others and you’ll need to handhold your camera to get any shots at all. If possible, the background should either be dark or far enough away to be underexposed, which decreases the possibility of its showing through your subject.
Step 4: Shoot away! Remember to wait a few seconds between each shot to allow the flash to recycle fully, otherwise you won’t get a full count of flashes. Also let your flash cool down for a few minutes after every few sequences. Repeating flashes can really heat up the flashtube.
Practice. Repeat. Practice…
Here’s a sample picture I took a while back, using Kodak Tri-X film in an old twin-lens-lens reflex camera. The flash was a handle-mount unit. To be quite honest, this shot was the only one of the twelve exposures I shot that day that I liked. It isn’t easy to get the skipping and the flash rate to match so closely. I guess I got lucky. Note that every other image has the rope either up or down!
 Multiple skipper:
This successful strobe shot of a young lady skipping rope was simple to do in concept, but not easy to accomplish in practice
We rehearsed before shooting. The skipper adjusted her speed to get one complete skip per second and I positioned the camera so that four skips just about filled the frame. I then set the flash for two flashes per second and an appropriate power setting. The main difficulty was getting the synchronization just right.
To get the blank space on each end of the scene I used the open-flash method. I opened the shutter set on “B”, fired the flash manually and then closed the shutter after seven bursts.
Cool science
Some scientific photos, such as those illustrating the acceleration of falling objects, are relatively easy to take. It requires more effort to plan and execute a fun or artistic shot. Expect to use a bit of film to get some decent photos-I sure did! Or you can do it digitally using techniques I’ll get to a bit later.
No budget? No problem
For a zero budget way to get strobe photos, you can use the flicker of any gaseous street or gymnasium lamp.
 Who needs a strobe?
For stroboscopic effects without a strobe, try shooting under a sodium vapor lamp. The effect of its pulsating light is not seen in the streaks of this car’s headlights and taillights, but rather in the dotted yellow lines above and below the streaks. Note that only reflective highlights and light colored moving objects will show up. A digital camera is a real plus here.
Look at the light streaks above the bright white and red ones. See the dots? The street light pulses 120 times per second, in tune with the 60 cycle electric power. Thus any moving object will be lit 120 times per second. The dots were glare spots on the car that moved as the car went by. Try this at an indoor tennis court. A 1/10 sec shutter speed works pretty well for these shots.
Now, let’s do this with a digital camera
You can take strobe photos with a digital camera using essentially the same techniques I’ve already described. Generally, you’ll be better off using a digital SLR or ZLR because a camera with manual exposure control is mandatory. All digital SLRs and virtually all ZLRs provide full manual control options. With digital, you’ll have the advantage over film shooters in being able to see and correct the inevitable sub-par shots.
Set the camera’s ISO to 400 and the shutter speed to an appropriate setting for the action you’re photographing. Try to keep exposure times to one second or less on a digital camera to minimize the noise. Use the long exposure compensation function to reduce the noise if your camera has this feature.
I used my Nikon D70 SLR to take the car streak photo. In this case I didn’t use a flash per se. As mentioned, the photo was lit by a sodium vapor street light which flickers like a strobe. With a bit of work you can get interesting photos with this kind of ersatz strobe–or, you can use a real one as described above.
By the way, if you want to get some background on the history of flash, buy or borrow a copy of the following book:
The Photographic Flash
A Concise History
By Pierre Bron and Philip Condax
ISBN 3-9521472-0-6
This is a well-written and beautifully printed book for which I supplied some archival material and photos, and wrote the introduction as well.