The sound of falling rain, with its rhythmic hum, has a calming effect, but it’s not always pleasant to stand in. Photographers, in particular, generally try to avoid taking pictures in the rain because of the risk it presents to our gear. Avoiding the rain, however, robs us of a unique opportunity to capture incredible, rainy day photos. Fortunately, there are steps we can take to stay somewhat comfortable while capturing pictures of rain, and our portfolios will thank us for it. Use these 10 rain photography tips for beautiful photos that make it worth venturing outside our comfort zone.
10 Rain Photography Tips for Beautiful Photos
- Dress (Your Gear) for the Occasion
- Aim for the Clouds
- Focus on Reflections
- Go Macro
- Start with Shutter Speed
- Create Epic Backlit Couples Portraits
- DIY Rain Photography
- Make It Timeless in Black and White
- Look for Rainbows
- Edit Rain Photography like a Pro
Tip 1: Dress (Your Gear) for the Occasion
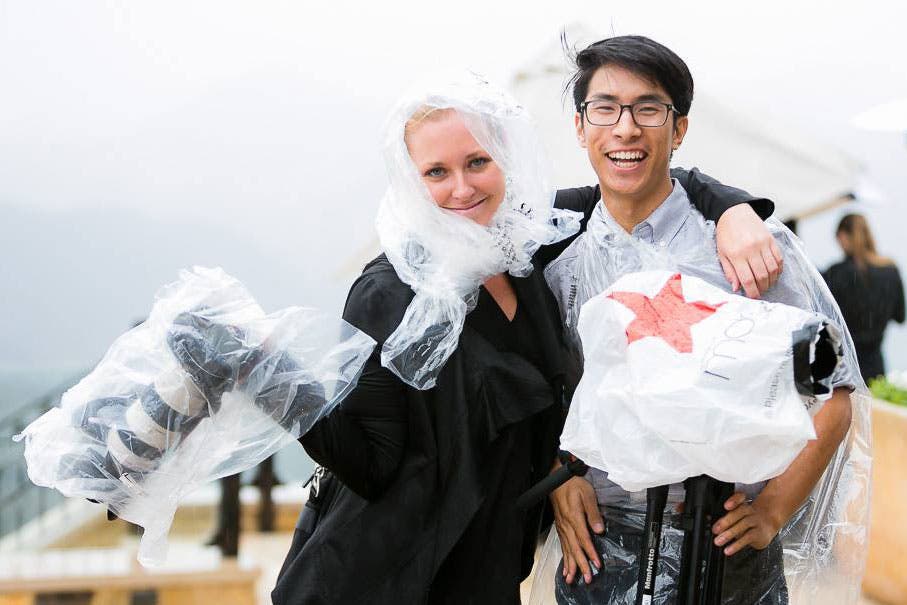
It goes without saying that it’s important to keep our gear and ourselves in optimal condition, regardless of the weather. When we venture out to snap pictures of rain, however, we have to take some added precautions. Here’s a quick breakdown of the tools you’ll need to keep your gear and yourself dry, at least for the most part.
- Waterproof Bag
- Camera Rain Covers
- Camera Sleeves
- Waterproof Camera Housing
- Lens Hood
- Microfiber Cloths
- Umbrella (also works as a prop – see the couples portraits below)
- Raincoat & Boots (for you)
You can find more in-depth information on most of the above items in this article on ways to protect your camera in the rain. Considering the amount of money we invest in our gear, it’s definitely worth protecting.
Tip 2: Aim for the Clouds
Before (or after) the rain, you’re bound to find clouds. Depending on where you live, you may have cloudy skies on a regular basis. While some may consider a cloudy backdrop less than ideal, we can use clouds to add a lot of visual appeal to our images.
Dramatic Cloud Photos
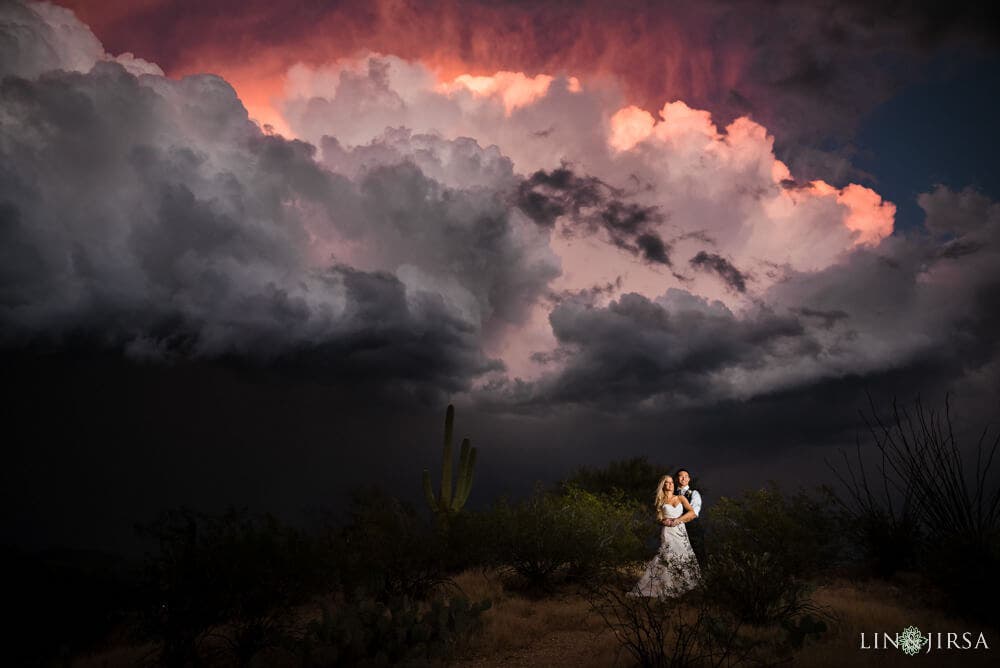
The main thing we want to do when photographing clouds for dramatic portraits is to maximize our dynamic range. This means that we need to preserve as much of our highlights and shadows as possible. Clouds already assist us in this area by cutting out enough direct sunlight to allow us to preserve more details. To make sure you’re maximizing dynamic range in your cloud photos, I recommend using the histogram and highlight alert on your camera when dialing in your exposure.
Softbox Style Cloud Photos

Clouds also serve as a natural soft box. All we need to do to take advantage of this is to position our subjects so that they’re facing the sky. In the image above, my subject sat next to a hedge and looked up toward the camera as I photographed her from a higher angle.
Tip 3: Focus on Reflections
Rain puddles serve equally well for splashing and capturing reflections. As photographers, we can take advantage of the latter before indulging in the former. Of all the benefits that come with taking photos in the rain, reflective puddles rank right near the top.
If there’s a break in the rain and the puddle is calm, we can use it to capture tack-sharp reflections. In terms of composition, the reflection can serve as a bonus element within a scene or as a means to showcase the subject (see the images above). In other words, we can fill the scene with the reflection and even flip it around to turn the “real world” upside down.
Tip 4: Go Macro for Rain Photography
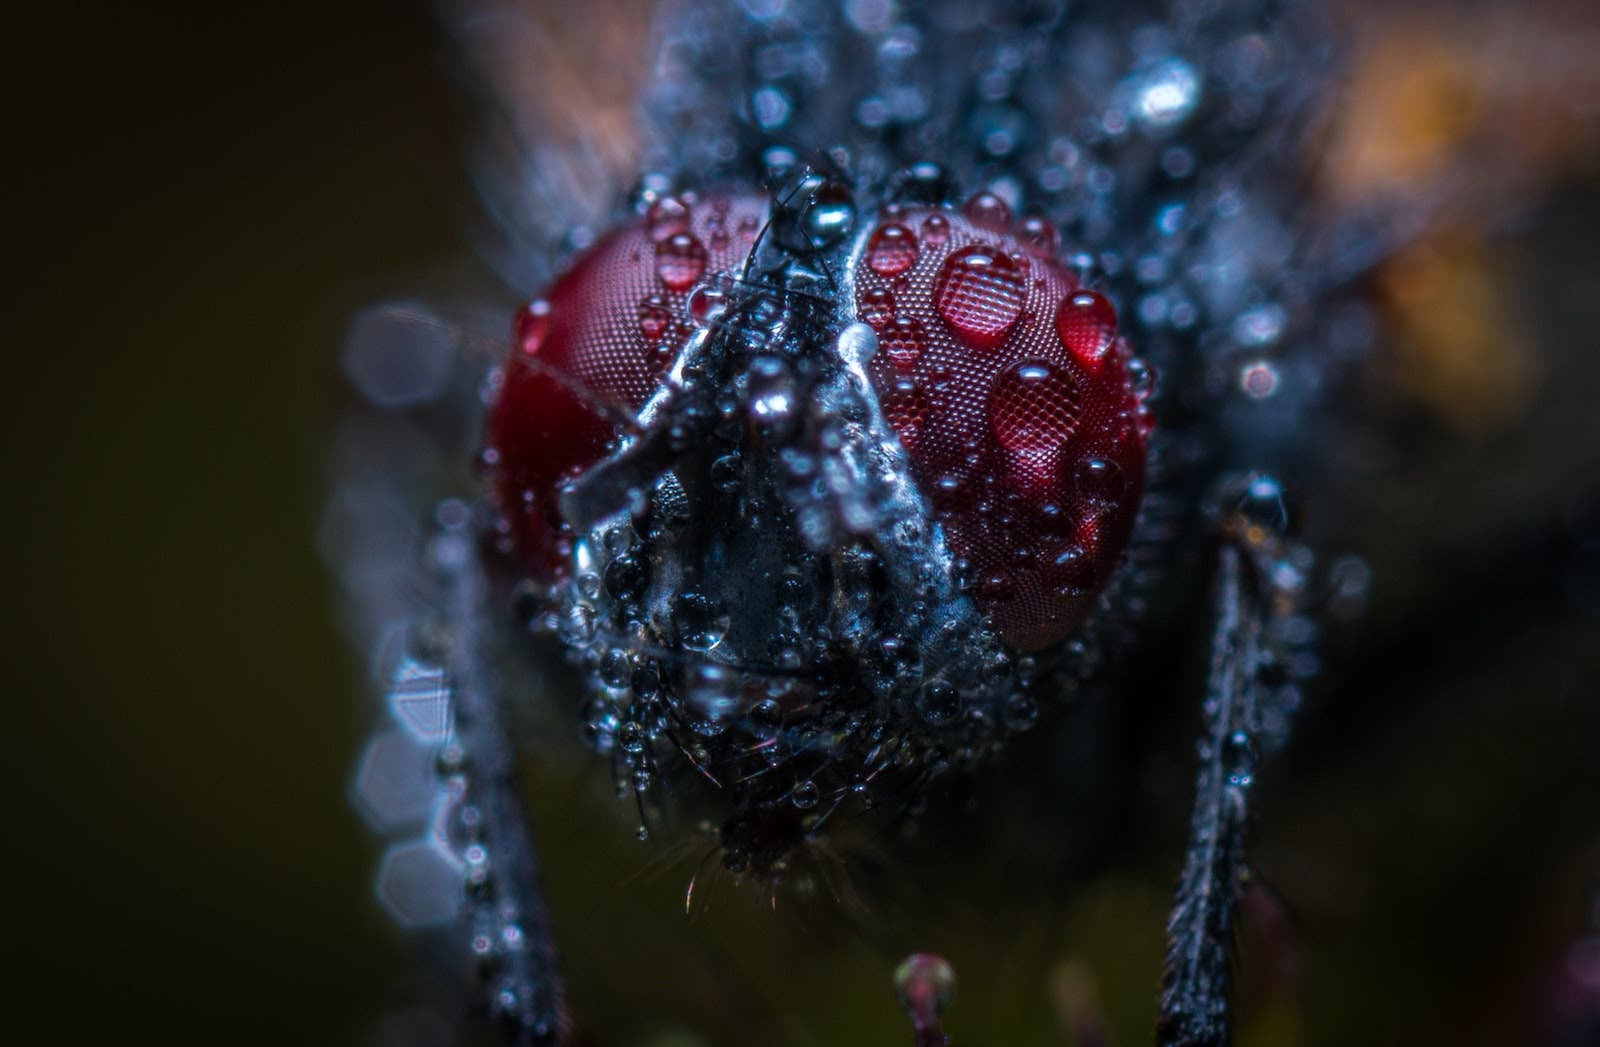
Macro photography allows us up close glimpses of objects we’d never see with our own eyes. Because of this, photos captured with a macro lens already have an upperhand in capturing our attention. When you combine macro and rain photography, the results become even more compelling. Raindrops, whether at rest or mid-splash, add a unique texture to macro photos. If you’ve never tried it, I recommend bringing along your macro lens the next time you try your hand at taking photos of the rain.
Tip 5: Start with Shutter Speed
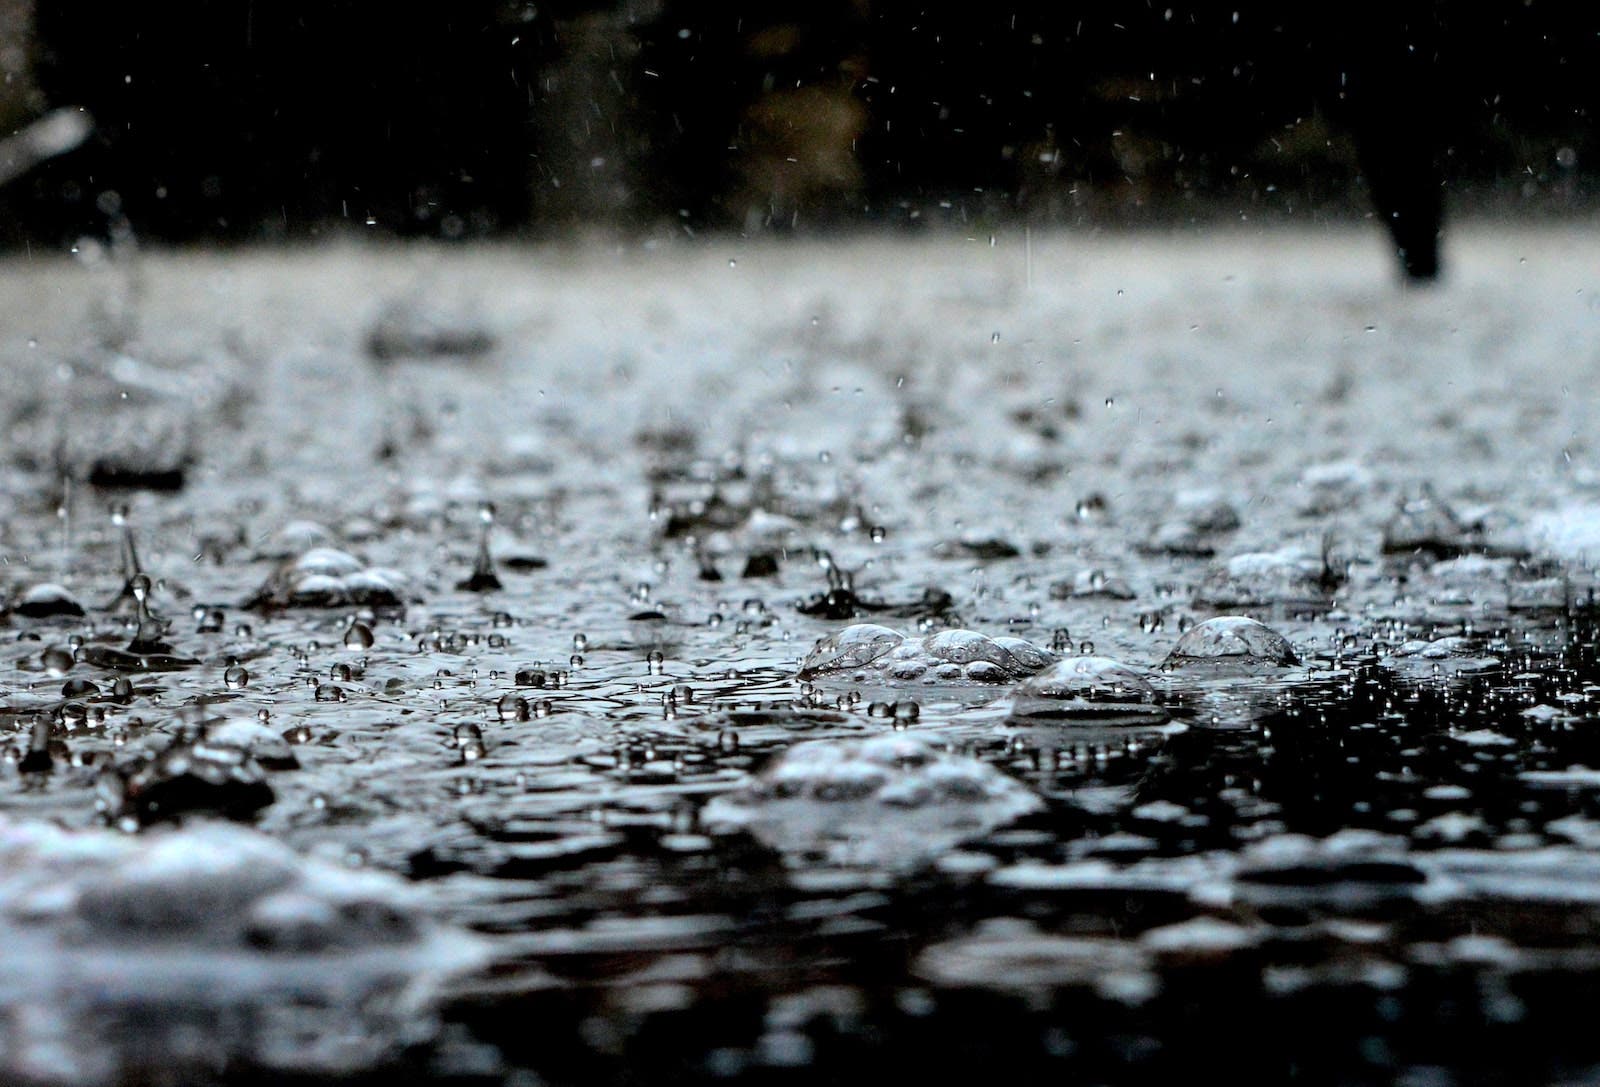
You’re likely familiar with the exposure triangle, which refers to the shutter speed, aperture, and ISO settings photographers use to get the right exposure. Beyond the purpose of exposing for light, however, these settings can also be used creatively. Rain photography offers a perfect platform for doing just that.
Because of the inherent motion of falling rain, I suggest starting with shutter speed. Using shutter speed, you can choose to freeze the rain or exaggerate its movement with a longer exposure. The exact settings will vary depending on the available light in your scene, so it’s best to take a couple test shots until you capture an acceptable amount of movement. For slower shutter speeds, I highly recommend that you use a decent tripod.
What About Aperture and ISO for Rain Photography?
After you’ve set your shutter speed to either freeze or allow motion, you’ll need to dial in your aperture and ISO. The low-light nature of rain photography may require you to make sacrifices when it comes to the other exposure settings.
Aperture
When photographing rain, we usually want to capture the rain in some detail as it falls. A fast shutter speed allows us to do this to an extent, but our depth of field will also determine how much detail remains. If we choose a wide aperture, the resulting shallow depth of field will eliminate much of what we can see of the rain. This is fine if we’re photographing a subject in the rain for an abstract shot (see below), or say for couples portraits in which the rain takes a back seat. Even then, however, we don’t want to go too shallow.
An aperture of f/8 makes for a safe starting point, although you may need to open this up if you need more light to reach the sensor and you’ve hit your limit for ISO, which we’ll talk about next. If you prefer the shallow look that accompanies a wider aperture, then by all means go that route.
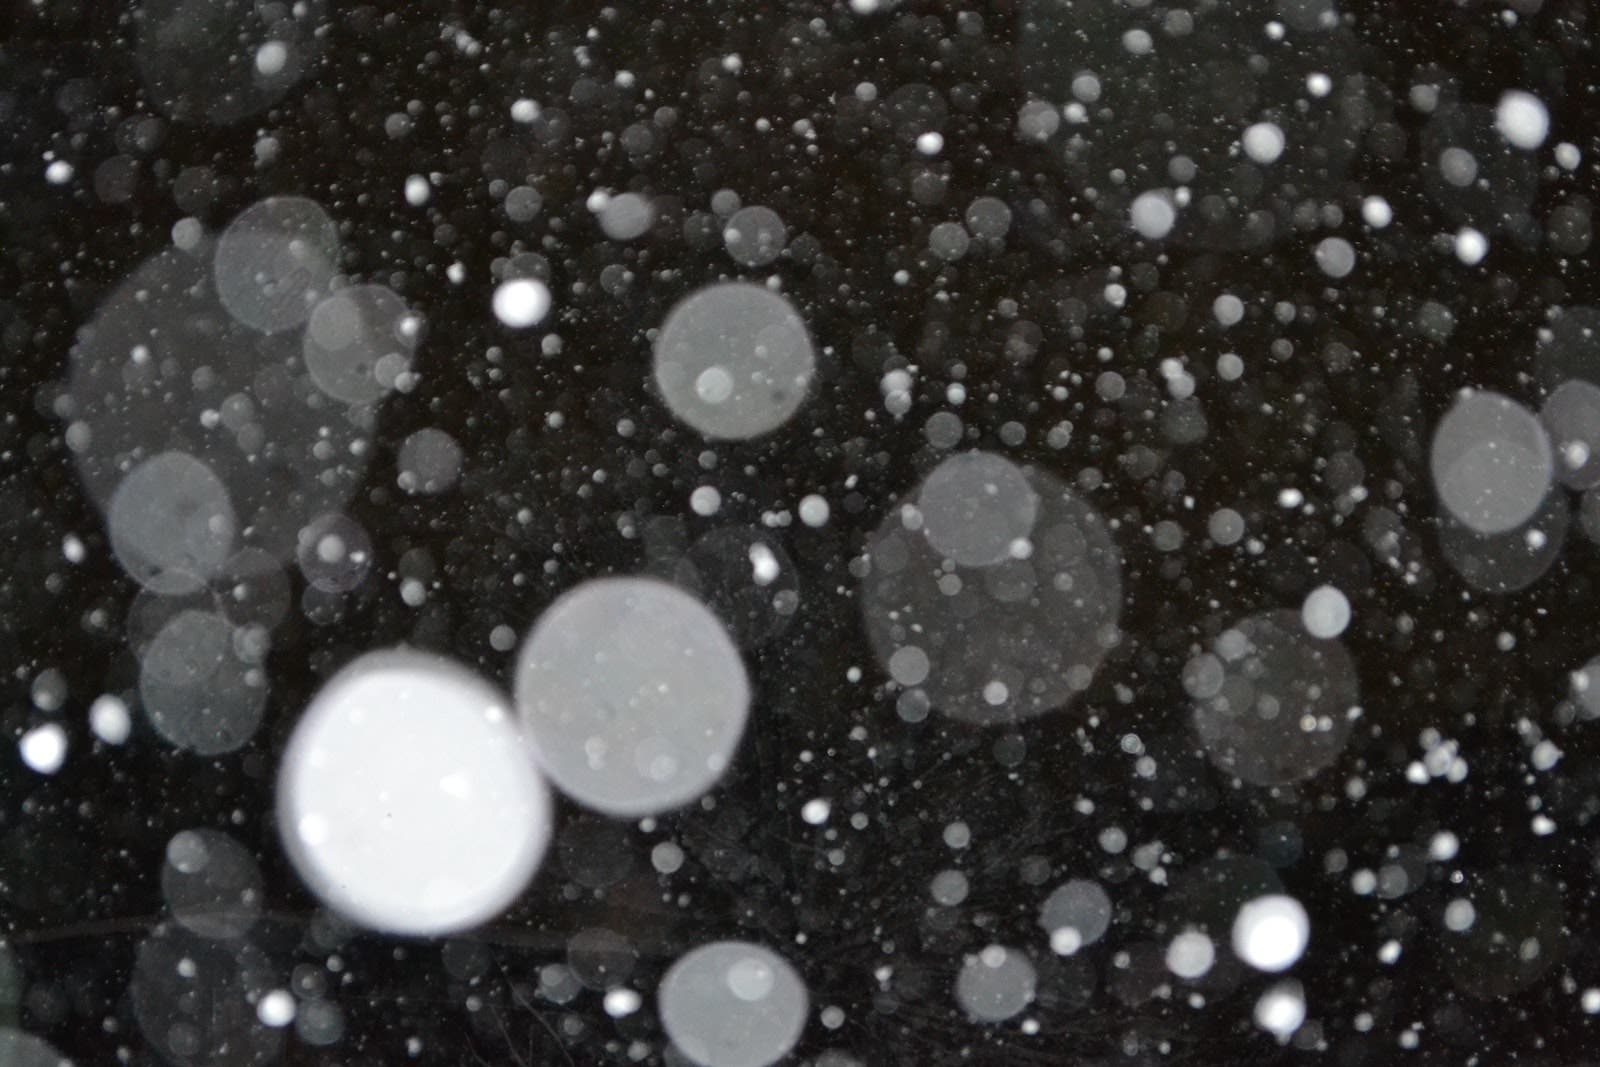
Rain Photography Bokeh
Rain also make for amazing shots that feature rainy day bokeh. Your focal point and aperture can take an everyday scene and transform it into an abstract masterpiece.
ISO
Newer camera bodies allow more freedom when it comes to bumping ISO without sacrificing quality. You should know your camera’s limitations in this area so that you don’t introduce more noise than you deem acceptable in your final image. A certain level of noise is to be expected in rain photography, especially if we’re going for a filmic look. Again, although it varies, try to keep your ISO below 3200, and you should be okay.
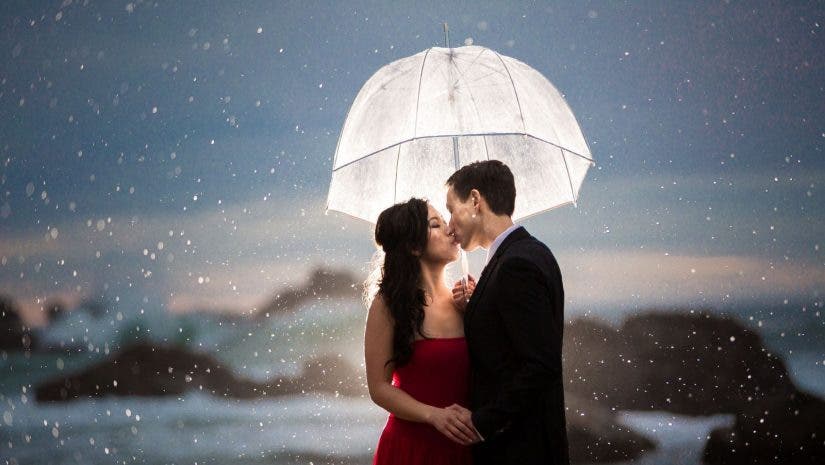
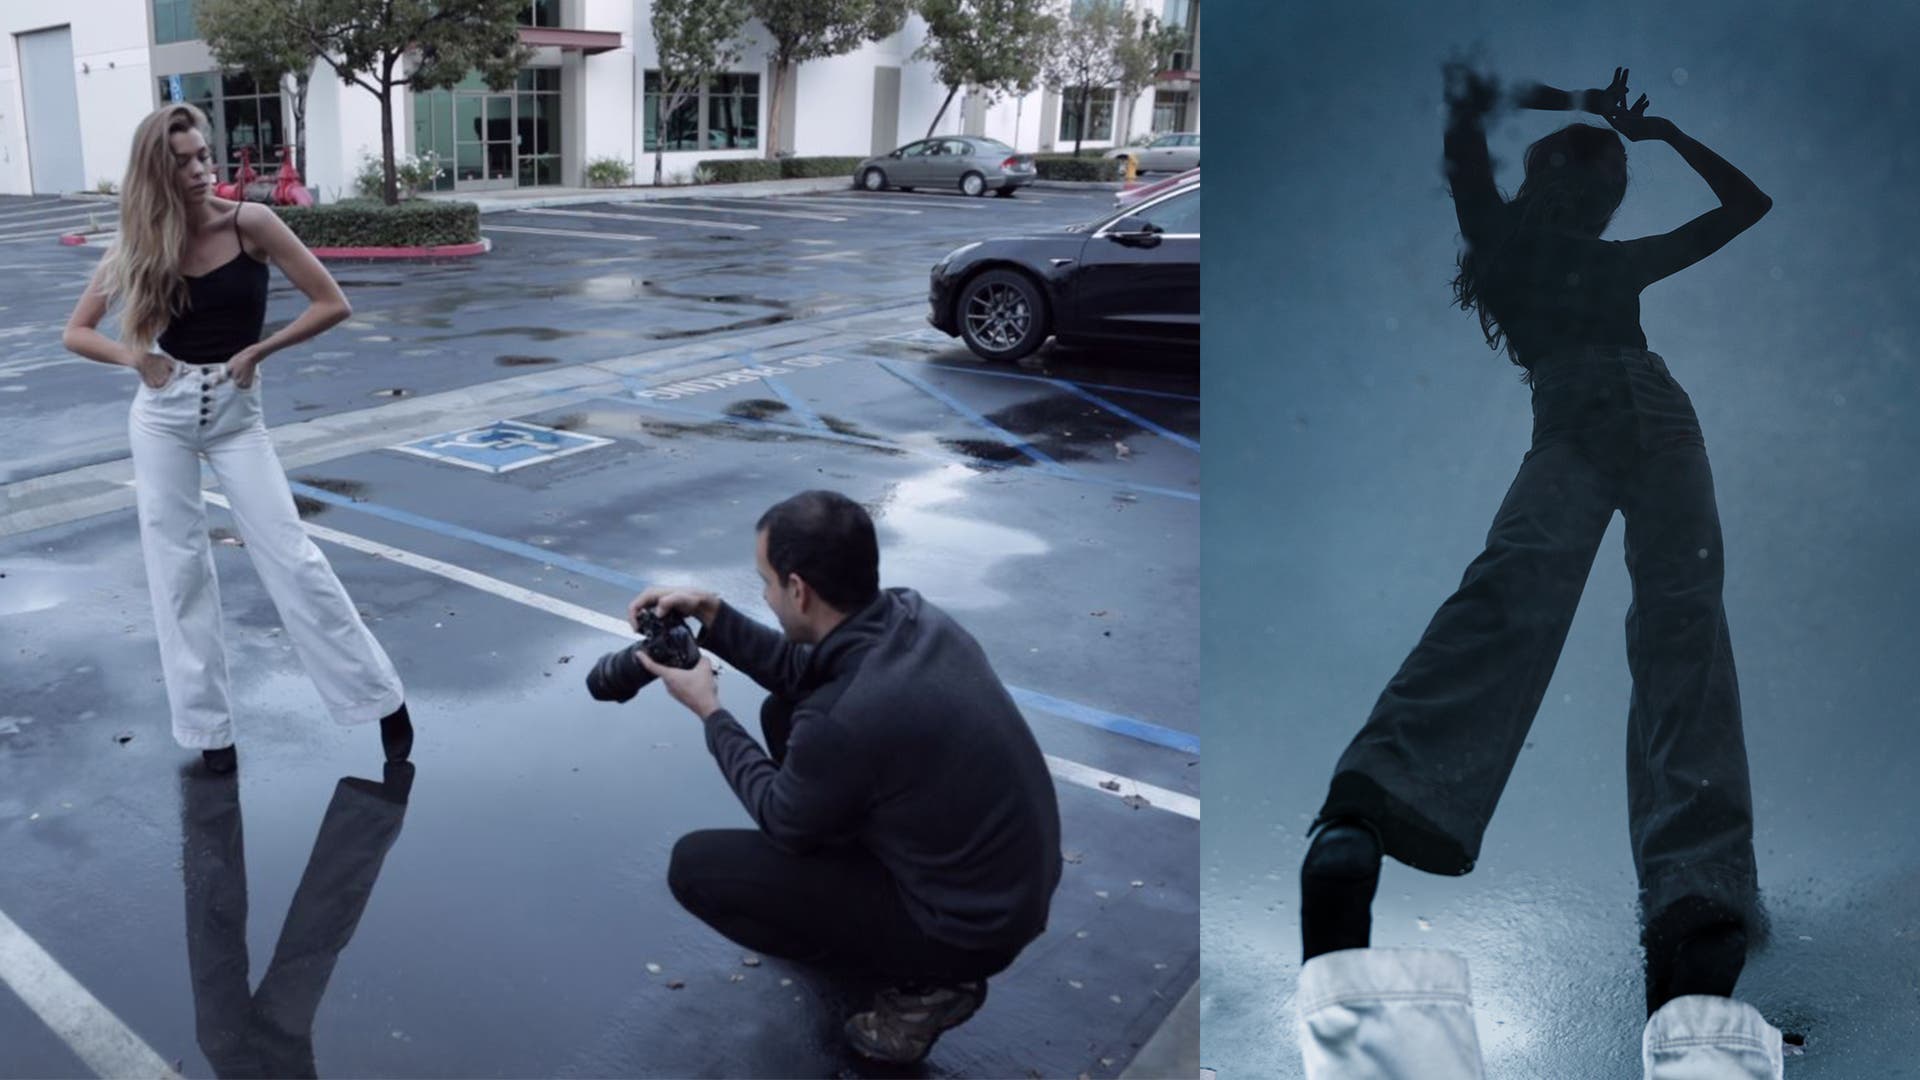
Tip 6: Create Epic Backlit Couples Portraits

Backlighting remains one of my favorite ways to turn an ordinary scene into something extraordinary. This technique, which is one of five featured in the video above from Adorama’s YouTube Channel, works especially well for rain photography. When backlighting a subject in the rain, here are a few things to keep in mind.
Flash Power
As is true anytime you use flash, make sure it is not too powerful. The goal is to create a pleasant rim light around your subject without blowing out details. Take a couple test shots if necessary to dial in the appropriate flash power.
In addition to adjusting your flash power, make sure that your exposure settings keep the ambient light dark enough to allow the lighted raindrops to show up. If the ambient exposure is too bright, the raindrops will be hard to distinguish.
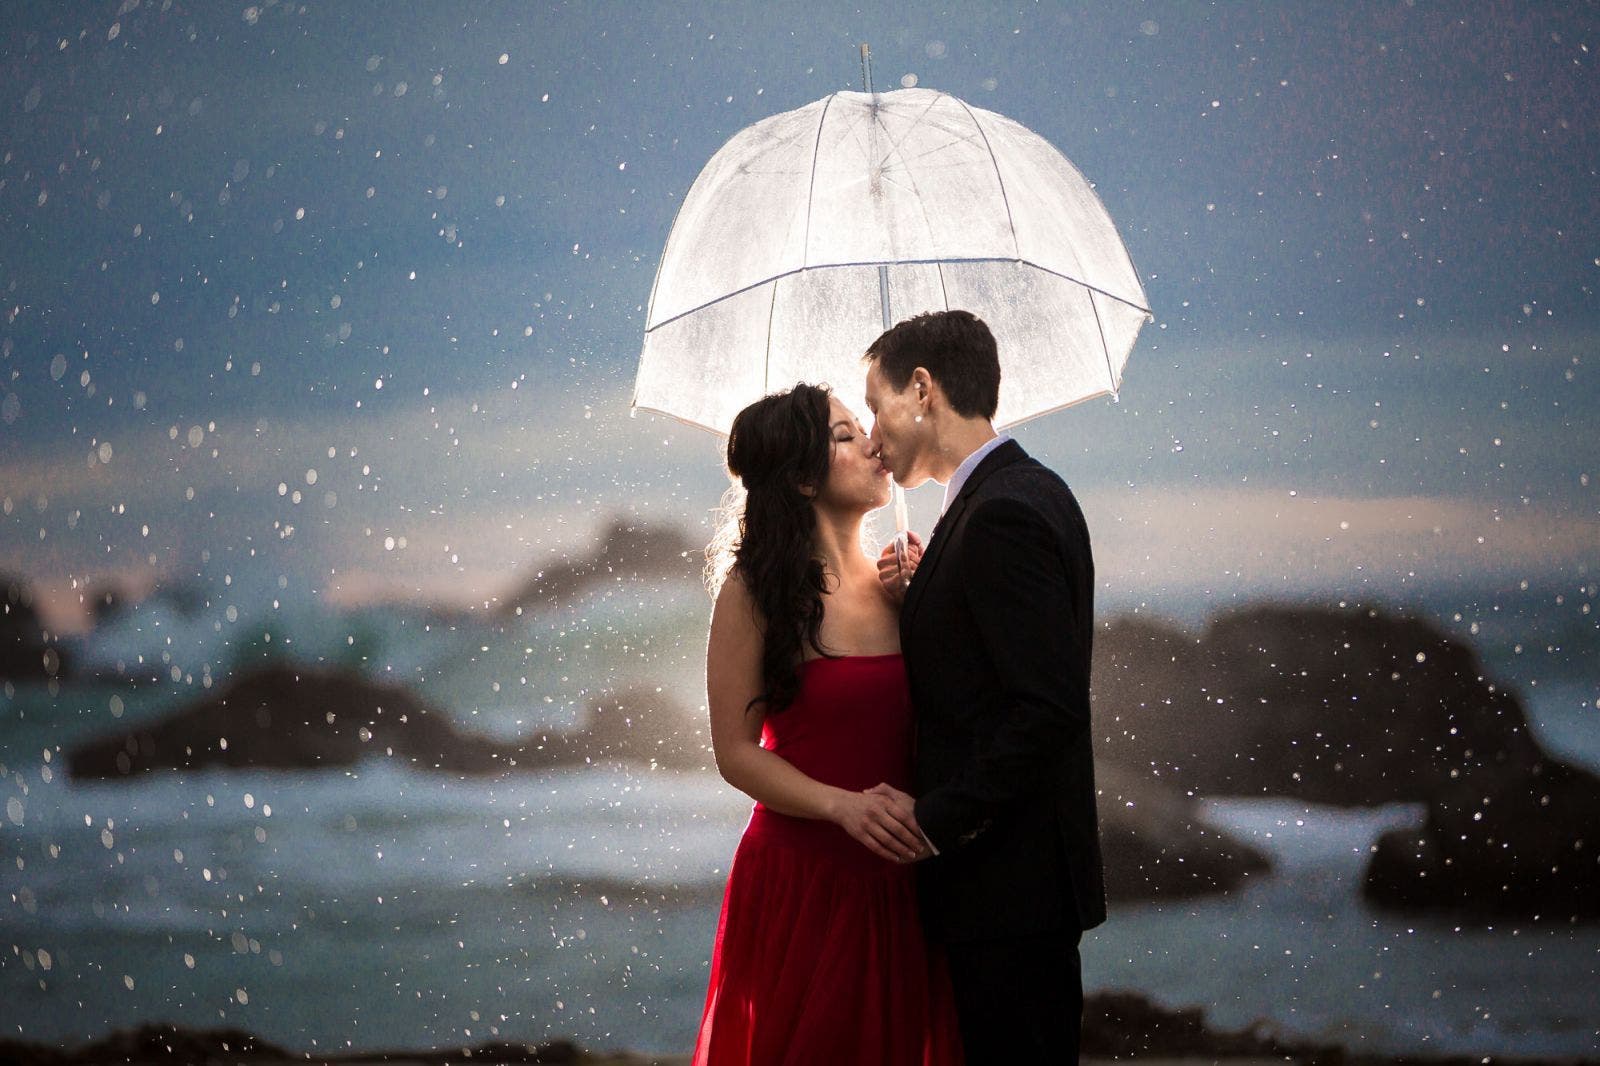
Light Color for Rain Photography

I prefer warmer rain photography portraits, which may or may not match your interests. A typical flash unit fires at 5500K when not gelled, which falls on the cooler side. As a result, I like to place a CTO gel on the flash and then set my white balance to around 4400K. This will warm the light color hitting the couple and make the natural blue tones in the background more pronounced.
If you’re unsure which direction to go, I suggest matching your camera’s white balance to the ambient light and then adjusting from there to make the light color appear warmer or cooler.
Posing & Light Placement

Pose your couple so that they connect in the center, and place them directly between the camera and the flash. If our camera angle is off to one side, we’ll get a brighter highlight around one of the subjects. The closed pose should block the flash from the camera’s view. In addition to using the pose for concealment, you’ll have to adjust the height of the flash. I generally match the flash height to the shorter person’s shoulder height and angle the flash slightly up so that the light falls fairly evenly on both faces.
Before you call it finished, ensure that you’ve created a nice rim light that outlines their shape and form without creating unnatural and unflattering highlights. That’s it.
Tip 7: DIY Rain Photography

You’ve probably heard the saying, “Make it rain,” but you may not have considered applying the phrase to your photography. Even if the weather’s nice, you can turn to DIY rain photography techniques to add interest to your photos. In the above video from Adorama TV, Gavin Hoey demonstrates how to set up, shoot, and edit pictures of rain using a garden hose and some protective camera gear. Check out this video for more fake rain tips and learn how to create rainy window portraits in the studio.
Tip 8: Make It Timeless (or Dramatic) in Black and White

I don’t recommend converting all of your rainy day images to black and white, but those with a decent amount of tonal range and interesting textures or shapes can make for incredible black and white images. When we remove the color from our photos, we’re forced to focus more on the contrast and shapes present in the frame. Black and white edits add a sense of timelessness to our photos, and the lack of color and boosted contrast also tends to create more drama.
Tip 9: Look for Rainbows
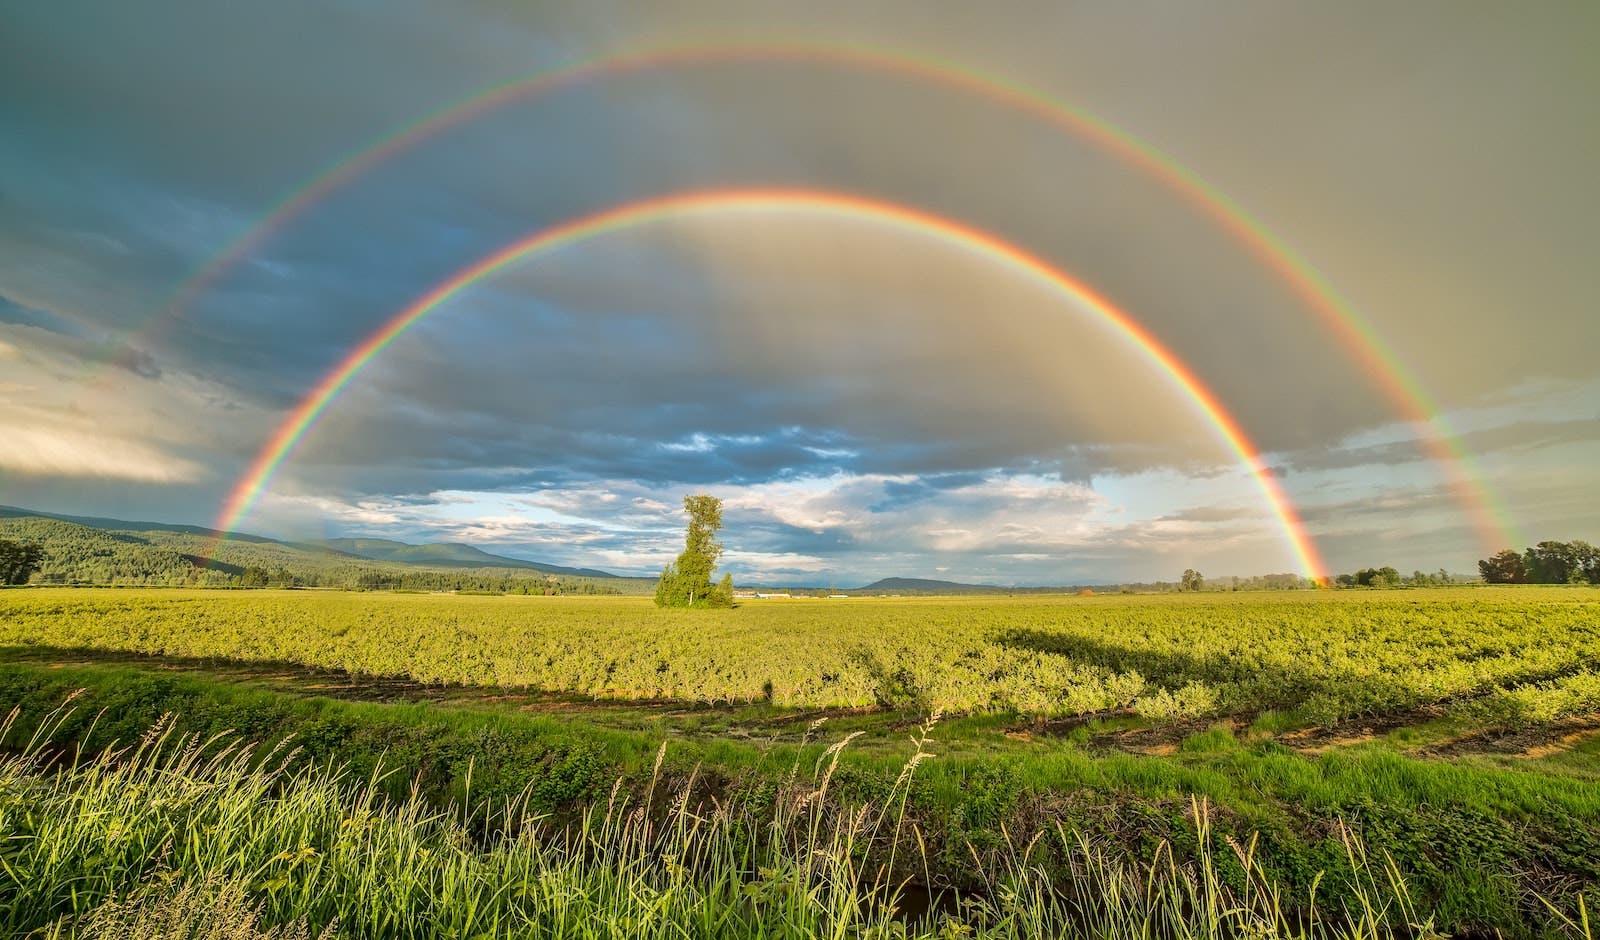
At some point on a rainy day (perhaps the last day for a particular batch of inclement weather), the sun will come out. So long as the air is still moist, which it most likely will be, you stand a good chance of spotting and photographing a rainbow. It’s an added perk for getting through rainy days and being prepared with your camera. If the rain is still coming down when the sun breaks through, expect even grander results. Also, a nice polarizing filter can help add more contrast and really make the rainbow pop.
Tip 10: Edit Rain Photography like a Pro
Post-production can go a long way in bringing our final images to life, and the same is true for rain photography. For the most part, you’re going to edit rainy day photos the way you would any other pictures. You can even use presets if you have a favorite pack. Just like with other portraits, you can crop your photos in post to focus on the most compelling subjects.
Where your rain photography edits may differ, however, lies in the details. For example, rainy day photos typically benefit from a bump in contrast and clarity, especially those captured in drab conditions. Another area that helps in expanding the tonal range of rain photos involves adjusting the blacks and highlights, usually moving the sliders to the left. The impact these simple edits can have on rainy photos is significant. This becomes more evident when shooting against a darker backdrop to really highlight the rain in the foreground.
Conclusion
I hope you’ve enjoyed these ten rain photography tips for beautiful photos. While it’s not as easy as shooting a session in warmer weather, taking pictures in the rain doesn’t require too much prep. So long as you outfit your gear and yourself in the proper protective gear and head out with creative techniques in mind, you should find yourself rewarded with amazing photos for your portfolio. Or, you can try the studio-based techniques mentioned above and capture rainy photos in the comfort of your own home or studio. Either way, learning to incorporate rain into your photography is a worthwhile venture.