Wait a second! What’s DPOF?
 Digital Print Order Format (DPOF) is a feature found in most digicams that enables the camera to select which pictures and how many copies of each you want to print. DPOF data consists of a set of text files and is stored in a special directory on the memory card along with the photographic files. It can only be used with JPEG capture and cannot be applied to RAW files.
When you insert the card into a compatible printer or photo lab kiosk, the number and sizes of prints you requested are automatically printed. If you use a photo lab that has equipment supporting DPOF, you save time because you don’t have to tell the photo center which pictures you want printed–or, just as importantly, the ones you don’t want printed.
Some cameras only mark some possible DPOF information, but if your camera fully supports Digital Print Order Format, it will allow you to tag your pictures with the following information:
- You can specify the number of prints, print size, and request an “index print” showing all of the images on the memory card.
- It can allow you to print the date, title or text.
- The Equipment/Use features of DPOF contain data about the camera used along with capture date and time. This is sometimes called EXIF or Exchangeable Image File Format data.
- Other user information, such as name, address, and phone number, may also be recorded.
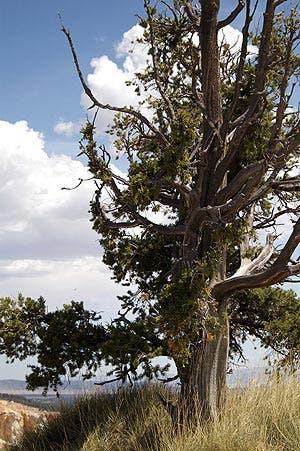
Beyond the image: This photograph was made with a Pentax K100D in Zion National Park, Utah. Exposure in Program Mode was 1/500 sec at f/8 and ISO 200. Nope, I don’t have a good memory; this information is contained in the EXIF (Exchangeable Image File Format) data that’s part of the image file.
Marking Your Pix
The DPOF option can be accessed through your camera’s DPOF menu. Because of the many different structures found in digital cameras I suggest you read your camera manual to find the specific information. Using the Pentax K100D digital SLR as an example, you first put the camera in Playback mode, then use the buttons in its four-way controller to select the photo you want to tag.
When you press the Function (Fn) button, you’ll see the DPOF icon. Press the four-way controller’s up arrow and you’re in DPOF mode. Other cameras have similar gateways. Once there (with the K100D), choose how many copies you want (up to 99) and whether or not you want the date the photo was made printed. When you press the OK button, those settings are stored and the camera is returned to Playback mode.
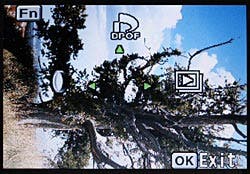 What you see: Here is the actual DPOF Screen found in the Pentax K100D. You put the camera in Playback mode then use the buttons in its four-way controller (to the left of the screen) to select the photo you want. Then press the Function (Fn) button and you will see the DPOF icon.
To apply the same settings with the Pentax K100D to all the image files, get to the DPOF menu then press the Fn button. This gives you a screen that lets you chose the number of copies and if the date is to be printed but as applied to all of the files on the SD card. If you want to apply these setting to all the images, just get back to the DPOF window and press the Function button which brings up a menu that lets you apply these choices to all the images. Press the OK button and you’re ready to take the memory card to a photo kiosk or output through compatible desktop printer at home.
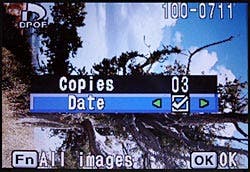 Two at a time: The DPOF Screen in the Pentax K100D lets you do three things even though only two choices are shown. You can specify the number of prints you want but it you select “zero” no prints will be made providing the functional equivalent of “do not print.” The third choice is showing the date of capture.
The K100D only provides these particular settings; your camera may offer more or fewer choices but the process remains the same for tagging image files with DPOF data. Find the menu, put your camera in Preview mode, and apply the DPOF setting you want for a particular image. What comes next is the print-making experience and even here there is some variation in what you may expect.
Making Prints at Home, Online, or in a Store
You can make prints directly from the memory card but not all printers have a built-in card reader even though they may be DPOF-compatible. In that case, you will need to connect the camera to the printer using a cable (usually provided by the camera manufacturer). The technology used to make these prints is called PictBridge and will be covered in an upcoming article.
To print pictures with a DPOF-compatible photo printer, remove the card from the camera, insert the card into the appropriate memory card slot on the front of the printer and, using the printer’s controller, select DPOF from its menu options. The controller will usually alert you to the total number of images that have been tagged with DPOF data. Then simply press the Print button and your photos will be printed automatically. If you connected the camera to the printer, it’s a good idea to plug in the camera’s AC adapter so that you won’t run out of battery power when making DPOF prints.
The software used by most, if not all, on-line printing services does not usually recognize DPOF data, so you probably won’t be able to use that capability when uploading image files via the Internet. On the other hand almost all photo printing kiosks that let you insert memory cards, including Adorama’s own in-store Photo Center, recognize DPOF data and will produce the prints you specified. Depending on the lab’s equipment, the date may or may not be imprinted even if that particular DPOF setting was made.
Don’t let all the acronyms get you confused. DPOF is a convenience that helps you through the process to get the number and kinds of prints that you want and that’s a good thing.
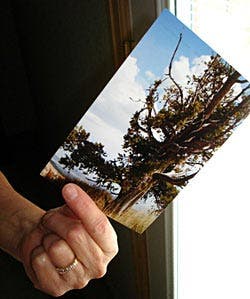
This is easy: It all comes down to this: making the prints that you want simply and easily. That’s what DPOF is all about.
Joe Farace’s newest book, “The Advanced Digital Photographers Workshop” co-authored with Rick Sammon and others, is available from www.joefarace.com. Please visit his newly updated website at www.joefaraceshootscars.com.
© Adorama Camera, Inc.

