This is the third and final installment of the three-part series giving you the lowdown on the Flashpoint eVOLV lighting system. Part one is an introductory overview; part two is a bit of a deeper dive; and this final part demonstrates three key scenarios for using the eVOLV in real world circumstances.
I am often called on to make consistent work which has a distinct style, a bit of a refined polish; and yet time constraints, budgets, and working room are often less than ideal. At the same time, to paraphrase a classic photo expression: clients can’t print excuses. So while tools and workflow become refined over time, the question remains the same: how to create work that is evocative with a small overhead in gear.
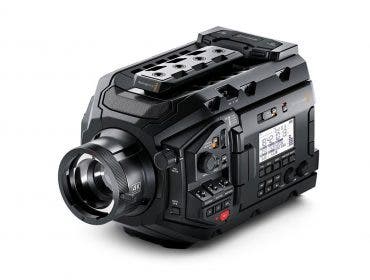
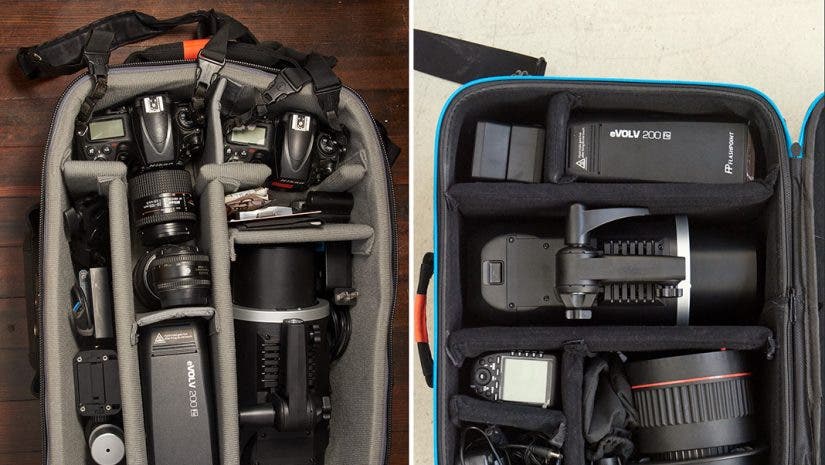
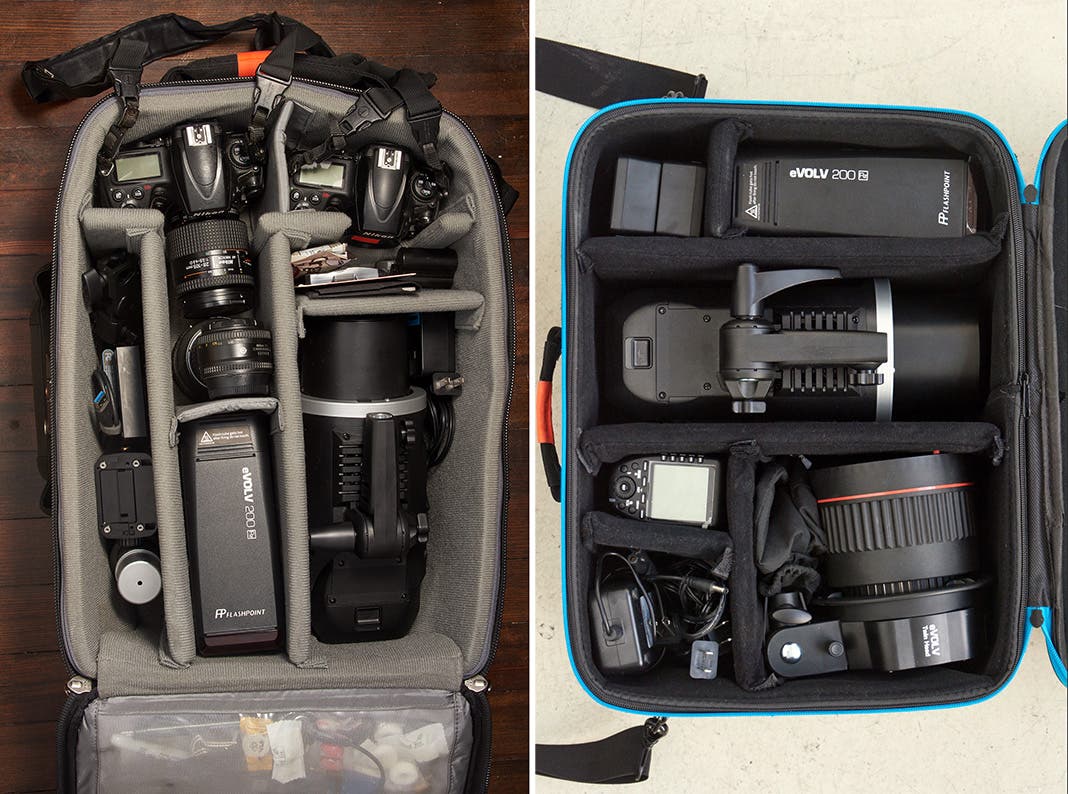
The eVOLV lights are liberating in that they require little packing volume, and combined with the R2-Pro transmitter, are absurdly simple to setup and operate. Their size allows you to capitalize on available space, and the output, especially with the twin head bracket, offers enough flexibility that you can pivot from a strobe-dominant environment to mixing strobe and available light.
eVOLV on assignment:
Three common assignments for me are: full-length portraiture or fashion; tighter headshots and beauty; and lastly, tabletop still life. Here’s my approach to each, from concept to execution:
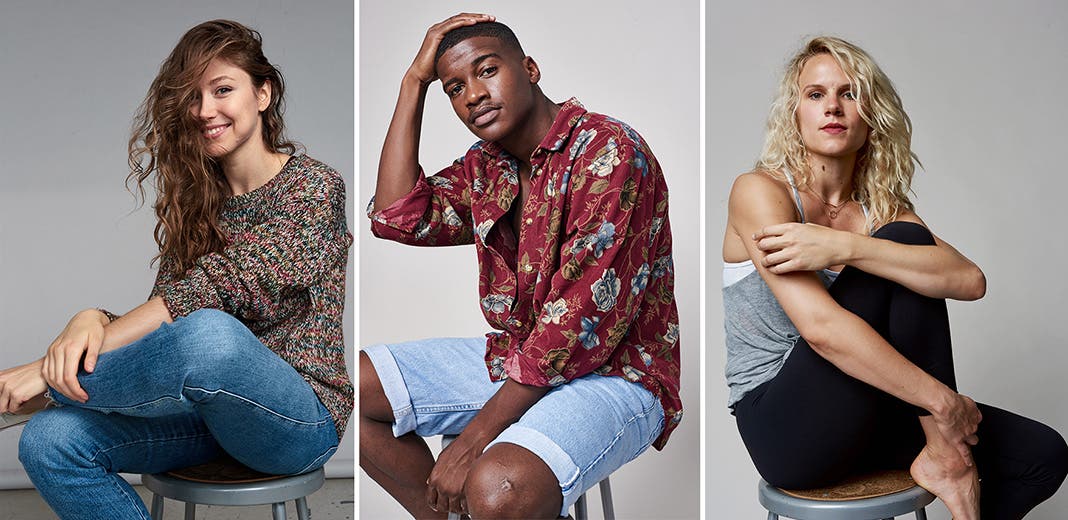
Full-length portraiture & fashion:
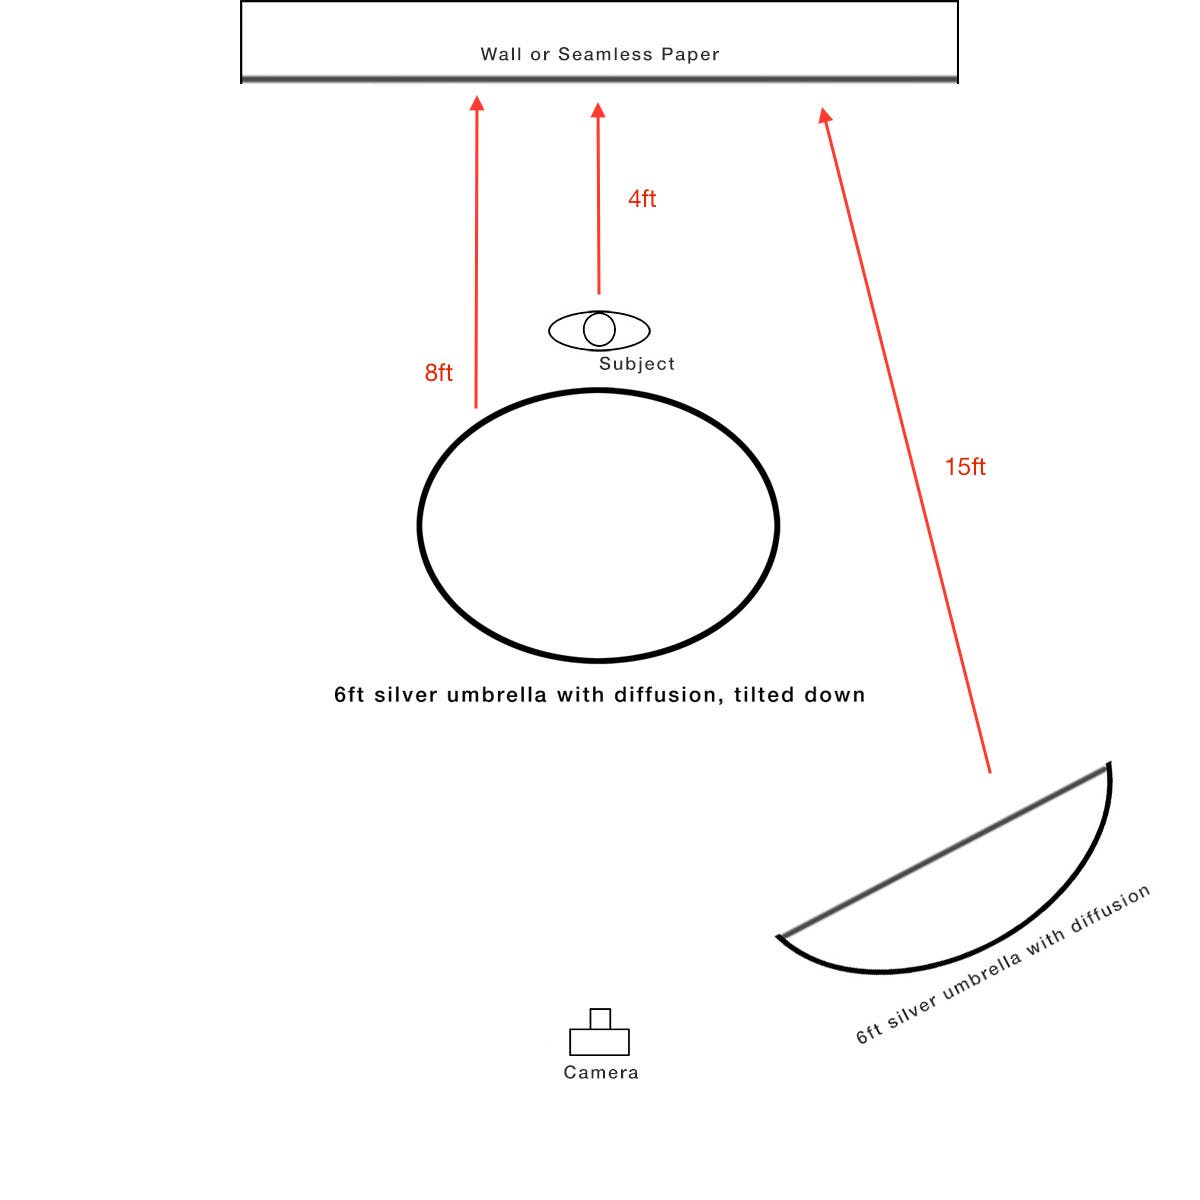
My go-to for these images will be to create the broadest coverage possible. Ideally, you’ll have two light sources which are close in output power, with one set to generate slightly greater output than the other — whether by output power or distance relative to the subject. The combination of the two will create a region of consistent exposure, inside which your subject can move freely (within reason).
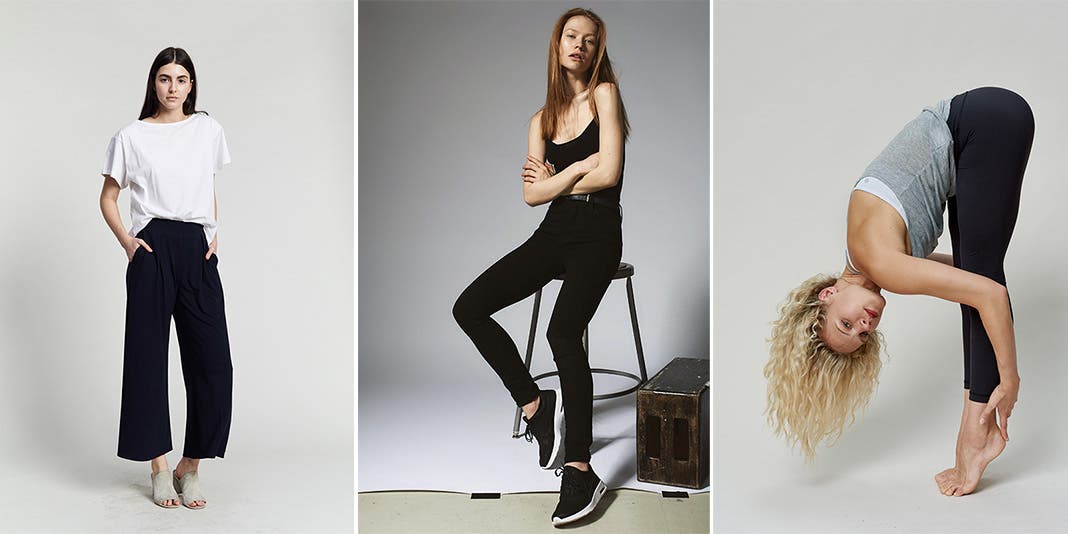
Keeping your subject close to the background — around three to four feet — creates a nice balance by not allowing the background to fall off into darkness too quickly. I typically do this with a single Xplor as my key light, in a large umbrella, adding a diffusion sock. Then I use a pair of eVOLVs in a second large, diffused umbrella as fill. But you can just as easily do this scenario with two Twin Head eVOLV setups, in either single centered bulb configuration, or with two eVOLV’s per source. In each scenario what will change is your ISO or recycle times, and it’s up to you to decide which better serves the experience you’re creating.
Given the size of coverage and distances, combined with my own interest to keep pacing fluid and capture the natural qualities of my subject moving, I will start with my camera set somewhere in the ballpark of f/8, ISO400, 1/160th and the lights at ¼ power. I often find that distance, and not power, creates a ratio between my key and fill light that has a nice character of shape and contrast — with both lights set to ¼ power, but my key light about six feet from my subject, and my fill light between 10 and 15 feet away.
Tip: if you find that power and distance is having you push ISO to get a good exposure, and you’re concerned about grain or noise in your images at ISO800-1600, work to understand exposure more clearly. Images show noise more severely is they’re brightened in post, and leaving the exposure/brightness sliders at 0, or better still a negative number, offers cleaner output. To this end, tethering can be a life saver, allowing you to check things like highlight clipping and shadow density, and nail exposure at capture time. One way to offset noise is to fill the shadows of your images pretty liberally — shooting “flat” — and crunch them with a mild S curve or Levels adjustment in your raw converter of choice.
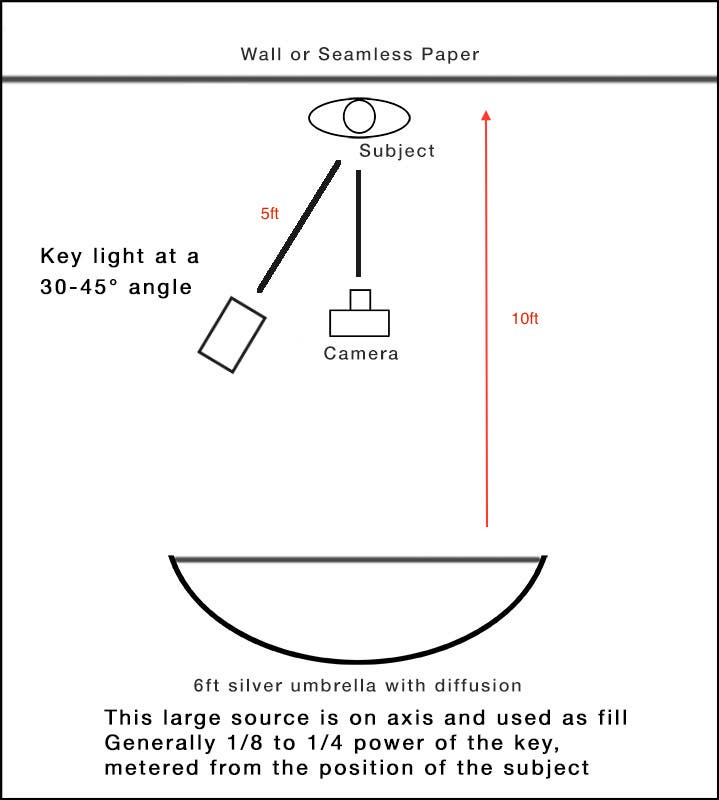
Headshots, tightly-framed portraits & beauty:
I’ve been shooting headshots for years as the sort of bread-and-butter work that is consistent and repeatable. It’s a great way to practice some new techniques and build relationships while the stakes aren’t too high. I have often had commissions for one or two headshots in a day, but have sometimes done high volume, rapid turnaround headshots for clients in large corporate environments, as many as 50 in an abbreviated work day. As I’ve written in my key and fill article, I like to go into these jobs keeping it simple, but at the same time, looking to produce work that has a refined feel.
Your first decision will be to choose a style of key light. There are several modifiers, but in general they all fall into one of three camps:
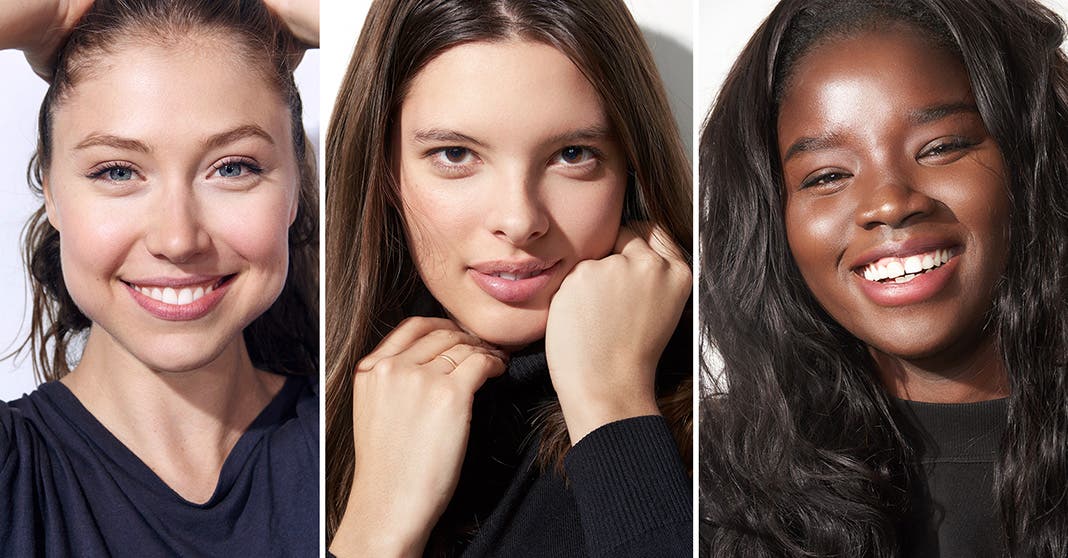
Hard source: fresnel, bare reflector, gridded reflector, hard box, zoom spot. These sources are chosen if the interest is to mimic high-key sun, and are known for sharp, well defined shadow edges. For the eVOLV, one of my favorite modifiers in this category is this small, high efficiency reflector. It packs small and light but in my recent tests, creates a cleaner shadow than even the 7-inch fresnel I have.
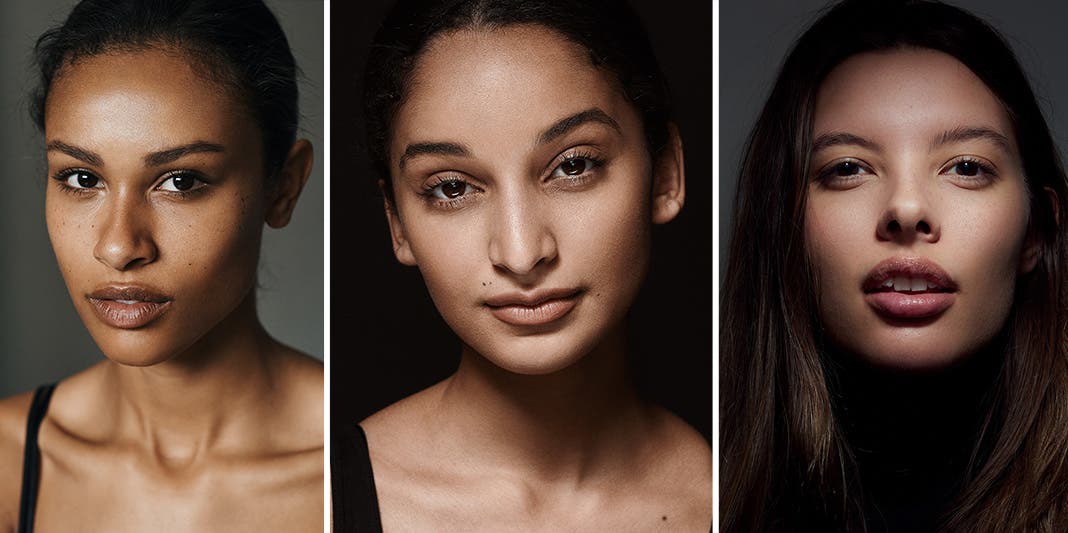
Specular, punchy source: beauty dish, Magnum, parabolic umbrella. These sources are known for having a high contrast mid-tone “snap,” and feature richly dense shadows that have a somewhat diffused (though not soft) edge. This is a very flattering light, and the beauty dish, especially with a diffusion sock, is so inarguably flattering, the word “beauty” is in the name. Glow makes two beauty dishes fitted for the Bowens mount — a 22-inch dish and a 28-inch dish — and they would make a perfect fit for the twin bracket with a center-mounted bulb.
If you’re looking for a lightweight, compact option, the 38” Glow Parapop small octa works, provided you remove the outer diffusion panel. In a pinch, a high-key silver umbrella, like this one from Elinchrom, can get you in the neighborhood.
Glow has also recently released two high-output reflectors — this 45 degree “long throw” and this Magnum. I’ve tried both — they’re excellent, and accomplish different goals — but ultimately the Magnum has become one of my new go-to light sources.
Soft source: Photek Softlighter II, a large octa, a standard softbox. The Photek is very popular as a shortcut to “Annie Leibovitz”-style lighting, but any one of these sources, used at fairly close distances, makes a wonderful go-to. Whereas the high key and punchy options get their signature style by elevating highlights and keeping shadows richly defined, a soft source mutes specular highlights while also making the transitions from highlight, to mid tones, to shadows, very gradual. Soft sources are often said to have a “painterly” quality. If you want to preserve skin detail and texture, soft sources can produce really beautiful results.
Tabletop still life:
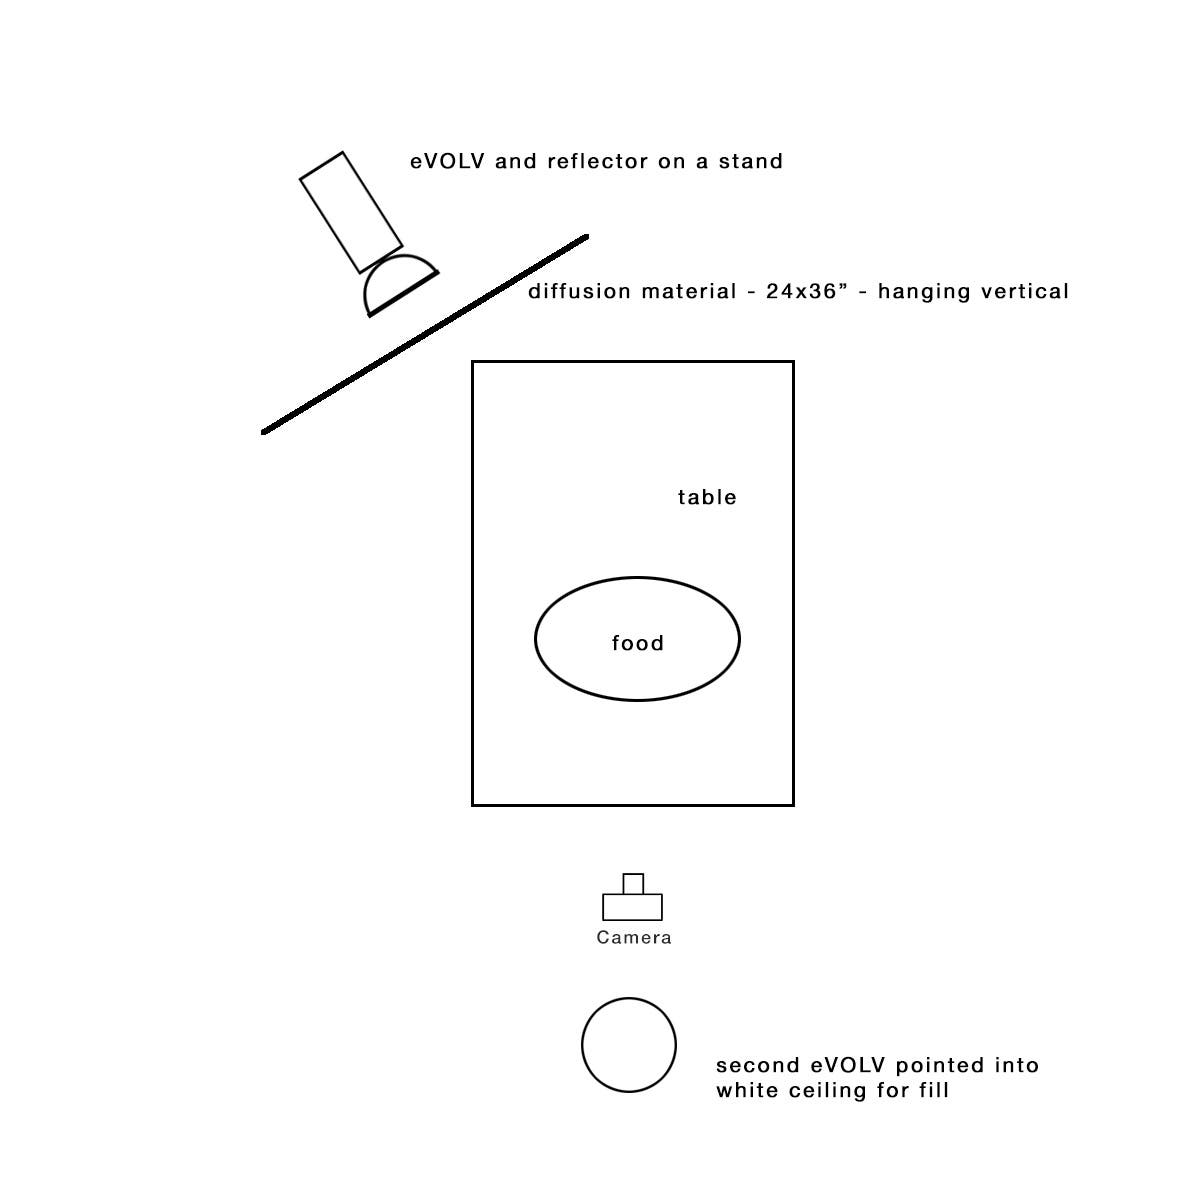
Melina Hammer, my wife, is a fantastic and well-regarded food photographer (cookbook author, stylist and chef to boot!). She shoots all of her work with available light. We were talking recently about a client she’d been approached to shoot food for, and they laid out the circumstances of a job — shooting in a tight space, availability of light questionable. I offered that we could create a style of light with a pair of eVOLVs that, while not entirely mimicking sunlight, would look really nice.
Seeing it as a fun exercise, I tasked myself with designing a lighting kit that would be easy to transport to location, require minimal setup time and work in a tight space. A small 6×10 room in our apartment became proxy for a challenging location, and in minutes we had a setup going for these images:
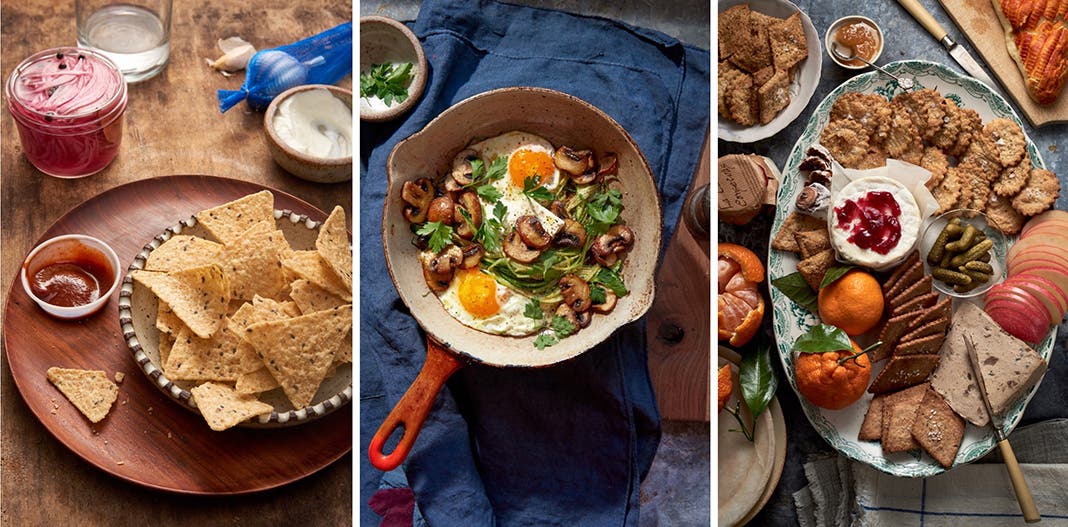
Here’s what’s especially fun about this exercise: from concept to execution I was done with the lighting setup before the food hit the table. In the weeks since taking our first swing at this, me lighting and shooting, Melina styling, it has become such a fluid and speedy experience, we will often setup the lights almost as an afterthought.