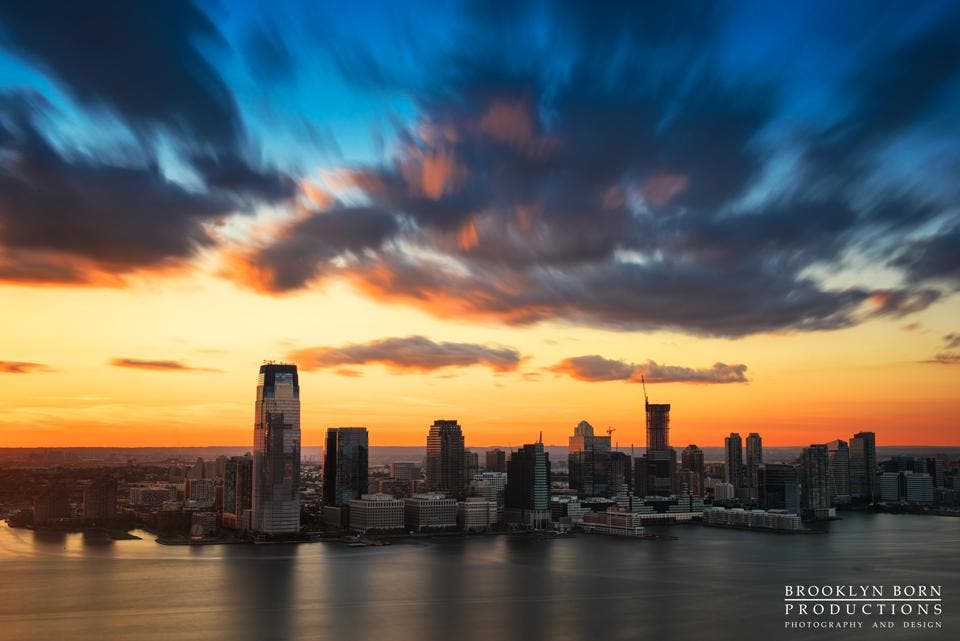
People often ask me about long exposure photography, so I thought it would be a good idea to create a two-part guide explaining what gear and techniques I use. If you haven’t read my first installment, Gear Essentials for Long Exposure Photography, check it out to get a list of photo toys I use. If you have read part one (aw, you like me, now I’m blushing), read on below for the settings and steps to get some great long exposures.
SETTINGS
There may be a lot of disagreement on what settings to use, and that is perfectly fine. Every photographer does things differently. However, some settings can cause you to miss shots or get blurry shots. I have been told that I take my time to set up my camera, but why shouldn’t I? I like getting my shots as close to what I see or want my final image to look like before I start post-production (editing).
- Manual Focus: Yes, I set my camera to manual focus because most of the long exposures I take are in the dark. I don’t want to risk shooting a three minute exposure, only to find out that the auto focus did not focus on the right spot. When it’s really hot or cold outside, you’ll want to get it right the first time if possible.
- Long Exposure Noise Reduction On: Again, I like to get my images as good as possible in my camera so I can spend less time editing. So, unless I am shooting something that requires multiple images without any delay in between shots (i.e. star trails), I keep my long exposure noise reduction set to “on”. What this feature does is take your long exposure, and then take another picture for the same exact amount of time while the shutter is closed. This results in a completely black picture that has the same noise pattern as the picture that you took. This noisy black picture helps your camera determine the noise pattern in your shot and remove it. What you get is an image with the noise already removed, without the need for noise reduction software.
- Aperture: Now here is the part that bugs me. I see a lot of videos and tutorials that will tell you to set your aperture anywhere between F8 to F32, because smaller apertures let in less light and allow you to shoot longer exposures. That is the worst piece of advice ever. The reason that is so bad is because very small apertures cause diffraction, which will reduce the sharpness in your image. If you don’t know what diffraction is, check out this great video about Lens Diffraction In Photography (link: https://www.youtube.com/watch?v=N0FXoWdHXTk) by Steve Perry (link: http://www.backcountrygallery.com). It may take a little research, but you can find the lens “sweet spot” for whatever lens you’re using. I like to shoot between F8 and F11 for sharp pictures with a lot of depth of field.
- ISO: I like very little noise in my pictures and I am obviously trying to increase my exposure time, so I use the lowest native ISO (64 on my Nikon D810, 200 on my Fuji XC-E1) that my camera will allow. Do notice that I use the lowest NATIVE ISO and not the lowest ISO. A native ISO setting will be represented by a number and will determine how sensitive your camera sensor is to light. Some cameras will have ISO setting that start with “Hi” or “Lo”. When using these ISO settings, your camera is using software to make the image brighter (Hi) or darker (Lo). It has been debated that this can cause a decrease in image quality, so I avoid them just to be sure.
- Mirror Up Mode: When you use a DSLR and take a picture, a mirror that reflects light up to the optical viewfinder moves up and exposes your sensor to light. This movement can cause a small amount of camera shake. The Mirror Up Mode requires the shutter button to be pressed twice to take a picture. The first press moves your mirror up, but does not take the picture. This means that the shake occurs before you begin exposing. The second press exposes your sensor to the light for the length of your shutter speed. Again, if I am shooting something that requires multiple images without any delay in between shots (i.e. star trails); I would not use this function. However, if I am not shooting multiple images, Mirror Up Mode is always set.
TECHNIQUE
Now that you know what gear and settings I use, here is the step by step method I use to take long exposures:
1. Compose: The first thing I do is compose my shot WITHOUT using my tripod. Sometimes people immediately put their camera on a tripod then begin angling their camera to get the best shot from the tripod. Instead, I look for the best shot and then set my tripod up to get the shot that I want.
2. Set Constant Settings: Some settings I always use during long exposures. Before I start taking pictures, I like to make sure they are all set:
a. ISO: 64 (or lowest native)
b. Manual Focus
c. Mirror Up Mode
d. Live View: On
e. Long Exposure Noise Reduction: On
3. Connect Wireless Remote: I made sure I listed this as a separate step purposely. I used to keep my wireless remote connected to my camera as I walked around looking for shots. Eventually, the pins that connected to my camera bent and I had to replace it. Now, I connect the remote when I am ready to shoot.
4. Focus: Before I set my aperture and shutter speed, I make sure I am focused on the object I want to be sharp. I do this before I set my aperture or shutter speed because I am usually shooting long exposures at night. The dark conditions may make it difficult for autofocus to detect objects and may also cause your Live View screen to be very dark. I open up my aperture as much as I can to let in a lot of light, then I use my Live View screen to zoom in and focus on an object.
5. Set Aperture: After I am focused, I set my aperture to have a large depth of field. When shooting wide, you will get a lot more depth of field so I usually shoot between F8 and F11 to get sharp shots and avoid diffraction.
6. Set Shutter Speed: After my aperture is set, I set the camera’s Live View screen to display an exposure preview (essentially making it similar to an electronic viewfinder that will show you what the shot will look like before you take it) and set my shutter speed to get the exposure I want.
7. Attach Filter: Once all my settings are set, I attached the filter to the lens very carefully, so I do not change my focal length or change what I am focused on.
8. Reset Shutter Speed: Yes I know this sounds dumb, but here’s the thing: There are some scenarios where you will not be able to use the Live View screen to determine your exposure if you have a filter on. Filters will also make it very difficult to focus, but they two let you know how many stops of light they block out. Once you have your settings ready without the filter, you decide which filter you are going to use and then change your shutter speed based on the filter. If the shutter speed is longer than 30 seconds, you’ll have to set you camera to bulb and set the shutter speed on your remote.
9. Shoot: Well of course you have to take the picture! That’s the reason you went through all of these steps! When the picture is taken and the Long Exposure Noise Reduction is complete, take a look at your image. Tweak the settings if needed and keep shooting until you get the shot you want.
Yes, this may seem like a lot of steps but once you get the hang of it, shooting long exposures will become second nature. If you have any questions about my technique for shooting long exposures, feel free to send me a message on my website (bkborn.com).
I hope this helps you get some great shots.
