Think of ISO as a worker bee. If my camera is set for ISO 100, I have 100 worker bees; if your camera is set for ISO 200, you have 200 worker bees.
These worker bees gather the light that comes through the lens and make an image. If both of us set our lenses at f/5.6 so the same volume of light will be coming through our lenses, you will record the image the quickest, since you have twice as many worker bees.
How does this relate to shutter speed? Let’s assume we’re photographing a flower on an overcast day. For you, 1/250 sec. is correct, but for me, 1/125 sec.–a longer exposure–is indicated. Get out your camera and a pen and paper. Set your ISO to 200 and your aperture to f/8. Point at a subject and adjust your shutter speed until a correct exposure is indicated. Write down the shutter speed. Now change to ISO 400, leaving the aperture at f/8, and point the camera at the same subject. You’ll see that your light meter is indicating a different shutter speed for a correct exposure. Write it down. Repeat at ISO 800 and 1600.
What have you noticed? When you change from ISO 100 to ISO 200 your shutter speed changed: from 1/125 sec. to 1/250 sec. or perhaps something like from 1/160 sec. to 1/320 sec. Each shutter speed is close to if not exactly half as much as the one before it.
So, going from 1/125 sec. to 1/250 sec. is half as long an exposure time. When you set the ISO to 400, you went from 1/125 sec to 1/500 sec. Just as each halving of the shutter speed is called 1 stop, each change from ISO 100 to ISO 200 to ISO 400 is considered a 1-stop increase (an increase of worker bees). You can do this same exercise just as easily by leaving the shutter speed constant, for instance at 1/125 sec., and adjusting the aperture until a correct exposure is indicated in the viewfinder; or, if you choose to stay in autoexposure mode, select shutter-priority, set a shutter speed of 1/125 sec., and the camera will set the correct aperture for you.
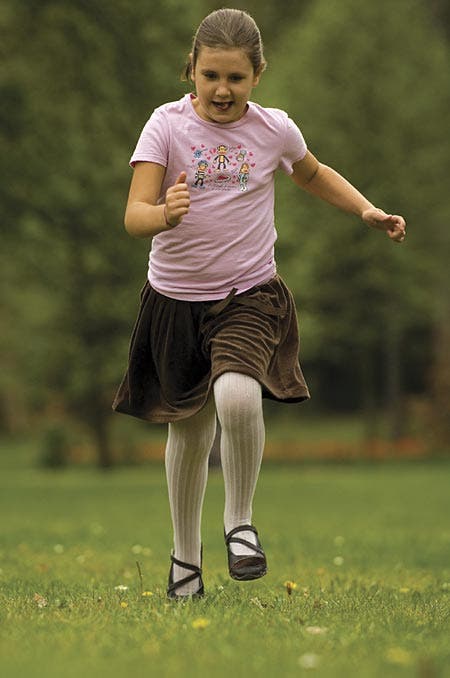
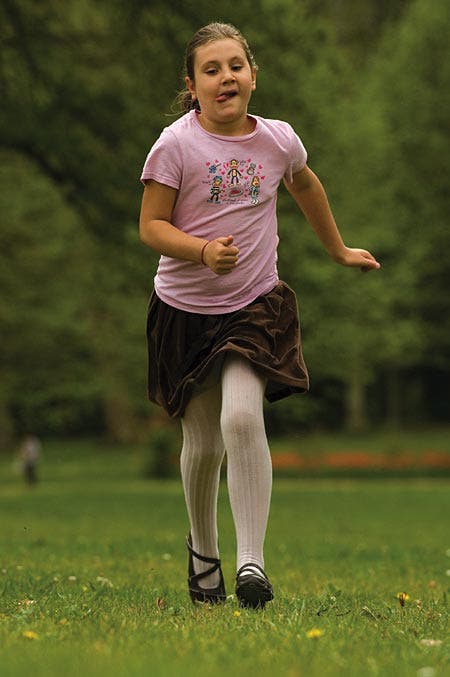
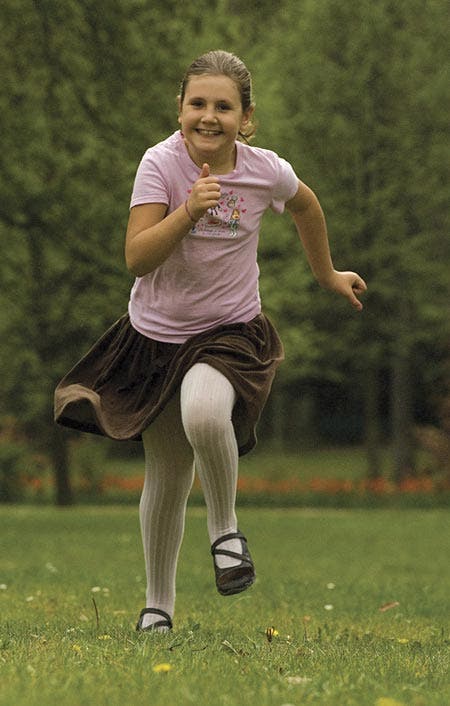
ISO in action
In all five of these shots of my daughter flying towards me, I used the same action-stopping shutter speed of 1/250 sec. with my Nikon D200 but used a different ISO and, subsequently, a different aperture in order to keep the exposure constant. As my ISO increased, so did the visual flaws (increased noise and, in this case at least, some unwanted increase in depth of field).
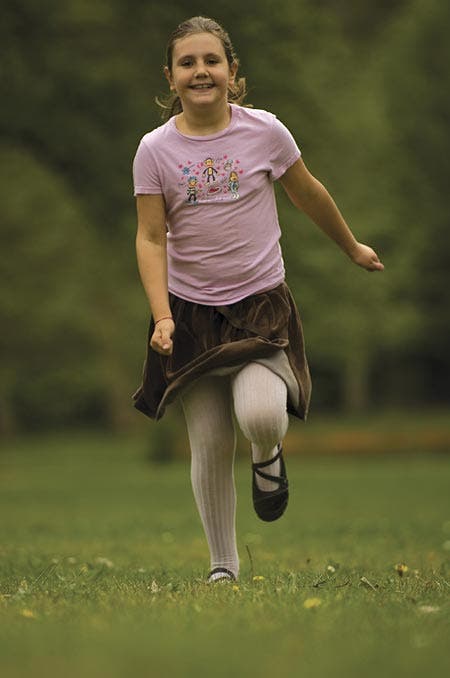
ISO 100
ISO 200
ISO 400
ISO 800
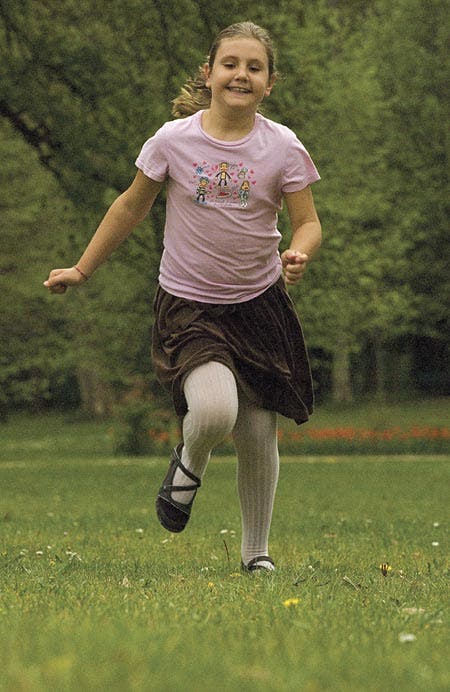
ISO 1600
In the first image note the out-of-focus tones that surround her. The exposure was ISO 100 at an aperture opening of f/4 for 1/250 sec.. Note how the area of sharpness around her increases as the ISO gets higher. You can see it clearly in the grass both in front and behind her foot and also in the background, which becomes more defined. In addition, the use of ISO 1600 really brings on the noise!
Bryan Peterson is a widely-published photographer and a successful commercial photographer for over 30 years. He has photographed annual reports, corporate brochures and advertising campaigns for a diverse range of clients including Kodak, UPS, Intel, Microsoft, and Citibank. The most recent of his popular series of creativity and exposure books is “Understanding Shutter Speed: Creative Action and Low-Light Photography Beyond 1/125 Second.
” See his work at http://www.bryanfpeterson.com.