
Photography is packed full of jargon, and the term “feathering the light” is one you’ll hear often, if portrait photography is the area of photography you’re looking to learn more about. But what does it all entail?
In simple terms, feathering the light refers to the technique of rotating a light source so it points away from your subject. Yes, it’s that straightforward. A “feathered light” is simply a light source that has been deliberately adjusted so that it no longer faces your model directly—if it faces them at all. This leads to a more critical question: why would you want to do this?
To answer that, we need to delve a bit deeper. However, let’s first dispel a common misconception, especially prevalent online, regarding feathering the light. Feathering does NOT make the light softer, and the softest light does NOT come from the edges of your light modifier. Instead, soft light is determined by the size of the light source in relation to the subject, not its angle.
It’s easy to think that light from a softbox only travels in the direction of its sides. For instance, a stripbox projects a strip of light, an octabox emits a cone of light, and a square softbox generates a straight-edged beam of light. Unfortunately, this isn’t how these modifiers actually function in practice. Regardless of their shape, a softbox will disperse light at almost 180 degrees in all directions.
While we’ve discussed the purpose of different-shaped light modifiers in a previous blog post, it’s important to remember that if you—or your subject—can see the surface of your light modifier, the light will reach you.
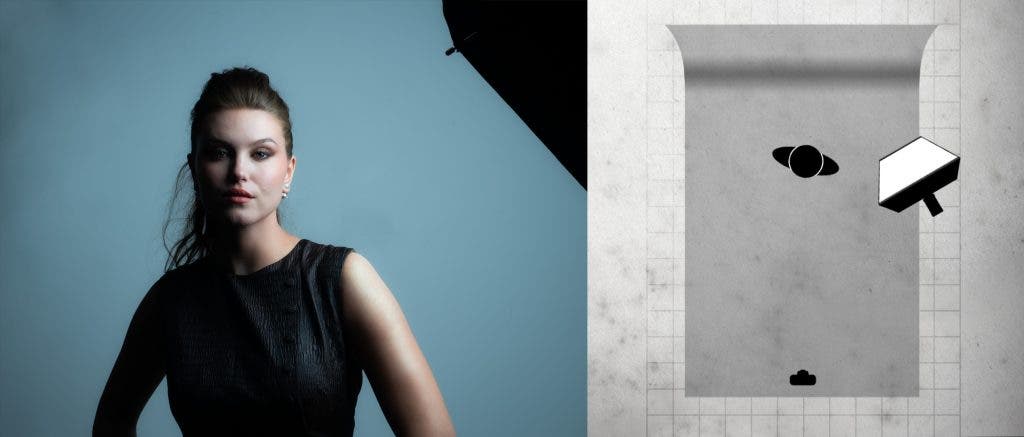
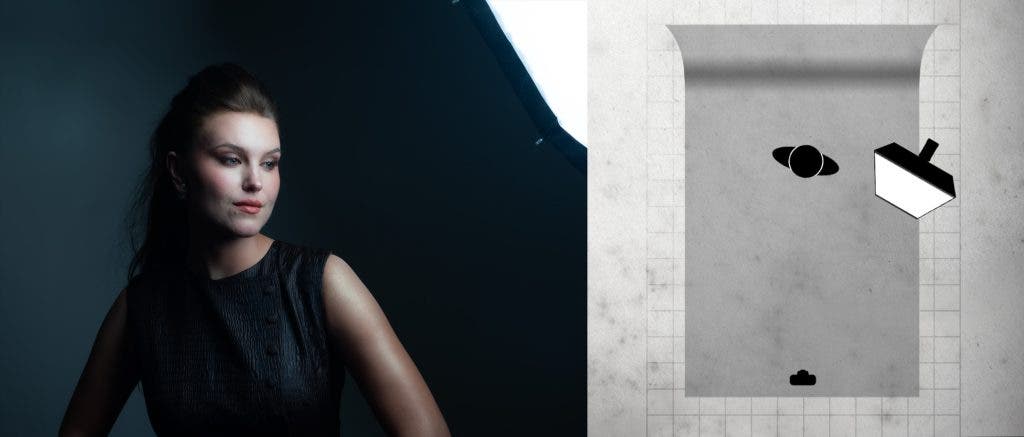
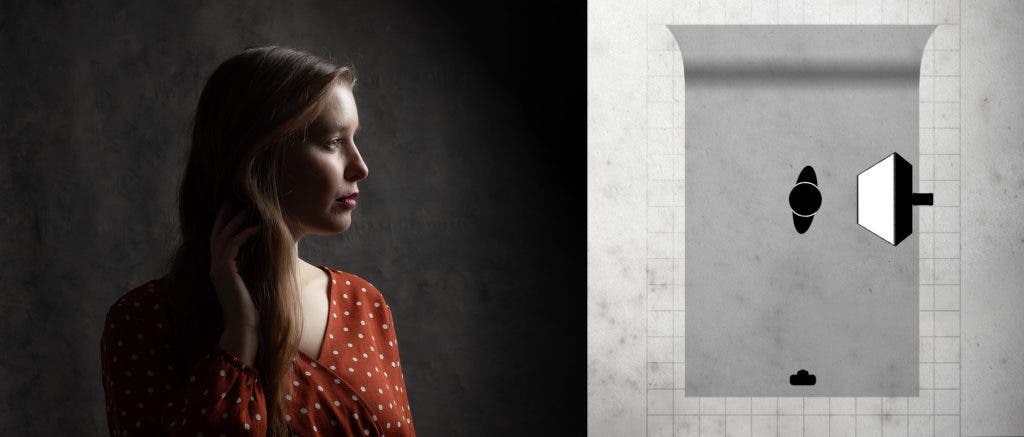
Darkening a Background
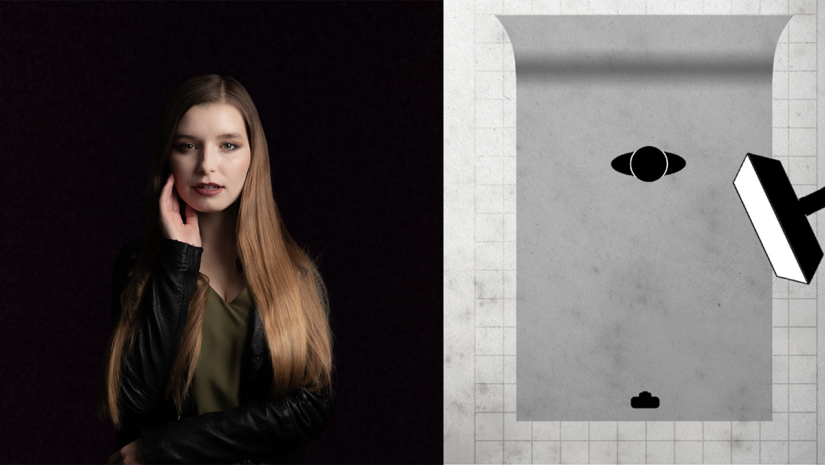
To illustrate this in a real-world scenario, imagine you’re in a small studio with limited space between your model and the background. You’re using a single light in a softbox positioned at the traditional 45-degree angle. While this setup provides excellent lighting for your model, it also illuminates the background. This may not be an issue initially, but feathering the light becomes crucial if you aim for a darker background.
You can feather the light away from the background without repositioning the light stand. As a result, the background will appear darker while still maintaining suitable illumination on your model. To check if this technique is effectively working, ask your model, “Can you see the white surface of the softbox?” If they can see it, then the light is reaching them. Now, walk behind your model to inspect the background. If you cannot see the white softbox, this indicates that the background will be dark.
Keep in mind a few important considerations. First, feathering the light will reduce the exposure on your model, and the more you feather the light, the more noticeable this loss will be. Secondly, angling the light toward the camera increases the risk of lens flare, particularly if you’re feathering a hard light source. Finally, the light source will appear thinner from your model’s perspective, but we will revisit this point later.
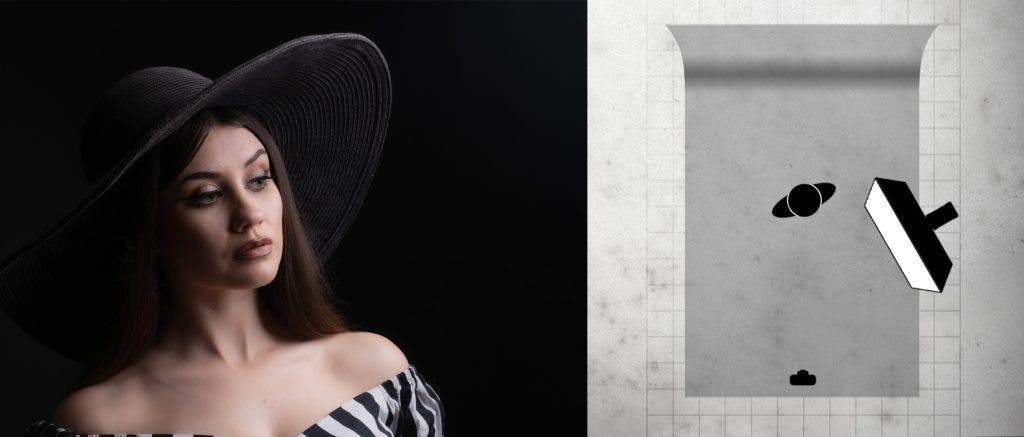
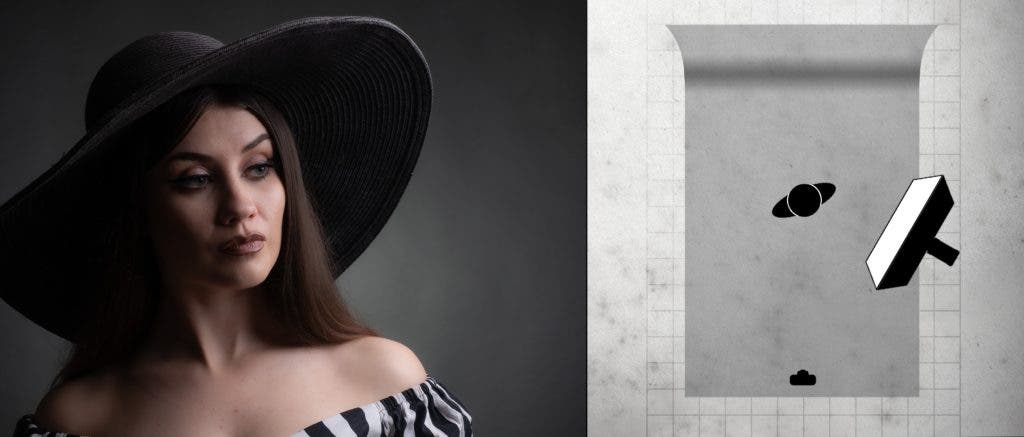
Lightening a Background
Of course, the opposite can also happen. Take the same setup of a single light portrait at 45 degrees, but this time you want a brighter background. If feathering the light away from the background makes it darker, it stands to reason that feathering it towards the background will make it brighter.
However, it’s not quite as simple as that. Because the distance of the light to the background remains largely unchanged, it won’t get any brighter, at least not in the center. It might brighten a dark edge (at the expense of the other side), and if you keep feathering the light, you’ll eventually turn it enough that your subject falls out of the light and becomes a silhouette. That’s a cool look, but the background will only get brighter if you introduce additional light to it.
Controlling Exposure
Most portrait photographers agree that having lights with greater power is generally beneficial. More light allows for a lower ISO setting, which results in cleaner images, and enables the use of smaller apertures for increased depth of field. However, there are several situations where opting for less power is the better choice.
While it’s possible to simply reduce the power of the lights, some models have limited flexibility. For example, the Flashpoint BLAZ300 is a budget flash that only reduces to 1/32 of its power. This means that even at its lowest setting, a 300ws flash still emits a considerable amount of light.
When you reach the limits of power reduction, one effective way to decrease light output further is by feathering the light. A slight amount of feathering may not significantly alter the exposure, but greater amounts will. In theory, you could feather the light to such an extent that no light reaches your subject, causing them to fade into darkness. However, in practice, the feathered light has to go somewhere. If you’re working in a small space, especially with light-colored walls, that feathered light will bounce around the room, creating a weak, non-directional fill light.
Creating Contrast
By now, you should have a better idea of the pros and cons of feathering a light, but there’s one more reason you might want to consider feathering the light that reaches your model. In a word, feathered light adds contrast!
If you want to learn feathering, the classic 3’x2’ rectangular softbox is a great place to begin. If we return once again to our single light scenario and feather the 3’x2’ rectangular softbox, imagine from the model’s point of view what shape the light becomes. The vertical height remains the same, but the horizontal width changes as you feather. The 3’x2’ rectangular softbox can appear to be a 3’x1’ rectangular stripbox.
An example of a 2’x3′ softbox from Glow:
A stripbox doesn’t produce a strip of light, but it does make it much easier to create shadows by reducing the wrapping effect of a broader light source. More shadows with the same highlight exposure is what we call contrast.
In Conclusion
Feathering a light is not a mystical process, and it doesn’t defy the laws of physics. However, once you grasp the effects of feathering a light, the reasons for angling it away from your model become evident. If you’re still having trouble mastering the technique with a softbox, try using a grid attachment. It will become much more apparent when you do!