Let’s face it: Most of us had already gotten this whole film thing figured out. We’d shoot pictures of everything that caught our fancy, make 4×6 prints at a one-hour lab, and occasionally order one of those BIG 8×10’s enlargements. Then, we mail some photos to friends and family, stick the leftovers in a shoebox, then a bigger shoebox and finally a banker’s box stacked somewhere in a corner of the—depending on where you live—closet, basement, or garage.
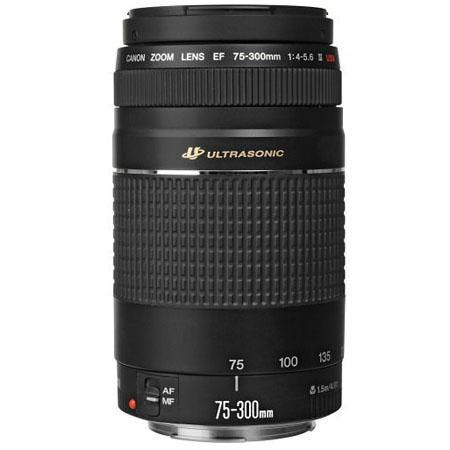
This photograph of a butterfly landing on a flower was made at Mission San Carlos Borromeo in Carmel-by-the-Sea, California. It was one of 1,500 photographs that I made over a weekend in Monterey, so some kind of digital workflow was required to make sure I knew what I had and saved the best. The camera I used was a Canon EOS 20D with Canon EF 75-300mm IS f/2.8L zoom lens set at 300mm. Exposure was determined in Program mode to be 1/1500 sec at f/8. © 2004 Joe Farace All rights Reserved.
A bigger boat
With digital it’s the same thing, right? As Roy Scheider said to Robert Shaw in Jaws you’re “gonna need a bigger boat” or in this case a larger capacity hard drive. You see, all those shoe boxes your cousin Ernie dug out of the dumpster at Shoes R’ Us were more or less free, but hard disk real estate is gonna cost you (although the neighborhood is getting less expensive every day). There’s more to this process than just accumulating more hard drive space. So, unless you’ve got an unlimited budget, you’re going to need a digital workflow solution.
The step-by-step
Here’s what I do with digital images as they are captured. As I said last month, this may not be a perfect solution for everyone because you don’t make the number and kind of photographs that I do, but it should give you some idea of how I do it, and suggest some possible solutions for handling your own images.
Step1: Get rid of the dogs right away. During a break in shooting, take the time to “chimp” the images you’ve shot on your camera’s LCD screen , and erase those that clearly don’t make the grade. Don’t be too hard on yourself (unless you don’t have a lot of memory cards) and keep your marginal images for a more critical evaluation later.
Chimping, if you’re not familiar with the term, is the kind of behavior digital camera owners exhibit when looking at pictures on their digicam’s LCD screens. Oooooh, ahhhhh, ooooooh… You know what I mean?
Tip: Transferring images from your camera via a card reader can be slow unless you’re using a USB 2.0 or FireWire card reader. USB 2.0 readers are inexpensive and fast. Make sure your computer has USB 2.0 connection, not just a “USB-compatible” one. What the latter term means is that the port (that’s the buzzword for it) is really USB 1.1, which is TEN TIMES slower than 2.0. You can add USB ports to your computer inexpensively, so just do it. You’ve got better things to do than wait for files to transfer.
Step 2: You’re also gonna need management software to sift and organize the image files. You should already have a copy of Adobe Photoshop Elements 3.0 installed on your computer. If you’re a Windows user you’re ready to go using the program’s Photo Compare mode that lets you sift through similar shots and pick the best. For reasons only known in San Jose, this feature is not available in the Mac OS version. I guess Adobe expects you to use Apple’s iPhoto. It’s not as good as Elements 3.0, but at least it’s free.
UPDATE: Adobe introduced Photoshop Elements 4.0 in October 2005 with expanded image organizing features, for Windows only.–Ed.
Step 3: At this point I create folders on the hard drive with names that indicate the contents. Last weekend I shot more than 1,500 images, and started by creating a folder with the name of the event and place, plus additional smaller folders, inside each of these, with names reflecting the various subjects in the images. (If you don’t know how to create and name a folder in Windows or Mac OS , check your manual. It ain’t a big deal.)
Step 4: Next, I make a CD or DVD that holds all of the images in the main folders. Be sure to label the disc so when you pick it up next month, you’ll know it contains pictures of Thomas’ first birthday party. You can take that CD to your friendly neighborhood kiosk (or send a copy to Adorama–they make darn good prints from digital files) and the disc can serve as a backup.
Step 5: When the files are temporarily stored on the hard disk, I pick the ones to crop, color correct, or manipulate to create a better-looking file. These image files are kept in the same folders as the original ones and I usually name them using the camera’s protocol. The top image is called IMG_5320.CR2. (It’s a Canon RAW file from an EOS 20D.) When working with the file, I open and immediately save it as a Photoshop (PSD). Yes, Virginia, Adobe Photoshop Elements reads and writes PSD files.
When my hard disk starts to get too crowded, I look at the oldest folders, and before erasing them from the drive, copy all the information, including the original JPEG or RAW files, the PSD files, and any JPEG or TIFF files I created from the original files. Then I toss the old disc, stick the new one in the case and file it.
That’s not the only way to do it; it’s just the way that I do it.
All content and photographs ©2004 Joe Farace
Joe Farace is Colorado-based photographer/writer who has written or edited 24 books and 1300 magazine stories. His newest book is The Advanced Digital Photographer’s Workbook from Focal Press. > www.focalpress.com < Please visit his websites at www.joefarace.com and www.joefaraceshootscars.com.


