While the strobist movement encourages the use of multiple wireless networks of flashes to blast away and create stunning portraits, a single flash may be all you can afford. Not to worry: There’s a lot you can do with one light source.
Let’s face it: A good flash can cost hundreds of dollars, and once you’ve added on such incidentals as a slave, stands, brackets, diffusers and reflectors—all of which you can buy at the Adorama Flash and Lighting Store, a three- or four-flash setup can easily run you over a grand. Fortunately, there are techniques for getting dramatic, evocative portrait photography with a single light source.
Small light sources—most likely a shoe-mount flash with little or no modification of the light out put—can create dramatic effects, while larger light sources—windows, shooting flash through diffusion material such as a light box, or reflecting flash off of an umbrella, a white bedsheet or white wall—wrap the light around your subject’s face for more flattering results.
In addition to the shape and intensity of the light, where you position your light will affect the look and feel of the portrait, as described below. There’s no reason why you can’t augment the light with reflectors, which kick some light into the shadow areas to pick up details and soften the intensity of the contrast between the lit areas of a face and the areas where the shadows fall. Let’s look at some examples of single-light portraits.
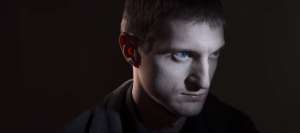
1. Sidelight small source
Placing a single light to the side of the subject can create mystery—after all, half his face is in deep shadow! Sidelight portraits are best with low-key (dark) backgrounds as these add to the sense of mystery. Does this effect look familiar? It was famously used in the cover photo for the Beatles’ first U.S. album, Meet the Beatles!
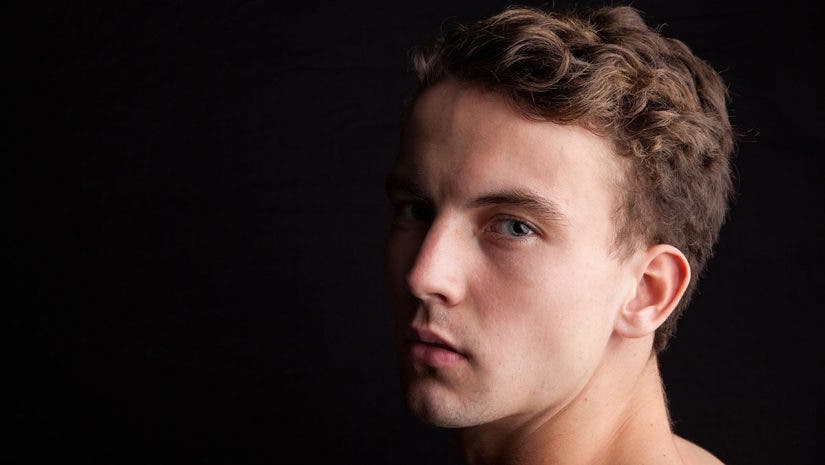
2. Sidelight large source
While small source light creates a sense of mystery, large light sources, such as a window or shooting through a soft box or large umbrella, softens the transition between highlights and shadows as the light wraps around the subject. There is a little more detail in the shadows—which can be further enhanced by using a reflector to bounce light into the shadow areas. You can use low-key or lighter backgrounds; if the light source is big enough, it may throw sufficient light to illuminate both your subject and the background.
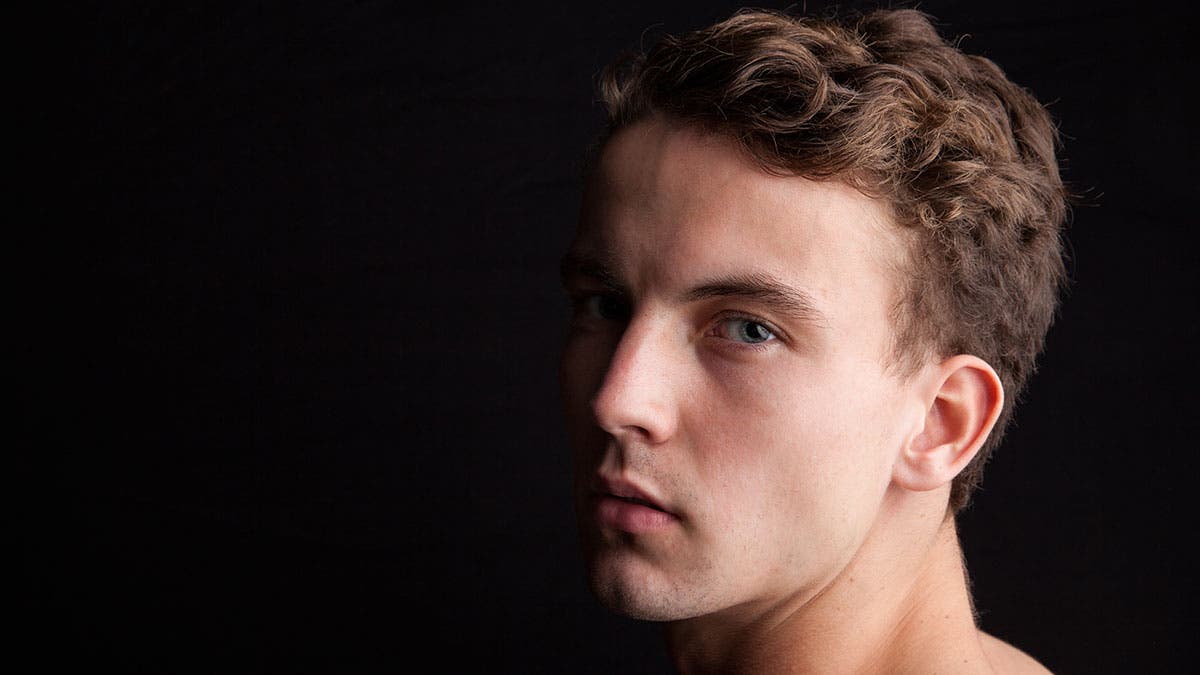
3. Three-quarters light large source
Moving your large light source so it’s at a 30-45-degree angle to your subject helps to reveal more facial details in the shadows, since the light will now wrap around the face. Use a reflector to bounce in more light, as was done here using a gold reflector to add some warm tone to the subject’s left cheek.
4. Three quarters light small source
A small light source projects a harsh light that can be used effectively when positioned at an angle to the camera. In this case, the light was placed at approximately 45 degrees from the camera, and the couple was turned to face the light directly. In this case, with a touch of warm tone, the directional light creates an intimate feel, despite the harsh shadows.
5. High frontal large light source
While straight on-camera flash of any kind is to be avoided, placing a single light source several feet directly above the camera position can create a dramatic effect, with the face mostly lit but shadows falling on the subject’s body. Don’t place the light source too high or above the subject, however, since that would create unflattering shadows in her eye sockets. In this case, because the light source was in front of the subject, the eyes are well lit and engaging.
6. Almost full frontal high small light source
Placing a flash without a reflector or soft box above and to a slight angle from the camera is like putting your subject on a stage. The spotlight effect is great for lighting singers and actors who want to look like they are performing. Placing a few out-of-focus low-voltage, colored light bulbs against a black background can further enhance this feeling. In this example, the light source was a foot or two above and to the right of the camera.
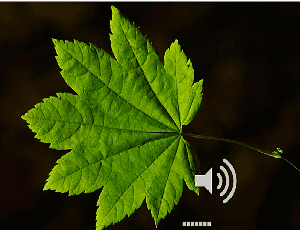
7. Light source in photograph
Make the light source a part of the photo. In this case, blasting the light through a pattern over a diffuser gives both a big wrap-around light source and a point of interest.
Keep in mind there are many other ways to light with one source. Explore the Adorama Studio & Lighting Store for affordable ideas and inspiration. Find a willing, patient subject and experiment by moving lights around, positioning them in different ways, and shifting your position and the direction the subject faces as well. A shift of a few inches in camera position or a slight pose adjustment can make a huge difference!