Mark Wallace
Mark Wallace is a professional photographer, educator, and content creator known for his expertise in studio lighting and portrait photography. With a career spanning over two decades, Mark has worked with top brands and publications, honing his skills in both commercial and fine art photography.
As a passionate educator, he has produced hundreds of instructional videos on photography techniques, lighting setups, and gear reviews, reaching a global audience through platforms like YouTube and Adorama TV. His engaging teaching style and deep knowledge make complex concepts accessible to photographers of all skill levels.
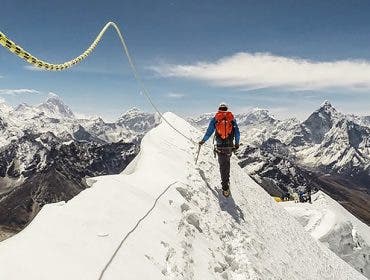
Beyond the studio, Mark is an avid traveler and adventurer, often documenting his journeys through compelling imagery and storytelling. His dedication to the art of photography continues to inspire a new generation of visual artists.
Find more of Mark’s tutorials on his Instagram
Using Continuous Lights Ep 105: Exploring Photography with Mark Wallace
Mark Wallace:
In this episode, I’ll show you how you can get extreme shallow depth of field in the studio.
Voice Over:
AdoramaTV presents “Exploring Photography” with Mark Wallace, where you will learn
innovative techniques on shooting a wide range of photography. Here’s your host, Mark Wallace.
Mark Wallace:
Hi everybody! Welcome to another episode of AdoramaTV. I’m Mark Wallace. Well, on our comments, some people have been writing in to AskMark@adorama.com and asking me specifically about shooting in the studio with a wide open aperture of like 1.2. These huge aperture settings for extremely shallow depth of field.
Now we did an episode, Episode 212, about using neutral density filters with studio strobes. But a lot of people have been following up, saying “hey, I don’t have a neutral density filter.” “I don’t like using them because I can’t see what I’m shooting.” “Is there a different way that I can take pictures using one of those extremely wide apertures? Maybe a 1.4 or 1.2 in the studio?”
Well, absolutely you can! Let me walk you through some of the problems that people have been having, so you’ll understand where we’re going with this.
So, to start out with, let me introduce Casey here. Now Casey is an awesome model, and I love that she has these really amazing freckles. And so, what I want to do is get a really tight portrait shot of Casey that shows those freckles, and I want to use an extremely shallow depth of field because I love how her red hair accents or freckles. But I really want to focus on the freckles, so I want her hair to just sort of fall out of focus and get this really dreamy shot.
Well, we need to use a very specific lens. I’m going to be using an 85mm 1.2 lens to do that. But let’s talk about the light. I want to use a really large source of light, and so I have a 4×6 softbox here.
Now, here’s the problem: when I meter, my metering tells me that the light is at 3.6. I want it to be metered at 1.2 with a wide open aperture. I can’t take my power off my light down any farther. It’s down as low as it will go, and I’m using my least powerful studio strobe.
So, what can I do? Well, what I could do is I could come over here to my strobe, and I could just take this guy here and move it way back, right? I can just get this guy way, way, way back here. I think I’m off screen, but you can sort of see when I move it way back there like that. And then, I meter my light, and my camera is over here. That actually meters right at 1.2 because we did that before we started taping to see how far back we need to go.
But you can see that it’s just way over here, and the problem with this is we’re losing all of the benefits of that big soft box. Now on Episode 59, we talked about the inverse square law. And the inverse square law, if you’re not familiar with it, watch “Digital Photography One-on-One” Episode 59. They will show you that when you move your light back like that, it changes dramatically how the light falls off. And so, we’re just going to get just this big chunk of light that’s very even. The contrast is going to be really low. It’s not what I want. I want really rapid light fall-off, which means I need to have my light close to my subject.
So what can I do? One of the cool things about this light (I’ll grab it and bring it back here) is that all studio lights—almost all studio lights—have something built in called a “modeling light.” Now that’s the mark of light that you’re seeing right there. And I can take this, and I can turn it on and off, and so it’s going off.
There it goes—it’s back on again. You can use that “modeling light” as the source of your light and not trigger the strobe. It’s just basically the same thing as using a video light or a hot light. And so, what we’re going to do is use our modeling lights as our source of light to shoot with an extremely wide open aperture of 1.2 to get an amazing look, and that’s what we’re going to do next.
Well, to start with, let me show you this lighting setup. I have Casey here, and we’re using basically two lights with the reflector. Our key light is this very large 4×6 softbox. You can see this is really, really large, and I have it horizontal like this because it’s just wrapping light around Casey. Some of this light is going forward to hitting this reflector and bouncing back into the opposite side of her face. It’s one of the things I love to do with a large softbox like this. We have a black seamless background here, this paper. I want to make sure that Casey is separated from that background.
So, I have some light that’s coming from a second light over here, and this is just a light with a 10° grid on it that allows us to separate our model from the background and exceeds for very, very simple a key light and reflector that is for Phil. Now what we really want to talk about, though, are the things you have to do to make sure that you get great pictures when you’re shooting with really shallow depth of field.
Now to do this—because we’re shooting with ambient light, we’re going to make all of our lights go off here. And we’re going to turn on this crazy light over here, so you can see me and I’ll walk you through these things. Now one of the things that’s really important is obvious—because we’re shooting with our modeling lights or if you’re using hot lights, you have to make sure that there are no strobes that overpower an ambient light.
So, you have to make sure you turn off all the lights that you don’t want to show up in your photos. And so when I took some of the earlier shots, we actually had all the lights turned off, not even these video lights, so I can see exactly what was going on.
So make sure that you’re aware of your ambient light, and you have to control that you can’t overpower it like you can with strobes. The other thing that we’re doing here is we have to meter our light, and so I’m using basic through-the-lens metering just using the built-in light meter on my camera.
Now what I did, though, is I put my camera in Manual mode. So I’m shooting in Manual mode. I have my aperture set at f/1.2 wide open, and then I just rolled my shutter to the appropriate shutter speed. Now, you have to watch out when you’re doing that.
With a setup like this, we have a really dark background because as you move your camera away from the background, you see more and more of that dark black background or darkness. If you’re isolating light, it’ll throw off the meter reading in your camera because it’s going to try to average up the black up to gray and it will overexpose your photos.
So make sure you dial in really close. I like to meter on my model’s face, lock that in Manual mode, and then I can move around. And it’s not going to be thrown off by dark backgrounds, and so that’s the best way to do it. Even better, use a light meter. We chose not to do that in this episode because not everybody has a light meter.
Now, speaking of camera settings, another thing that’s really important to pay attention to is your shutter speed. Again, in the studio, you’re normally shooting with strobes, and you don’t have to worry about shutter speed too much because the strobes are going to freeze motion.
Well, that’s not the case now because you’re shooting with ambient light, which is the light that’s coming from your modeling lights, and that’s not gonna freeze motion. You’re gonna have to use a shutter speed that’s fast enough to freeze motion.
And so, when I first started out, I had my camera set to ISO 100, and my shutter speeds were down in the 60th of a second range, which just isn’t fast enough to freeze motion, if I move my camera a little bit off the tripod with my model moving a little bit.
And so, what I did was I increased my ISO up to about ISO 400 and some of the shots that I did. I even went all the way up to ISO 800, so I could get my shutter speeds up to the 300th of a second range and so, that will freeze that motion.
Use the Manual mode so that your TTL metering doesn’t throw things off. Make sure your shutter speed is nice and fast. But really, what we care about with wide open aperture values is our focus, and with extremely shallow depth of field, you’re gonna have focus issues.
In fact, one of the things about the 85mm 1.2 lens that people talk about is focusing. It’s very, very difficult because any movement from the subject or camera can throw the focus off. So, let me show you exactly what I mean. I’m going to take my camera off of my tripod, shoot handheld, and show you the kind of issues that we run into.
So, I’m going to ask Casey to stay as still as possible, and then I’m going to focus on her eyes using my autofocus points. So, I will just focus right on her eye. It’s great. It’s locked. Now, if I move just slightly, so I’m just going to focus. My focus was locked because I was using one shot, but I moved just slightly about an inch or so.
You can see from these photos that slight movement throws everything to focus, and that’s not what we want. And so what I suggest that you do is use a tripod. So, using a tripod locks the camera in position. It allows you to use slower shutter speeds. So I can raise this up and now when I focus, then it’s just locked in and I am set.
I don’t have to worry about my camera moving. But I do have to worry about the model moving. And so, I’m going to do this exact same thing this time with my camera on a tripod, and we’ll watch what happens when Casey moves just slightly. I’m talking about an inch or so. Or maybe she’ll just move her head a little bit, and you can see what happens.
[To the model] So what we’ll have you do, Casey, is look towards this. I’m going to focus my camera. So, my camera is focused and locked. Now turn and look toward me. Go ahead. There you go.
I’m going to take that picture and so all we did is, I focused and locked, and she turned her head a little bit. When you look at this, you’ll see that the focus is soft because I didn’t focus again, which is what I really should have done.
[To the model] So, what we’ll do is we’ll also have you turn again and look toward that light and then just lean forward, just slightly. There you go. Okay… Good!
So, there was just a very, very slight amount of movement, and when we look at this picture, you’ll see again her eyes are falling out of focus because she just barely moved.
Now this isn’t something that models will do intentionally. But you just try to stand exactly still for a little—it’s really difficult. So, you’ll really have to pay attention to what your subject is doing to make sure there’s no movement, and then make sure that you take several photos, and then check your focus.
You cannot trust the little teeny screen on the back of your camera because it won’t show you accurate focus unless you zoom all the way into 100%. So, what I recommend you to do is always check on your computer to make sure your focus is sharp. You’ll be surprised at how many photos aren’t sharp because of just a little bit of movement.
Now the last thing I recommend that you do, if you have a camera like I have, I have a 1DS Mark II—a Canon 1DS Mark II—with a bunch of autofocus points, as I think 45 autofocus points. Well, usually, 45 or 50 autofocus points. We also have a Nikon D3S, but that’s just too many autofocus points to cycle through.
So, what I like to do is take that in my custom menu and tell my camera, “hey, you know what, use only 16 of these and 9 of these,” so I can just sort of quickly go to an autofocus that’s close and then shoot.
Well, I don’t like to do that when I’m shooting something with this really extremely shallow depth of field because if I do, I’ll have to recompose, and my model can move, and things can get out of focus. So, I turn on all of my autofocus points, so I can get it as exactly as close as possible to my subject’s eyes and then take the picture without moving.
So, those are my tips for shooting with a wide open aperture using your modeling lights, and you can put these things into practice, and I’m sure you’re going to get some great pictures just like we have.
Well, thanks so much for joining us today for Exploring Photography.
Now, we did mention some things in this episode that I didn’t dive into but I have in the past on Digital Photography One-on-One, specifically using a neutral density filter in the studio to achieve a really shallow depth of field. Now, that’s Episode 212 of Digital Photography One-on-One.
The inverse square law, we talked a lot about that on Episode 59. It’s a spectacular episode, so don’t miss that. Also, we shot with this really dark background here and that could throw off your meter readings. And I talked a lot about how to adjust for that in Digital Photography One-on-One Episode 26.
Now, you don’t have to miss anything that is on AdoramaTV. All you have to do is hit the Subscribe button. I’ve done it, Casey’s done it, and you should do it—just hit the Subscribe button so that you don’t miss a single thing.
And for even more articles and information about photography and photography gear, zip over to the Adorama Learning Center. It is a spectacular resource and it’s free, so why not do that!
[To the model] Thanks so much for being our awesome model today, [to the audience] and thank you again for joining us. I’ll see you again next time!
Voice Over:
AdoramaTV is brought to you by Adorama, your best source for the equipment and knowledge you need. For all the latest photography, video, and computer gear, visit Adorama.com. Place your order by 7 o’clock, and it ships the same day.
Plus, the next time you’re in New York City, be sure to visit our store located on 18th Street, between 5th and 6th Avenue. Check out the Adorama Rental Company for professional cameras, lighting, computers, and more!
We’ll help you make the best selection to match your needs while giving you the knowledge to achieve the best outcome from your rental. Adorama is your complete solution for equipment, printing, training, and more. Adorama, more than a camera store.
Related Products at Adorama
- Canon EF 70-200mm f/2.8L
- Profoto D1 1000 Watt Second Air
- Profoto D1 500 Watt Second Air
- Profoto Zoom Reflector 2
- Profoto Softbox 4’x6′
- Profoto Softbox 2’x3′
- Profoto White Softlight Reflector (beauty dish)
- Profoto 10 Degree Honeycomb Grid
- Sekonic L-758DR Light Meter
- Benro A2690TBH1 Travel Angel Aluminum Tripod
- 40″ 5-in-1 Reflector
Photos by Mark Wallace


