Jack Hollingsworth
Jack Hollingsworth is a world-renowned travel and lifestyle photographer. He has spent the last 40 years commercially shooting for some of the biggest names in the leisure, hospitality and tourism industries.
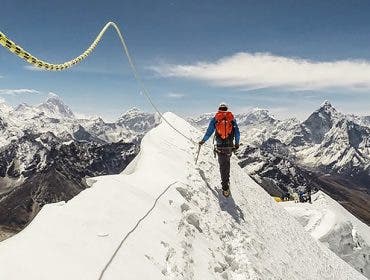
Join Jack Hollingsworth in the series of Picture Perfect as he shares some of his iPhone Photography knowledge and explains how to take the best Landscape Photographs using your iPhone.
Tech Notes from Jack:
1. Because I shoot so often at dawn and dusk, I almost always use a tripod
• Mefoto is my favorite tripod brand
• I use a Mefoto Sidekick 360 adapter to attach my iPhone to my tripod
2. On the iPhone, because of the relative small size of the lens compared to a tiny sensor that fixed F2.2 aperture is more like shooting at F22.
• That means that most subjects you shoot, in bright light, will have “deep focus” or lots of depth-of-field
• The only exception to this is 1: when you are shooting in low-light and 2: when your camera-to-subject focusing distance is close
3. The iPhone has a built-in matrix average meter and can be fooled when shooting into bright light sources like the sun
• When shooting into the sun, lock your exposure-reticle on the subject itself and not the background.
• If you instead lock your exposure on the background i.e. sky, instead of subject i.e. person, you’ll end up with a silhouette.
4. Almost all digital files, even iPhone JPEGS, can be improved my making small adjustment edits
• I use the default Photos app for making quick adjustments to exposure, contrast, brightness, saturation
• For more granular control I use these 3rd party editing apps-VSCO, Snapseed, Camera+, Enlight
5. My favorite time of the day for shooting landscape photography is either early morning or late afternoon
• You have about a full hour of sweet light, right after sunrise. Shoot away!
• You also have another hour of gorgeous light, right before sunset and about 45 minutes after sunset
6. The Time-lapse feature of the iPhone is simple and stunning.
• Time-lapse mode captures 2 Frames-per-second -FPS, combines them into a 1080p video clip, and plays them back at 30 FPS -15X faster than actual speed
• Time-lapse longer than 10 minutes and shorter than 20 minutes, will be recorded at 30X actual speed.
7. Did you know that the iPhone, in panorama mode, can take up to 63MP files
• Panos can cover a full 240 degree Field-of-View
• Panos can be as large as 63MP -16,400X3900 Pixels. Very impressive, and they print well too!
8. The iPhone 6s Plus has built In Optical-Image-Stabilization -OIS-
• OIS Is perfect for recording video and also shooting stills in low-light, it works on both stills and video
• The iPhone 6 only has Digital-Image-Stabilization -DIS- which is not as powerful as OIS
• I think shooting with an iPhone 6s Plus is worth it just for the OIS-really! (you pick up, practically a couple stops of light when shooting)
9. The editing tools/ Photos App that come bundled with the iPhone are actually quite a powerful tool set for basic image editing
• I use the Photos App, for basic adjustments, when I want to get in and out in less than a minute. Slider controls are simple and intuitive and fast.
• If, and when, I want to spend more than 1 minute, editing photos, I’ll likely opt for more comprehensive 3rd party editing apps
10. I sparingly use attachment lenses with my iPhone camera. When I do it’s because I need to get close or wider than the default lens allows
• The default iPhone camera lens, 4.2mm, F2.2/fixed, has a Field-of-View around 71 degrees
• To get wider or close than 71 degrees FOV, you’ll need either a Telephoto or Wide angle attachment lens.
• I personally like the Olloclip active kit that comes with a 2x Telephoto and Ultra-Wide Angle glass.
Related Products at Adorama:
MeFOTO SideKick360 Plus Smartphone Adapter for Tripods
MeFOTO RoadTrip Aluminum Travel Tripod with Ballhead
Olloclip Active Lens for iPhone 6/6s/6 Plus/6s Plus
Photos by Jack Hollingsworth


