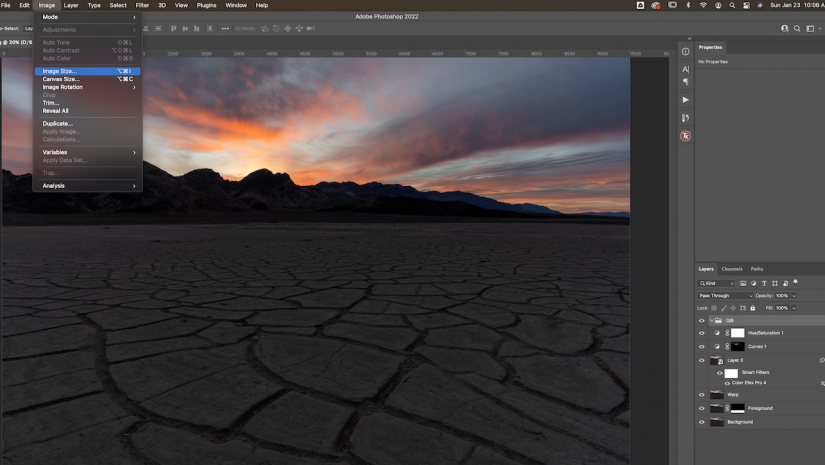
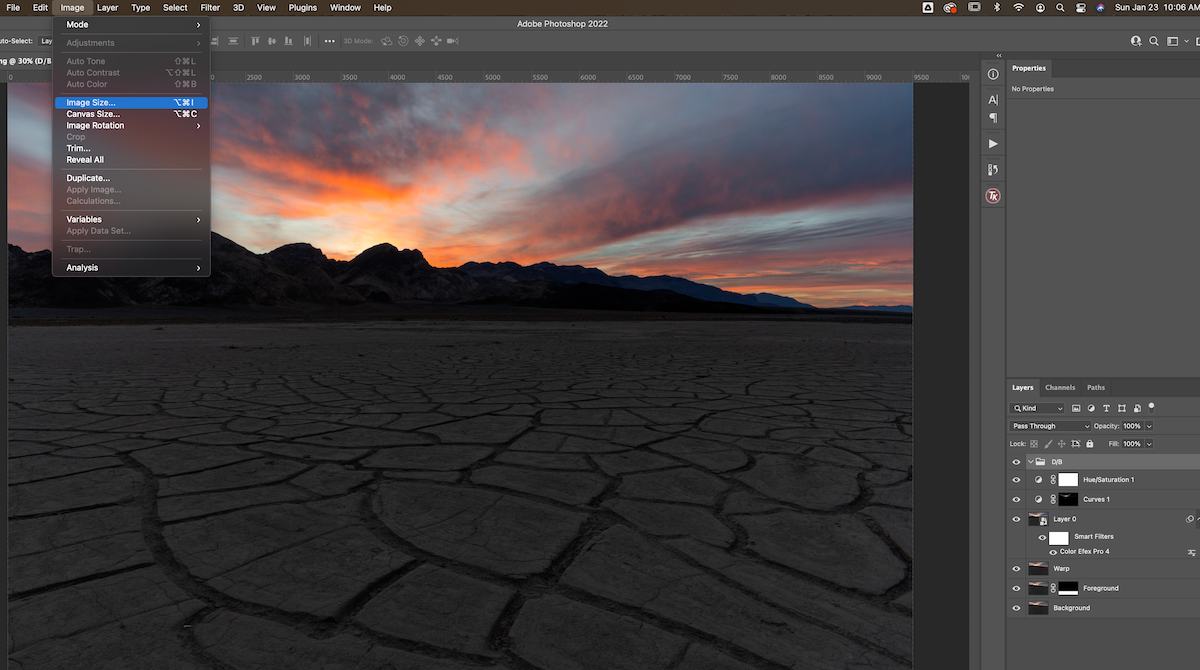
Photoshop makes it easy to be able to resize your photos. Whether you want to resize your photos for print, web, or social media, the process is quite simple and can quickly and efficiently be done in the software. Here’s a step-by-step guide on how to resize a photo in Photoshop.
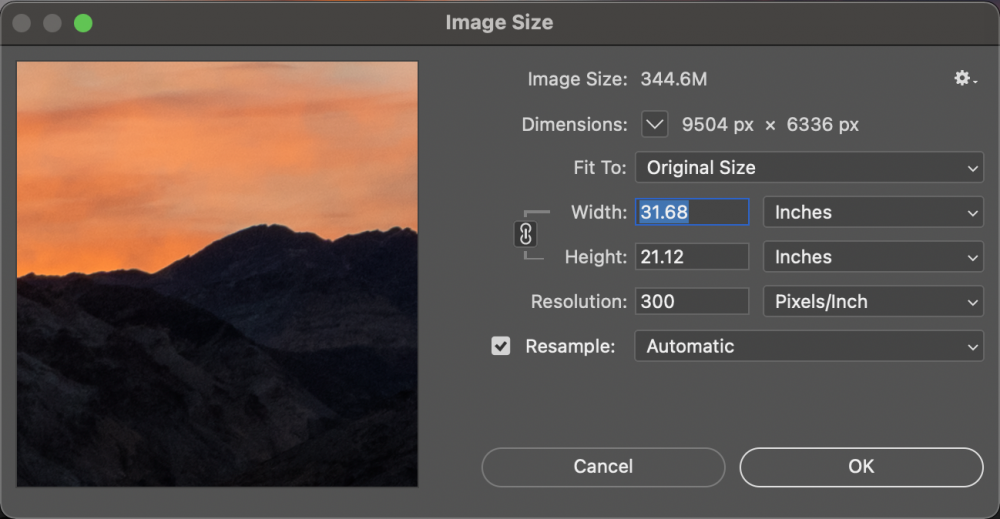
To resize your images, first select Image > Image Size. You should see a box with all of the size details of your image.
How to Adjust the Preview
If you want to adjust the Preview box, you can do that easily in a few different ways. First, you can drag the corner of the Image Size box to make it larger or smaller. If you want to preview a different part of your image, simply click and drag inside of the preview box. If you’d like to zoom in or out on the Preview box, Alt-click on Windows, or Option-click on Mac. The magnification level should appear on the bottom of the preview box when you do this.
Change the Unit Measurement if Needed
When resizing, the first thing you should do is to change the units. If you are printing, you want to use inches or centimeters to resize to the correct size. If you are resizing your image for the web, you likely will want to use pixels. The unit can be changed by clicking on the triangle next to the dimensions. Selecting a different unit of measurement will automatically convert your image size into those dimensions.
How to Avoid Cropping
If you want to resize your image but don’t want the image to be cropped at all, make sure to select Constrain Proportions. This appears just to the left of the width and height. When this is selected, if you change the width, the height will be changed to keep the same ratio, and vice versa. If you wish to adjust these dimensions independently, make sure that Constrain Proportions is turned off.
You Can Preset a Size
If you would like to create your own presets or utilize Adobe’s presets, you can go into the Fit To drop down menu and select a preset size. You can also create your own presets here by selecting Load Preset.
Resampling Options
If you wish to adjust the size of the image to make it smaller or larger, make sure that Resample is selected. You can manually select an interpolation method, or choose to leave it set to Automatic.
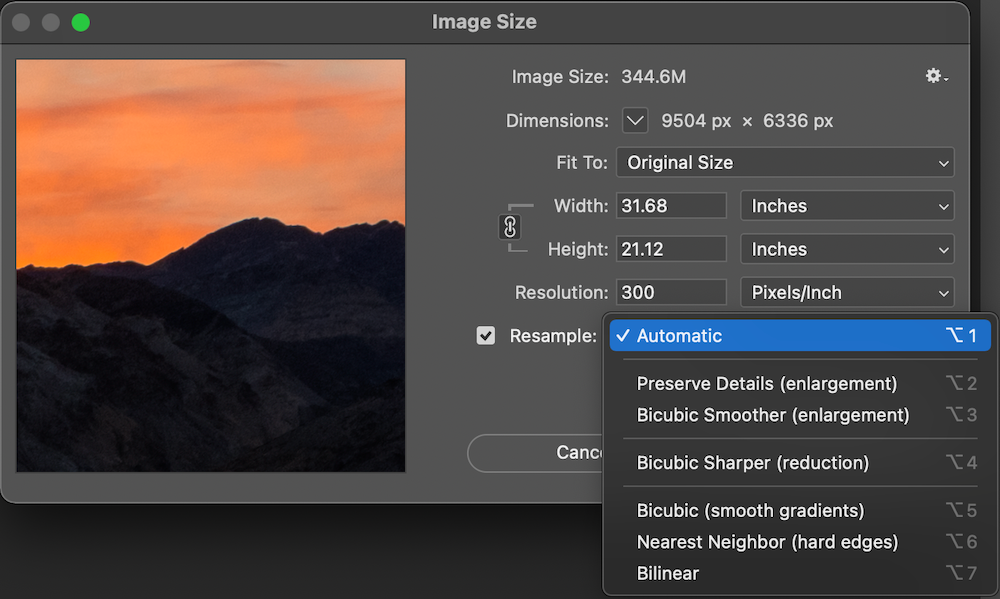
If you want to manually select resampling options for the best results, you can do so. Here are all of the options for resampling.
- Automatic – Photoshop will choose whichever resampling options it thinks will work best for the image.
- Preserve Details (enlargement) – This is great choice for creating large prints. This option will give you a noise reduction slider to smooth out noise as the image gets larger.
- Bicubic Smoother (enlargement) – This is a nice way to upsize your images and create smooth results.
- Bicubic Sharper (reduction) – This is usually the best option to downsize an image. If this oversharpens parts of your images, use Bicubic instead.
- Bicubic (smoother gradients) – This is a slow but precise way to resize an image.
- Nearest Neighbor (hard edges) – This is a fast, and less precise way to resize an image.
- Bilinear – This is a way to resize that produces medium quality results.
If you don’t wish to change the amount of pixels in the image, but wish to change the size or resolution, deselect Resample.
Finally, if you wish to change the resolution, you can do this right below the height and width options. Once you are finished, click OK. If you are increasing the size of your image, it may take a few minutes to load. This should provide all the context you need to accurately resize a photo in Photoshop.
