
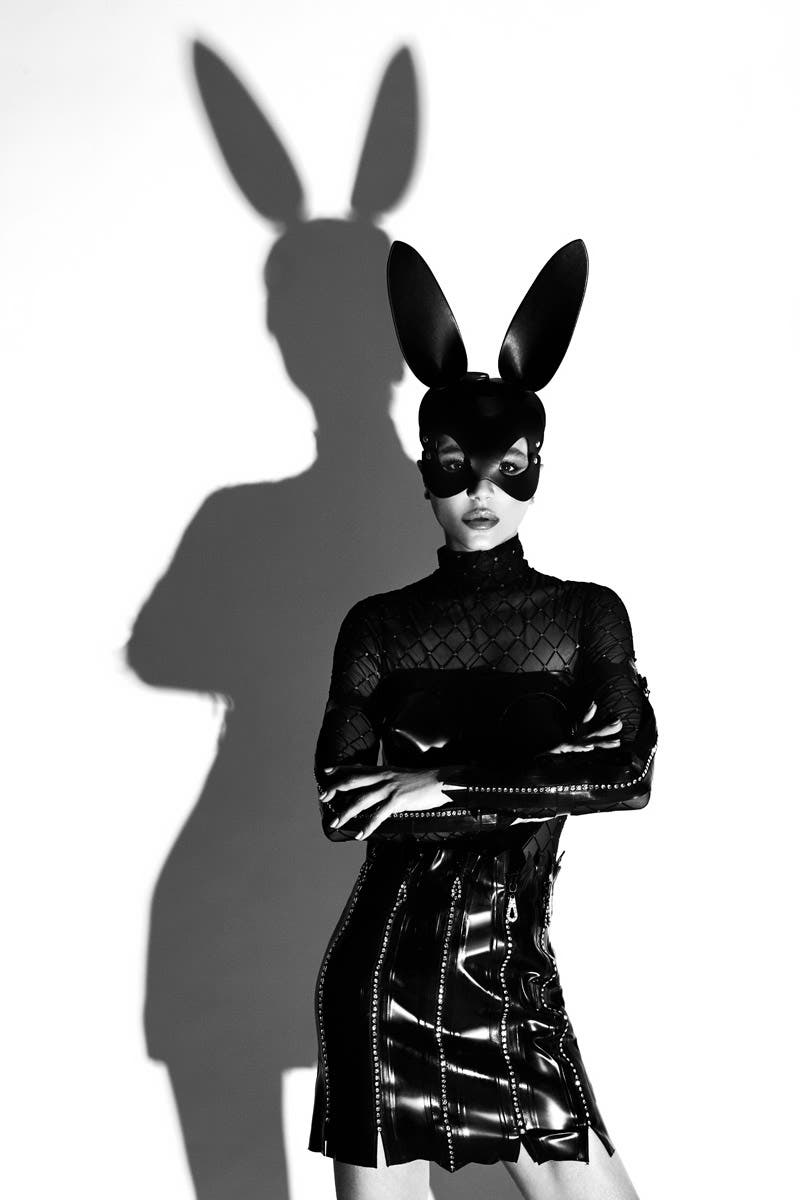
Fashion lighting doesn’t need to be complicated to be striking or high fashion. One light doesn’t mean ‘boring’ either. In fact, many of the lighting setups on the covers of the biggest fashion magazines are achieved with a single light. I’d like to share three of my favorite fashion setups that you can achieve with a single light, and here’s what’s great about it — they all look totally different. They have completely different vibes and could be used for a commercial catalog, dramatic portrait, or fashion editorial.
Learn more: In November 2020, I launched a brand new tutorial and lighting recipe guide dedicated to one light photography. Watch for it on my IG and at learnwithlindsay.com.
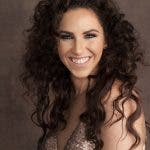
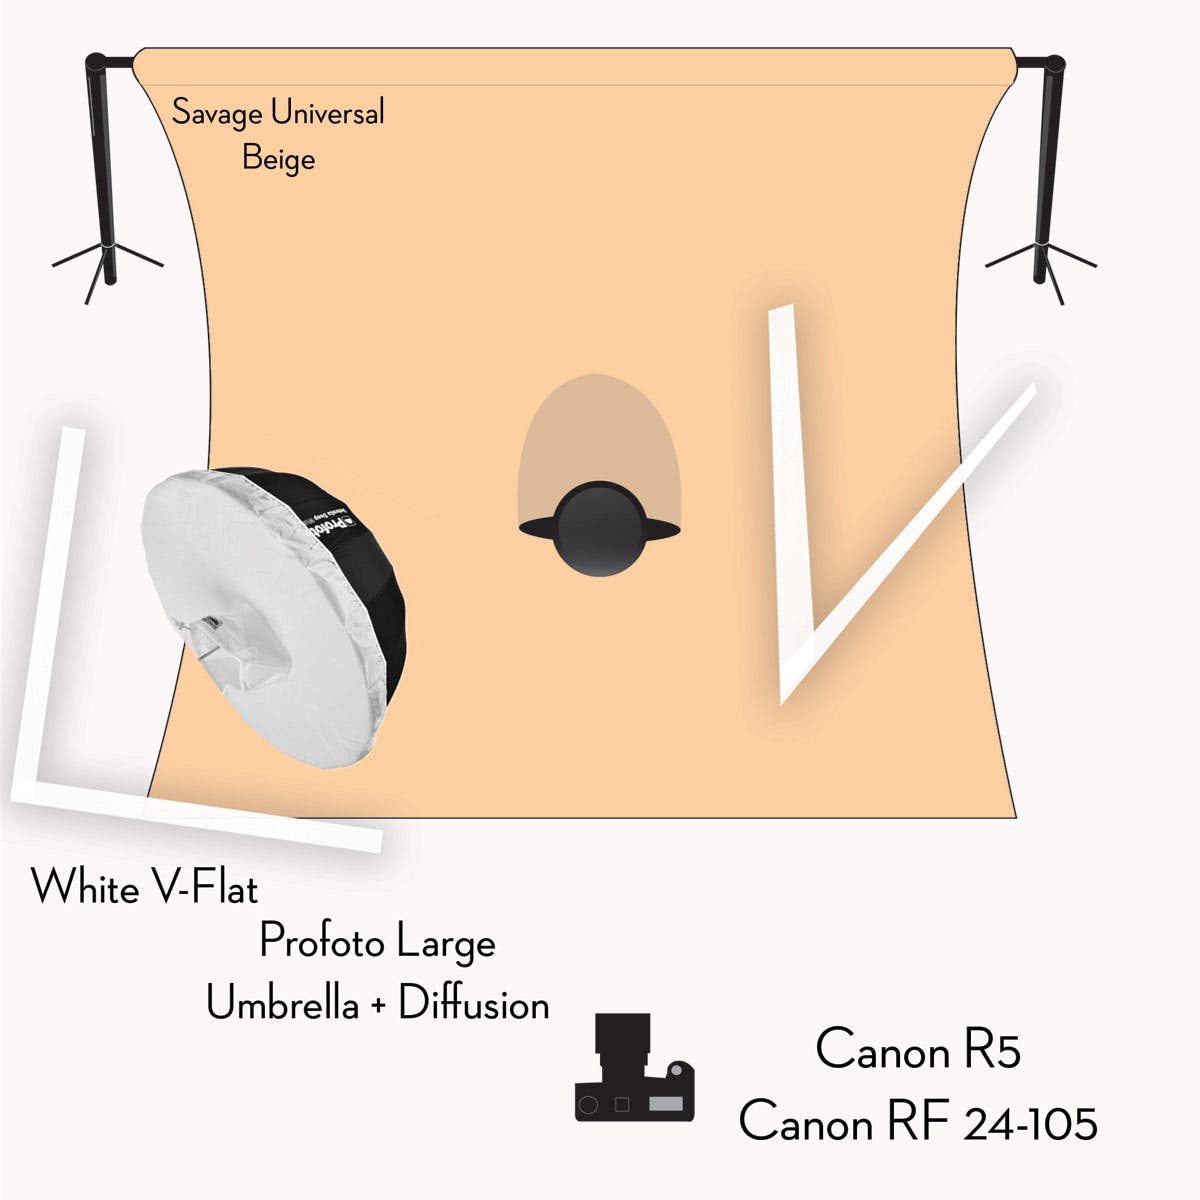
Fashion setup #1: Umbrella with diffusion
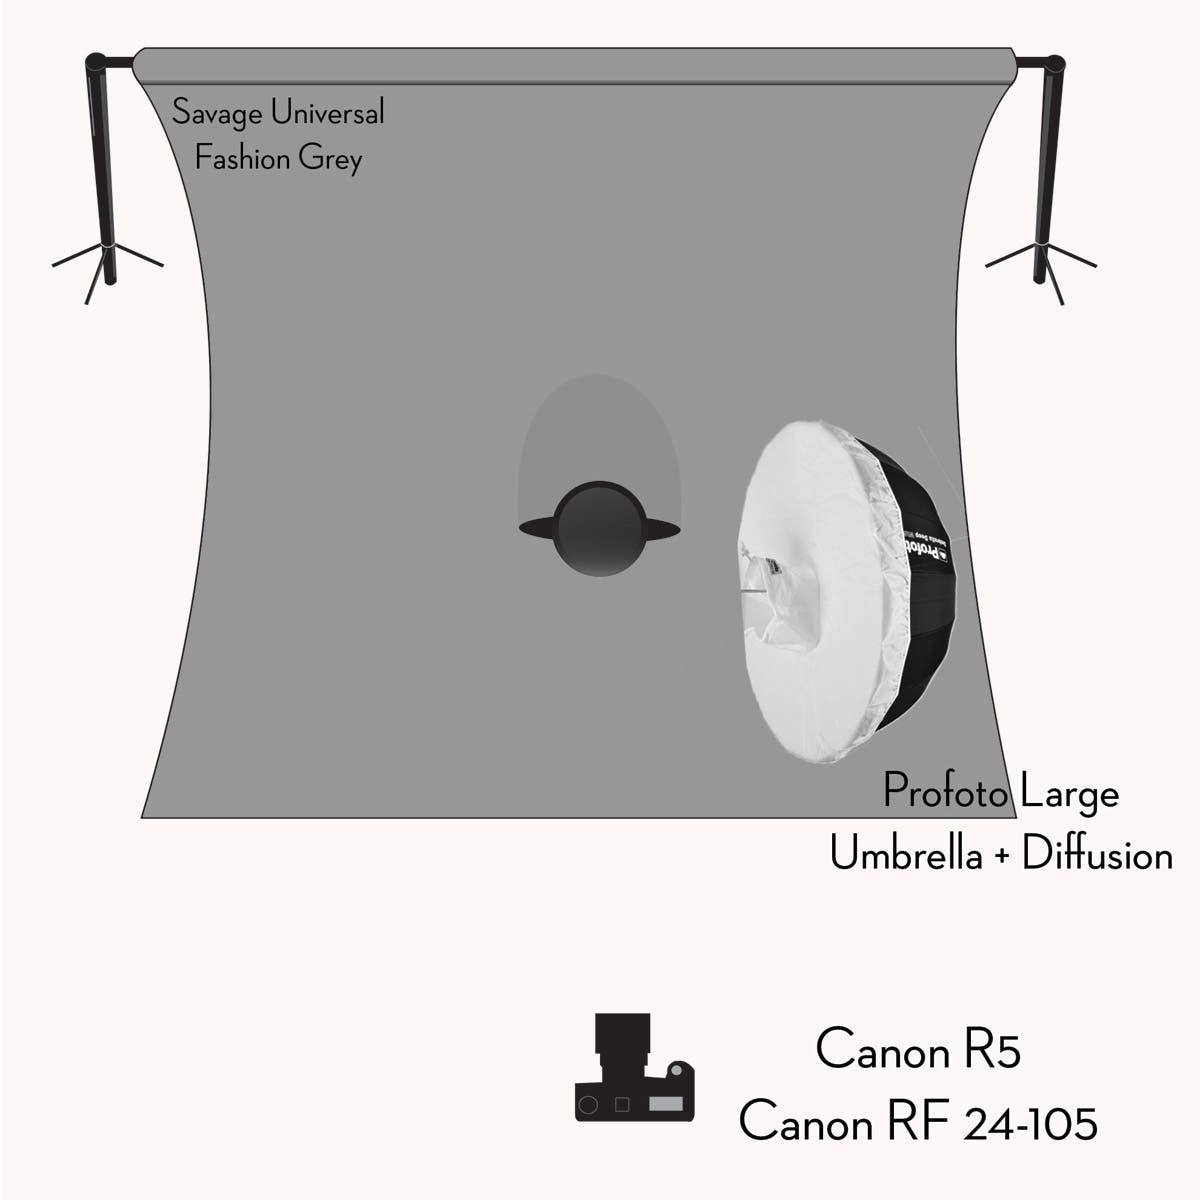
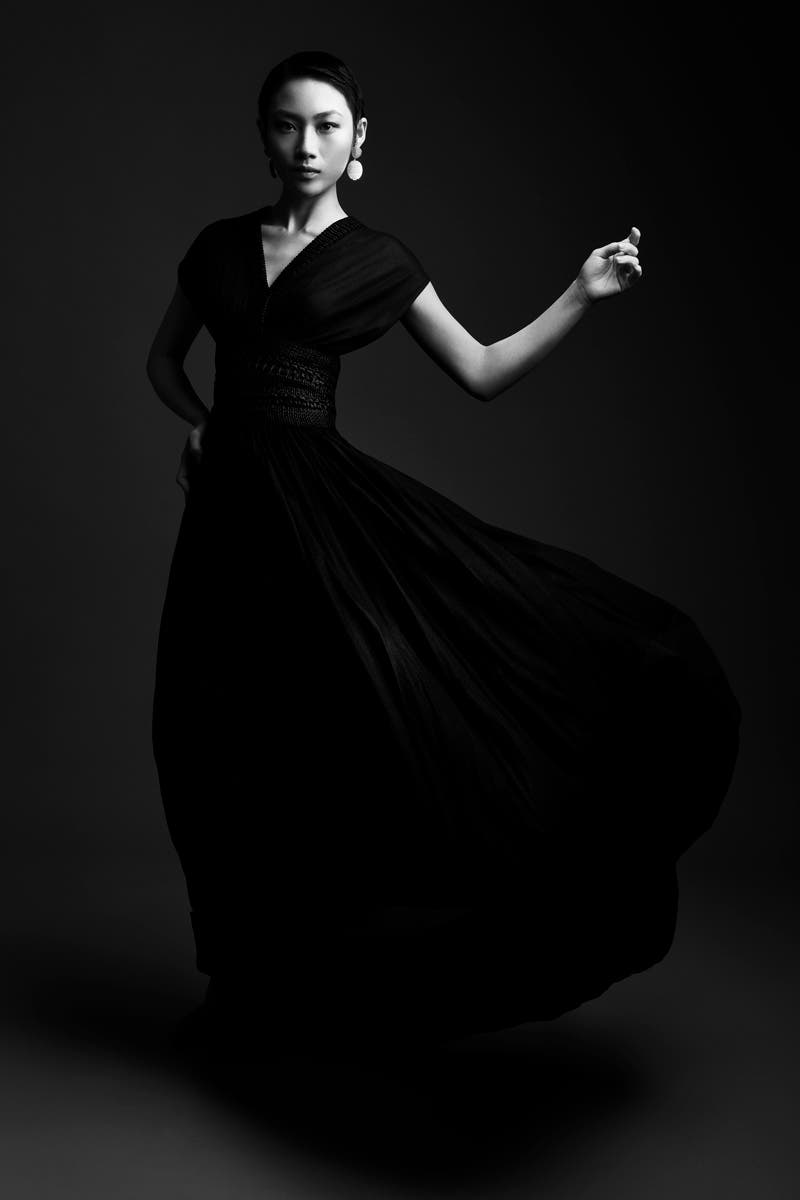
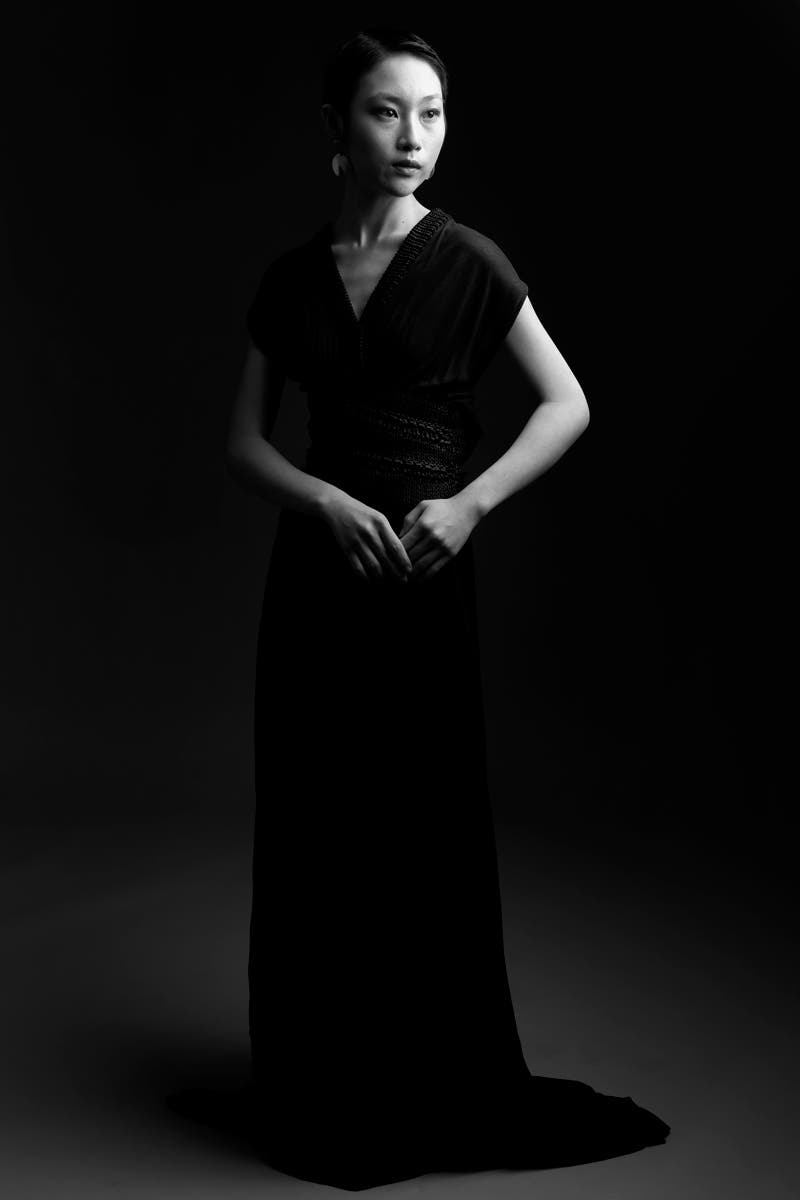
A simple large umbrella with diffusion is a great way to create soft, sculptural light that is popular in fashion magazines. It looks incredible in black and white because of the rich tonalities you can create on a fashion grey background.
What’s great about this single light setup is that it actually gives you a lot of control to shape the light by varying the distance of the subject to the background and the feathering of the light.
These three images were all taken with a single umbrella, but in each one, the light was feathered slightly. Feathering occurs when you keep the strobe and stand in the same place, but you change the angle of the light. In one shot it is angled toward the background and in another it is feathered far away from the background (almost to the camera). When I rotate the light toward the background, the background becomes lighter. As I feather the light away from the background, I can make it almost completely black.
This setup certainly could be achieved with a softbox, but I prefer an umbrella with diffusion because not only is it less expensive, but it also is much (much) easier to assemble and still achieves soft qualities of light.
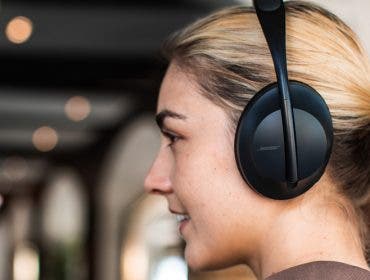
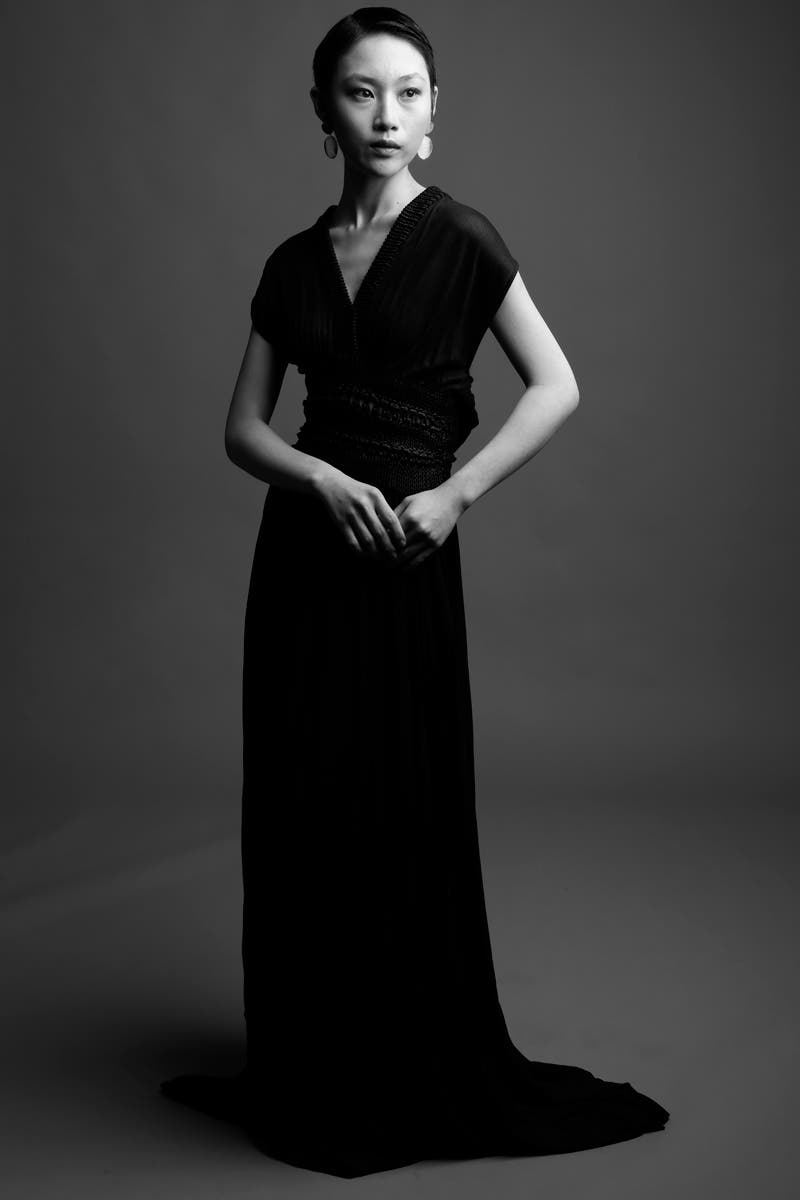
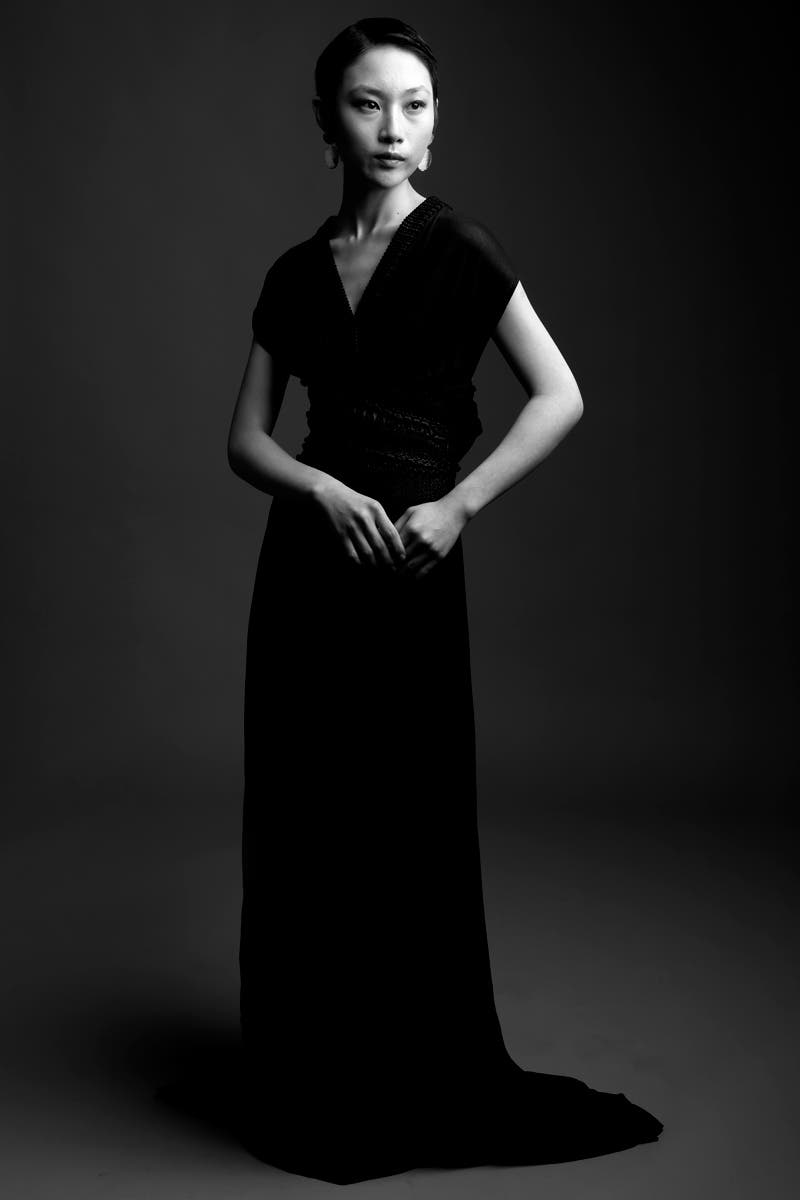
Fashion Setup #2: Bounced Light

Bouncing a strobe can be a fabulous way to create extraordinarily soft light, which is exactly what we do in this setup!
First, I set up a white V-flat to the left-hand side of the frame. Next, I take the same modifier as the previous setup (large umbrella with diffusion) and bounce it so that it lights into that V-flat. The V-flat actually then becomes the light source — extraordinarily soft and bouncing light in all directions.
While I absolutely love the quality of light from this setup, be aware that it is hard to control the spill of light in the scene. If the walls, ceilings, or floors in your space are white, they will begin to behave like reflectors as light bounces around the room.
For this fashion setup, I selected one of my favorite background colors (Savage Universal Beige) so that I could compliment the color of her clothing. Any light color background will be quite flattering — I’d personally base it off of the clothing choice, specific color you want to accentuate, or general “vibe” you are going for.
This setup is great for soft portraits or commercial catalog shoots and this look is very popular (and very commercial in-demand) right now.
While it is not necessary, I’ve actually added another white V-flat to the right hand side of the frame helping me to nearly eliminate shadows in the shot by bouncing light into the darker areas of the frame.
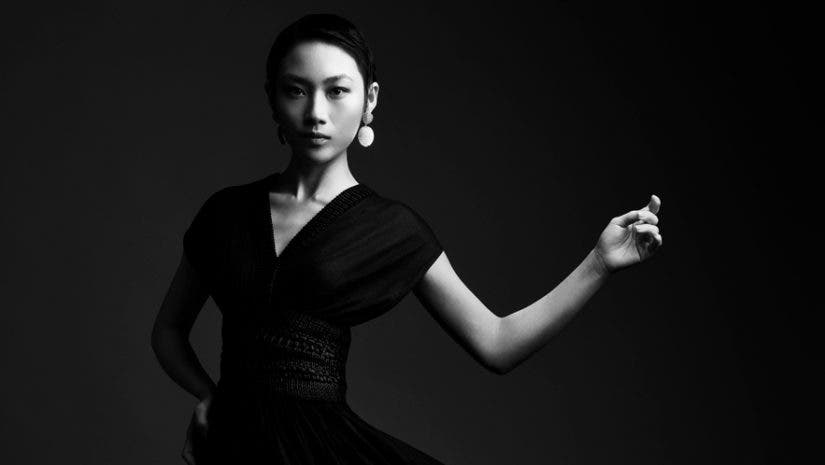
Fashion Setup #3: Hard Light Shadows
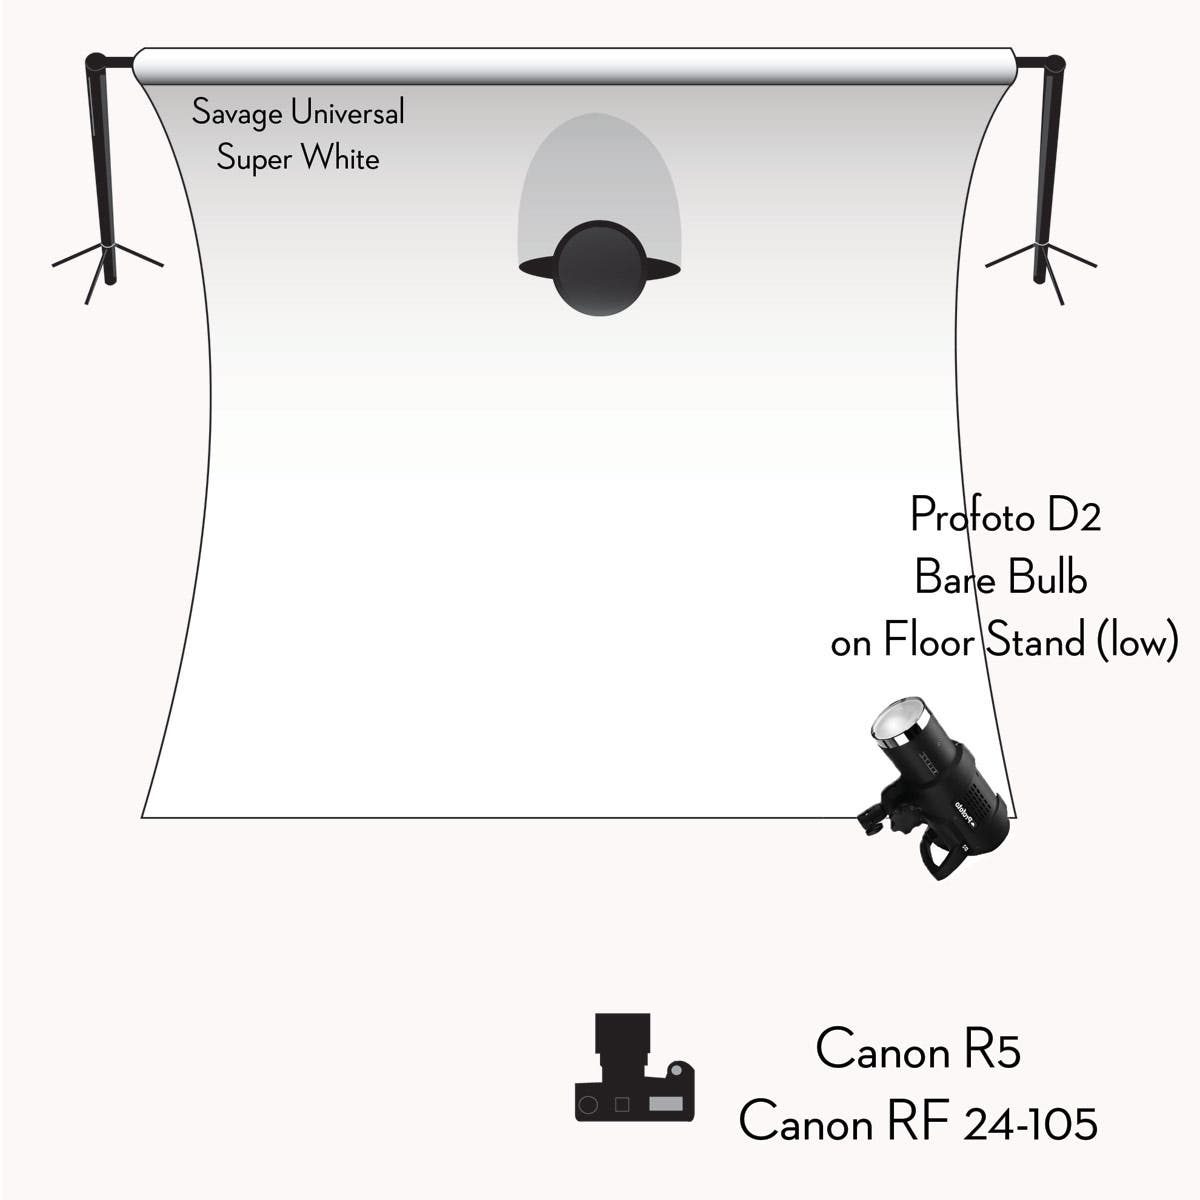
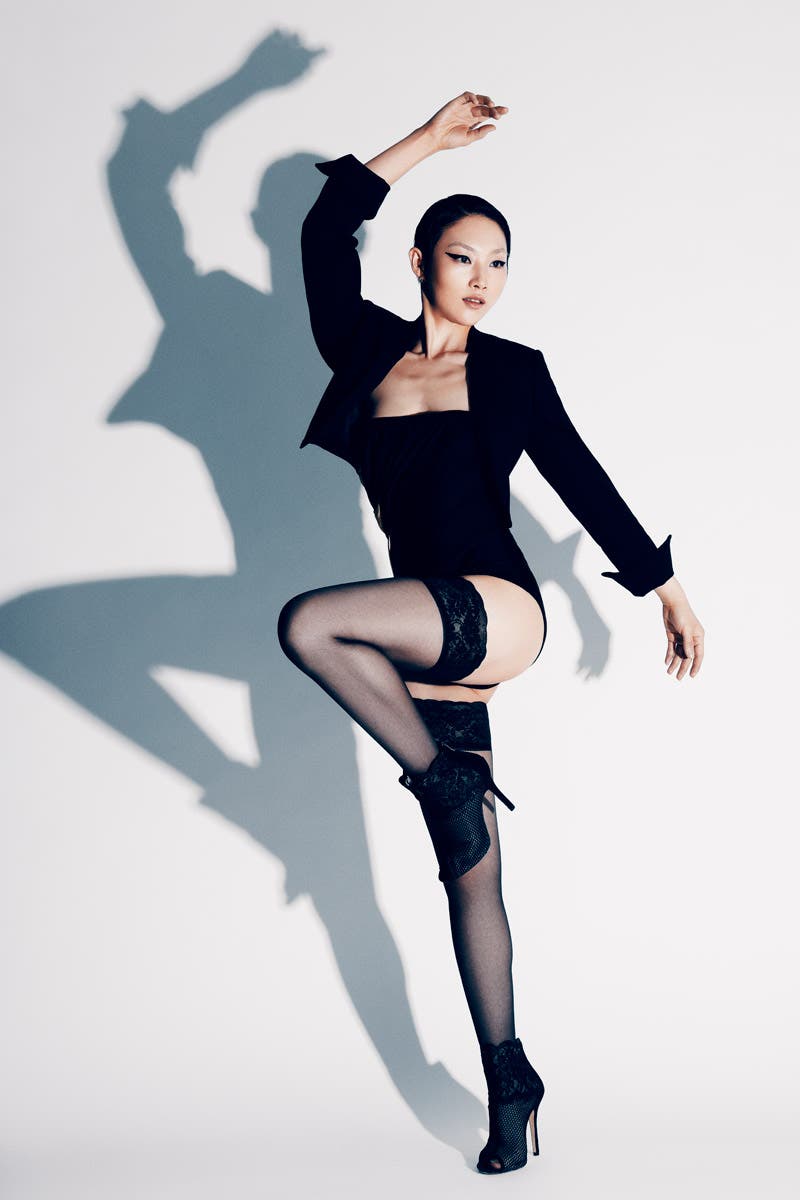
For our last setup we are going for a completely different mood — high key, graphic, hard light and a bit more editorial. By the way, “editorial” implies a shoot that is creative, stylistic, or for a fashion editorial in a magazine. (In other words, it’s not a commercial shoot to advertise a product.)
As you may know, portrait photographers often avoid hard light because it can be unflattering to the skin. The hard light increases contrast and texture, and therefore can emphasize skin or accentuate wrinkles/blemishes. Guess what? We love hard light over here in the world of fashion photography. It creates drama, crisp shadows and looks great in high contrast black and white imagery.
In this setup I am going to break the rules twice. Rule break #1: Using a bare bulb (hard light). Rule break #2: Putting main light below eye level “monster light.”
I begin by placing the subject right up against a Savage super white background. Posing my subject against the background allows me to achieve an white background even with a single light. There is no fall off of light so it stays bright.
Placing the subject so close to the background creates shadows… but in this case it is a good thing! Because I plan on using hard light, I know the shapes of the shadows will be defined and create another interesting element to the shot.
Once the subject is in place, its time to set up our single strobe. Here we use absolutely no modifier at all (just a bare bulb). Now here’s the weird part. For this image, I’ve actually placed the strobe on a floor stand near the ground. I was always taught to never ever use low “monster” light also known as up light. For my concept, this odd light placement actually makes sense because I am playing with shadows. The low angle of light helps to create larger shadows against the paper.
I’ve decided that the shot should be a high contrast black and white or with desaturated colors. I added a black V-flat to the left of the frame (optional) to create deep, darker shadows by preventing the bounce of light in the room. This is “negative fill.”
The final ingredient to make this concept work is for the model to create interesting poses with her body, and as a result, to create interesting shadows behind her. A boring or lifeless shape will create lackluster shadows, meaning the shadows aren’t contributing to the image’s success!
Conclusion:
These three shots each achieve a very different mood, but all done with a single light. Remember, with fashion photography, it’s not just the lighting that counts. It’s how the lighting, hair and makeup, pose, color choices, and other creative decisions work together. Lighting is just one very important piece of the equation and it certainly doesn’t have to be complicated.
Gear:
- Canon R5 ()
- Canon RF 24-105 ()
- Profoto D1 ()
- Profoto Large Deep Umbrella with Diffusion ()
- Savage Fashion Grey ()
- Profoto D2 ()
- Savage Beige ()
- Savage Super White ()
- V-Flat World V-Flats ()
Want to see a bit more behind the scenes of making these images? Check out this video at Adorama TV:

Feature photo by Lindsay Adler