
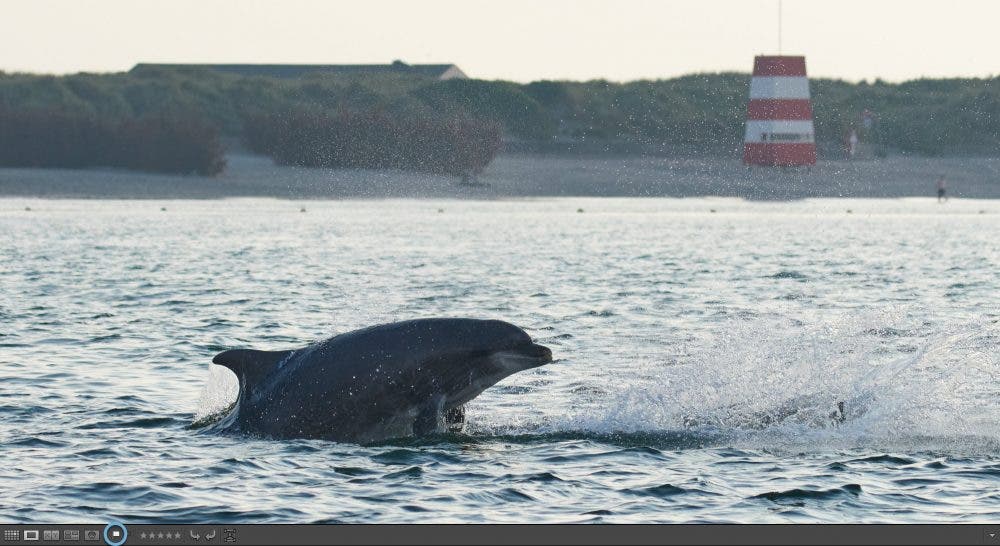
Have you ever got back from a shoot and found yourself with thousands of photos to edit and no idea where to start? This is a familiar scenario for any photographer but with a bit of know-how, you can cut down those photos to a manageable amount in no time. We’ll cover five key tips to cull your images in Lightroom that will help you save time and get more organized.
1. Develop a Criteria and Stick to it
One of the trickiest parts of culling down your catalog of photos is knowing what photos to cull in Lightroom. Some are obvious, such as blurry, over-exposed, or otherwise useless photos. Although, often you end up with many very similar photos. How do you know which to get rid of and which to keep?
This is where having a “photo criteria” to help you decide which photos to keep and which to delete can come in handy. Your criteria should essentially be a set of guidelines that you can compare your photo to help you decide whether it’s worth keeping. Having criteria will also help you develop a more consistent and recognizable style.
What should you consider as part of your criteria?
Aesthetics
Your aesthetic criteria should be personal to you and depends on the types of photography you practice. Although, it may be influenced by other photographers whose work you admire. This is all about what you like in a photo. Do you prefer portraits with plenty of bokeh or good depth of field in your landscapes? Think about what you value aesthetically, write down the key points, and compare your raw photos to see if they fit the bill. For example, a photo might be great, but if you prefer a light and airy look and this photo are very dark and moody, it’s not going to fit well aesthetically with the rest of your photography.
Technicality
The technical aspects of your photography are easy to spot once you start looking out for them. For example, is your photo well exposed, focused, and composed? If it isn’t and you don’t think this could be improved with editing, delete it.
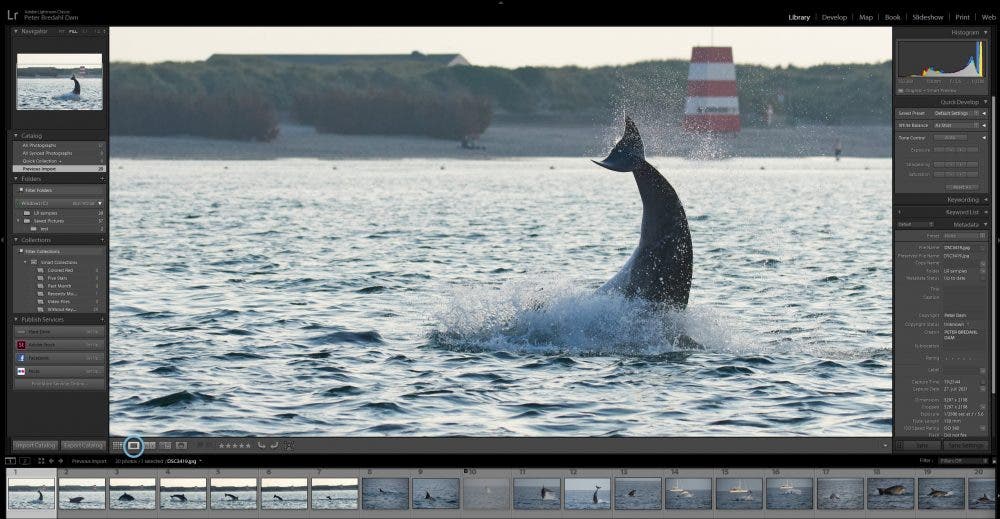
2. Utilize Viewing Modes in the Library Module
When you’re ready to cull photos in Lightroom, it is best to always work in the library module. After all, this is what it’s made for. The library module is great for viewing, sorting, categorizing, and culling through your photos in a time-efficient way. Several different viewing modes in the library module can help you when culling through your photos.
Grid View
Grid view is great for getting a general overview of your batch of photos. From here, you can easily spot dud photos that need to be deleted and save yourself time later. To open your photos in grid view, press G.

Loupe View
Loupe View lets you take a closer look at your photo, viewing each one individually. You can also zoom into your photo to inspect certain elements. When culling through your photos in Lightroom, you’ll likely want to use Loupe View most of the time. To easily get to Loupe View, you can press E while in the library module.
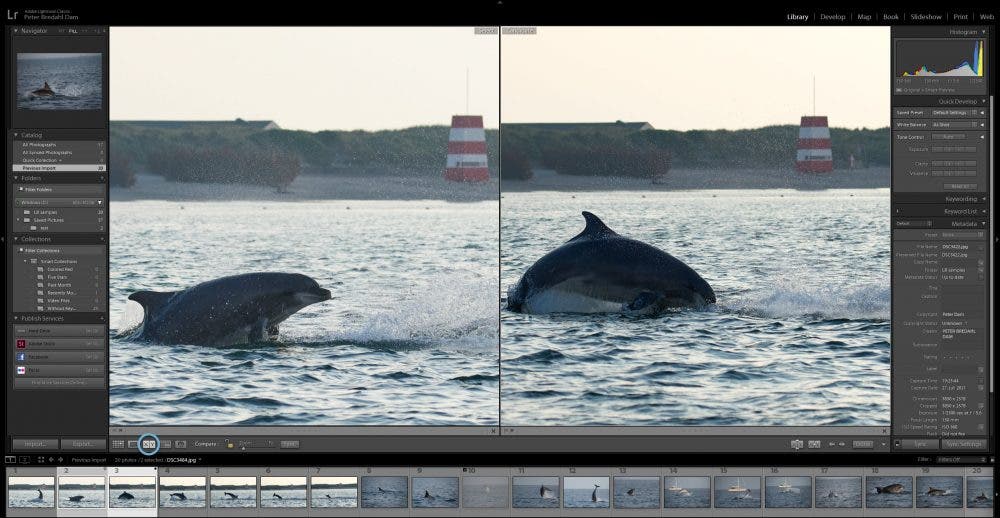
Compare View
In Compare View, you can see selected photos side-by-side to compare and contrast. This is helpful when you have two similar photos that you might be having a hard time choosing between. Rather than flicking between each photo individually, press C to open Compare View and then drag your two photos to the left and right panes.
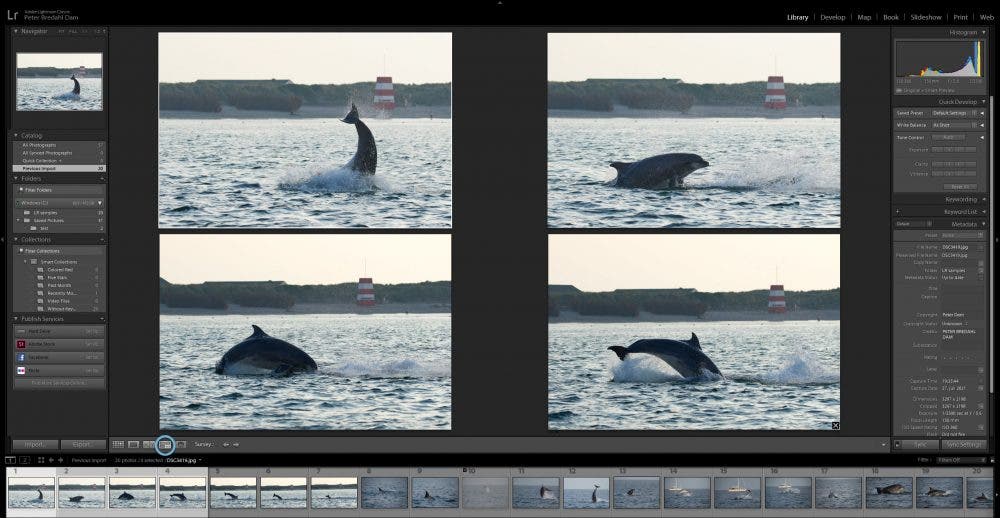
Survey View
Survey View is similar to Compare View, except that you can view more than two photos at a time. If you’re stuck on choosing between several photos, Survey view can come in handy. Rather than flicking between each photo individually, select each one by holding down Command and press N to open them in Survey View.
3. Flag your Photos
Flagging your photos is key to efficiently cull photos in Lightroom. Luckily, it’s pretty easy to master. For each photo you see, you can choose to either flag as ‘picked’ or ‘rejected.’ You can also choose to leave it unflagged if you can’t make your mind up.
- To quickly flag as ‘picked,’ press P on your keyboard. To flag as rejected, press X.
The ‘picked’ photos will be marked with a small white flag on the top left-hand corner and the ‘rejected’ ones with a black one.
Once you’ve gone through your entire batch of photos and flagged them as either ‘picked’ or ‘rejected,’ you can now quickly cull your photos by selecting Photo> Delete Rejected Photos.
Although this may seem time-consuming at first, this will save you time in the long run as you won’t have to be deleting photos as you go.
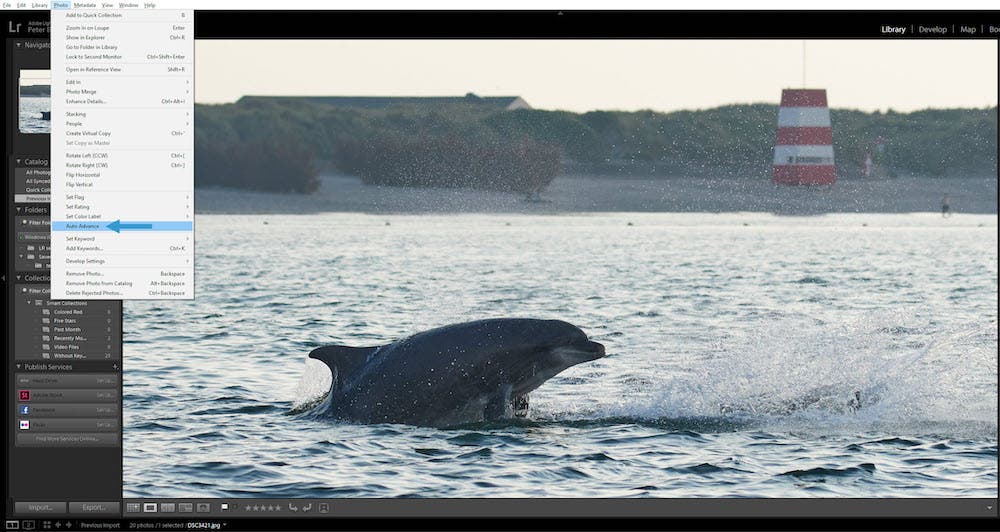
Using Auto Advance
The key to efficiently cull your photos in Lightroom is to minimize the number of steps you have to take on each photo. Auto-advance cuts out the need to press any button to see the next photo in your filmstrip, automatically loading the next photo after you have flagged a photo.
- To use auto-advance, go to Photo> Auto Advance in the top menu bar. Or press Caps Lock on your keyboard to activate auto-advance (press it again to turn it off).
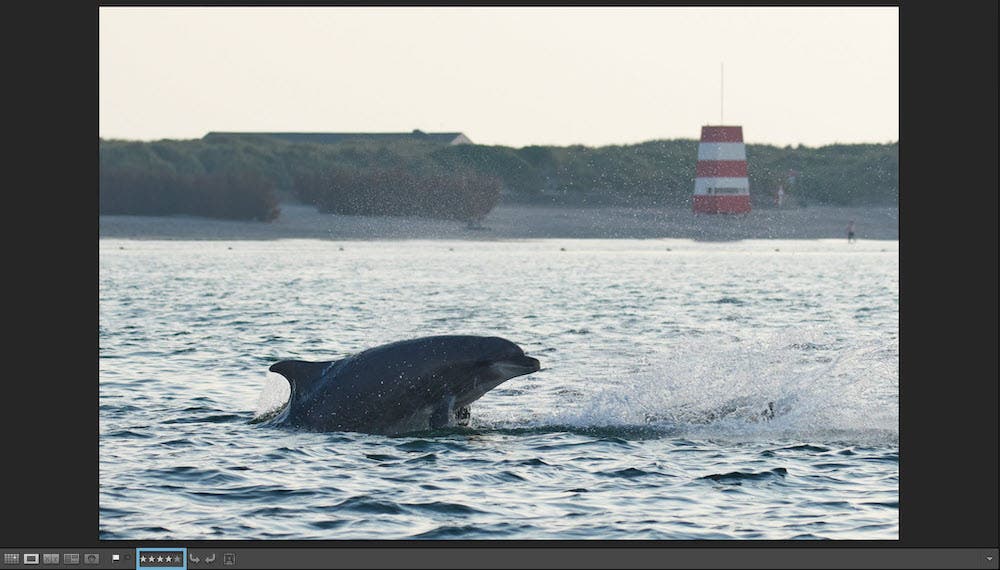
4. Rate your Images
Rating is a great way to rank and categorize your photos, especially ones you are struggling to make a final decision on. Once you’ve flagged all your images as either picked or deleted, you can use ratings to trim down your ‘picked’ images further.
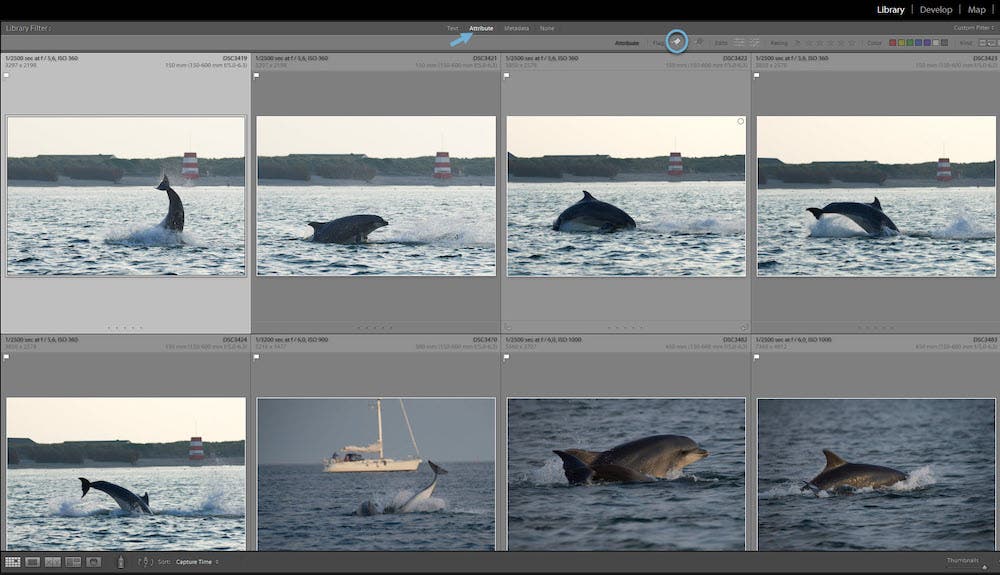
- To do this, first filter your images to show only the picked images by going to grid view, clicking on ‘attribute,’ and selecting the white flag under the filter menu.
- Next, using Loupe View, give each photo a rating from 1-5 by pressing the corresponding number on your keyboard.
This can be particularly helpful if you are in a situation where you have a certain number of photos to deliver to a client. If you are well over the number of photos needed, you can easily cull away those lower-rated photos. But if you need a few more to send, keep them in.
5. Cull in Stages
Working in stages is a great way to speed up your workflow when trying to cull images in Lightroom. This ensures you’re not getting held up by decision-making and can save the more important decisions for later.
Stage 1: While in Grid View, quickly scan through your batch of images and remove the ones that have obvious faults.
Stage 2: Go through your batch in Loupe View, but progress quickly using auto advance and flagging as you go. Make sure to consistently reference your criteria to ensure you’re picking and rejecting the right photos.
Stage 3: In this final round, your batch should now be significantly smaller. Filter to show only your picked photos and flick through with a more careful eye, rating each photo as you go and referencing your criteria. This is also where Compare and Survey View may come in handy.
Final Thoughts
Going through potentially thousands of photos after a shoot can be a daunting task. Although, it doesn’t have to be. Learning how to efficiently cull images in Lightroom can help you speed up this process and spend more time shooting than editing. After all, who wants to spend all their time deleting photos instead of taking them?