
Flash photography used to intimidate me. Like a lot of people, I assumed it just meant attaching a flash to my camera, setting it to TTL, and hoping for the best. But over the past few weeks, I’ve taken the time to actually learn how flash works, and it all finally makes sense!
This article will cover the basics I wish I knew sooner:
- What flash actually does
- The difference between on-camera and off-camera flash
- How to get creative with motion and light
Learning Flash Basics
Flash photography becomes a lot less overwhelming once you understand one simple idea:
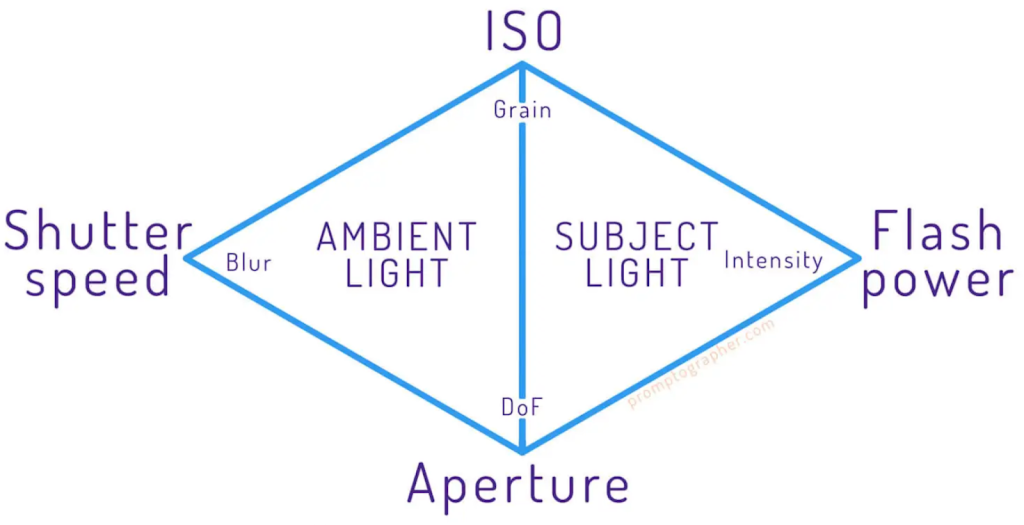
Flash light = subject. Ambient light = background.
Your camera is essentially making two exposures in one image:
- The ambient exposure, which determines how bright or dark your background looks
- The flash exposure, which controls the brightness of your subject
Because these two exposures are controlled by different settings, your usual exposure triangle becomes two connected triangles.
How each setting affects your image
- Shutter speed → background brightness
Slow shutter = brighter background
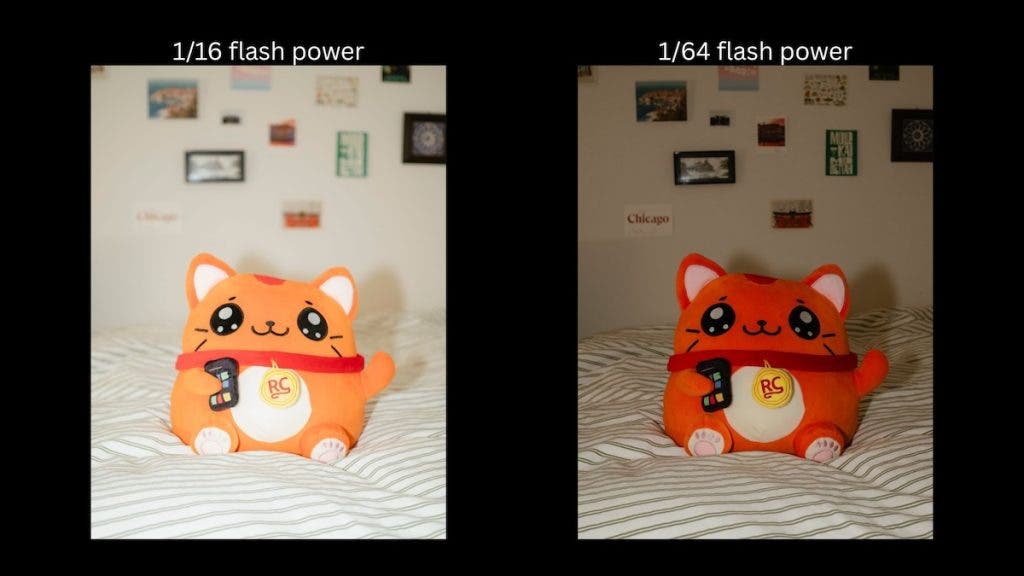
Fast shutter = darker background - Flash power → subject brightness
More flash power = brighter subject
Less flash power = darker subject
- ISO + Aperture → everything
Higher ISO = everything brighter
Wider aperture (lower f-number) = everything brighter
Understanding this framework alone made flash feel much more logical.

TTL vs Manual Flash
TTL (Through The Lens) is essentially “automatic mode” for your flash. The camera fires a small pre-flash and decides how bright it thinks your flash should be.
- TTL = quick and convenient
- Manual = control and consistency
If you’re shooting events or moving fast, TTL is great. But if you want repeatable results, it’s best to understand how to use manual flash for more consistency and control.
Once you understand how ambient and flash exposure interact, flash stops feeling scary and starts to feel more in your control.
On-Camera vs Off-Camera Flash
Once you know how flash works with your camera settings, the next step is understanding the direction of light. This alone can completely transform your photos.
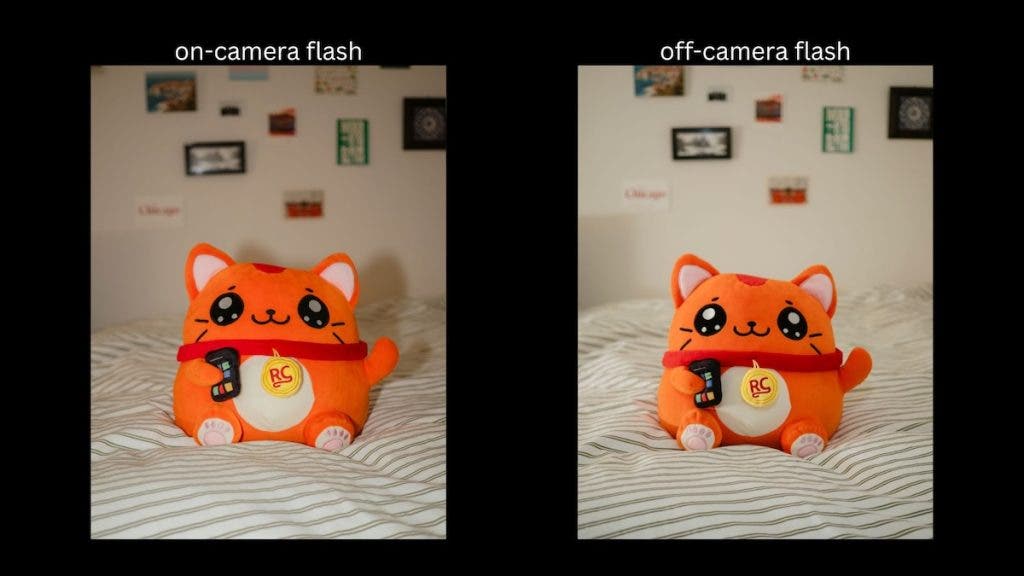
On-Camera Flash
On-camera flash fires from the exact same direction as the lens. It’s convenient and great for run-and-gun situations, but it often looks flat, harsh, or one-dimensional.
There are two main ways to use it:
- Direct flash → bright, punchy, but flat
- Bounce flash → softer, more natural (when you bounce off a ceiling or wall)
Bounce flash is a huge upgrade for indoor photography — it effectively turns the whole ceiling into a giant softbox.
A great option for on-camera flash is the Flashpoint X100 TTL R2 On Camera Li-ion Round Head Flash.
Off-Camera Flash
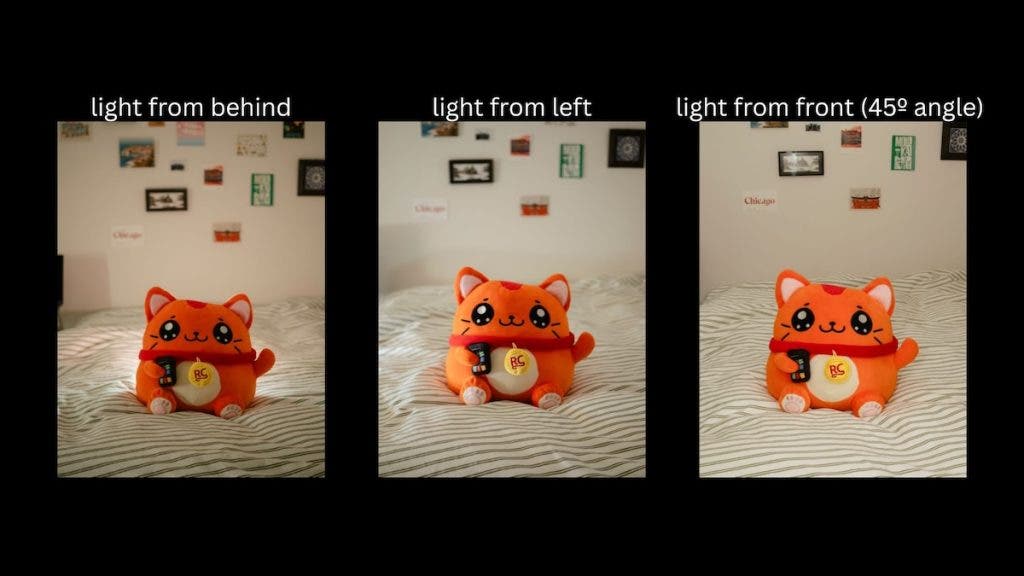
Moving your flash off your camera unlocks depth and dimension. You now get to choose where the light comes from:
- Front light → clean and bright
- 45º light → sculpted, flattering, more cinematic
- Side light → dramatic, moody, lots of contrast
- Backlight → separation and glow
It’s the same flash, just placed somewhere more intentional where you have more control over what the final look will be. This is the moment many people fall in love with flash photography, because you stop reacting to existing light and start shaping it yourself.
Pro Tip: If you plan on working with your flash mostly off camera, look for a unit like the Flashpoint XPLOR 400 Pro II R2 TTL. It is still battery-powered, but has much more power and can use many more accessories.
Getting Creative with Shutter Drags
Once you understand the basics, flash becomes a powerful tool for creativity. One of the most fun techniques is the shutter drag.
What is a shutter drag?
A shutter drag happens when you use a slow shutter speed along with flash. The slow shutter captures ambient light and motion blur, while the flash freezes your subject. You end up with an image that feels energetic, dreamy, and full of motion.
Front Curtain vs Rear Curtain Sync
The timing of the flash affects how the motion blur looks:
- Front curtain sync → flash fires at the start, so motion appears in front of your subject
- Rear curtain sync → flash fires at the end, so motion trails behind your subject (this usually looks more natural and artistic)
How to try it
Start with something like:
- ISO 200
- f/4
- Shutter 1/5–1/10s
- Flash on rear curtain sync
Have your subject move, or move your camera slightly — and let the flash freeze the moment.
This technique is messy and unpredictable, but that’s often the best part about it. Try it out for yourself!


Final Thoughts
Flash photography doesn’t have to be complicated or intimidating.
Once you understand how flash exposure and ambient exposure work together, everything becomes more intuitive. If you’ve been nervous to learn flash, I hope this helps you realize it’s far more approachable (and fun!) than it seems.