

Export done. I close the photo editor, stretch my legs, and grab a coffee before sitting back down at the Mac. This is the point where I switch from creative mode to productivity mode, and that’s when I lean on the built-in Mac apps. Being a professional photographer isn’t just about taking pictures and posting them online. It’s also about staying organized and efficient behind the scenes, so I actually have time to get out and shoot.
I like to keep things simple when I work. If my workspace is cluttered with stuff I don’t need, I lose focus fast. That goes for both my actual desk and my Mac apps. I want a space where I can be creative, jot down notes, work quickly, and get to the tools I need without digging around. These are the built-in Mac apps I rely on to stay productive through the day.
Notes
For me, productivity always starts with figuring out what actually needs to get done. This is where I struggle most: trying to keep my notes simple, but still gathering all the details I need for each task.
In the past, I have been tempted by all-in-one online tools that promise to do everything—docs, to-do lists, notes, spreadsheets, images, mood boards —you name it. But I always end up coming back to what’s simple and actually works. Good app integration is worth more than a bunch of fancy features. And if it’s already on the Mac, even better. That’s where the Notes app comes in.
Adding a ton of information or getting reminders about tasks I can’t finish doesn’t help me at all. If anything, it just makes me feel more behind.
All I really want is to give each to-do a headline, jot down a few details, and break it into smaller steps if needed.
Notifications are really just a fancy way of telling me I’m behind, when the real problem is just being too optimistic when I plan.
(If you miss having reminders, share that specific note with Apple’s built-in reminder app. Double-click the reminder, and it opens the Notes App on that note.)
But as long as I open Notes, I know what’s on my plate for the day.
I do have to keep my notes organized in folders, though. It’s easy to filter by folder or by what I’ve attached to a note.
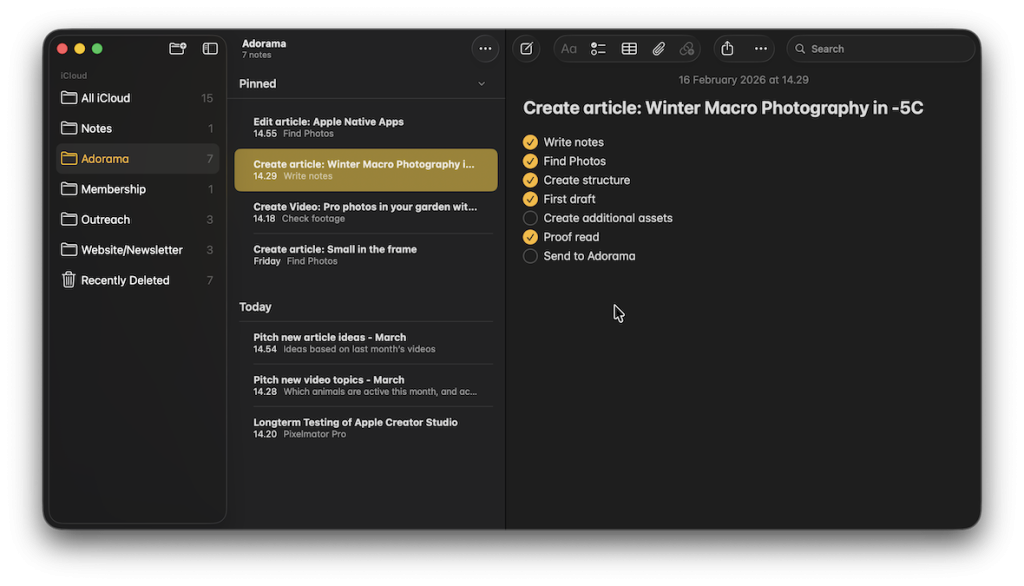
If I need to gather more than just text, I can add photos, scan a document, or even sketch something right in the app.
Desktop and On the Field
On the desktop, if I click to add a photo, my phone’s camera pops up so I can snap a picture, and it lands straight in my notes.
When I’m out in the field or wandering around with my camera, I often get ideas I want to jot down. Since Notes is already on my iPhone, it’s easy to add something on the go, knowing that it is instantly synchronized with the desktop app.
It is simple and uncluttered, but it can do everything I need.
Spotlight Search
Spending all day at the computer can really wear out your mouse hand. But if I keep my fingers on the keyboard, I can get to almost anything on my Mac way faster than clicking around through folders and apps.
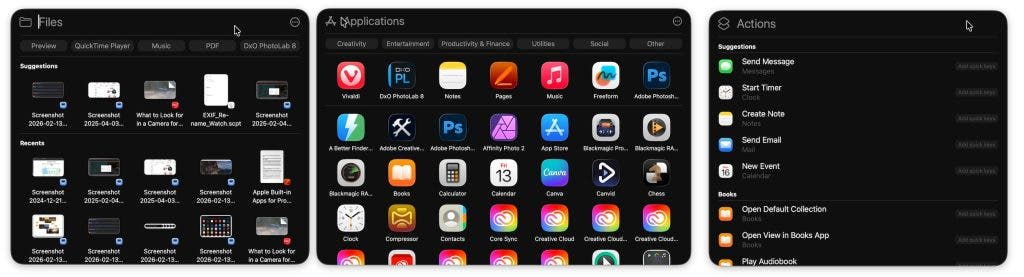
CMD + Space brings up Spotlight Search. I just type a few keywords and hit Enter, and I’m where I need to be—files, apps, even websites.

Spotlight doesn’t just look at file names—it checks metadata and even the content inside files. If I type an app name and press TAB, I can search for files related to that app, like documents or photos.
Shortcuts
Another handy built-in app is Shortcuts. As the name suggests, it lets you create shortcuts for just about anything.
You can keep it simple and set up a shortcut to add a new note from anywhere on the Mac, just by pressing a key combo.
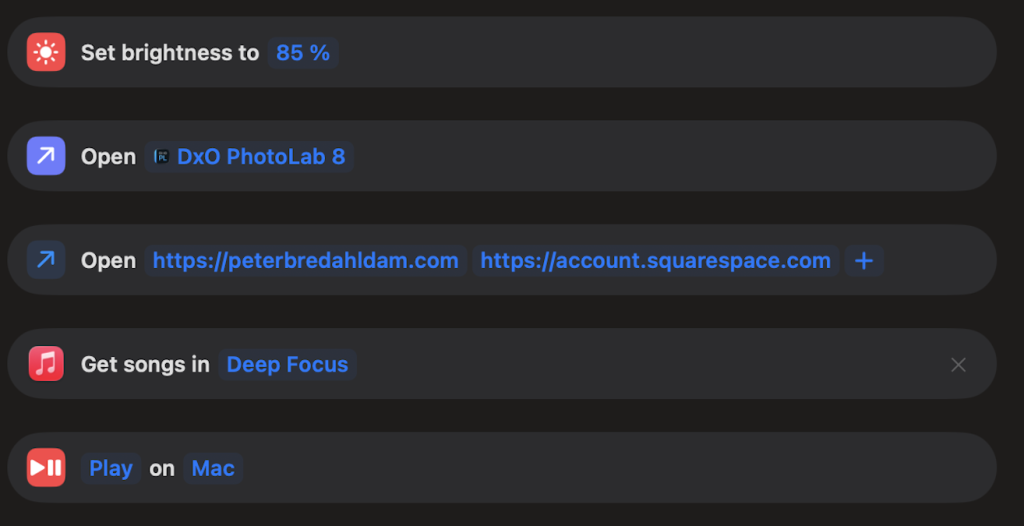
Shortcuts are easy to overlook, but the real magic is in stacking tasks together. For example, I made a shortcut getting ready to upload photos for my website.
When I press Control+Option+Command+W, here’s what happens:
- The screen brightness goes to 85% (which is handy, since the kids sometimes mess with it while watching Netflix).
- DXO PhotoLab 8 opens up for editing photos,
- Vivaldi browser opens, finds my website, and logs me into Squarespace so I’m ready to work.
- Music app starts up, picks the Lo-fi Chill playlist, and hits play to get me in the zone.
- Focus mode switches to Do Not Disturb on all my devices.
With one keyboard shortcut, I’m ready to dive into editing.
I’ve got another shortcut for writing articles (it opens Notes and Pages instead of my website), and one for video editing.
It makes it much easier to get started instead of getting sidetracked. Do you also forget your to-dos every time you open a browser? I know I do.
AppleScript
If you want to go deeper with automation on the Mac, AppleScript is a powerful tool. Don’t worry, you don’t have to be a coding expert.
I usually don’t rely on AI; however, when it comes to coding, I will make an exception. I just tell Google Gemini what I want, and it spits out a script I can copy and paste into AppleScript. If it doesn’t work, I copy the error message back in and let the AI fix it.
One way I use AppleScript is to resize photos from a specific watch folder, so they’re ready for my website. You can even have AppleScript rename your files to include Exif information like lens, shutter speed, aperture, and ISO, if you wish.
However, let’s keep the example simple—just resizing images—and see if we can make a bit of automation magic happen.
I haven’t had any problems with scripts so far, but just a heads up: I can’t take responsibility if something goes wrong. When you’re renaming or resizing files automatically, you can mess up filenames or overwrite your originals. Make sure you use a separate folder and copy the files into it. DON’T use your standard image folder, or move your originals into the folder, as it will resize all your photos. The code below actually resizes a copy of the image and moves the original into an archive folder.
Code
Open AppleScript and paste this code into a script:
[Start of script]
on adding folder items to this_folder after receiving added_items
set resizedFolderName to “Resized_1920px”
set archiveFolderName to “Originals_Archive”
set targetWidth to 1920
set sourcePath to POSIX path of this_folder
set resizedPath to sourcePath & resizedFolderName & “/”
set archivePath to sourcePath & archiveFolderName & “/”
— Create folders
do shell script “mkdir -p ” & quoted form of resizedPath
do shell script “mkdir -p ” & quoted form of archivePath
repeat with anItem in added_items
set itemPath to POSIX path of anItem
— Use a shell command to check if it’s a file (skips folders)
set isFile to (do shell script “[ -f ” & quoted form of itemPath & ” ] && echo \”true\” || echo \”false\””)
if isFile is “true” then
try
— SIPS is much more robust than Image Events
— It resizes while maintaining aspect ratio automatically
do shell script “sips –resampleWidth ” & targetWidth & ” ” & quoted form of itemPath & ” –out ” & quoted form of (resizedPath & (name of (info for anItem)))
— Move original to archive using shell (faster than Finder)
do shell script “mv ” & quoted form of itemPath & ” ” & quoted form of archivePath
on error errMsg
log errMsg
end try
end if
end repeat
end adding folder items to
[End of script]
Now, all you need to do is to set up a watch folder and test it.
How to set it up (Step-by-Step):
- Save the Script In Script Editor, go to File > Save.Press Cmd + Shift + G and paste this path: ~/Library/Scripts/Folder Action Scripts/Note: If the “Folder Action Scripts” folder doesn’t exist, create it inside “Scripts”.Save the file as “Resize.scpt”.
- Attach to your Folder Open Finder and find the folder you want to use as your “Watch Folder.”Right-click that folder.Go to Services (or Quick Actions) > Folder Actions Setup…If a list appears, select “Resize.scpt” and click Attach.Ensure the checkbox “Enable Folder Actions” at the top left is checked.
- Test it Take a photos (JPEG or PNG) and drag it into that folder.
Within a few seconds, the files should begin to resize with the resized version ending up in one folder, and the original being moved to an archive folder, making the watch folder nice and tidy.
If you’ve got a task that eats up your time, it’s worth seeing if your Mac can do it for you.
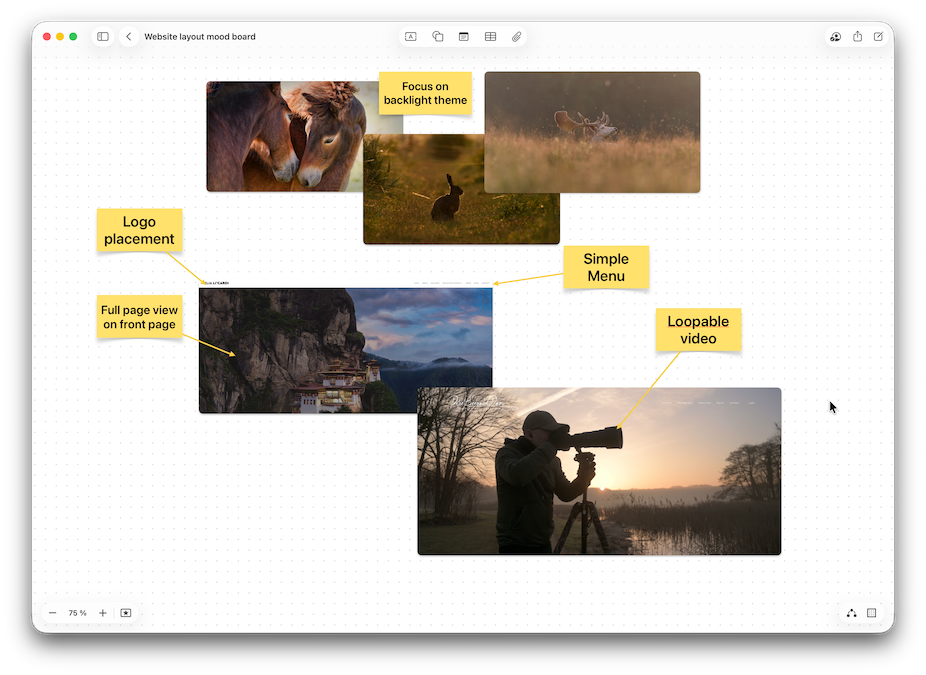
Freeform
Not everything I do is about being effective and productive.
Sometimes I just need to gather my thoughts in a more creative way, or try to capture a certain mood or feeling.
Right now, I’m brainstorming ideas for a new website layout, and, as Apple used to say, there’s an app for that.
Freeform gives me a huge canvas to collect ideas or inspiration in one place, so I can narrow things down or set a mood. It’s a great way to make abstract ideas more concrete. Once I’ve got everything on the board, I can start organizing and get things ready to hand over to the designer.
Don’t Forget the Free Office Package Preinstalled on Your Mac
If you’re new to Mac, you might not realize there’s a pretty powerful office suite already installed—and it’s free.
You get Pages (for writing), Numbers (for spreadsheets), and Keynote (for presentations). They work well together on Mac and iOS. The only downside is that sharing with Microsoft Office users can be a bit clunky. It works, but it’s not as smooth as staying within the Apple ecosystem.
Putting the creative side of professional photography aside for a moment, a lot of success comes down to how organized and productive you are. For all the behind-the-scenes work, Apple’s built-in Mac apps are a big help. Some are so intuitive that you can just click around and figure them out. Others, like AppleScript, take a bit more effort, so it’s worth weighing the pros and cons.
Since I get distracted pretty easily, I really appreciate how simple these Mac apps are. Their clean interfaces help me stay focused and productive, and over time, that makes a huge difference.