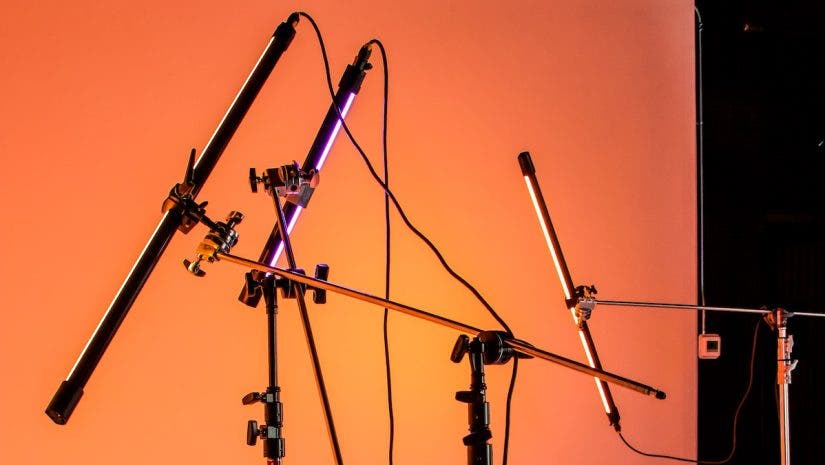

The C-stand is probably the most valuable tool in a gafferor DP’s arsenal. It is incredibly useful and versatile — you can never have too many on set! Normally used to hold and place flags, it also works to hold rolls of diffusion, fabric, back drops and a variety of light modifiers. It also works exceptionally well as a light stand. There are several very good manufacturers of C-stands, and choosing the one for you is simply a matter of personal preference.
What is a C-Stand?
A C-stand normally has two riser arms and can be fitted with a gobo arm. A gobo arm is essential in order to get the maximum use out of your C-stand. It allows you to extend and position your flag or modifier in a variety of different ways. C-stands and arms are incredibly strong and can bear a great deal of weight. It’s truly the work horse of any film/video set.
C-stands come in two basic varieties. A standard “C” stand and a “C+” stand. The C has a permanent, non-removable base. The C+ has removable base that allows you to insert a junior-to baby adapter and use it as a low light stand. The one end slides into the base and the other end is the correct size to attach a lighting fixture.
Avenger C-Stand
Junior to baby adapter
Some Basic Rules
Because of their size, weight and versatility, a C-stand needs to be treated with respect. There is the potential of damage, both to people and to equipment if used incorrectly. A few hard and fast rules will ensure that the C-stand works as it should — and with no damage or injuries.
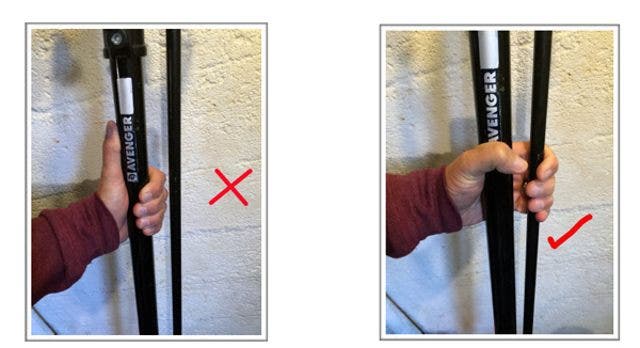
First thing to think about is how to carry and move a C-stand. This sounds easy, but it is very easy to pinch your fingers if not careful.
When you pick up a C-stand, it will have its legs folded and the gobo arm retracted and running parallel to the main riser. Pick up the stand by gripping both riser and gobo arm.
If you hold it by the riser only you will find that, when you hand it off the person receiving, it will probably grip it correctly around the riser and the arm. This will trap your fingers between the riser and the gobo arm. Painful!
Setting Up a C-Stand
The first thing to know — less for safety, but more for speed and convenience — is the correct order to extend the risers. Every C-stand has two risers that allow you to set the height of the modifier you are using.
When extending the risers always extend the top one first. That way, if you are fully extended and realize that you need a few more inches of height, it’s an easy thing to slacken off the lower riser and add that height. If you had extended the lower riser, first you will find the upper riser is too high for you to reach it.
As mentioned earlier, every C-stand should have a gobo arm. It is possible to buy them without the arm but, in my mind, it would be like buying a car without a steering wheel. Without a gobo arm, the C-stand is a very nice light stand. With the arm, it becomes the Swiss Army knife of production.
In addition to the C-stand with a gobo arm, there are two other pieces of essential equipment that you should have. You should have one of each for every C-stand. A sandbag and a tennis ball. See below for why you need the tennis ball.
Tips for Using a C-Stand
Righty Tighty, Leftie Loosie
The gobo arm on a C-stand can carry a lot of weight. Put a large flag or other modifier on it, extend it, and that weight will want to pull the arm down. If the arm is extended to the right when looking at the handle, then the weight is pulling the arm in a clockwise direction. The effect is to tighten the arm, (righty tighty). If the arm was extended out to the left the weight would then pull in a counter-clockwise direction and the arm would risk coming loose (leftie loose).
Always Place the Sandbag on the Tall Leg
Another crucial step is to ensure the arm is over the tall leg. If not, there is always a risk of the stand tipping over. Always put a sand bag on the tall leg to help with stability and finally — the tennis ball. Nothing hurts more, or has more potential for putting an eye out than the end of an extended gobo arm. When the set is lit and there are areas behind the camera that are a little darker, it is very easy to walk into the end of a gobo arm. Get a bright colored tennis ball, cut a slit in it, and place on the end of the gobo arm. A bright and very visible warning for all to see!
Utilize the Sliding Legs
Your C-stand can also function as a very strong light stand. Take off the gobo and knuckle and place your instrument on the riser. A good feature on some C-stands is a sliding leg(s). This allows you to slide a leg up the main stand, which then allows you to position the C-stand on uneven ground and still keep it vertical. This is ideal when you need a C-stand on a staircase, for example.
If you work in video, a C-stand is an absolutely essential piece of equipment. It is a tool that will make your life easier. It will shape the look of your image, open up avenues of creativity in your lighting, and will soon prove to be indispensable. C-stands can be used to hold modifiers, lights, boom poles, even to reposition a prop. Their use is only limited by your imagination. They are also extremely rugged and can put up with all sorts of hard work. No videographer should go out without at least two in their arsenal. I go out with a minimum of four and find myself using them on all my shoots.