By day, Nicholas Wong is a civil engineer for the City of New York. But in his off hours, the photographer in him comes alive. This is when he pursues his beloved hobby with personal projects. Chiefly street, portrait, and digital infrared photography. This talented artist says he began his photo journey in junior high school, where he first experimented with infrared film. While he loved the distinct look of those images, Wong found the process tedious—especially when it came to developing the film.
That all changed when he discovered digital infrared photography. Today, Nicholas Wong’s infrared portfolio embraces that otherworldly glow and dreamlike esthetic that is a trademark of the genre. For instance, bright-white foliage against dark skies. Every element is visually striking and looks like it’s been taken on another planet. I sat down with the photographer so he could explain his digital infrared process, as well as discuss what’s next in his photo journey. As he describes his transformation, “Infrared has changed the way I look at the light and at my images.”
Step 1: Camera Conversion
Most standard digital cameras are designed to block infrared light, so before taking the plunge into the world of infrared photography, you need to either have your existing camera converted to infrared or full spectrum. Wong has opted for full-spectrum conversions. Converting a camera for infrared involves removing the internal infrared-blocking filter, and in the U.S., Kolari Vision and Life Pixel are two leading companies offering this service. Wong uses Kolari Vision.
For the most part, his images are created using his converted Sony a6000 and Canon ELPH, but he’s now in the process of shifting to a converted Canon Rebel T7. Says Wong: “With a converted digital camera, I can capture the surreal looks I seek out with infrared, particularly high contrast and more texture and grain. Buildings take on a more dramatic quality because they turn black, landscapes include luminous foliage, and skies look dark and ominous. I love it!”
Step 2: Choosing the Right Filters and Lenses
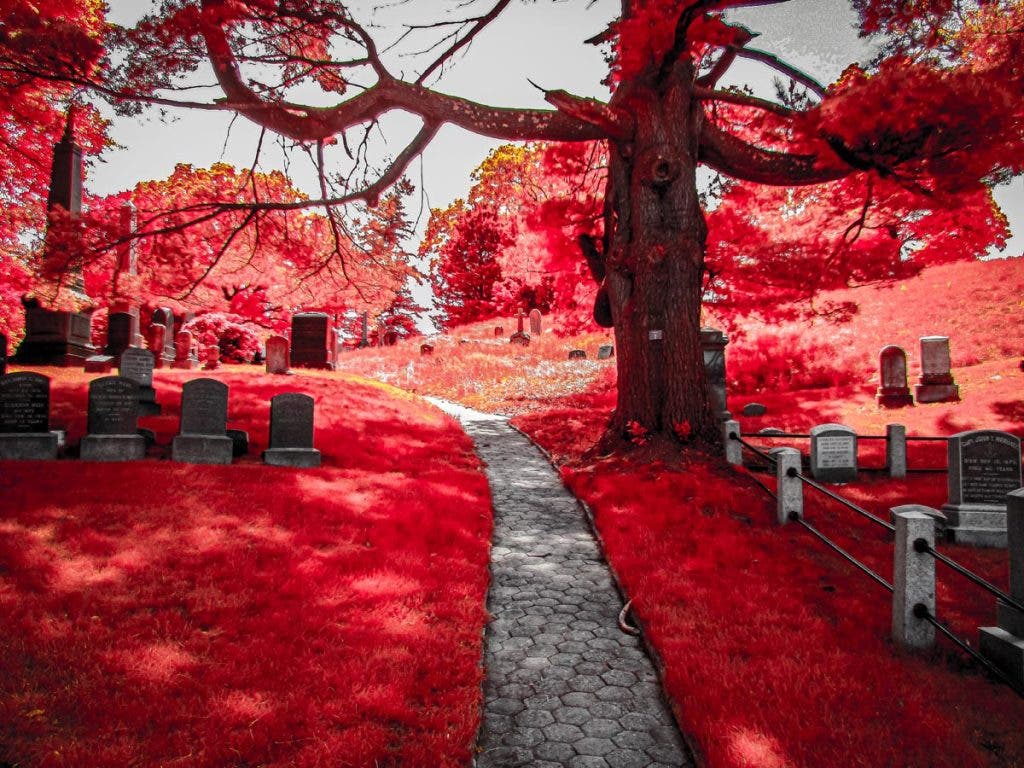
“While infrared photography offers a range of creative possibilities,” says Wong, “it’s largely determined by the filters one uses.” Wong’s go-to is a 930-nanometer filter, which produces stark black-and-white images with extreme contrast. For those looking for a hint of color, Wong says a 720-nanometer filter can introduce subtle hues like yellows in the sky. Another of his preferred filters is the Aerochrome-style filter, which mimics the look of Kodak’s legendary infrared film, producing deep reds and oranges straight out of the camera with minimal post-processing.
However, some filters require more advanced editing techniques. Wong admits he’s not a huge Photoshop fan and instead prefers to use Lightroom for his adjustments. There are some filters that yield a bit more extreme results, like Kolari’s Candy Chrome, which turns all foliage pink and requires intricate color correction to maintain realistic skin tones. “I don’t want everyone looking like an Oompa Loompa,” Wong jokes.
In terms of lenses, Wong has found that using anything wider than a 35mm lens can lead to unwanted lens aberrations, especially around the edges of the image. To combat this, he primarily shoots with 35mm and 50mm lenses, favoring the 50mm f/1.8.

Step 3: Choosing Your Subject Matter and Lighting Conditions
Wong explains how his infrared portfolio is borne out of experimentation and understanding how different elements interact with infrared light. Consider, he says, the following before embarking on your infrared journey:
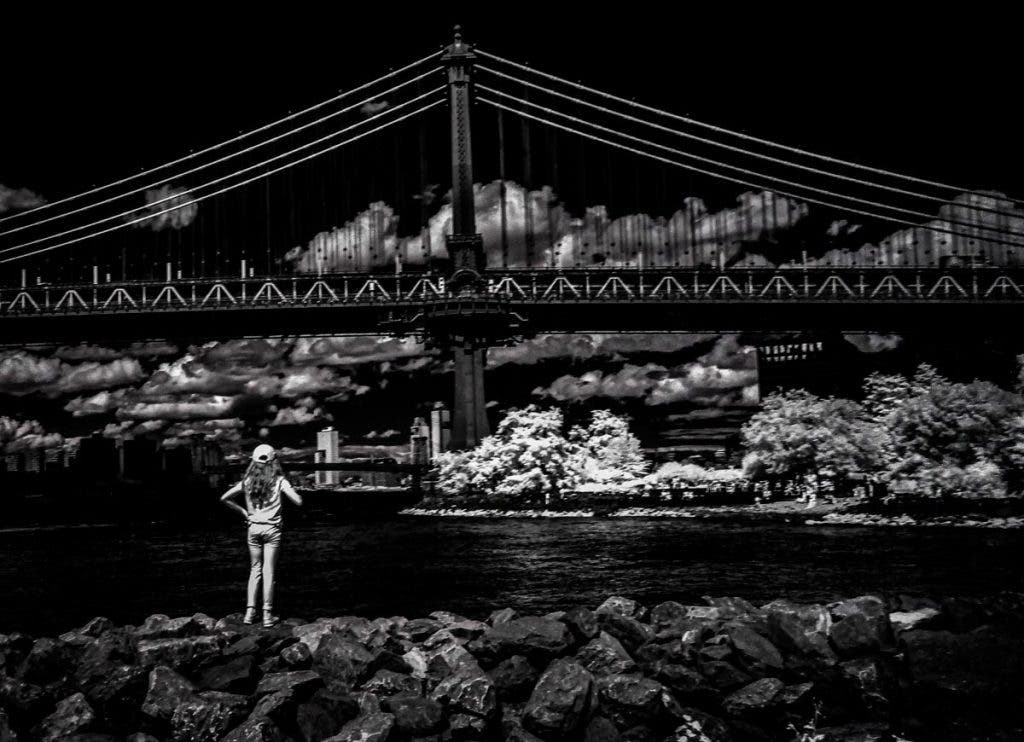
- Living subjects like trees, plants, animals, and people reflect infrared light well. Conversely, non-reflective surfaces like water and buildings appear dark, even black.
- Cloudy days are good for enhancing contrast and depth. Wong’s images often include detailed clouds standing out dramatically against a black sky.
- High noon is the optimal time to shoot infrared landscapes when the sun is at its peak. Shooting at this time of day creates bold looks with bright, glowing foliage, dark, dramatic skies, crisp, high-contrast shadows full of depth, a ghostly feel, and a reduction in haze.
- Grain is inevitable in infrared photography, especially in low light. Wong says it’s an easy fix, to reduce the grain in post-processing, but his artistic preference is to embrace the grain.
Other Considerations
Infrared film photographers usually use a tripod, but Wong says that because he is working with digital, and usually shoots on sunny days, he doesn’t need to use a tripod. “Film infrared would require a tripod a camera with bulb mode, and a shutter release,” he explains, and shutter speeds would range from 1 minute to 3 minutes.” Wong’s typical exposure time is 1/60th on a cloudy day and 1/100th on a bright sunny day.
Step 4. White Balance Settings
When shooting digital infrared photography, Wong says understanding and properly setting white balance is crucial, as the camera sensor will capture infrared light differently than visible light, often resulting in strong color casts if not adjusted. The best approach is to typically set a custom white balance using a reference image like healthy green foliage or a grey card, depending on the scene, to achieve the desired color rendition in your final image.
For Wong, a custom white balance must be set every time a filter is changed. “I use a white balance card in whatever light I’m shooting in. On the rare occasion, I forget my white card, I will balance off anything I can find. White cars, white buildings, white dogs!”
Step 5. Post-Processing and Editing
“Infrared images often come out of the camera looking flat and require adjustments in post-production,” Wong explains. “Skies typically appear gray and need to be darkened, while highlights and whites must be dialed down to reveal hidden details.” He especially emphasizes careful cloud management—overexposed clouds can become indistinct white blobs.
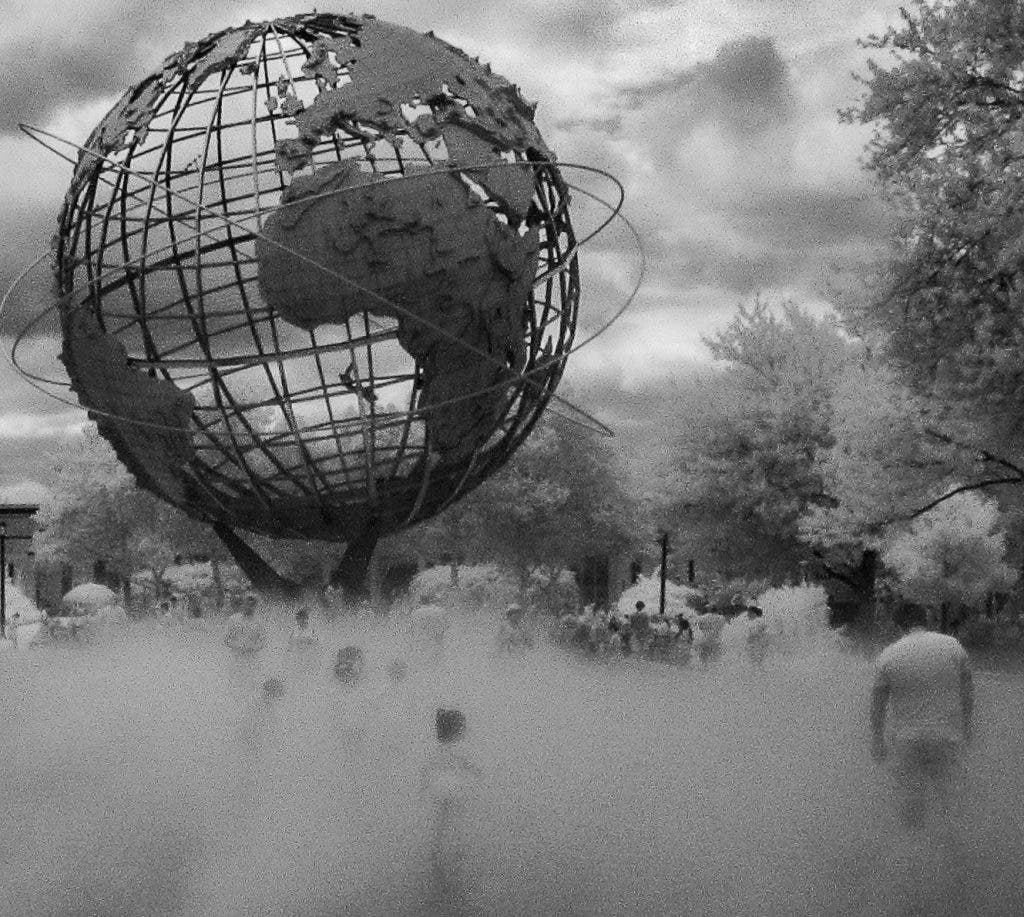
For black-and-white infrared images, the key is adjusting contrast and detail. Wong’s goal is to achieve a deep, dramatic black sky while preserving enough details in the highlights to maintain texture and form. His World’s Fair Globe image (above), for instance, was initially shot with a 520-nanometer filter, but as he continues to experiment, he has shifted to using a 930-nanometer filter for an image like that to create an even more striking, high-contrast look.
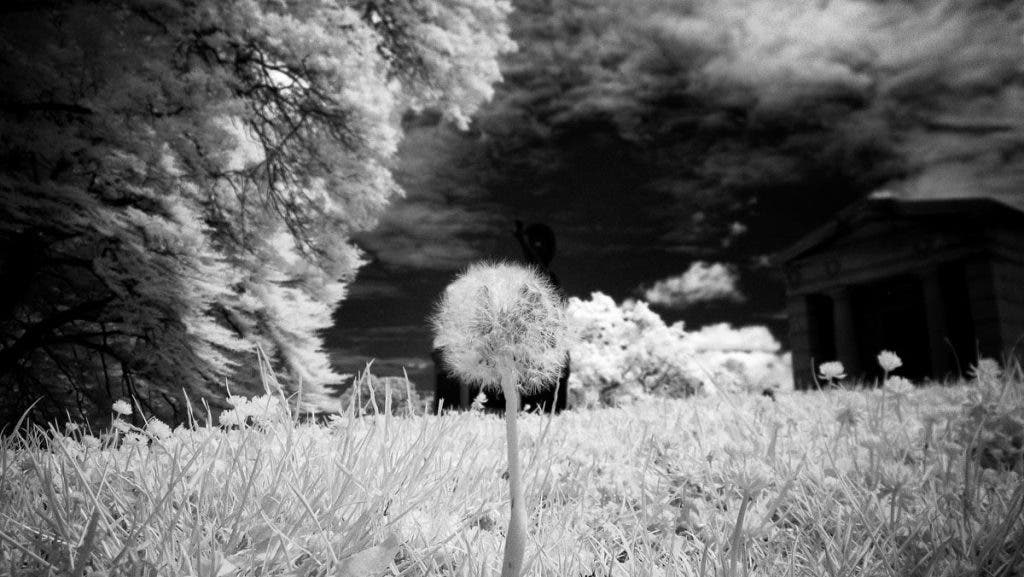
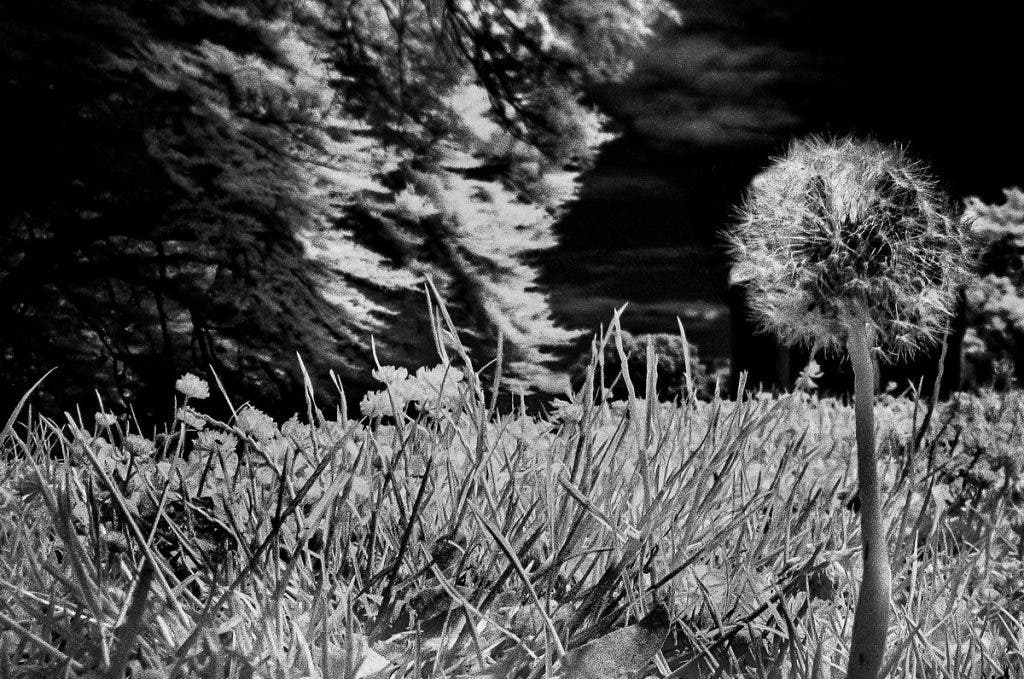
A Case Study: The Dandelion
To understand the process better, Wong breaks down one of his favorite infrared images, which he says is also the perfect example of his digital infrared photography—the dandelion.
The dandelion image shown here was photographed with Wong’s converted Canon ELPH and a 930-nanometer infrared filter. His exposure time was 1/80th of a sec. Below are his steps, in his own words, starting with the original image all the way through to the end result in all its infrared glory!
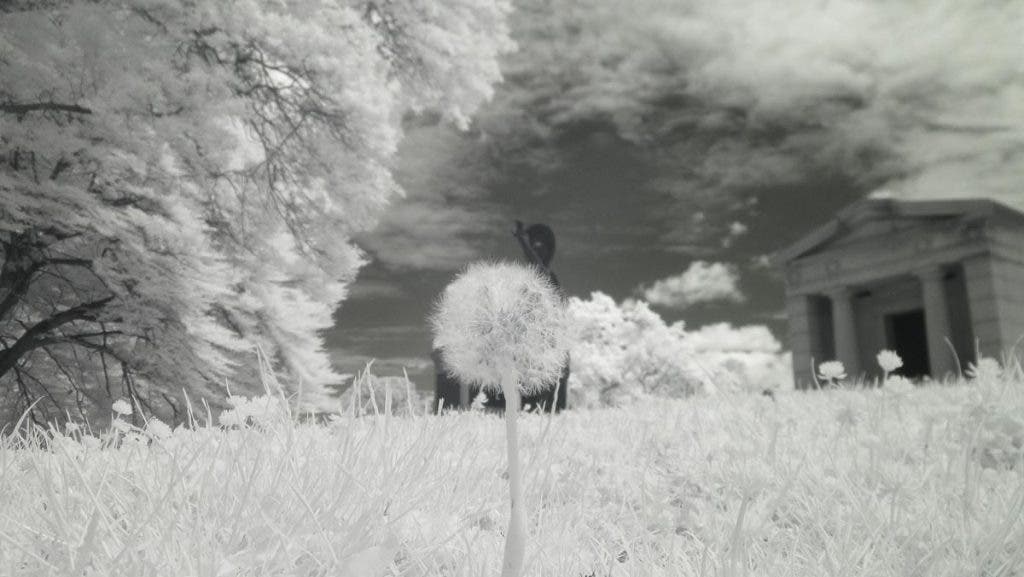

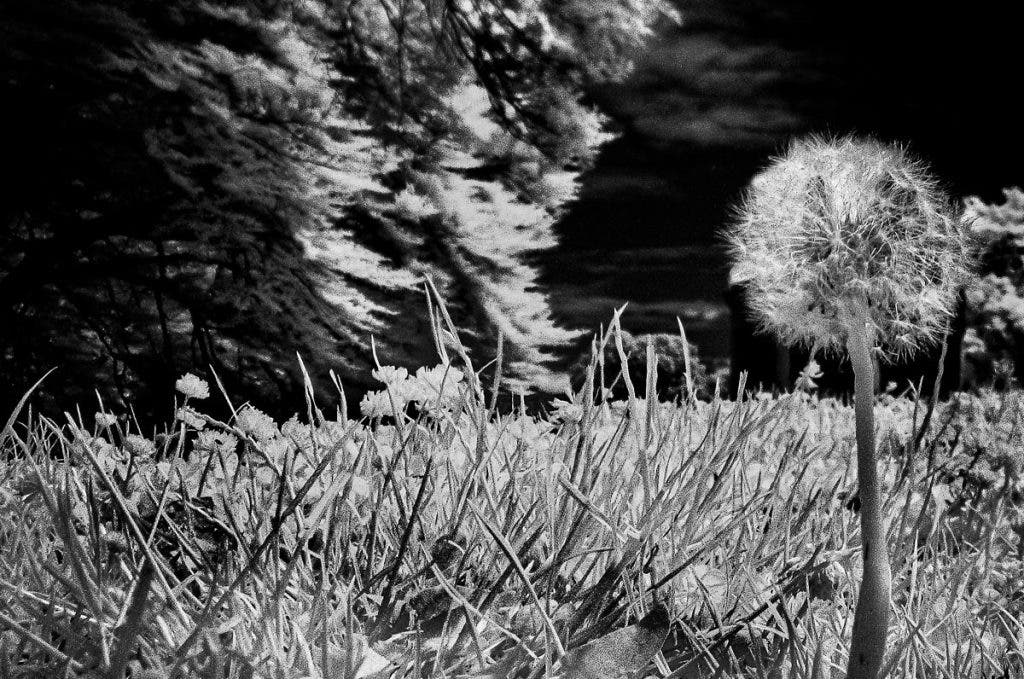
Wong’s Lightroom settings for the final dandelion image:
- Exposure: -110
- Contrast: +110
- Highlights: -43
- Shadows: -100
- Whites: +26
- Blacks: -59
- Temp: +53
- Tint: -25
- Texture: +53
- Clarity: +75
- Dehaze: +40
- Vignette: -24
- Midpoint: 50
- Roundness:+42
- Feather: 58
- Highlights: 32
- Grain: 20
- Sharpening: 75
Pushing the Boundaries
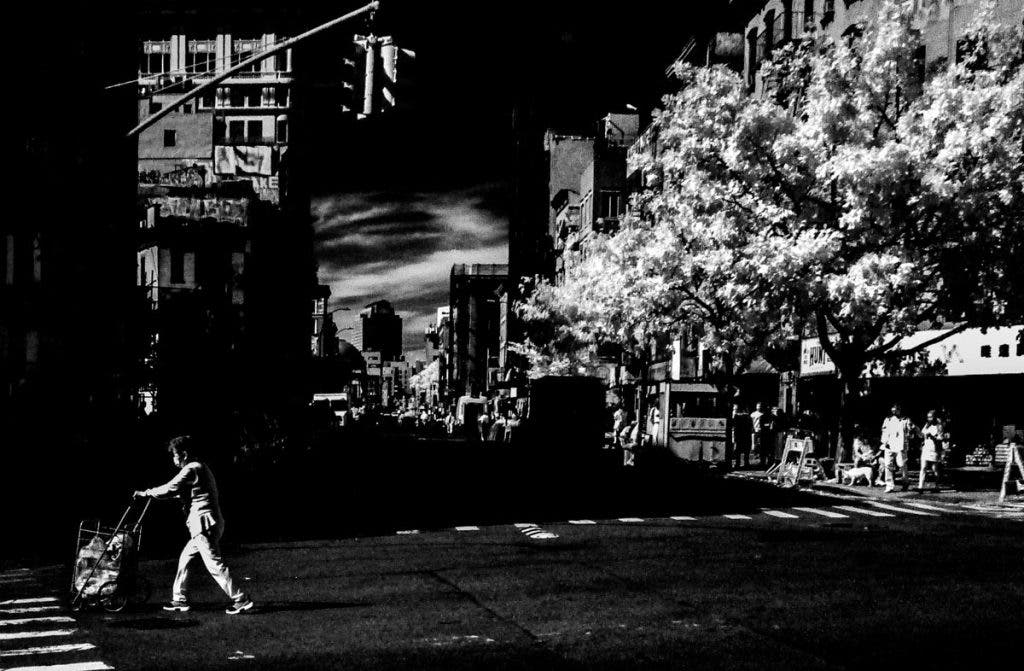
While landscape photography is a natural fit for infrared, Wong is currently pushing the boundaries by incorporating it into street photography and portraiture. He acknowledges that infrared portraits can be unsettling, as they reveal skin in unnatural ways, but he’s intrigued by the challenge.
He’s also experimenting with full-spectrum conversions, which allows him to switch between infrared and ultraviolet photography. A potential upcoming project involves capturing side-by-sideportraits in standard, infrared, and ultraviolet light. The ultraviolet spectrum particularly intrigues him as it highlights skin imperfections and can reveal hidden patterns—like how sunscreen appears black under UV light. “The problem,” he admits, “is finding subjects who want all their skin flaws front and center!”

On The Horizon
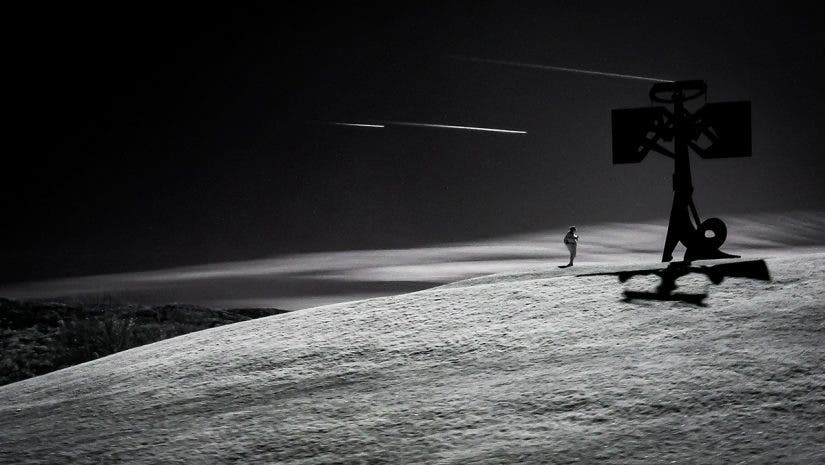
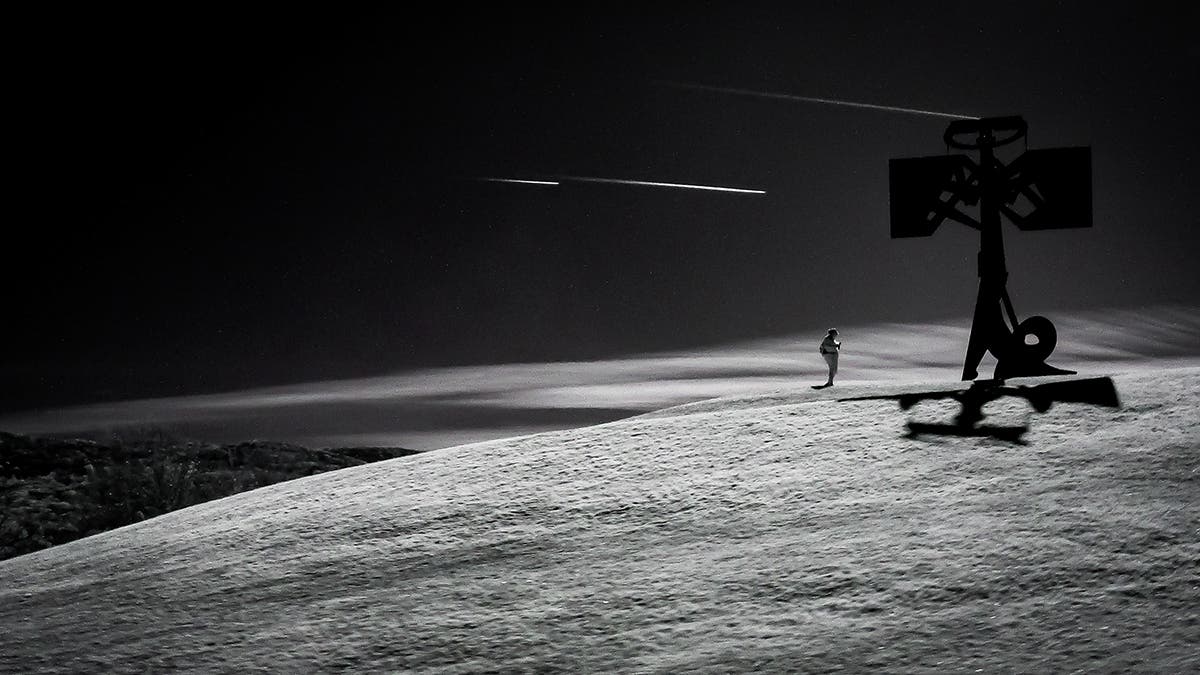
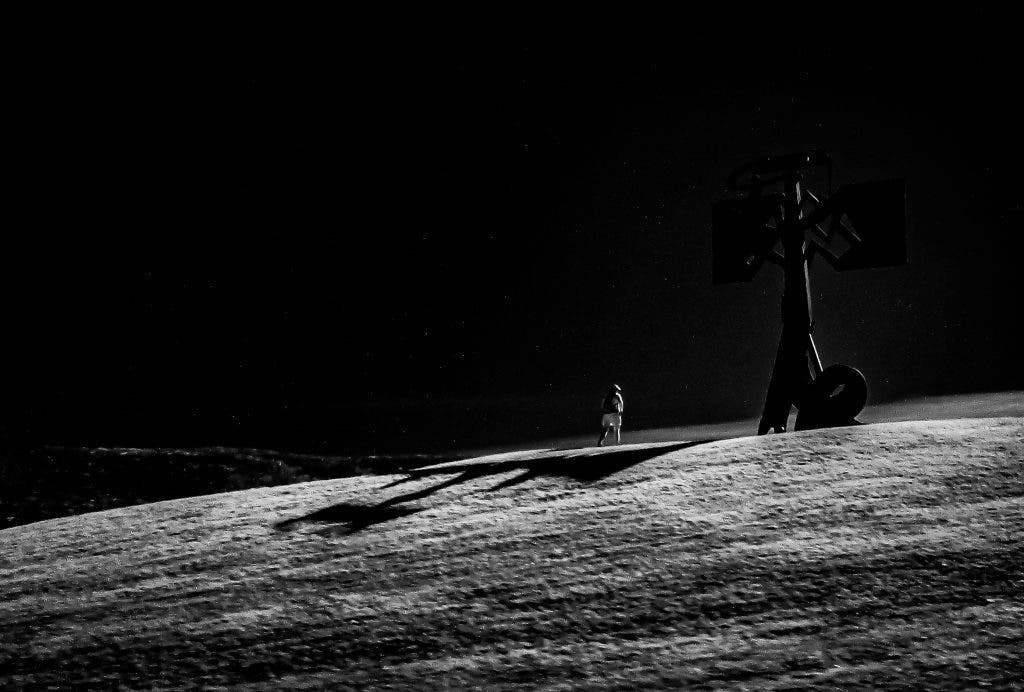
Wong recently acquired an infrared flashlight and is exploring light painting techniques, using fiber optic bristles to create ghostly, half-lit portraits. The interplay of light and infrared reflection fascinates him, and he hopes to develop a series of experimental images showcasing this unique effect.
That said, digital infrared remains a deeply personal and artistic pursuit for Nicholas Wong. Whether capturing high-contrast landscapes or venturing into new creative territories, his work continues to transport viewers into a world that feels both familiar and otherworldly. For those looking to dive into digital infrared, his advice is simple: “Experiment, embrace the unexpected, and find the infrared look that speaks to you.”
See more of Nicholas Wong’s images on his website as well as his Instagram page.
All images Copyright Nicholas Wong