While the primary purpose of film scanning is to digitize negatives and transparencies for reproduction and preservation, an increasing number of photographers are using scanning as part of a hybrid workflow.
Digitizing original film negatives or transparencies (aka slides) allows you to show your work on the internet or make inkjet prints. It can also be used to create enlarged digital negatives for contact printing with an enlarger or alternative processes such as platinum, gum dichromate, cyanotype, and many more.
Scanning is not difficult, but to do it well requires a good scanner and software, along with a few basic concepts to get the most out of both. When considering the purchase of a scanner, there are two things to consider: resolution and Dmax.
Film Scanning Resolution
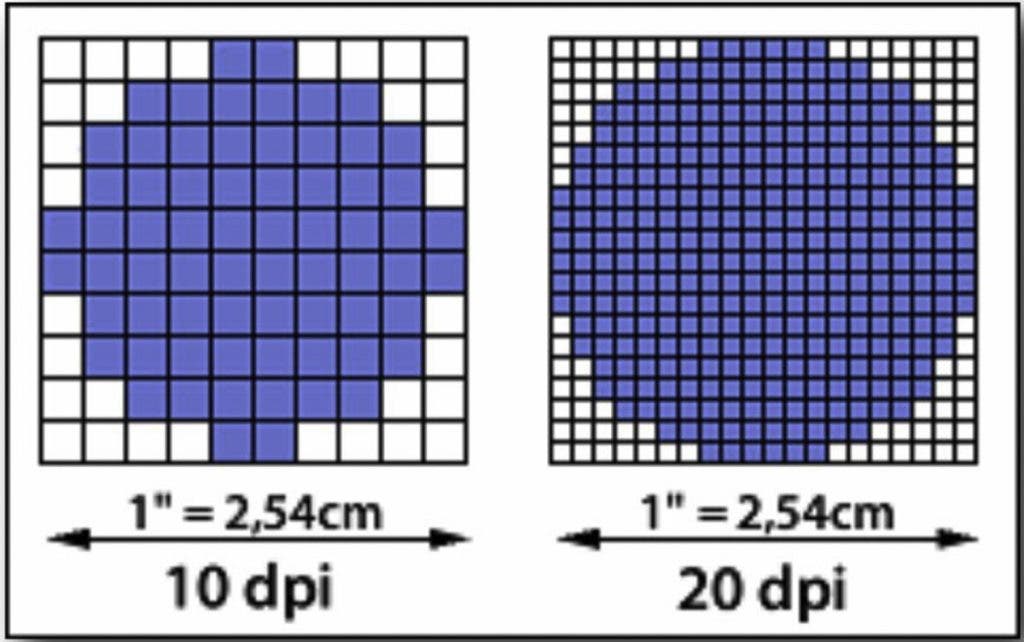
Scanning resolution is how much detail a scanner can record in a single inch of an image. When reviewing the specifications of a scanner, the lower number is optical, and the higher number is interpolated. The optical resolution is the one that matters. So, a scanner with a resolution of 6400 x 9600 dpi has an optical resolution of 6400 dpi and an interpolated resolution of 9600 dpi.
NOTE: Although it is not technically correct, most scanner manufacturers use dpi (dots per inch) when referring to both input and output. To avoid confusion, I will use dpi throughout this blog.
Optical resolution is the scanner’s true resolution as determined by the manufacturer through controlled testing. In practice, scanners will never achieve the highest optical resolution for which they’re rated. At best, the rated optical resolution is only an indication of a scanner’s potential quality.
Interpolated resolution depends on software to create pixels where there are none. While this can make an image appear smoother, it degrades the overall sharpness. When considering purchasing a scanner, consider only the optical resolution.
The scanning resolution determines the maximum size of enlargement you’ll be able to make without compromising quality. The choice of scanning resolution is dependent on the native size of the film (e.g., 35 mm, 6×7 cm, 4×5-inch, etc.) and the purpose for which the scan is intended.
Three Approaches to Scanning Resolution
There are three approaches to scanning resolution. The first is to use the largest rated optical resolution and downsample it for each use. The second is to classify the film by type (e.g., fine-grained, low or high ISO, color negative, transparency, etc.). The third is based on intended use and the size of the film format. All three methods will produce good scans; use the one you are most comfortable with.
Regardless of which method you use, no two scanners produce the same results, and even the same scanner will produce different results with different software. For that reason, you should test each format and type of film you use and compare the results. Spend a day doing this, and you shouldn’t have to do it again.
The following is the method I use: format + intended use.
Internet
Save scans intended for the internet as JPEGs with the Preset (SilverFast) or JPEG Quality (VueScan) set at 80 dpi.
35mm: 2000 to 2400 dpi saved as a JPEG
Medium Format (all): 1200 to 1600 dpi
4×5-inch film: 480 to 500 dpi
8×10-inch film: 320 to 400 dpi
NOTE: Some scanning software programs have controls that will allow you to adjust the density and color of the image prior to scanning. If you correct your images in the scanning program, you can save them as JPEGs. If you intend to post-process, save them as TIFF files.
Prints and Digital Enlarged Negatives
35mm: 2400 to 3200 dpi
Medium Format: 1200 to 1600 dpi
4×5-inch film: 650 dpi
8×10-inch film: 320 to 400 dpi
These recommendations are for prints up to 10×15 inches with a printing dpi of 300. Save these scans as TIFF files so you can edit them in post-processing.

Film Scanning to Archiving Originals
Though it may be counterintuitive, using the highest resolution setting does not result in better scans. Instead, it accentuates the grain and takes up more space on your hard drive without providing additional information in the highlights or shadows.
Scan all film sizes at least one setting below the maximum optical resolution and save them in uncompressed TIFF or RAW files. For example, if the highest optical resolution is 6400 dpi, scan at 4800 dpi.
Density Range(DR)
A scanner’s minimum density (Dmin) will usually be less than 1.0, with the maximum density (Dmax) as high as 4.0.
The difference between Dmin and Dmax determines the dynamic range (DR) of the scanner. So, if the Dmin of your scanner is 0.2 and the Dmax is 3.9, the DR of the scanner is 3.7. When possible, choose a scanner that has a Dmax of at least 3.5.
TYPES OF SCANNERS FOR FILM
There are three types of scanners for film: drum, dedicated, and flatbed. Digital cameras can also be used to scan negatives, but that is the topic for another time.
With a drum scanner, the artwork is attached to a drum that spins while a laser beam activates the recording sensors. A drum scanner can have optical resolutions as high as 11000 dpi. This is the scanner to use for collector’s edition books.
Dedicated film scanners have higher optical resolutions than flatbed scanners, but less than drum scanners.
These Dedicated film scanners are limited to 35mm and/or 120 film. If you can live with this limitation, then the Plustek OpticFilm 8300i with an optical resolution of 7200 dpi, DR 3.6, and infrared dust removal is one of the best options for film negative and transparency scanning. Use a dedicated film scanner for archiving your negatives.
Flatbed scanners such as the Epson Perfection V850 Pro are more versatile in that they can scan large format negatives and prints. The scan quality is not as good as a dedicated film scanner, but good enough for any purpose except collector’s edition books—for that, a drum scanner is the best choice.
The V850 has an optical resolution of 6400 dpi and a DR of 4.0. It can scan in 48-bit color mode and 16-bit black and white. It is also capable of fluid mount scanning, which can be used to effectively remove scratches and reduce grain. Fluid mount is especially effective for scanning large format negatives intended for display.
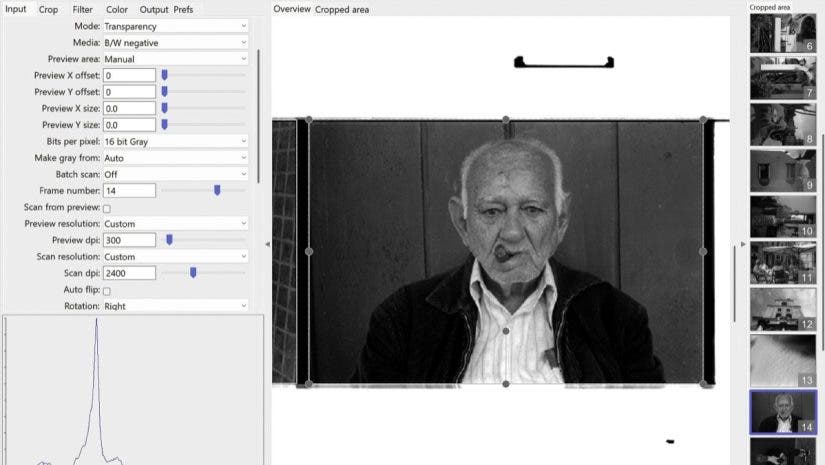
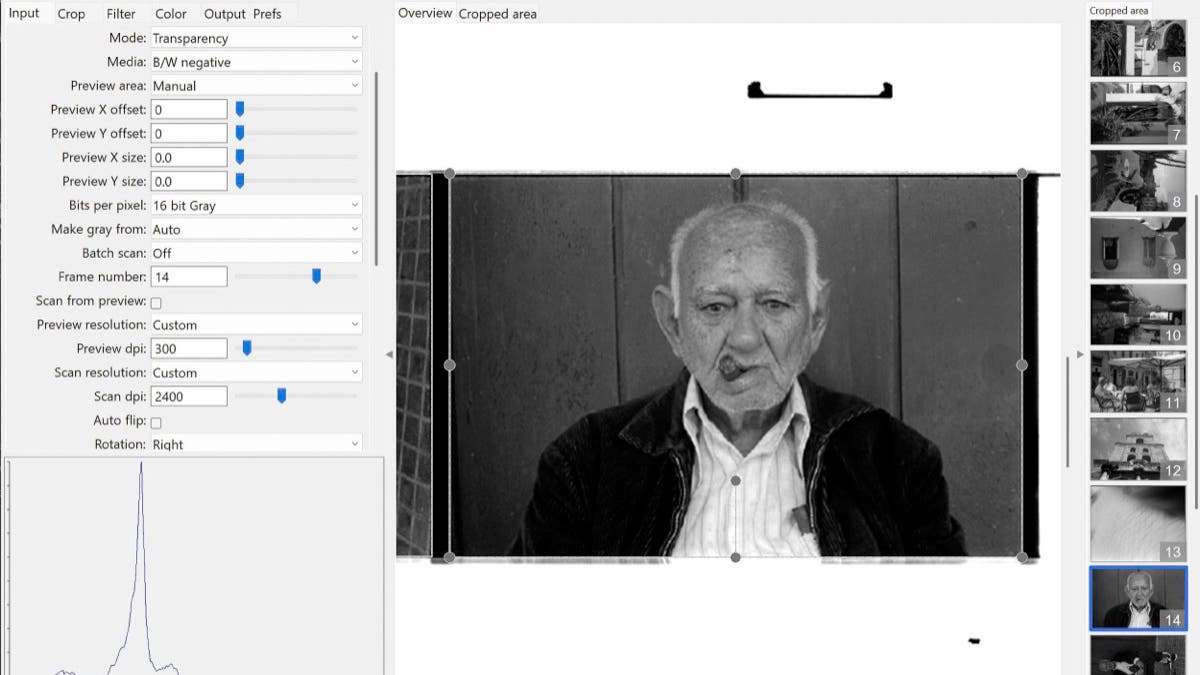
Film Scanning Software
Even the best scanner relies on the use of good software to create the highest quality scans. Most scanners come bundled with dedicated software, such as Epson Scan or Plustek Quick Scan Plus. The bundled software works well with the scanners it is intended for, but is often not updated by the manufacturer and usually has limited features.
For more complete control of your scan, try using third-party software, such as VueScan or SilverFast SE Plus.
VueScan is known for its compatibility with a wide range of scanners, including many that have been discontinued. It is intuitive to use, containing many advanced features, including infrared dust removal (if your scanner supports infrared), multi-exposure, and batch processing.
SilverFast SE Plus is a more robust program that also supports infrared dust removal, multi-exposure, and batch processing. SilverFast allows more control over the process. It also has a full-auto feature, Workflow Pilot, that produces great image quality.
Both VueScan and SilverFast have trial versions. If you’re new to scanning, I recommend learning with the software that comes with your scanner. Once you have the hang of it, try the VueScan and SilverFast trial versions and decide which one works best for you.