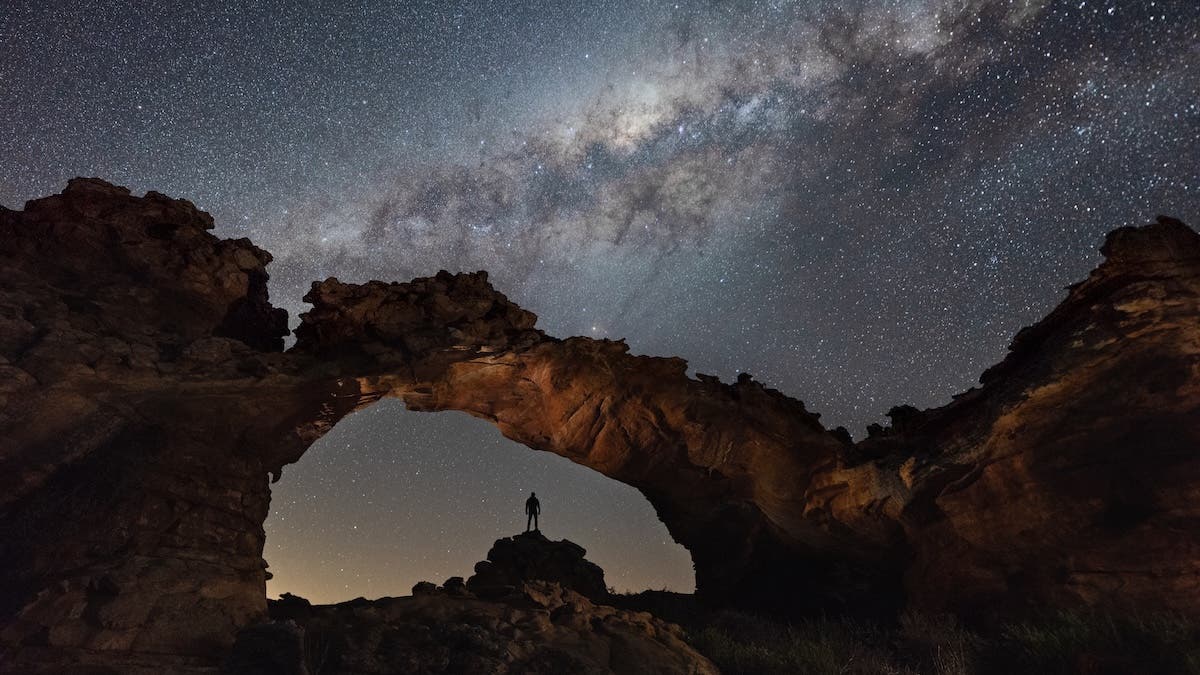
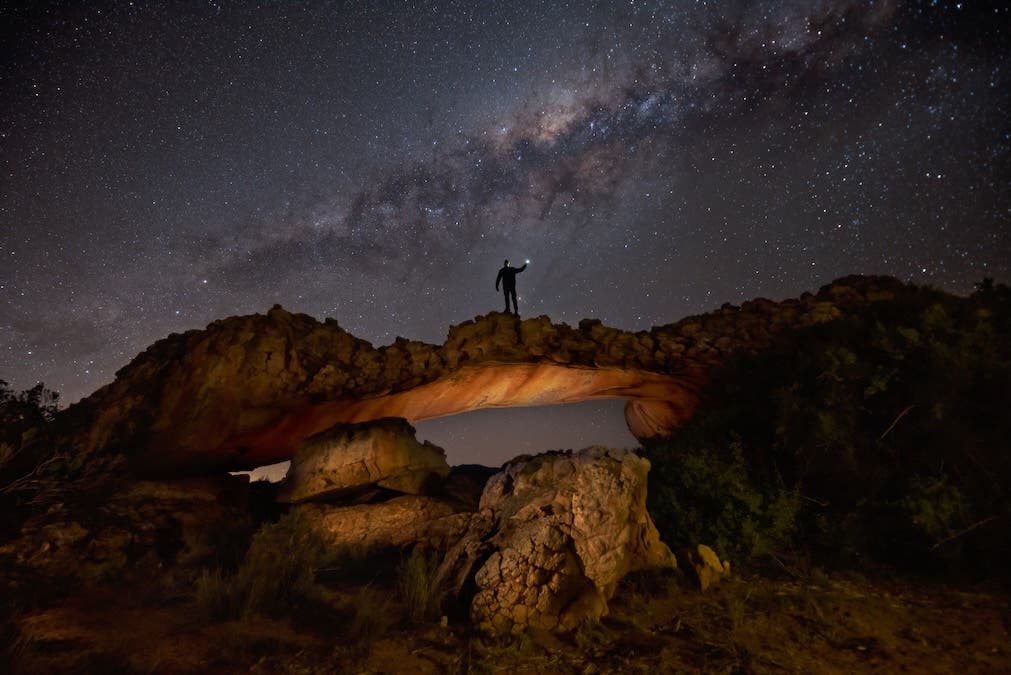
My first mission to capture the Milky Way in the Cederberg mountains of South Africa ended without a single photograph. We journeyed for hours to reach the impressive rock formation of Wolfberg Arch for night photography. We realized, to our chagrin, that the Milky Way would not rise near the arch and that the cloud obscured the night sky. The trip was a hard lesson about the importance of planning and understanding the conditions for astrophotography.
This guide will walk you through the essential steps of planning a successful night photography hunt, from finding the right location and a perfect dark sky to packing the right gear and considering your camera settings and light painting.
Finding Inspiration: Location and Composition

The first step is finding a location near your city with little to no light pollution. Don’t settle for merely shooting the sky. To create a compelling image, you need to ground the celestial in the terrestrial. Look for unique structures, appealingly shaped rock formations, ancient trees, or interesting ruins. The goal is to combine a striking landscape with the canopy of the night sky to help the viewer connect with our place in the universe.
Timing the Cosmos: Seasons and The Moon
You cannot force the sky to cooperate; you must work on its schedule of the universe.
The Milky Way Season
If your goal is the Galactic Core, the densest and brightest collection of stars in the centre disc of the Milky Way, you must know when it is visible.
- Northern Hemisphere: The core is generally visible from March to October.
- Southern Hemisphere: The core is generally visible from February to October.
Out of these seasons, you will have different views with the core only partly visible, low on the horizon, offering a far from ideal scene for your objectives. Being in “Milky Way Season” gives you a plethora of opportunities: you can shoot wide-angle astro-landscapes, star trails, or use a telephoto lens to capture detailed, texture-rich images of the Milky Way core itself.
The Moon Phase
Ideally, plan your mission during a new moon, when the sky is darkest, and the pale crescent is only briefly visible around sunset/sunrise. Moonlight competes with starlight, and a bright moon will wash out the Milky Way, leaving your images lacking detail and contrast.
If you cannot shoot during a new moon, timing is your savior. Look for days when:
- The moon sets before the galactic core rises.
- The galactic core sets before the moon rises.
This window of total darkness allows you to capture the stars without the distraction of moonlight. Having said that, a little bit of light from the rising moon, or when the night just begins and the blue hour is towards its last breath, can give you stars against vivid blue skies. Here’s an example of such a Nautical Twilight photo, i.e., when the blue hour ends and the night begins. The galactic core in this photo is behind the top of the tree.

The Digital Scout: Planning with PhotoPills
Once you have an inspirational location and a date, you need precision. The Earth is spinning at 1,000 miles per hour; you cannot afford to figure out your composition while the Galactic Core is drifting out of frame.
PhotoPills is the go-to app for this phase. It is a must-have tool that removes the guesswork.

Key Features of PhotoPills
- Night AR: This uses augmented reality (AR) to show you exactly where the Milky Way will rise, where it will be at a specific time, and where the Celestial Poles (North or South) are located for star trails.
- NPF Rule Calculator: This helps you calculate the precise shutter speed for your specific lens and camera combination to get pin-point stars without trailing.
- Hyperfocal Distance: Tells you exactly where to focus to keep all elements from your foreground to the distant stars acceptably sharp.
Planning Workflow
I prefer to start my research on a large monitor using Google Maps. I scour satellite imagery for interesting features, such as rock formations or ruins. Once I find a spot, I copy the coordinates and paste them into PhotoPills.
From the comfort of home, you can punch in the coordinates and your chosen date. You can scrub backward and forward in time to verify that the moon won’t interfere and to align the Milky Way perfectly with your chosen foreground. This virtual scout gives you a near-precise feel for the shoot. When you arrive on location, you aren’t searching; you are executing a plan.
The Physical Scout: Arrive Early
Digital planning is essential, but it doesn’t account for everything. Always arrive at your location early, while it is still broad daylight.

Time Management
- Refine Compositions: Find the exact tripod placement.
- Identify Obstacles: That perfect angle on Google Maps might be blocked by, for example, a large bush in reality.
- Shoot Golden Hour: Take advantage of the sunset to capture landscape images before the stars come out.
Safety and Security
Scouting in daylight also boosts your confidence. Navigating rocky terrain in pitch darkness is difficult. Furthermore, bring a friend. Not only is it safer to have someone watching your back in the dark (so you don’t jump every time a leaf falls, thinking it’s a leopard), but an assistant is also invaluable for lighting. They can serve as a model or help you with complex light-painting setups.
Prepare for Light Painting
Sometimes the foreground is too dark, even for a long exposure. This is where light painting comes in. Prepare yourself for a few light painting scenarios.
Gear for Light Painting
I often use my headlamp, but small, controllable lights like the Aputure MC with a diffuser are excellent. You can place them in the scene, hidden behind a rock or tree, and control them via your phone to adjust brightness and color without running back and forth.
The Multi-Exposure Blend
Learn the concepts of layers and blending in tools like Photoshop in advance, or at least be aware of them. This will help you realise that, because light painting often requires trial and error, you can combine exposures in post-production.
For example, I combined three exposures:
- Base Shot: My friend stood still, holding a globe (no lights, just silhouette).
- Highlight: I lit the arch from below using a light turned on for just a few seconds.
- Foreground: I painted the foreground softly from a side angle (not behind the camera) for one second.
The Essential Gear List
Planning extends to your backpack. Missing a single cable or battery can ruin the night.
- Camera & Lens: A full-frame camera is ideal for noise performance. You need a fast, wide-angle lens (f/2.8 or faster is best). A telephoto zoom is also great for isolating the core. I do shoot with mid-range lenses like 24-70mm and 50mm as well.
- Tripod: It must be sturdy. Micro-vibrations ruin long exposures.
- Lighting:
- Headlamp: Ideally, one with a Red Light mode to preserve your night vision.
- External Lights: Aputure MC or small LED panels for static lighting. These are optional.
- Flashlight: A distinct beam for light painting.
- Power: Night photography involves long exposures and cold temperatures, both of which drain batteries fast. Bring at least two spares and a power bank.
- Comfort: Even in summer, 3 AM is cold. Bring layers, a warm jacket, gloves, sturdy boots, a snack, and water.
- Smartphone: Pre-loaded with PhotoPills and offline maps.
- Shutter Release Cable: If you want to shoot star trails, this is recommended, and we will discuss technique below. The alternative is to use the built-in intervalometers in your camera, if available.
Plan The Execution

The execution checklist below is an essential part of the planning as well. You need to verify whether some of the features listed below are available on your camera and which menu they are in. Furthermore, for star trails, you need a memory card that can store a good few hundred photos of the night sky. Before you arrive at your location, use this checklist to ensure you don’t miss the shot.
- Cleaning: Clean your lens elements and sensor before leaving home, and remove UV filters.
- Focus: Learn how to switch to manual focus using a button or menu. You will need to switch your lens to manual focus and use “Live View” to focus.
- Stabilization: If your lens or camera body has image stabilization (IS/VR/OSS), turn it off as if you were using a tripod; this can actually cause blur.
- The Settings: Learn the NPF Rule through the PhotoPills app and your camera settings. (Daniel to insert the link of our previous article we wrote that has the settings).
Scenario A: Shooting the Milky Way (Single Exposure)
You will need to set a 2-second timer to avoid camera shake when pressing the shutter. If you are going to take multiple exposures for light painting, I suggest using a remote shutter release, as button-press might move the tripod legs fractionally, obliging you to manually align your multiple exposures in post-processing back home.
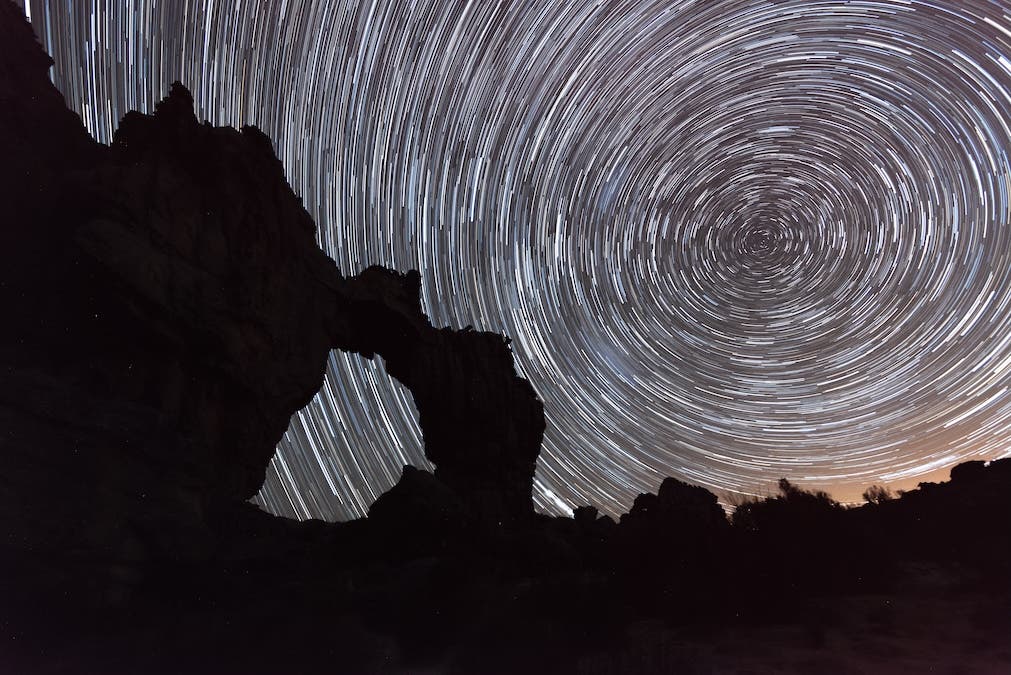
Scenario B: Shooting Star Trails
The following is part of your plan:
- Locate the Pole: To locate the Celestial Pole, north or south, depending on your hemisphere, learn PhotoPills Night AR or basic sky knowledge.
- The Vital Setting: Find how to turn off Long Exposure Noise Reduction in your camera. If this is on, the camera will take a “dark frame” after every photo to reduce noise (e.g., a 30s photo takes 60s to process), resulting in large gaps in your star trails, making them appear as dotted lines rather than smooth streaks. Rookie mistake to forget this!
- The Intervalometer: A shutter release cable lets you take continuous photos of star trails without gaps. Otherwise, learn how to use your camera’s built-in intervalometer or an external remote, setting the interval to 1 second (or as short as possible). You generally need at least 45–60 minutes of continuous shooting to get decent trail lengths. You can then use post-processing software such as StarStaX to create the full vortex image, or even use individual images to create time-lapses.
Final Thoughts
Embrace the journey from inspiration to the final click of the shutter. Remember that you are not merely taking photos; you are capturing the heavens, evoking emotions that resonate deeply within us, and recording what has fascinated man since the dawn of time. So, inform yourself well and prepare soundly to capture night photography that stirs the soul.