Intrigued as I have always been by the idea of model photography, the shift from my customary landscape work posed its challenges. While I felt comfortable outdoors, the prospect of interacting closely with people made me apprehensive, as contrasted with the solitude of capturing nature. That very unfamiliarity, though, also sparked the desire to learn and grow in a new direction, and I embraced the challenge of stepping into unfamiliar territory.
In this article, I’ll share my experiences and insights from my first steps into model photography to encourage the beginner to break the barrier and start the quest. Whether you’re considering making a similar leap or are already on your journey, this guide aims to inspire you, offering practical tips and confidence-boosting advice.
Test Shoots and Existing Gear: The Building Blocks
In the past, I declined photo shoots because I felt I lacked proper equipment and was inexperienced in working with models. My greatest anxiety was my limited understanding of posing – what postures work for a shoot and what emotions they convey. I also had hesitations based on my reluctances, such as physically adjusting a model.
I followed the approach for learning:
Practice with friends and family
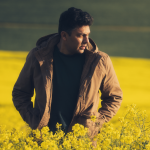
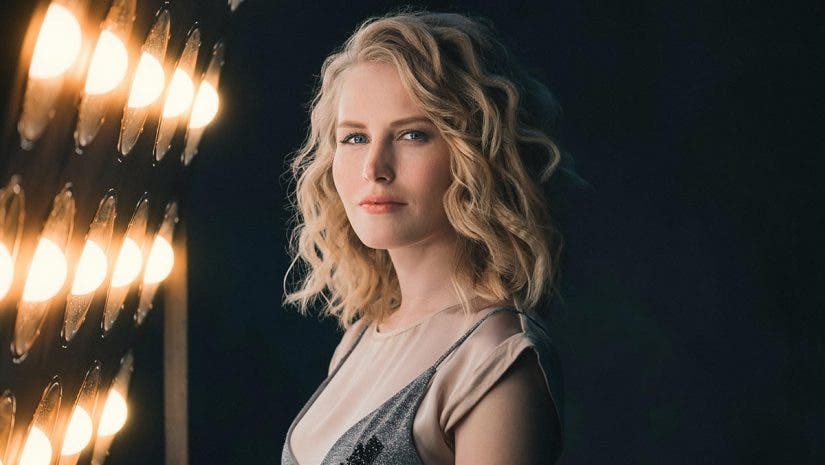
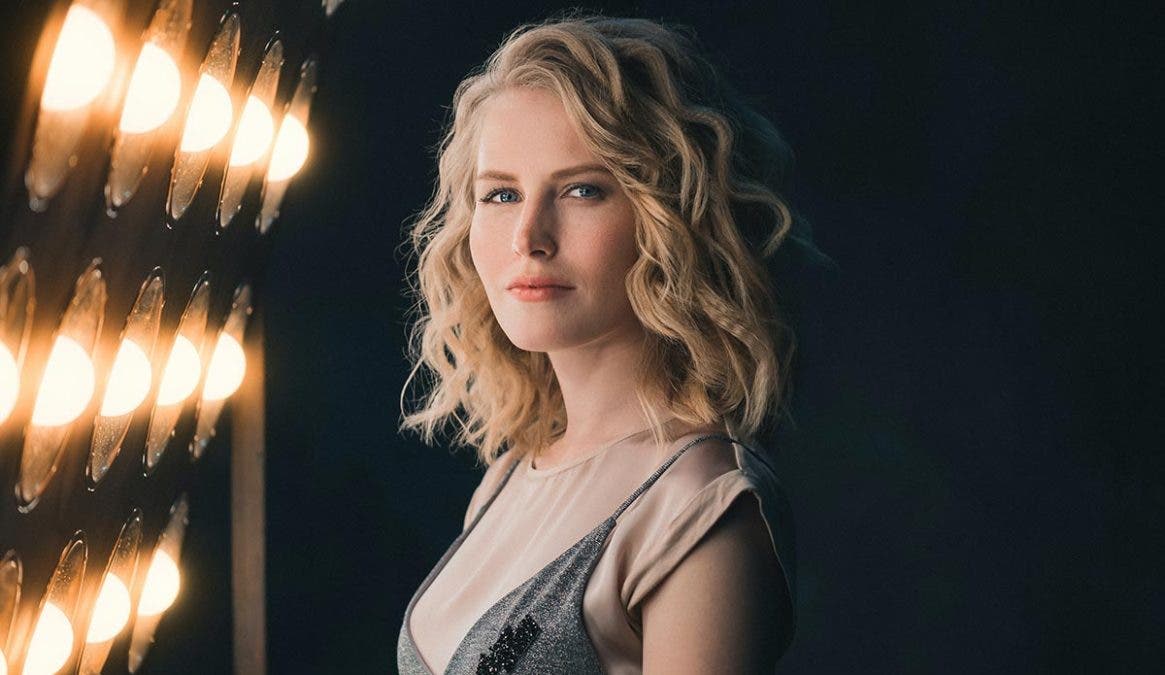
Approach those in your circle and also seek out individuals who want test shoots for their portfolios. The image below is from an earlier shoot with a friend who agreed to be my model. I could practice without client pressure. We had fun, and she loved the results. I used my existing full-frame camera with a 70-200mm f2.8 lens without acquiring any special gear and specialized lighting, just natural sunlight.

I converted my garage into a studio by hanging cheap black cloth and asked my son to pose. Using borrowed inexpensive continuous lights meant for video shooting on either side, I sprayed him with a water bottle, and we captured a memorable photo.

Gear doesn’t matter
As cliche as this phrase sounds, it holds true, so begin by using the equipment you already own. If you’re considering making new purchases, do this gradually as you get a feel for your shooting preferences. I started with nothing more than my landscape photography camera and lenses. With time, I bought a flash and a cheap five-in-one reflector.
Gain Practical Insights: Learn from the Pros
There’s great benefit in observing those experienced in the field. I embraced simple steps to expand my knowledge.
Assist Others

Collaborating with experienced professionals allows you to observe their workflows, lighting setups, and communication styles with models. This exposure also helps you refine your own methods for posing and directing, thus enhancing your confidence for future shoots.
Online Learning
Reading articles, watching tutorials, or enrolling in an online course can significantly broaden your knowledge and enhance your skills. Such resources offer valuable insights from experts that you can apply in real-world situations.
Photography Workshops
Engage in immersive workshops that offer practical experience and guidance. In a relaxed setting, you will become familiar with lighting equipment and practical techniques, enabling you to ask questions and experiment to gain practical experience.
Learn to Communicate: Determining Client Requirements
I always ask people who approach me what the purpose of the shoot is. This question breaks the ice and helps guide the direction of what is needed. Referring to my subjects as “models” creates unnecessary pressure; seeing them simply as “people” takes the strain off the amateur photographer.
Shoot requirements, such as personal portfolios, commercial or brand needs, dictate specifics like wardrobe, location, and style. For casual shoots, there’s more flexibility. Whatever the case, focus on discussing preferred poses, outfit choices and props, and ask for reference images to ensure alignment on the final look. Your participation should be collaborative; offering suggestions eases the process.
Should the budget allow, don’t hesitate to explore options like renting equipment, booking a studio, or collaborating with an experienced photographer.
Let’s break down a few shoots:
A casual shoot in natural light
The shot below is for a tourist visiting Cape Town. There were no commercial requirements. We chose the wardrobe and poses together. Because it was a low-budget shoot, I didn’t hire an assistant and shot in natural light without extra equipment.

Requirements for a magazine
The model approached with requirements to shoot for a magazine portfolio. She selected her own wardrobe and list of poses. I used an inexpensive 50mm f1.8 prime lens. My assistant held a five-in-one reflector, a cheap but handy investment. I also mounted a flash on the camera. I brought an old leather briefcase and a wooden stool as props.

Collaborating and specialised equipment
To shoot this ballerina and trainer in action required specialised lighting and camera setup, so I joined forces with a fellow photographer. The shot was taken with a fast 35mm prime lens and off-camera flashes, ensuring proper exposure for both subjects and the background.

Get Comfortable: The Human Connection and Posing
During a shoot, the model suggested a pose. She struggled with her hair, so I offered help. I improvised when she expressed awkwardness about her hands, saying, “Your hand placement has been great — holding your hair, on your hips, or touching the trees adds beauty to the image.” She smiled and nodded as I adjusted her hand. Remember, your subject is just as willing to take direction as you are to refine your composition.

If you’re new to posing, follow these steps:
- Bring reference images as examples you can discuss.
- There are tons of free and paid PDF guides that help beginners.
- After taking a few photos, show them to the model. Zoom in on the images to check that they are in focus and that you are both satisfied. Shoot again if necessary.
- Keep discussing the images, then improvise with your variations to the reference images. I prefer sharing and discussing with my model as we go along, as it boosts their confidence in front of the camera.
Feel free to try simple poses; these unaffected, less staged shots can be powerful.

The success of the shoots depends upon effective team collaboration. Set the mood for the entire team.
Editing: The Final Touch
The shoot’s purpose determines the images’ final look and feel. However, if there are no strict commercial requirements, collaborate and get feedback from the subjects, especially if the project is for personal use.
- For social media, maintain a similar look and feel for editing, for example, color grading choices.
- Numerous free and paid presets are available online. If you favour a particular aesthetic, use it as a starting point and save your variations as presets.
- Remove blemishes and stray hairs and do touch-ups for perfect skin tones. Don’t forget to remove dust spots and objects that are eye-sore.
Conclusion
Starting model photography challenged me, but with practice, patience, and a desire to learn, I have built my confidence and improved my skills, and I am enjoying the journey. Photographing people combines human connection with technical skills. Take the leap – try your first model shoot, learn from your mistakes, and grow.