Night sky photography and astrophotography make great getaways from the city. Light pollution gets worse every year, but there are still places where you can see many stars within an hour or two of most locations. Noctourism is rising, so more dark sky places are offering overnight accommodations as well. Finding the perfect spot for night sky photography means looking for a great field of view, avoiding light pollution, and picking the right time to go. I’ll help you find the clearest views with minimal light pollution for your next night sky photography outing.
How Dark is Dark Enough for Night Sky Photos: The Bortle Scale
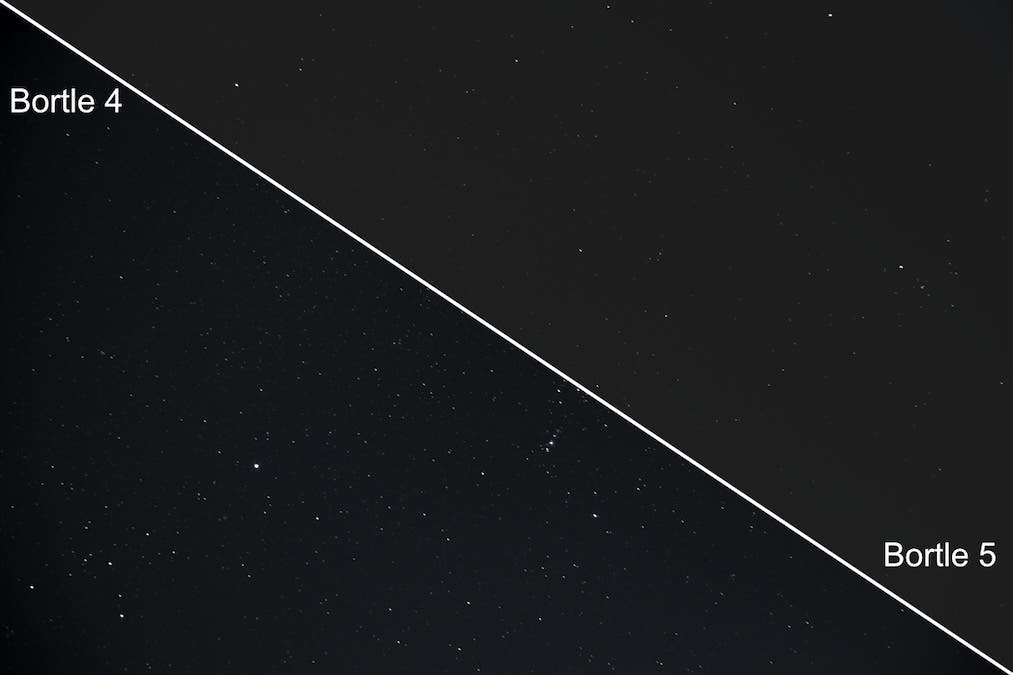
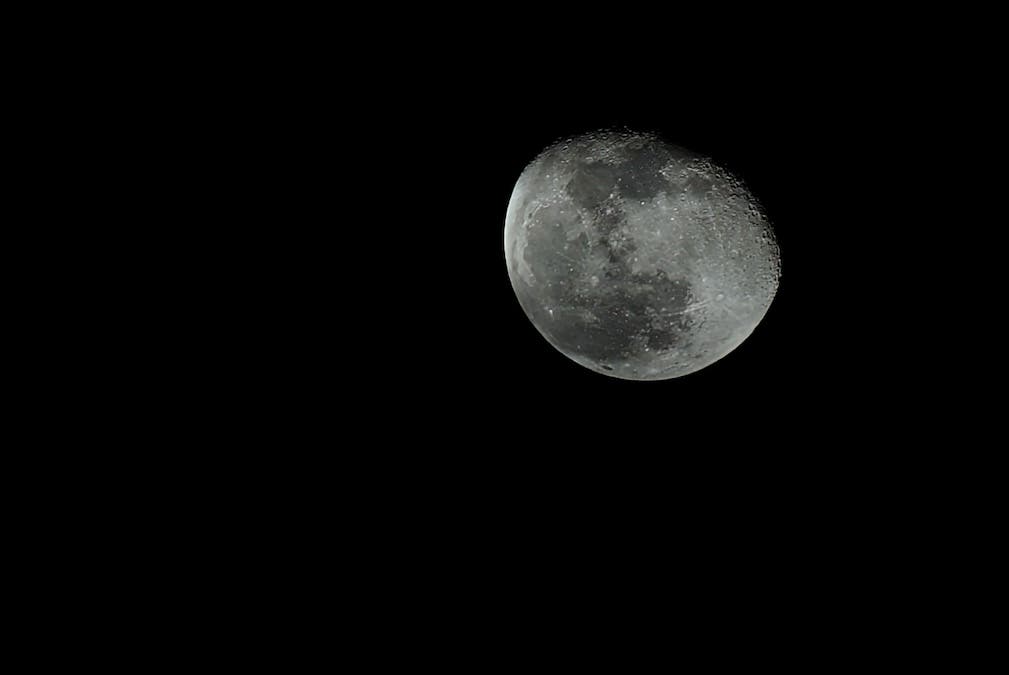
Before you get started with night sky photography, you need to know about the Bortle Scale. Much of how dark is dark enough depends on what you want to photograph. For example, the moon usually only requires a short trip out of even the biggest cities. However, for stars, planets, and the Milky Way, you’ll need to head for less populated areas and even avoid the moon in many cases. Sky light levels and light pollution are often visualized using the Bortle Scale.
How the Bortle Scale Works
The Bortle Scale estimates the light pollution in an area and measures it in 9 levels. Class 9 is the worst, and common in large cities, where the sky is washed out, and the moon might not even be visible. Class 1 is a dark sky location with little to no light pollution, and the sky is awash with stars.
What You Can See at Each Bortle Scale Level
| Bortle Scale Summary | ||
| Areas Typical of Each Class* | Faintest Magnitude Visible on Moonless Clear Night | |
| Class 9 | Inner City | > 4.0 |
| Class 8 | City | 4.1 to 4.5 |
| Class 7 | Urban/Suburban Transition | 4.6 to 5.0 |
| Class 6 | Bright Suburban | 5.1 to 5.5 |
| The Milky Way begins to become visible. | ||
| Class 5 | Suburban | 5.6 to 6.0 |
| Class 4 | Suburban/Rural Transition | 6.1 to 6.5 |
| Clusters M15, M4, M5, and M22 are becoming visible. | ||
| Class 3 | Rural | 6.6 to 7.0 |
| Zodiacal light increases. | ||
| Class 2 | Typical Dark Sky | 7.1 to 7.5 |
| The Milky Way becomes structured and detailed. | ||
| Class 1 | Excellent Dark Sky | 7.6 or greater |
*Note that small cities may score more like suburban areas if isolated, and rural farmland could score higher like suburban areas if in close proximity to large cities.
Finding a Night Sky Photo Location

You’re not alone in hunting a great night sky viewpoint. Besides photographers, stargazers and astronomy buffs are all interested in those same views. Dark sky parks, astronomy club events, state and federal parks, and private groups offer great access to the night sky.
What To Look For in a Night Sky Photography Location
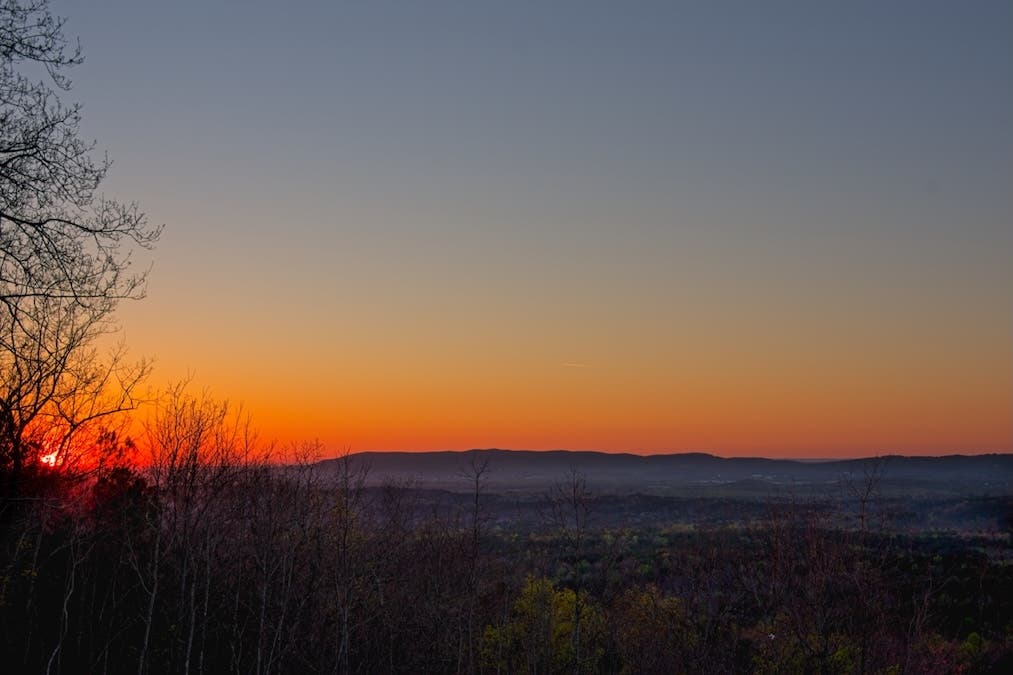
Picking a spot with a wide field of view and as few obstacles as possible makes night sky photography much easier. Often, this means looking for open fields, scenic mountain overlooks, or lakes where there is little between you and the horizon. Here is my checklist for finding a great night photo spot.
- Darkness Rating: Unless I’m photographing the moon, I typically aim for no more than Bortle 3 or 4. Astrophotography apps and programs, such as Light Pollution Map, help you estimate light levels.
- Big Sky: I look for places with wide views of the night sky and horizon. I also look at which direction the view is facing. Google Maps Street View is a big help for previewing locations.
- Publicly Accessible: Sometimes, even public lands have restrictions; for example, state parks often close at sundown unless you are camping.
- Travel Time: Unless I’m staying overnight, I look for sites within a 2-hour one-way drive.
- Safety: Safety usually means preparing ahead. I look for sites where help is readily accessible, or at least where there is cell phone service. I also want terrain that isn’t overly hazardous (steep slopes are easy to miss at night). Plus, I keep major wildlife dangers in mind. For example, I live in alligator country, so I don’t shoot in their habitat at night in the summer. I also take a friend with me when shooting at night.
Popular Night Sky Photo Locations
Astronomy organizations like DarkSky work to encourage low-light locations and certify areas with public access to help you find places to view the night sky. Some popular public lands locations to photograph the night sky with minimal light pollution include:
- Big Bend National Park in Texas: Bortle 1
- Grand Canyon National Park in Arizona: Bortle 1
- Yellowstone National Park in Wyoming: Bortle 1/2
- Yosemite National Park in California: Bortle 1
- AMC Maine Woods International Dark Sky Park in Maine: Bortle 2
- Arches National Park in Utah: Bortle 2
- Stephen C. Foster State Park in Georgia: Bortle 2/3
- Voyageurs National Park in Minnesota: Bortle 2
- Cape Lookout National Seashore in North Carolina: Bortle 3
- Cherry Springs State Park in Pennsylvania: Bortle 3
- Staunton River State Park in Virginia: Bortle 4
Scout Ahead
Once I’ve narrowed down a potential location, I scout in the daytime whenever possible. Looking at a site in the daytime helps you more easily identify potential hazards. It’s also much easier to spot obstructions to your view, plan tripod setup locations, and note safety concerns in full light.
For sites I can visit often, I like to start with moon photography before planning a star-photo trip. My personal rule of thumb is to watch for deep shadows cast by the moon on the ground to help predict darkness levels when the moon sets.
Timing Matters: Planning Your Star Photography Trip
What you want to shoot and your location dictate when and where you go. For example, the Milky Way Galaxy Core is seen at different times in different seasons. In the spring, it’s seen (in the U.S.) in the early hours before dawn, and in summer or fall, it’s seen just after sunset. Sites like Stellarium can help you visualize the night sky to plan outings.
When planning your astrophotography trip, keep in mind:
- Moon rise and set times
- Moon phase
- When the stars/planets you are targeting rise and set
- What portion of the sky needs to be visible to see your targeted objects
- Will the sky be clear or full of clouds (apps like ClearSkyDarkSky give forecasts and near-real-time cloud data)
What Camera Gear Do You Need for Night Sky Photography
Once you’ve found your night sky location, be sure you have the right gear. It’s fine to start small and work up as your skills increase. The more comfortable you are with your astrophotography camera settings, the more you’ll be ready to move up to more advanced gear. An entry-level DSLR or mirrorless camera (capable of exposures of at least 6 seconds) and a tripod will get you started. Later, you can add a star tracker to allow longer exposures, a telescope, and a telescope adapter (T-Ring) to attach your camera body to the telescope for deep-sky photos. Prepare for your first Milky Way shoot with these tips from Austin James Jackson.