Shooting a cityscape at night is as different from shooting the same scene during the day as, well, night and day.
Neon signs, building lights, street lamps and the lights from passing cars – set against a darker background and foreground of sky, buildings and streets – create beautiful, colorful, magical scenes. But they are also high-contrast scenes – scenes containing range of brightness to darkness – and require certain shooting techniques.
Here are tips to help you capture not only the scene you see in your camera’s viewfinder, but also the exciting feeling of the original experience. After all, if a picture conveys a feeling or an emotion, it’s a successful photograph.
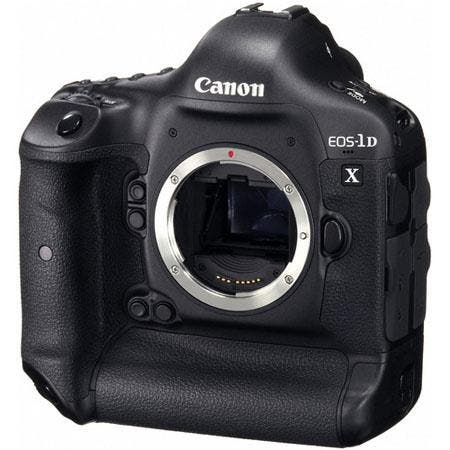
The pictures in this lesson were all taken in South Beach, Miami with my Canon EOS 1D digital SLR and Canon 16-35mm zoom lens. I set my white balance to Daylight because I like the resulting warm colors that this setting produces. If you shoot film, I recommend using daylight-balanced film. For after-sunset shots with my digital camera, I set my ISO to 400 and use a tripod to steady my camera during long exposures.
To determine the correct exposure, I set my camera to automatic (Time Value because shutter speeds are important under these conditions). I often set my Exposure Compensation to –1 because the dark areas of a scene can fool a camera’s exposure meter into “thinking” that the scene is actually darker than it actually is – resulting in the bright lights being overexposed. I check my exposures on my camera’s LCD preview screen, which features an overexposure warning displaying when certain areas are overexposed.
Turn down the noise
High-end digital cameras have a noise reduction feature that removes some of the grain associated with long shutter speeds on digital cameras. (Noise in a digital image is equivalent to grain in a film picture.)
When I plan on taking nighttime pictures in a city, I scope out the city during the day for scenes that may make nice nighttime scenes. Spending some time during the day helps me become familiar with the city. It also lets me pick safe shooting locations such as curbs or traffic islands in roadways.
I’d like to add an important safety note here: Follow your mother’s advice: Always wear white at night. You want passing cars, bicycles, and skateboarders and so on to see you when you are shooting.
This picture of the Waldorf Towers Hotel is a handheld shot, taken shortly after sunrise. (1/125th second at f/11, ISO 200).
Dusk is a must: A good time to take nighttime pictures is actually not at night. If you shoot shortly after the sun sets, you’ll get some skylight in your pictures. Skylight does two things. One, it softly illuminates the buildings so you don’t have just bright lights in your pictures. Two, it adds a soft glow to the sky so you don’t have a totally black sky, as is the case when you shoot well after night fall. This picture was taken about 30 minutes after sunset. (1/30 second at f/8, ISO 400).
Midnight action: Here are two examples, taken around midnight, that illustrates the difference between a snapshot and a more creative shot. One picture is static. But Miami’s South Beach area is all about action, and that’s what I wanted to capture! The picture lacks movement because it was taken at a shutter speed of 1/125 sec. – enough to stop most motion. The picture is also a bit too dark.
Second movement: Now check out the picture with the red taillights streaking through the frame. It says action! I used a shutter speed of about 20 seconds to produce that effect. Again, a tripod is necessary when taking long exposures. My f-stop was small, f/11 to boost depth of field.
Notice that there are no white lights in the picture – which would have been created by cars heading toward the camera. That is no accident. I waited and waited and waited until no cars were coming toward me – because I only wanted red lights in the scene. In addition, I took almost 25 shots, at different slow shutter speeds, to find one with the effect I wanted, with just the right amount of light and the right amount of streaking. The cars were moving at different speeds and the number of cars in the scene was constantly changing.
This picture is also brighter than my snapshot of the same scene. That’s because I lightened it using Curves (by pulling up Photoshop’s Curves from the center of the Curves grid in the RBG mode).
Speaking of streaking, look at how the bright red and yellow lights in this scene stop (or start) in the middle of the scene. It looks rather strange, don’t you think? My point: for successful streaking photos, most of the lights should streak through the entire frame. Again, to get that kind of result, you need to have patience, to take a lot of pictures – and to watch the lights.
This picture does illustrate, however, the benefit of shooting shortly after the sun has set – when there is still some light in the sky.
Final reflections: Here is an interesting technique. Try composing a picture so that a building is reflected in the hood or trunk of a car. Keep in mind that black cars reflect light more dramatically than white cars. For this picture of the famed Pelican hotel, my exposure was about 20 seconds. To get everything in focus, I used an f-stop of f/11. Again, I took many shots to get a shot I was pleased with.
So the n time you are in a city, remember: Nighttime is the right time for fun – and creative – pictures. And, please remember to wear white at night to be safe!
Rick Sammon is the author of the “Complete Guide to Digital Imaging,” which will be published by WW Norton this fall.
