I still remember the rush I got when I first captured an image of a moose I thought was once-in-a-lifetime. Instead of a tack-sharp, clean moose, what I saw was grain. Photographers call this grain noise — a frequent challenge. Fortunately, you can reduce it while shooting and fix it later with the right editing tools. n this article, we’ll be exploring everything you need to know about noise in photography.
What is Noise?
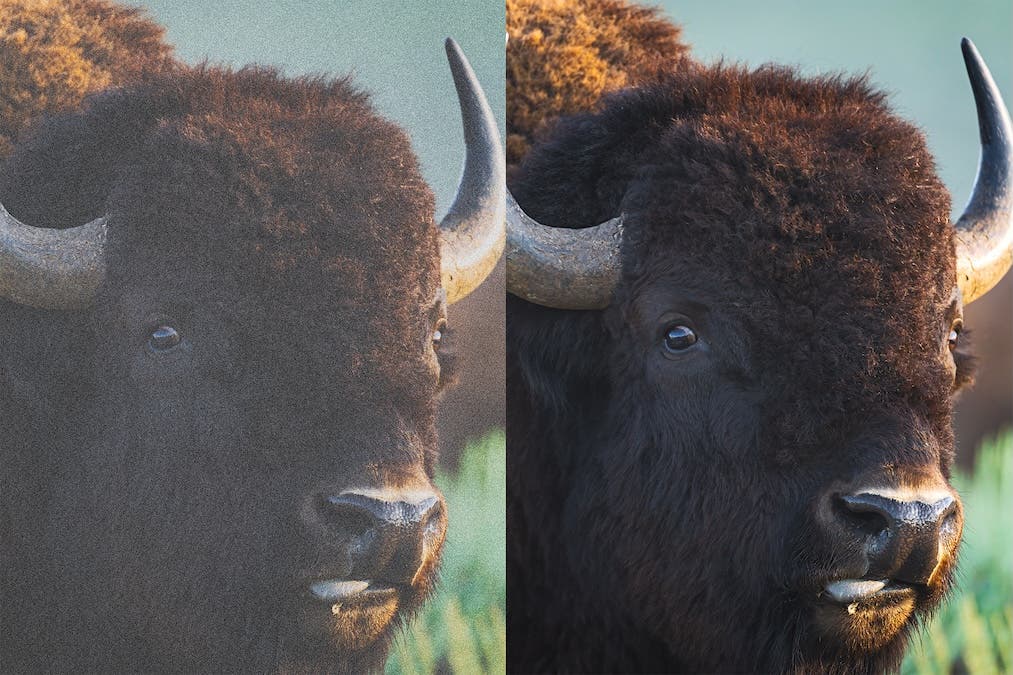
In photography, noise is referred to as the grain or speckled colors in your image. While noise comes in many different shapes and sizes, the important thing to know is that it degrades image quality, resulting in images that lack sharpness and clarity. You will find that every sensor produces unique noise patterns, and that specific cameras outperform the competition in low light.
What Causes Noise in My Photography?
The cause of noise in your photos can vary. But generally, you’ll have more noise in low-light situations when the camera doesn’t have enough ambient light. To increase the amount of light hitting the sensor, photographers can either increase the shutter speed, open the aperture, or raise the ISO. Typically, adjusting the shutter speed and aperture are the most ideal options. However, if you can’t adjust them due to creative or technical limitations, you’ll need to tap into the ISO. The ISO increases the sensitivity of the camera’s sensor, but it also causes increased noise in your image.
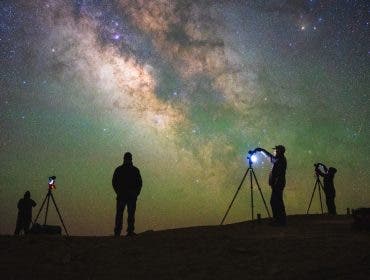
In addition to light, noise can also be due to temperature, especially when shooting longer exposures. Camera sensors can generate heat during extended exposures. And if the ambient temperature outside is warm, this can cause increased noise. Smaller sensors also generally struggle more with noise than larger sensors, though all cameras will experience noise if the right conditions are met. Finally, increasing the brightness of your image in post-processing can also uncover additional noise in the darkest areas.
How to Minimize Noise in Your Photography
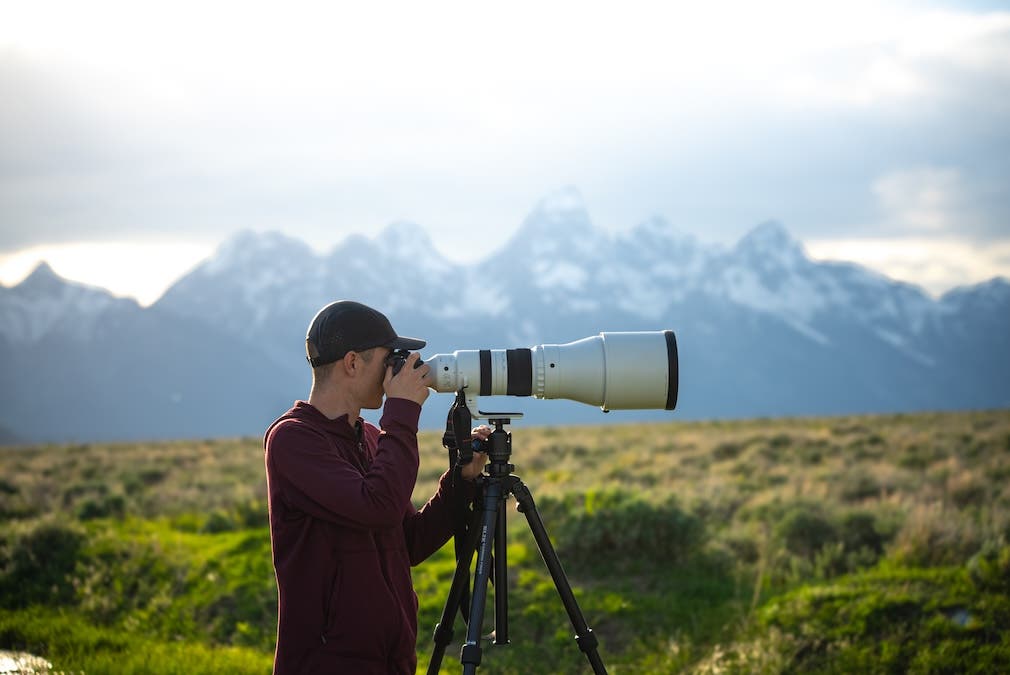
Even in tough lighting conditions, noise can still be minimized and even eliminated in the field with proper shooting techniques. For starters, try to ensure you have enough light. If shooting with your own lighting, make sure you have enough light to properly light the scene. For those shooting with natural light, using a tripod and extending the shutter speed to properly expose the scene can help you create images with very minimal noise. Whenever possible, open the aperture and extend the shutter speed to let in more light before increasing the ISO. However, ensure your shutter speed is fast enough to freeze the motion in the scene. It’s much easier to fix an image with noise than it is to fix blur.
If all else fails, a camera that performs better in low light may be the best option. While there is a lot you can do to reduce noise in the field and in post-processing, an upgrade may be due if you’re using a crop sensor or an older full-frame camera. Some of the newest cameras on the market perform substantially better than even the best cameras from five years ago.
Does Raising the ISO Increase Noise?
A common misconception about noise is that increasing the ISO causes more noise. While this has some truth to it, ISO does not cause more noise. Digital noise comes from the lack of light hitting the camera’s sensor. While increasing the shutter speed or opening the aperture allows for more light to hit the sensor, increasing the ISO does not. Instead, increasing the ISO increases the sensor’s sensitivity to light, ultimately brightening the image. However, the original problem of a lack of light still exists if you can’t extend the shutter speed or open the aperture.
Simply put, ISO is a way to artificially make the image brighter. Meanwhile, shutter speed and ISO actually cause more light to hit the sensor. An increase in noise is seen when we can’t generate enough light with the shutter speed and aperture, in which case you’ll need to use the ISO to achieve a proper exposure. It’s for this reason that you may have heard that increasing the ISO will create more noise. And while a higher ISO and more noise may be correlated, raising the ISO is not the direct cause of increased noise in the image.

How to Reduce Noise with Lightroom
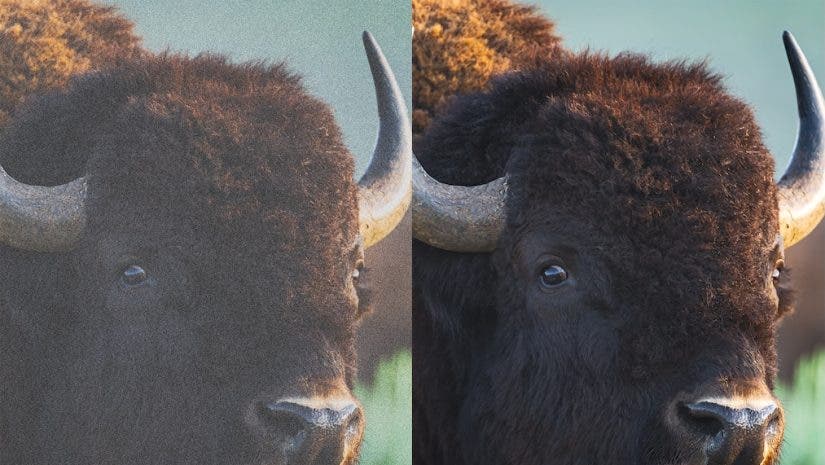
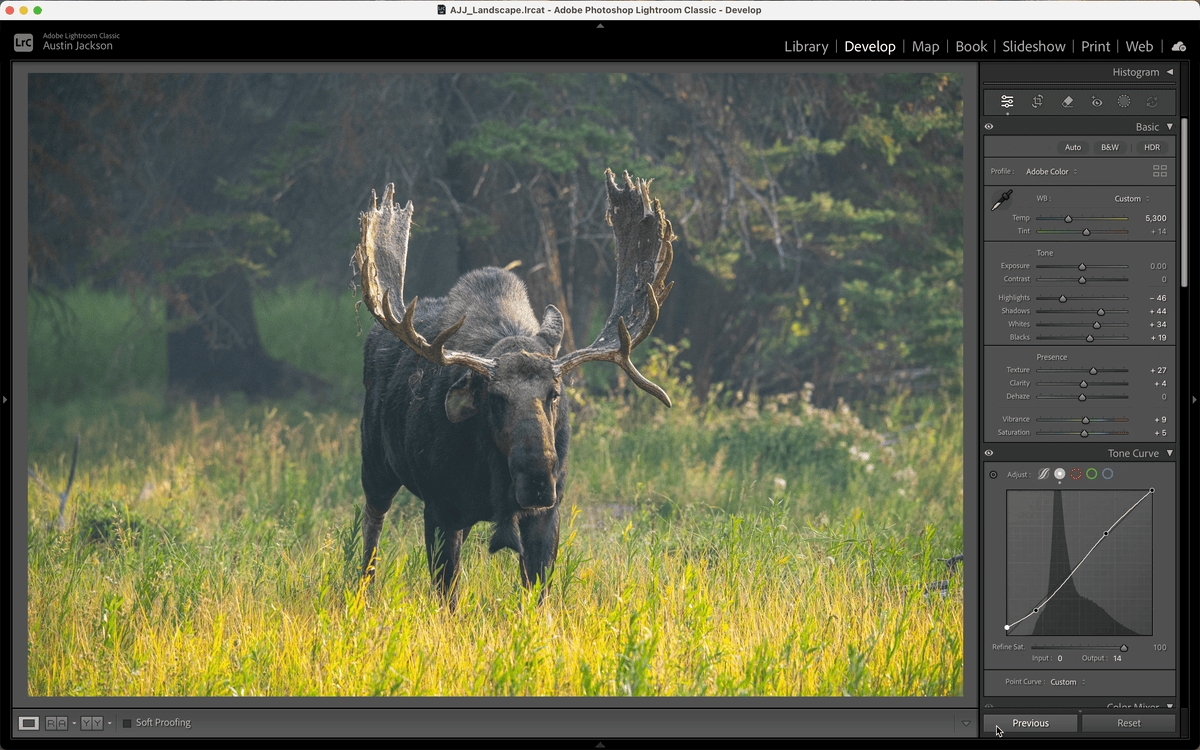
Even when you expose perfectly in the field, there are many situations where noise is unavoidable. For those times, you can use post-processing software to clean up your images. In April of 2023, Adobe introduced an AI-powered denoise feature within Adobe Camera RAW, Lightroom, and Lightroom Classic that was far superior to their previous denoising method. This software can help you retain the details in your images while getting rid of noise. Let’s take a look at how to use Adobe’s AI-denoise within Lightroom Classic. For the sake of this tutorial, we’ll be using version 14.5 (August 2025).
With your image open in Lightroom Classic, navigate to the Develop Module and scroll down to the Detail tab. Check the box for Denoise and wait for the algorithm to calculate noise in the image. Once done, you can adjust the slider up or down to remove more or less noise from the image. Be sure to toggle the eyeball to see the before and after, and remember that removing more noise is not always better. Having some noise in the image retains detail, and oftentimes removing all noise can make your image look like a painting.
Understanding what noise is, how you can minimize it in the field, and how to fix it in post-processing can help you overcome that pesky grain in your photography. While more noise generally means less detail, remember that a little bit of noise can help maintain the intricate details of your image, and small amounts of noise shouldn’t be a dealbreaker. In the end, proper camera settings, lighting, and a couple of sliders in Lightroom can help ensure noise doesn’t ruin that perfect shot.