
When I became interested in macro photography a few years ago, I was hesitant. I wasn’t too sure that I would do a lot of it. I was already taken by nature photography, and investing in gear and starting learning new techniques wasn’t my major priority. But I was curious and eager to photograph insects and other tiny subjects that eluded my lens so far. Thus, I gave it a go. However, when you are hesitant about something, you are prone to making mistakes. Confidence is key, but so are a few tips from people who stumbled on the same path before you. Here is what I learned and what I would do differently if I were to start over with macro photography.
Buy a Dedicated Macro Lens from the Beginning
The first thing on my to-do list was buying the gear that would help me take a macro shot. None of my lenses were good for this. Unlike other photographic genres, you can’t really experiment with macro photography without a lens capable of high magnification, close to 1:1 magnification or more.
At first, I bought diopters or filters that act as a magnifying glass for the camera lens. I could tell they were not for me from the first photographs.
Then, I bought a reverse ring. It allows you to mount the lens back-to-front and benefit from a very short focusing distance. With a reverse ring, a regular 50mm lens gives you a 1:1 life-size magnification. A wide-angle 28mm lens gives you an astonishing 3:1 magnification. Unfortunately, although handy, this method doesn’t provide the best image quality, and I didn’t like the result, and quickly got frustrated with the lack of aperture control when the lens mounted backwards.
Next, I invested in extension tubes and paired them with my wide-angle lens. They extend the distance between the lens’s rear elements and the sensor and produce a higher magnification than the lens can manage by itself. You can use a bunch of extension tubes together to reach the magnification you need. And they are not expensive. I got better results, but I still wasn’t satisfied. When using extension tubes with a wide-angle lens, you must get very close to the subject, which is something insects don’t appreciate. I don’t like it either because the camera-lens combo may cast extra shadow onto the subject. So, I gave up on them pretty soon, too.
Finally, I bought a used macro lens, and that was it. I was hooked on macro photography from that moment. To my surprise, it wasn’t as expensive as I thought it would be. I went for a basic macro lens with manual focus because it is what you need in macro photography most of the time anyway.
If I were to start macro photography now, I wouldn’t spend money, time, and energy going through all the inexpensive options that promise high magnification. I would go straight for a used macro lens. You don’t have to learn how to use new equipment; it works just like any other lens. Filters and other alternative options often have more distortions and limit the way you compose your shots. You’ll learn macro photography faster and better with a dedicated macro lens.
Don’t Be Reluctant to Use Flash in Macro Photography
In my beginner mindset, flash and macro photography didn’t go well together. I thought the images would look sourced and artificial, which is true if you are not careful. But if you are careful, it is much easier to take a good macro shot with flash.
In macro photography, the lens is very close to the subject, which means you often have less light than optimal. You could open the aperture to let more light in, but you already have a shallow depth of field and a very tiny area in focus. Opening the aperture even more would result in an even smaller area in focus, which may easily be smaller than the bug you are photographing. The only way to get the entire subject in focus is to move a bit further away or give up the 1:1 magnification that defines macro photography. However, don’t be afraid to pull back a little bit to get a little extra depth of field. It makes everything much easier.
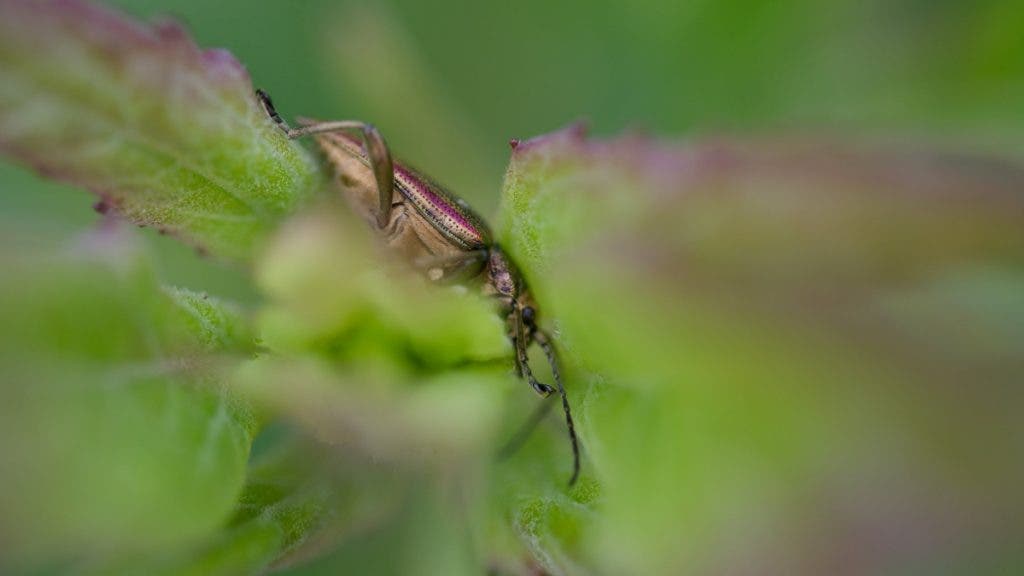
Caption: Even though I did use flash for this photo, I was still using too shallow depth of field with an aperture of only f/5.6. This caused me to not get the eyes in focus, but only the shiny body of this beautiful insect.
Fiddling with camera position and settings and shooting in low light conditions, sometimes in windy conditions, too, resulted in many, many missed focus shots. Even worse, I could tell they were ruined only when I would see them on my computer screen at home. After just a couple of months into macro photography, I reached for the flash.
For me, using flash in macro photography was a game-changer. All you need is to experiment with it a bit. To help you make the most of this setup right from the start, check out my go-to camera settings for macro photography with flash. I believe they are a good starting point.
Basic Settings for Macro Photography with Flash
| Shutter Speed | 1/200 of a second, because the light coming from the flash is so quick (likely around 1/10,000s depending on the flash and output settings) that overpowers the shutter speed |
| Aperture | f/11-f/13, because you get an area of around 0.5 – 1 cm in focus and take many well-focused images |
| ISO | ISO 400, higher if you think the background is too dark |
| Flash Output | 1/16th, because it is strong enough to freeze the movement and capture sharp images without producing an artificial look |
Bonus Tip: The Trap of Using a Low ISO Setting
When you use flash in macro photography, you have enough light to use whatever shutter speed and aperture you need. So, why raise the ISO, right?
Well, if you set a low ISO value, the background will turn out black. This happens because of the light’s falloff (or fallout). The intensity of the light coming from the flash decreases proportionally with the distance from the flash.
Light Intensity= 1Distance2
As the subject is much closer to the flash than the background is, the background will receive much less light than the subject. In extremis, the background will turn out completely black, which looks set up and artificial. Thus, I start at ISO 400, take a test shot, and go even higher than 400 if I still find the background to be too dark. I believe macro shots look more natural when the subject and background are harmoniously lit.
Shoot Without a Tripod
By this point, I was already using the flash. Thus, I could get rid of the tripod because I had enough light to not have to worry about camera stabilization too much. However, I had to learn how to hold the camera for macro photography.
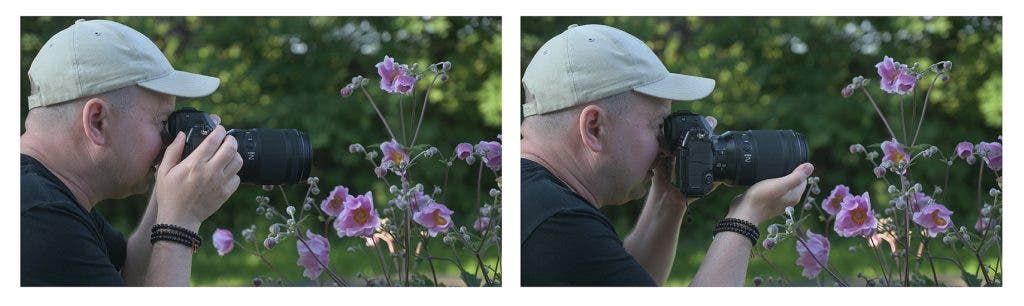
In the beginning, I was holding my camera with both hands from its right and left sides. It didn’t work because the heavy front element, the lens, was difficult to stabilize and kept moving up and down. Then, I tried placing one hand below both the rear end of the lens and the camera, but the front of the lens still had a lot of movement. Especially if you want to try focus stacking, having no up and down movements on the front of the lens is crucial. The winning position was to hold the camera with just one hand and place the other hand below the front of the lens. So, for me, this is now the setup for macro photography: macro lens, flash, and handheld camera.
Start Macro Photography with Easy Subjects and Setups
Another thing I’ve learned on my macro photography journey is to take it easy in the beginning. I believed that macro photography means photographing the smallest subjects I could find. As a result, I had a steep learning curve with lots of ruined shots and plenty of frustration.
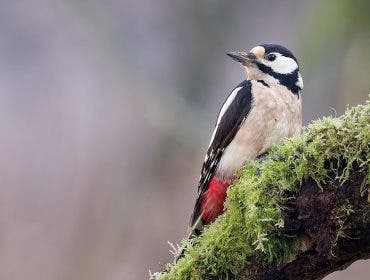
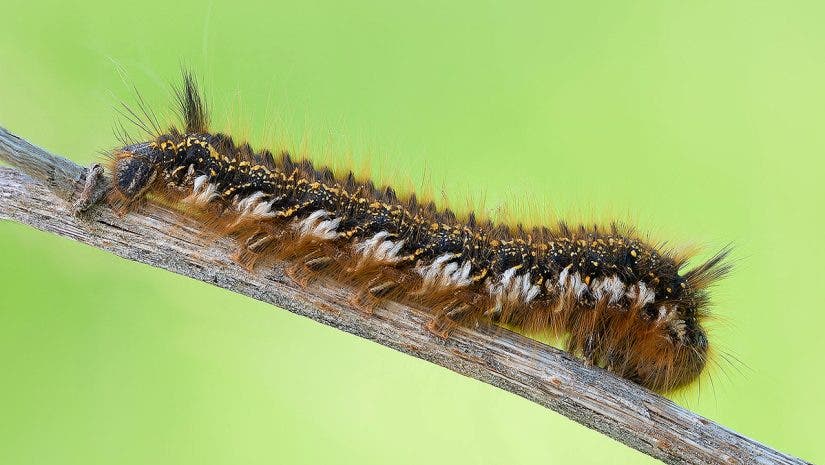
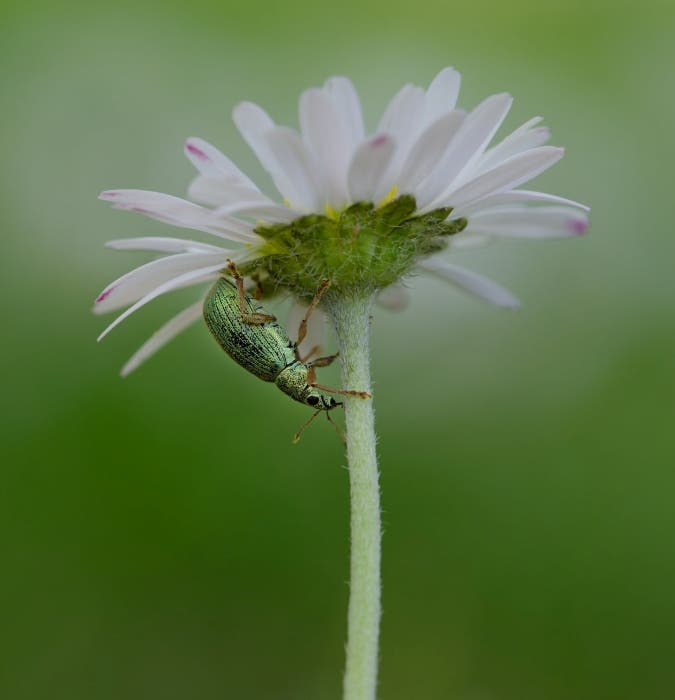
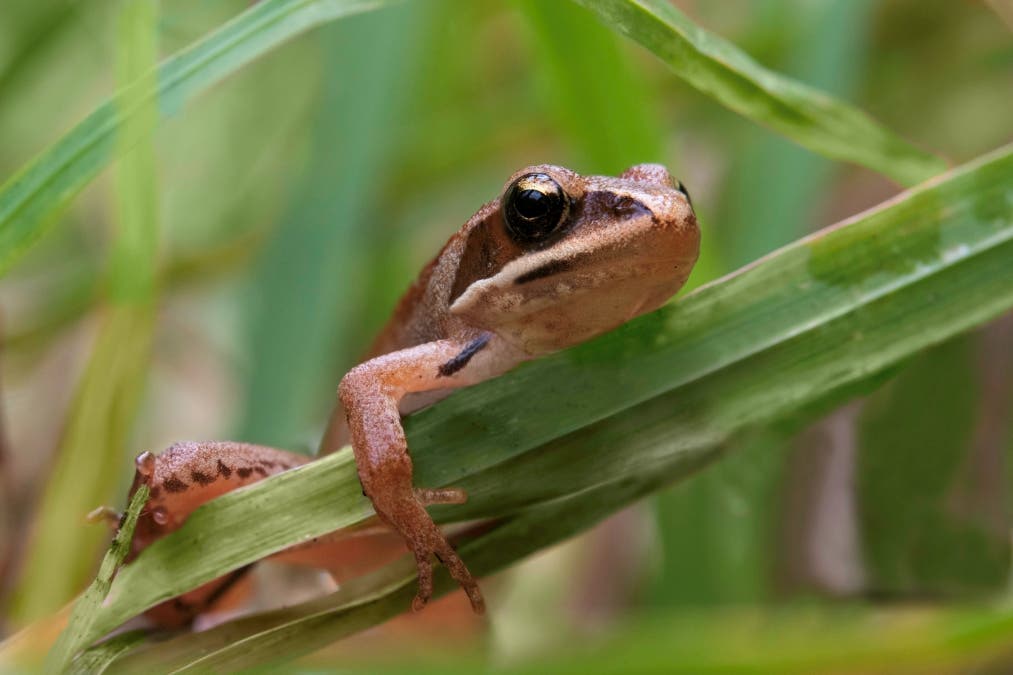
If I were to start over today, I would start with easy subjects and setups. Because it’s technically easier to photograph subjects of the size of a ladybug or bigger, you’ll concentrate more on focusing, composition, and storytelling. So, my advice: start macro photography by photographing bumblebees, dragonflies, beetles, small frogs, and similar. Your learning process will be smoother and much more rewarding.
I would also recommend avoiding challenging setups. On a windy day, for example, you don’t have to go into the forest for amazing macro shots. You can create a natural setup in a quiet place, such as your garden, where you can put out a grass blade or a flower, or look for ants or other insects to experiment with macro photography. It’s good practice. I believe spending as much time as possible practicing is better than waiting for the optimal conditions or getting frustrated because of too many messed-up photos.

Final Thoughts
Once I’d figured all these out, everything became so much easier. From a beginner in macro photography to a professional was just a step. With the right gear and proper techniques, macro photography becomes second nature. All your focus moves from technical aspects to studying the habits of your subjects and coming up with fresh ideas to tell their stories. In the end, this is everything macro photography is about.