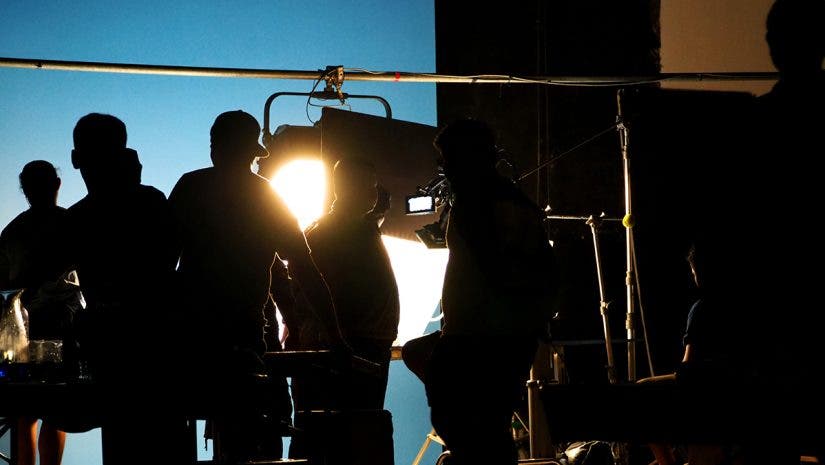

Mastering cinematic lighting is crucial for creating visually captivating videos and films. Filmmakers aim for natural-looking light that resonates with audiences, along with specific shadows and highlights that enhance the narrative, conveying the atmosphere and mood envisioned by the director.
Lighting design is meticulously planned, and the budget for this aspect of the film can be substantial. However, cinematic lighting can be achieved without expensive equipment and a large crew. Techniques such as the cinematic triangle yield excellent results with minimal gear operated by a single person. Often, expertise is more crucial than the budget. Read on to discover how the cinematic triangle can help you illuminate your videos beautifully and effortlessly.
What Is the Cinematic Triangle?
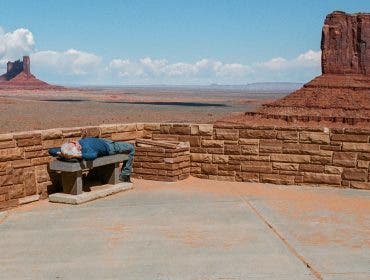
The cinematic triangle is a lighting technique that involves a single light source, which can be sunlight or an artificial light source. In this lighting design, the camera, subject, and light source form a triangle, creating a shadow side look.
The shape and size of the shadow depend on the position of the light in relation to the subject. For example, if the light source is partly behind the subject to a varying degree, the shadow will be larger. If the light source is mostly in front of the subject, the shadow will be smaller. In any of these scenarios, the camera, subject, and light source form a triangle.
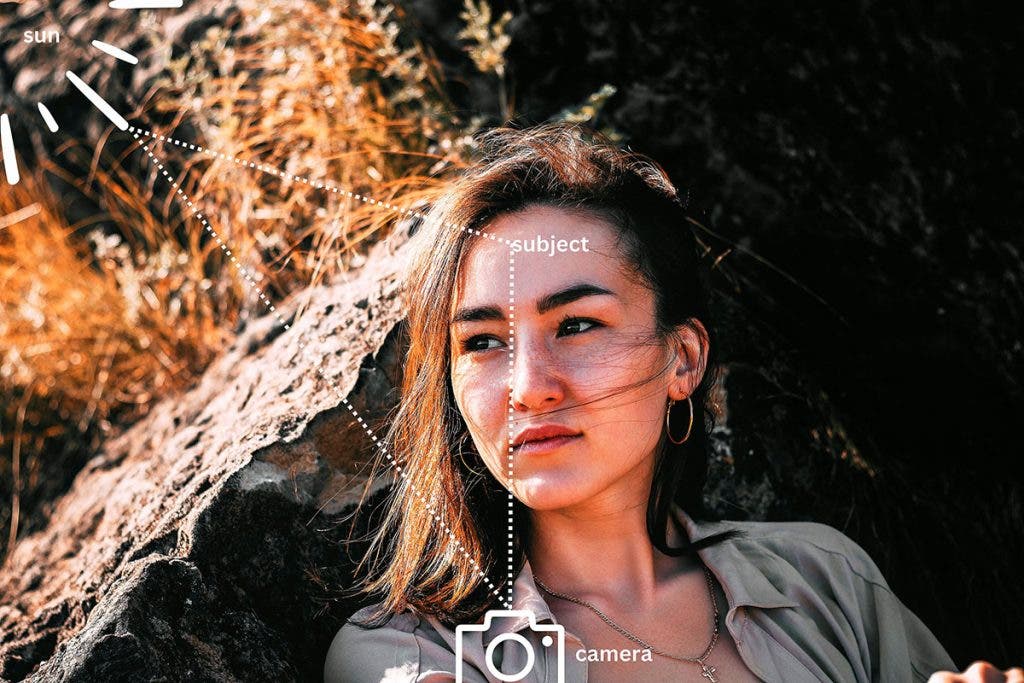
The cinematic triangle is effective because it resembles the way sunlight illuminates a subject, creating a natural and visually appealing composition. Most of the time, sunlight will fall on a subject from a lateral upward position, which means we are familiar with scenes featuring a single light source and plenty of shadows. Thus, the cinematic triangle adds depth to the video, producing a three-dimensional effect that we find realistic and soothing.
However, the way you place the three corners of the triangle (i.e., camera, subject, and light source) has a crucial influence on the video.
How to Light Your Videos Using the Cinematic Triangle
When working with natural light, you can only alter the sun’s angle and position to a point by choosing the location and time of the day based on the sun and/or using light modifiers. But when working with an artificial light source, you can fully control the light’s direction and quality. In both scenarios, you control the positions of the camera and subject. This ultimately means you can shape the triangle to create the desired illumination effect.
Loop Lighting
If the camera-subject-light angle is very narrow, less than 45 degrees, the light will illuminate the subject almost fully, resulting in a very small shadow. For example, if the subject is a person, only the nose will create a small shadow on the cheek. The subject will look right, slightly longer, and thinner. The more you move the light source to the side, the more the shadow increases, adding drama and intensity to the scene.
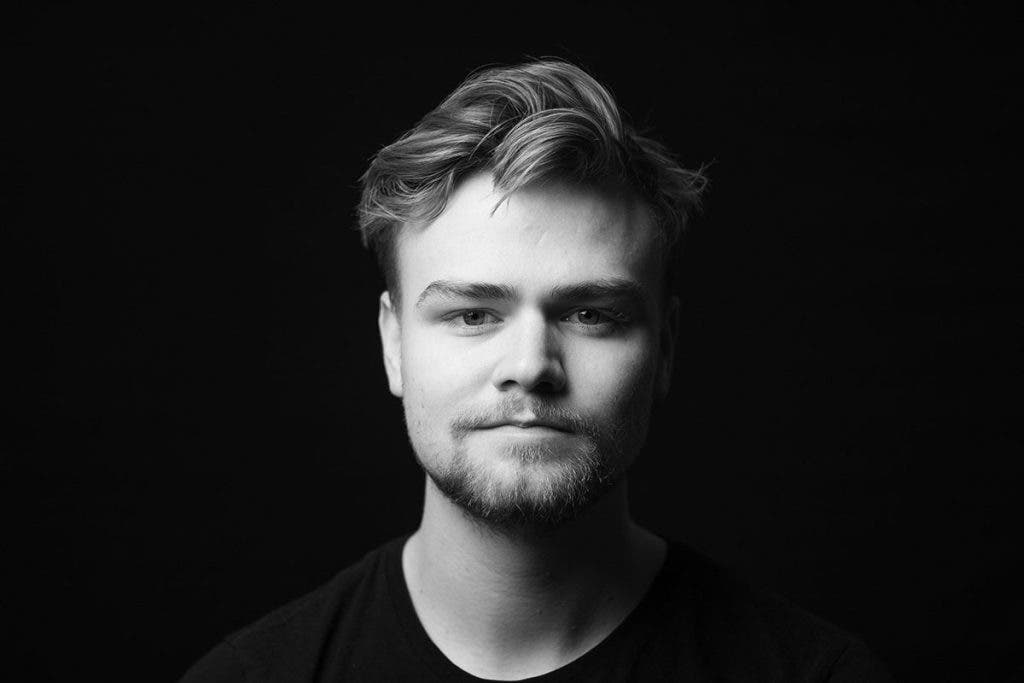
Rembrandt Lighting
When the camera-subject-light angle is 45 degrees, you get what it’s called the Rembrandt lighting pattern. The famous Dutch painter was a master of the chiaroscuro technique. In his works, the light source is typically positioned at a 45-degree angle to the subject, resulting in well-defined areas of highlights and shadows. In scenes with multiple subjects, this arrangement produces distinct lighting effects on each subject, with some being more illuminated than others, which enhances the realism and artistic quality of the video.

The Rembrandt lighting technique is commonly used in portrait photography. However, if the resulting image appears too gloomy and you prefer a lighter effect, you can create an illuminated triangle under the eye of the subject on the darker side of the face. While the key light illuminates the bright side, the darker side can become too hidden, losing its shape. To enhance the geometric contours of the face, place a reflector on the opposite side of the key light, keeping it at half-height and at half-intensity.
The darker aspects of the subject also significantly impact cinematography. These elements add drama, mystery, and depth, often portrayed through over-the-shoulder shots that heighten tension. The cinematic triangle serves as an ongoing source of various lighting patterns.
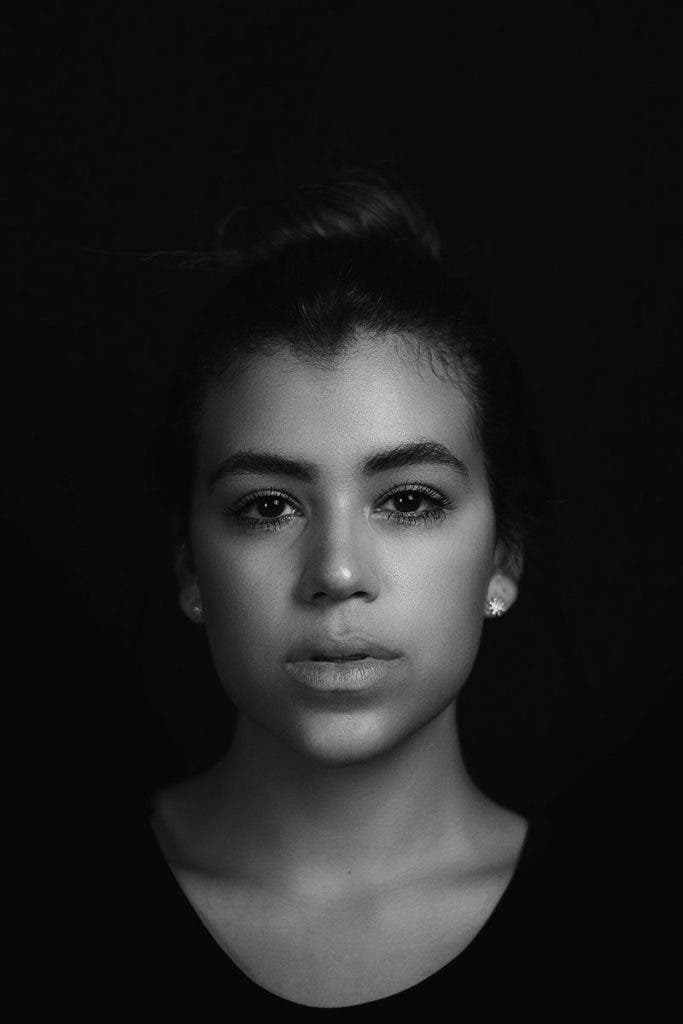
Split Lighting
When the camera-subject-light angle is 90 degrees, you get what is called the split lighting pattern, mainly because the subject is split into two equal areas: one bright and one dark. In this scenario, the cinematic triangle creates a sharp contrast, narrows the subject, and further enhances the scene’s dramatism. It’s an intense look that emphasizes facial features. You’ll find split lighting in glamorous beauty and fashion editorials, but also thrillers and dramas, such as Fight Club.

Backlight
If the camera-subject-light angle is over 90 degrees, you get a backlit pattern in which the light comes from behind the subject. This is an extremely dramatic, mysterious, and impactful lighting pattern that makes the viewer hold their breath and expect the unexpected. However, the light source is not positioned directly behind the subject to create a rim light, but at an angle, allowing the viewer to still see the subject’s details. Different angles produce varying effects, so experiment until you achieve the optimal lighting pattern.

Lighting Gear for Creating the Cinematic Light Triangle
Although you can use the cinematic triangle with natural light, an artificial light source provides more versatility and easily adapts to your artistic brief. It may also be more affordable than planning a shooting based on sun position and intensity. Additionally, consider bringing a couple of light modifiers with you, such as a reflector to enhance the lighting pattern (e.g., to bounce back a little light) or a diffuser to adjust the light quality (e.g., to soften the light). Here is the equipment to consider when using the cinematic triangle to light your videos.
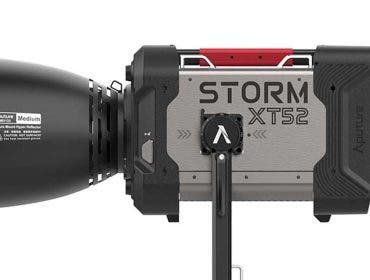
Aputure STORM 1200x 1200W Bi-Color LED Monolight
The Aputure STORM 1200x is a continuous light source that provides the versatility and adaptability you need from your key light in the context of the cinematic triangle technique. It produces an output of 22,500 lux at 3 meters (9.85 feet), which means it illuminates large areas and allows for placement wherever needed. In addition to the light’s direction, you also control the light’s color temperature, as the Aputure STORM 1200x provides fine-tuning color temperature adjustments from 2500 to 10,000K and white point control with color correction.
The light is easy to mount, dust- and weather-resistant, and equipped with enough operating modes to make your life easy on set.
Godox KNOWLED M600BI Pro Bi Color LED Video Light
The Godox KNOWLED M600Bi Pro is another practical and versatile continuous light source for cinematic videos. It excels in color accuracy, brightness, and control flexibility, producing an output of 21,400 lux at a distance of 1 meter (3.3 ft). You can adjust color temperature between 2800 and 6500K, brightness between 0.1% and 100%, and utilize 11 customizable lighting effects to speed up your workflow.
The light features an instant power-on functionality, which means it lights up automatically when connected to a power source. In addition, it can be controlled via DMX512, RDM, CRMX, Ethernet, Art-net & sACN, Bluetooth APP, and a removable controller for optimal flexibility. It is both lightweight and robust, and resists dust and water splashes.
Glow Reflector Panel and Sun Scrim Kit 39″ x 62″
A light reflector is a versatile piece of equipment that helps you alter the direction and quality of light, whether it is sunlight or an artificial light source. The Glow Sun Scrim is user-friendly, lightweight, and portable. You can use it indoors or outdoors(even in windy conditions) to adjust or bounce the light’s direction according to the cinematic light triangle.
The reflector features a reversible fabric, silver on one side and solid white on the other for improved light control, soft diffusion, and an ideal bounce effect.
Aputure Lantern 90 Omnidirectional Soft Light Modifier
Compatible with Bowens Mount lights, the Lantern 90 features a quick-build system for efficient setups. This durable light modifier offers comprehensive light control and features a substantial diameter of 90 cm (3 ft), making it suitable for illuminating large areas, particularly when utilizing the cinematic triangle technique.
Additionally, the Lantern 90 includes a fully adjustable hook-and-loop fabric light control skirt that helps eliminate light spill and refine the lighting configuration. It produces soft volumetric light with a 1-stop diffusion level, ensuring minimal light loss.
Final Thoughts
The cinematic triangle is a simple lighting technique that requires minimum equipment and set-up effort. By simply adjusting the triangle’s parameters, you get a full spectrum of light effects, ranging from bright and joyful to dramatic and mysterious. Thus, all it takes to create cinematic lighting is a single light source, which may very well be the sun, and maybe a light modifier or two. Practice with various angles and distances and notice how the smallest of adjustments create a different shadow side look, transform the light patterns, and change the mood and feeling of the scene.