
Approximately 11,000 species of birds live on Earth. Although not all reside in my vicinity, I’m surrounded by enough to spark my curiosity and make me turn my lens to them. I am a dedicated bird enthusiast and photographer, and I have found that one of the best ways to photograph them is from a hide. You get opportunities previously unimaginable, such as getting very close to birds and still photographing them in an open space. Contrary to what one might expect, using a hide allows for both proximity and a clear background.
One of the best things is that you get to have very nice encounters without stressing the birds. Like the blackbird that landed on my lens while I was in the hide and just sat there looking at me as if we were old friends. These moments solidified my joy for this type of bird photography. Thus, I would like to share with you what I’ve learned from birds and my experiences with photographing them from a hide.
Planning for a Bird Photoshoot from a Hide
The very first item on my planning list is to research the birds to see what species I can photograph and where I can find them. It depends on the season, location, and time of day. Once I know what species I focus on, I can research their habits, such as what type of food they like (e.g., seeds, nuts, etc.) and whether they prefer to land near the food, or have a perch or other designated landing spot from which to assess the food before going to eat it.
In fall and winter, I rely on food to get them to come near me. These are the seasons of scarcity when birds have difficulties finding food. I go a few days before the shooting and place some seeds or suet fat balls, depending on the species, in a visible place where the birds can see them. I don’t feed them too much, just a bit to ensure they will come. Keep in mind that you don’t want to teach the birds to rely on you for food. They are wild animals after all and must find food on their own. In the cold seasons, a bit of help is welcome, but don’t overdo it.
In the warm seasons, birds don’t need food, but rather a small pool of water. Alternatively, I seek places where they nest or use for courtship. Again, I am extremely cautious not to disturb them in any way. I don’t intervene in the natural course of events; I am just a silent and hidden observer. But you want to know all this information about birds to ensure you can photograph them in their natural environment. The hide helps a lot to keep you out of birds’ sight and avoid stressing them.
Placing the Hide
The planning part of photographing birds from a hide has everything to do with birds. The actual placing of the hide has everything to do with people. The locations birds prefer may be subject to regulations. For instance, you may need a permit to place a hide in a national park or may need to pay to place it on someone’s property. My advice is to start with easy locations, such as your garden or regulation-free places.
Assessing Your Location
Then, I am keen to assess the activity in the area. I’ve learned this the hard way. After planning intensively, feeding the birds for days, bringing my gear, and having the hide in place and me in the hide waiting since before sunrise, a few people walked by, stopping just near my hide and loudly talking about what this strange object was. As you may guess, no bird crossed my path that day. So now I research the area, too, trying to find out if it is popular for foresters, walkers, hikers, bikers, or any other noisy visitors.
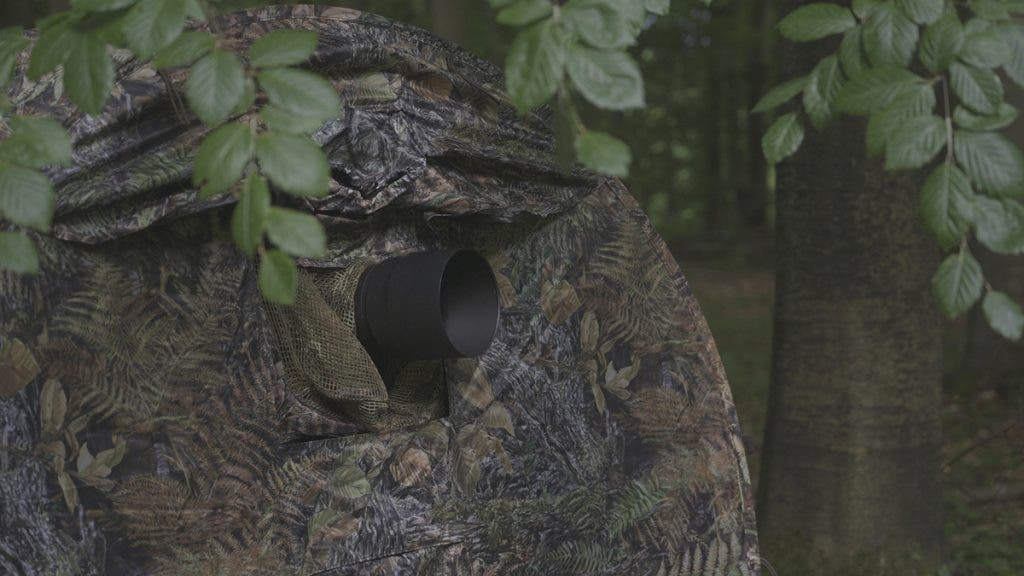
What is a “Good Spot” for a Hide?
I usually go in advance to look for good open spots. Good spots mean locations birds prefer, away from people, open so I can get a clear view of the birds, and with some elements to help me arrange the hide. You’ll often have to create some sort of feeding station, and there are a few natural elements that may help. For example, you want something to put the seeds on without blocking the view to the birds, such as a fallen tree trunk. You also want to hide the food from the camera with some moss or leaves. Once you are in the hide and birds are approaching you, there is no way you can get out and change the setup. So, getting it right from the beginning is essential.
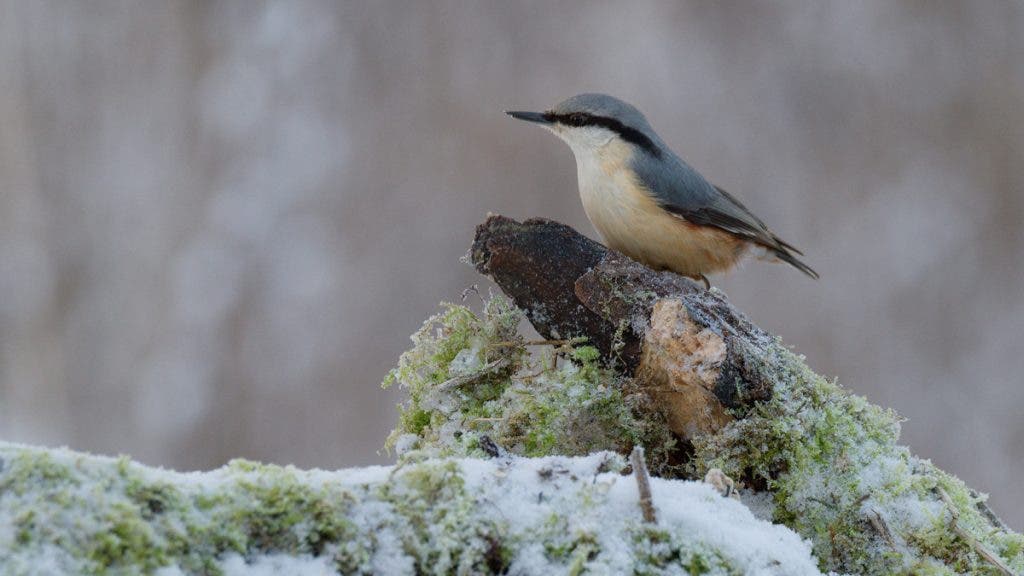
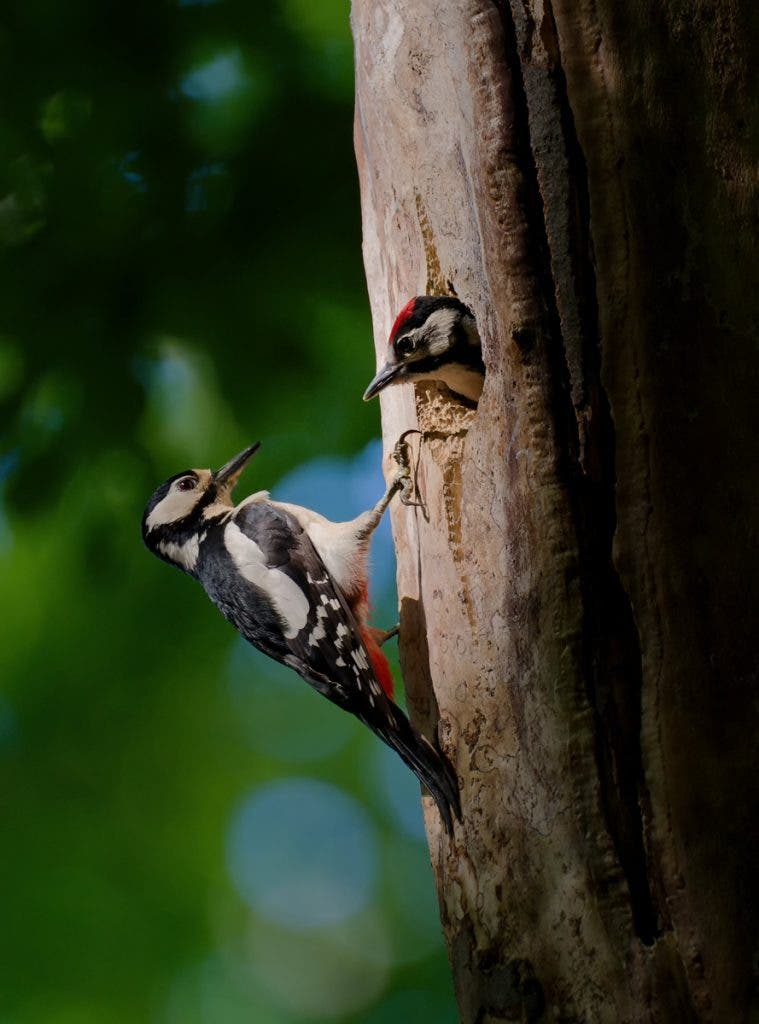
Because I found it tricky to photograph birds while they eat, I usually put a perch or something they can land on. If they like it, they will stay there for a few seconds before landing, which is long enough for me to take a nice close-up. I set up the shooting angle and focus, and just press the shutter release when the bird is in frame. Robins don’t like it, for example. They go straight to the ground. But blue tits, nuthatches, woodpeckers, and jays prefer it. However, for this, I need a good background.
Tip: Be Happy with the Background!
Nothing is more frustrating than getting home after a day of photographing birds from a hide, only to find out all your photos are ruined by a distracting background. And I mean all of them because you don’t get to change the location or shooting angle when in the hide. If you find yourself in this situation (I did!), all you can do is take the distractions out in post-processing (annoyingly slow and prone to errors) or zoom in and crop the image around the subject (a dangerous resolution reduction). The solution: check the background and then check it again.
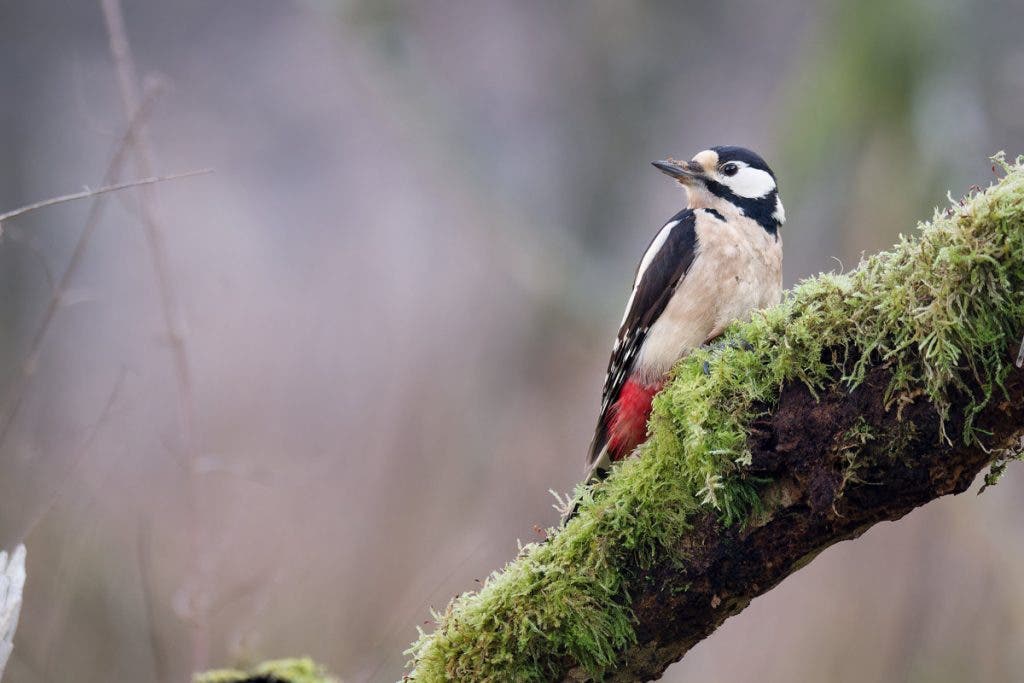
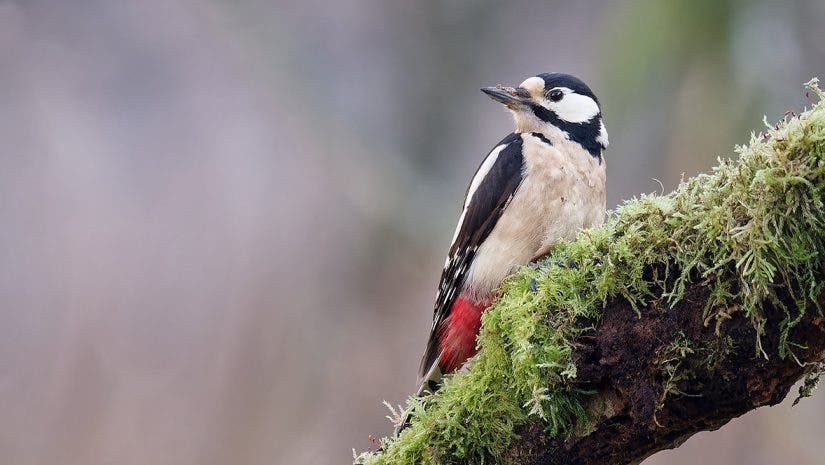
Caption: I like the woodpecker’s pose in this shot, but notice the grass and tree branch on the left. This requires extra cropping or cloning work in post-processing to get rid of it.
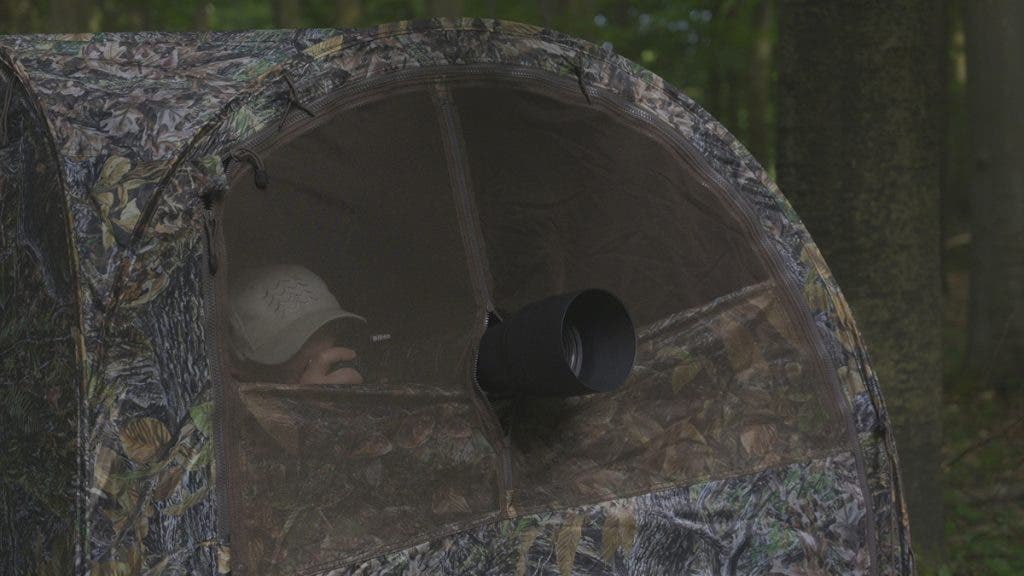
To create a beautiful, smooth, blurred background and a shallow depth of field, you need to put some distance between the subject and the background. Hence, you want an open space. But don’t look only at the line of trees far away behind the subject. Check the distance in between, too, because tall grass, twigs, and bushes may be in the way. Before you set up your hide, it helps to actually position the camera on a tripod and point it at the perch, so you can see the frame, shooting angle, and the resulting background.
Having the trees somehow far away from the hide has another advantage. It encourages birds to land on the perch instead of the ground. If the trees in which they are resting are too close, chances are the birds will go straight for the food because they have already had a look at it from the trees.
Lighting Tips
For bird photography, I prefer side lighting and backlighting. Side lighting is usually my go-to lighting setup because it creates a dramatic effect, similar to portraiture. It really makes the birds stand out as the main characters of the story. The colors are more vibrant, the textures are enhanced, and the overall scene looks more three-dimensional.
Backlighting is also a good choice because it creates a beautiful rim light around the bird and emphasizes its silhouette. But be careful with exposure. You don’t want an underexposed bird on an overexposed background.
When photographing birds from a hide, all you have is sunshine. So, take the light’s direction, intensity, and color into consideration when you build the hide and position the camera.
What Photographing Birds From a Hide Taught Me About Gear
In wildlife photography, bird photography included, good photos and top-end gear do match up. More expensive gear will give you sharper images and more versatility. However, because the hide allows you to get so close to the birds, I didn’t feel the need for an expensive lens. You can get great shots with a budget lens. Many of my bird shots are taken with a Tamron 150–600mm G2 lens, usually used at 500-600mm, because placing the hide too close may result in no birds appearing. You may want to experiment a bit with the distance at which you place the hide and the focal length of the lens. It also depends on the bird’s size. A blue tit is not the same as a heron.
I also use a 400mm lens and sometimes a 70-200mm lens if I can get very close. The reason I sometimes prefer the prime lens is its speed. The 400 mm is a f/4.5 lens, which is faster and sharper than the Tamron 150-600 mm, which isn’t quite as sharp until f/8. Therefore, the zoom lens forces me to start shooting half an hour later or at a higher ISO to have the same fast shutter speed and shallow depth of field. As I’ve learned, half an hour is a lot in bird photography. The birds may go away, the light may change, someone may appear and make noise, everything may happen. So, the more light you can get in, the more time with great light you get.
Final Thoughts
I hope I convinced you to experiment and use a hide next time you go out for a bird photography photoshoot. I believe it to be advantageous for both the photographer and the birds. You have better chances at good shots, understand the birds’ behavior more, and improve your workflow. Additionally, the birds are safe, at ease, and undisturbed. They may even get a tasty snack. So, get to know each other and create amazing photographs.