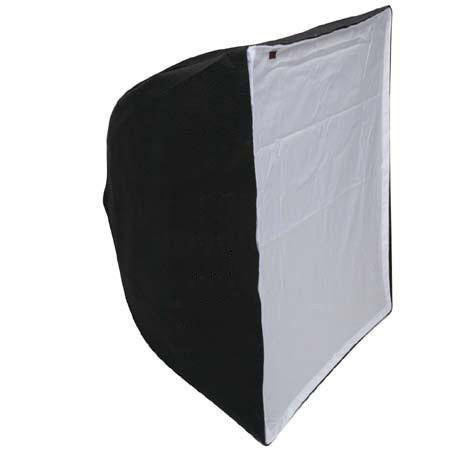
Adorama 18x18" Softbox for the 100 watt Second Budget Monolight.
SKU: LTBSB18
This item is no longer available.
Share:
Overview
Compare
Learn
Specs
Protection
Reviews about this item
Review Summary
2016-11-02T14:53:06
Rated 5 out of 5
Nice Lights
Excellent quality in the cheap. I know a couple of pros that use and recommend Adorama lighting products.
TODD M.
2012-05-06T21:00:00
Rated 4 out of 5
Good softbox
was slightly difficult to set up. Afterwards, was really easy to use
Joe T.
2012-03-11T21:00:00
Rated 5 out of 5
I would buy this item again
This item works well for me
BigDaddyColumbus
2011-12-05T19:00:00
Rated 5 out of 5
How Do I Put Together
How to put together... Note: The soft box unit must be assembled off the light and placed on light after assembled. 1. The soft box has a large opening and a smaller opening. Starting at the smaller opening; slide 1st post along the edge of one of the four corners of the light box. It should fit snuggly into a small pocket at the end of each corner. Continue this for all four corners. 2. Identify the bracket that fits on the front of your light. 3. Place each post into the one of the four holding holes on the bracket. The 1st two posts will fit in holes easily. The 3rd will be more difficult and will require bending the post (it will not break). 4. The 4th and final post will need to be removed out of the small pocket and pushed past the front of the soft box. This will allow the space needed to insert the final post into the holding hole. Insert one end of the post in the bracket and slide the soft box up along the 4th post and into the pocket. You will be required to bend the 4th post to make it fit. 5. Now the soft box the ready to be placed on the light. Note: Do not over tighten light box bracket to light, it may leave marks or damage light case at the point of contact.
MICHAEL D.
2011-09-24T21:00:00
Rated 4 out of 5
Space Saver
Use for portraits and glamor shots. Traditional umbrella takes up more space. Takes some time to put together, but prefer over an umbrella.
Spike
2011-07-23T21:00:00
Rated 4 out of 5
Fantastic Softbox
I needed a quick and small softbox so I purchased this little guy from Adorama.com. The only bad thing is that it didn't come with instructions on how to put it together. If you are a new photographer, you probably won't know how to assemble this guy. I made a video on how to assemble this product. [@]For the money, I'd definitely recommend this. It's great for portrait work and product photography, even if you are a seasoned photographer.
kimtown
2010-01-09T19:00:00
Rated 4 out of 5
Nice even lighting
Item works well with Flashpoint Budget 160 Monolight. No instructions, but I was able to put together in about ten minutes. Takes a little bit of force to get the softbox in the correct shape. Tip covers for the rods come loose easily.
Rob
2009-06-30T21:00:00
Rated 4 out of 5
Simple and easy to use.
I was worried when I read all the reviews saying that they wish it came with instructions. When I got the thing I found it was fairly simple to put together. Just put the sticks in and hook the hooks to the loops and you are good to go. As far as the use of it is concerned it does everything you want a shadowbox to do. I'm personally using this as a hair light.
Kterry
2009-04-07T21:00:00
Rated 5 out of 5
Excellent Product
Wins the derby folks.
Anthony
2009-03-29T21:00:00
Rated 4 out of 5
Works as advertised
Got this in an attempt to get a softer light than with an umbrella but it actually turned out a little hotter. Works well for its intended purpose though. It would have been nice if it came with assembly directions though. Took 15 minutes to figure out how to assemble it.
John D.
2009-02-22T19:00:00
Rated 4 out of 5
Softbox for Budget Flash
Assembly of the unit is more awkward than difficult. Requires three hands. Once assembled the unit functions well
Geoff
2008-11-19T19:00:00
Rated 4 out of 5
If you can get it assembled, it's great!
The unit is well made, and even comes with a case. But the case will never see any use from me, because it takes a degree in mechanical engineering to figure out how to put it together. I have no intention of ever taking it apart and attempting to put it back together. Once together it functions as you would expect. Just one or two pictures of how to assemble it would really help.
William P.
2008-05-07T21:00:00
Rated 4 out of 5
Worth it once put together
A good addition to the 100ws budget speedlight. Would it have bankrupted adorama to include instructions? First time ever assembling and I ws busy swearing up a storm. Used it for a while and it was worth but could have been so much easier with a single sheet with pictures
William H.
Adorama 18x18in Softbox, 100W Second Budget Monolight Specifications
Related Articles & Videos
About Adorama 18x18in Softbox, 100W Second Budget Monolight
What's in the box:
- Adorama 18x18" Softbox
- Speed Ring
- Adorama 6 Months Warranty