When you think of sports photography, lighting equipment most likely doesn’t enter the picture, does it? After all, most photographers that work with lighting equipment use it to shoot formal portraits or indoor studio work, right? Well, that used to be the case.
These days, lighting equipment is a lot more portable, affordable and easy to use, which means that it can dovetail with and enhance many different types of photography.
This lesson spotlights the new Photoflex® StarFire™ and FlashFire™ Kit in photographing outdoor action shots and demonstrates how valuable a little extra light can be.
Topics Covered:
- The Concept
- Limited Choices For Ambient Exposure
- Adding a Portable Diffused Flash
- Gaining Height and Stability
- Light, Camera, ActionFinding The Best Vantage Point
Equipment Used:
The Concept
For this lesson, I wanted to test out the new Photoflex® StarFire™ and FlashFire™ Kit by shooting some basketball action shots at dusk. I asked my assistant, James, if he would both assist and model for me, since he’s such an avid basketball player as well as a photographer. He agreed, and the next afternoon we met up at a basketball court in Portland, Maine’s east end.
Once we got there, I walked around with the camera to get a general idea of the angles from which I’d be shooting. The sky had some nice cloud cover and the sun had not yet set and I took a few shots to determine what the optimal ambient exposure ought to be. This shot was taken at f/9 at 1/200th of a second. [figure 1]
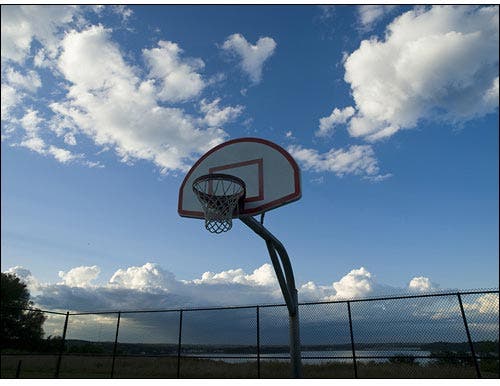
Figure 1
Limited Choices For Ambient Exposure
After carrying the lighting gear over to the side of the court in a GigBag™, James grabbed his basketball and took a few shots to get warmed up. As he did, I took a few shots of my own to get a sense of how the light would be on him. As you can see, I could either expose for the sky or James, but not both. [figures 2 & 3]
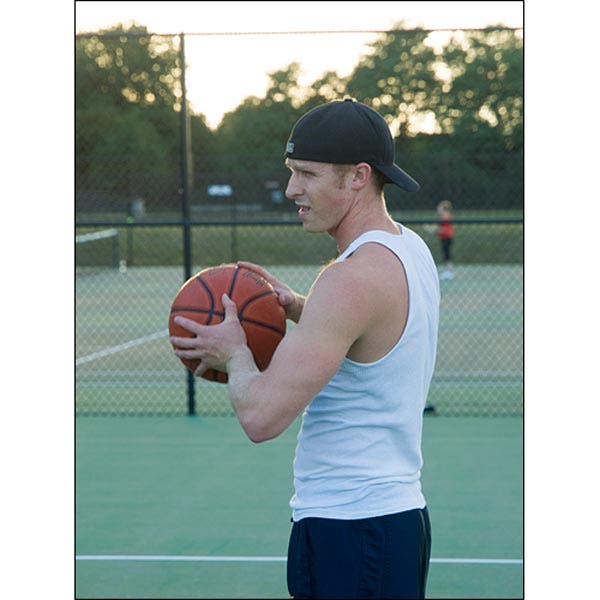
Figure 2
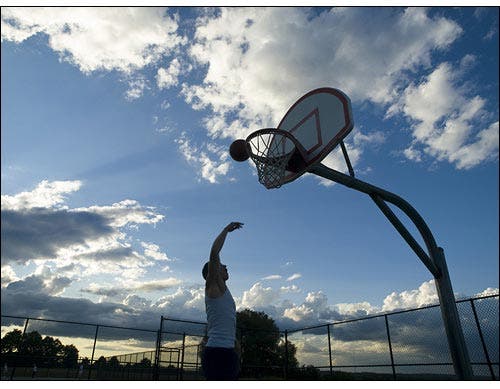
Figure 3
Adding a Portable Diffused Flash
Next, I decided to set up the StarFire™ and FlashFire™ Kit so that I could throw a little light on James, while maintaining a good exposure for the sky. (The next four images were taken a couple of weeks earlier at a nearby beach using this same equipment, but for a different lesson. Just in case you were wondering where the sand came from!)
After setting up the Small LiteStand and attaching a ShoeMount MultiClamp to it, I mounted the StarFire shoe mount flash to a FlashFire wireless receiver. Next, I mounted the flash to the LiteStand using the Adjustable ShoeMount Hardware, which also has fittings to support a small soft box. Then I mounted the Adjustable Shoe Mount Hardware to the ShoeMount MultiClamp. [figure 4]
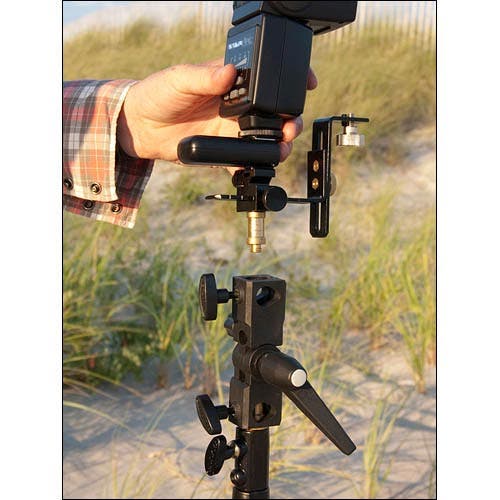
Figure 4
At this point, I was ready for the Extra Small LiteDome® SoftBox. I grabbed the Basic OctoConnector and inserted the rods of the Extra Small LiteDome into each of the four holes of the Connector. Once the Extra Small LiteDome was set up, I mounted the bottom side of the Connector to the ShoeMount Adjustable Hardware and adjusted the Hardware so that the Flash was optimally positioned to project light through the Connector and into the LiteDome. [figure 5]
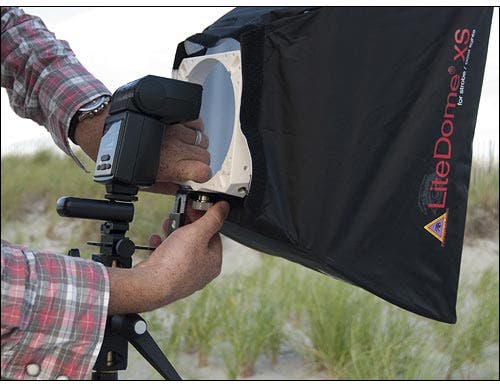
Figure 5
I then Velcroed the back flap to the back of the Extra Small LiteDome to prevent any potential light spill from the flash. With everything attached, I powered up the flash, set it to about 1/2 power, and powered up the wireless receiver. [figure 6]
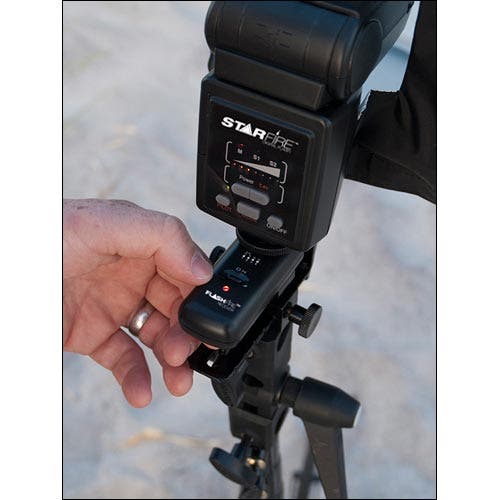
Figure 6
To sync up the camera with the flash, I mounted the wireless FlashFire transmitter to the hot shoe of the camera and tested the connection. [figure 7]

Figure 7
Once everything was set up, I raised the LiteDome up almost as high as it would go on the LiteStand and weighted down the base of the LiteStand with a sand-filled RockSteady® Bag in case the wind cropped up. I first decided to have the lighting equipment positioned camera right and took a few test shots at the same exposure settings. Here’s one from that series. [figures 8 & 9]
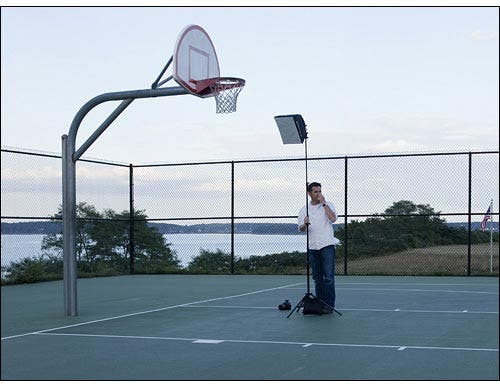
Figure 8
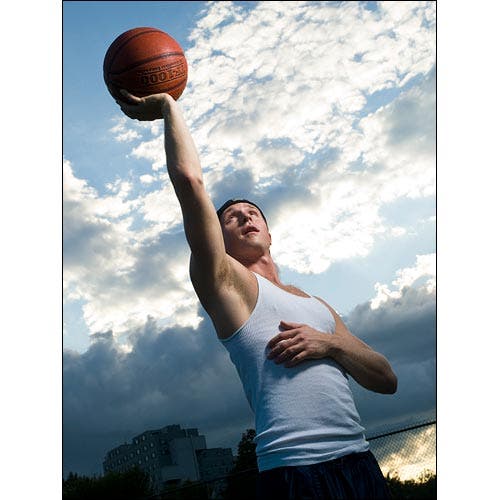
Figure 9
In reviewing the result, I saw that the LiteDome had done a good job illuminating James, particularly when I compared it against a shot I took of him with the flash disabled. [figure 10]
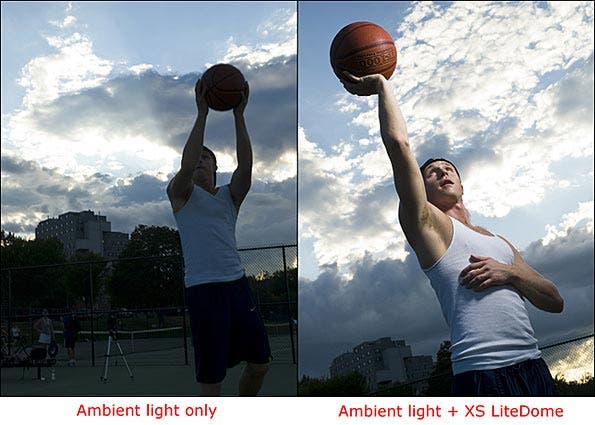
Figure 10
But even though the light was looking pretty good, I felt like I wasn’t getting enough of the scene in the frame. So I widened the frame somewhat and had James do a few more layups.
In reviewing the results, I saw that the light was exposing James fairly well, but that the direction of the light was coming from underneath, which wasn’t the look I was going for. I also noticed that the light, due to its relatively low position, wasn’t exposing the ball or the net as brightly as I wanted it to. [figure 11]
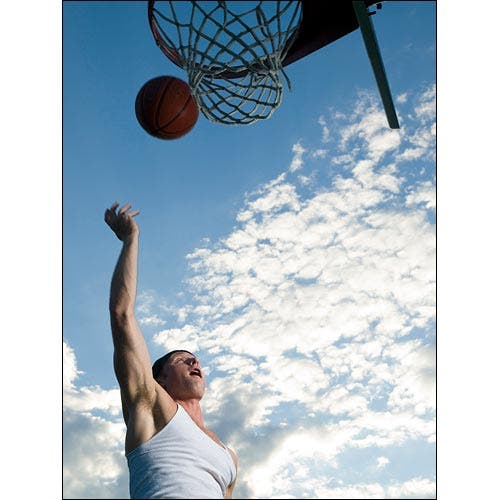
Figure 11
Gaining Height and Stability
The wind had also started to pick up, so to be safe, I decided to swap out the Small LiteStand with a Large LiteStand, which would give me some more height and provide added stability. While James went to get the Large LiteStand from the GigBag, I lowered the light on the Small LiteStand. [figures 12 & 13]
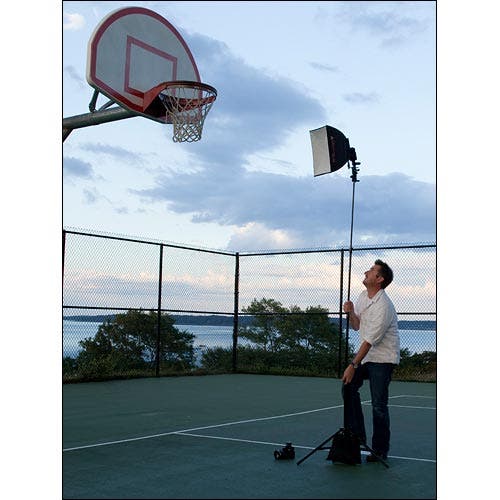
Figure 12
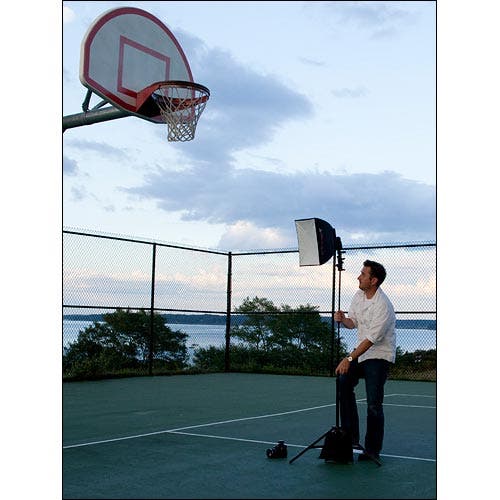
Figure 13
With the Large LiteStand and RockSteady Weight Bag in place, the Extra Small LiteDome was now comfortably situated above the rim, angled down slightly. This would help to render a more natural looking quality of light on James and the rim. [figure 14]
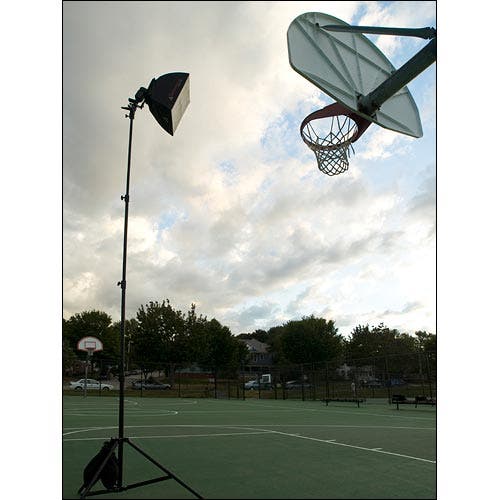
Figure 14
While James took a few more layups, I took some test shots to make sure everything was still synced up.
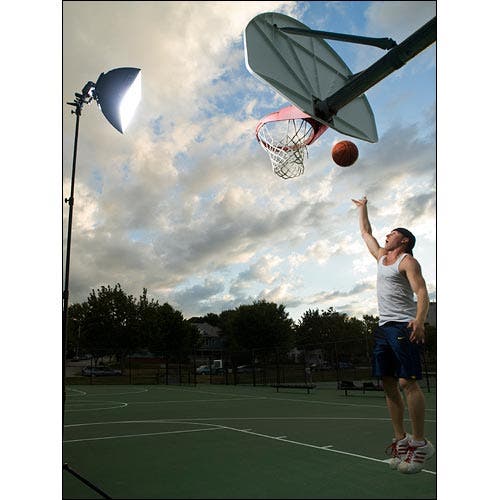
Figure 15
Light, Camera, Action
With everything ready to go, I stood just a couple of feet away from being directly under the net with a wide angle lens setting. Meanwhile, James had his camera mounted to a tripod and configured it so that that it would fire a series of setup shots as he took a layup. Here’s a side-by-side look at those results. [figure 16]
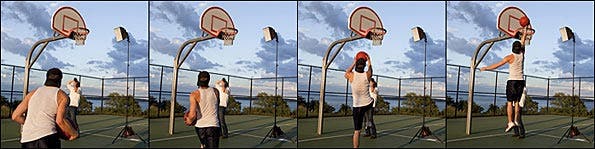
Figure 16
We did a few runs like this and then reviewed the results. Below is one from this series. [figure 17]
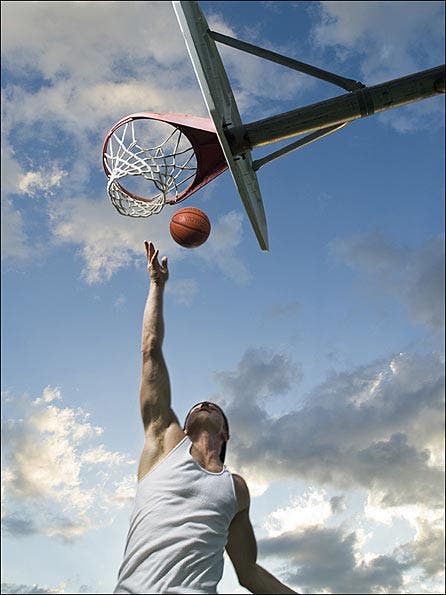
Figure 17
I really liked the quality of light in the results, both in the sky and on James, but I still felt like I wasn’t getting enough of the scene. Specifically, I really wanted to capture James mid-air for a stronger visual impact.
Finding The Best Vantage Point
So rather than stand, I decided to take a couple of steps back and kneel for a lower perspective. After taking a brief water break, James took a few more layups while I tried to capture him at the apex of his jumps. [figures 18 & 19]
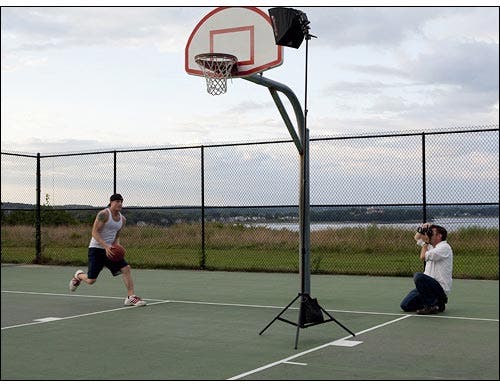
Figure 18
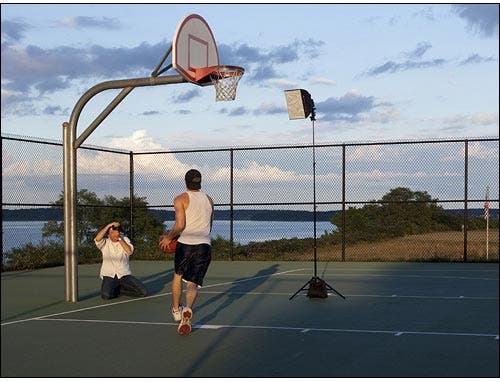
Figure 19
Here is one of the better ones from that series. [figure 20]
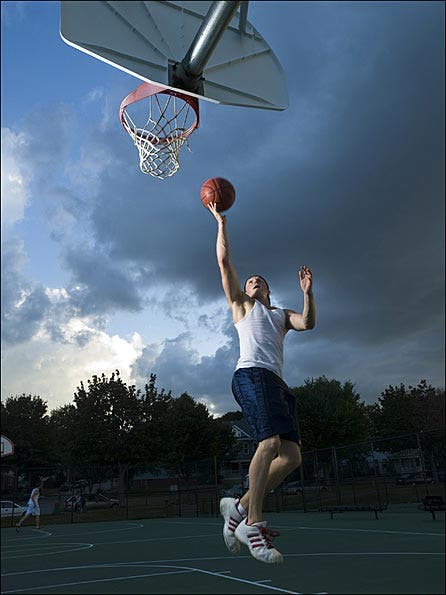
Figure 20
As you can see, the clouds in the background were becoming quite dark and added a nice dramatic quality to the shot. In reviewing the shot, I also really liked the quality of light on both James and the hoop. Below, you can see the difference the XS LiteDome Kit was making. [figure 21]
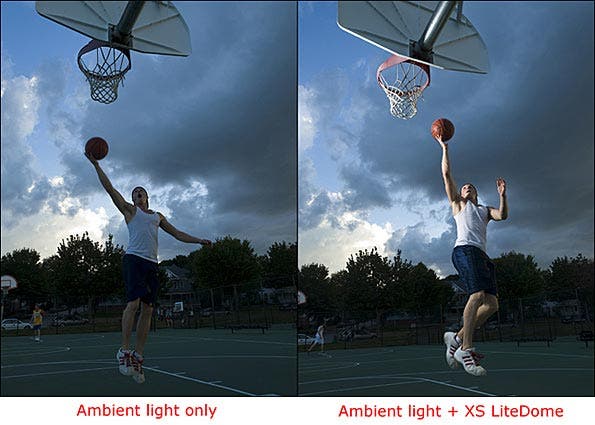
Figure 21
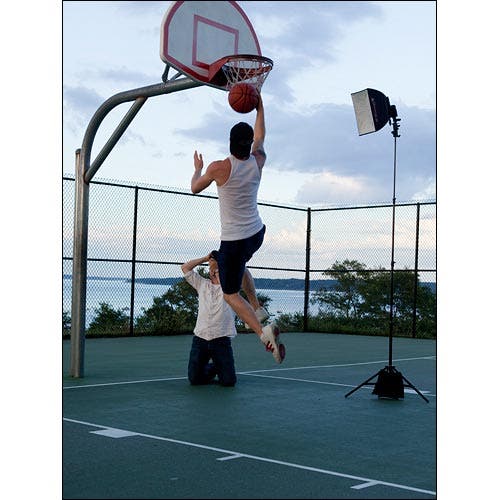
Figure 22
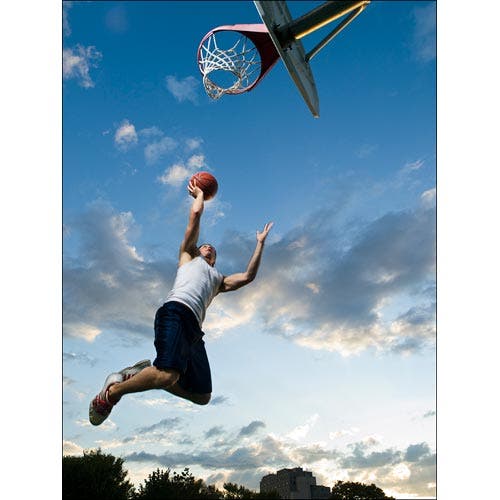
The only thing that bothered me at this point was the angle of view. I had captured James from head to toe in mid-jump, but due to the optical distortion of the wide angle lens setting as well as my relative position to him, it didn’t look as though James was jumping very high, even though he really was.
It occurred to me that my ideal vantage point would have been at about 30-40 feet below the surface of the court, shooting with a telephoto lens. But digging a hole that size would have required a lot more than an excavator and special permits, so instead I decided to work with what I had.
Risking the physical protection of both my camera and my body, I came in even closer to the net so that I could capture James’ entire body against the sky. In the setup shots below, you can see me both kneeling and sitting, but the final shots required me to lay on my stomach shooting upward. A little awkward, but it ended up being the best vantage point for the camera. [figures 23 & 24]
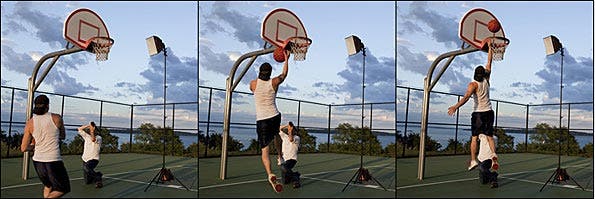
Figure 23
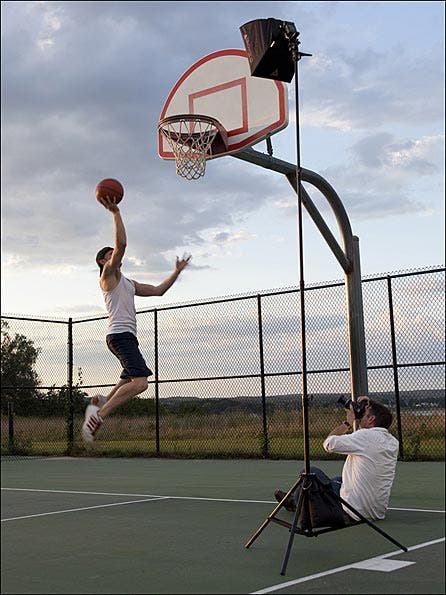
Figure 24
In addition to my lower vantage point, I asked James to try and lift his knees when he jumped so that his legs would clear the treeline. After a few runs, we came away with some great results. Below are our favorites of the bunch. [figures 25 & 26]
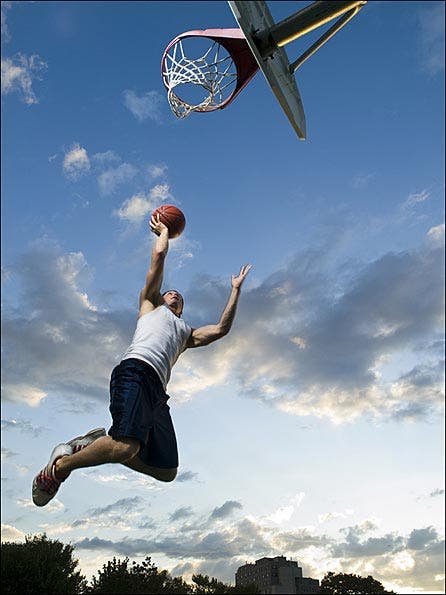
Figure 25
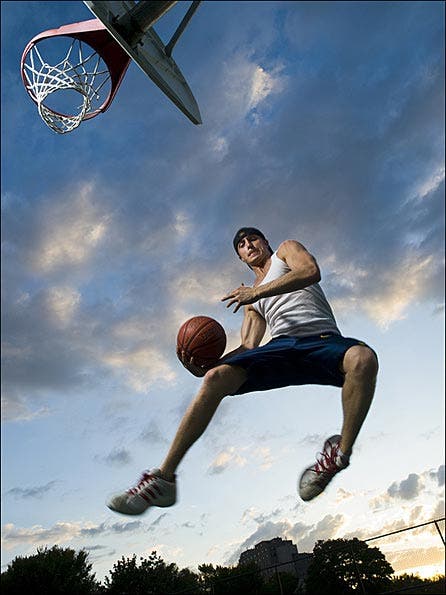
Figure 26
As you can see from the final results, the Extra Small LiteDome (along with James’ athleticism) really made these shots sing. Having a little extra portable lighting can really make a huge difference for shots like these.
As always, remember to experiment with your lighting, and above all, have fun in the process!
Written and photographed by Ben Clay, contributing lesson writer for WebPhotoSchool.com® and Photoflex.com®.
Modeled and assisted by James Helms.
Copyright © Photoflex, Inc. and Adorama Camera, Inc.