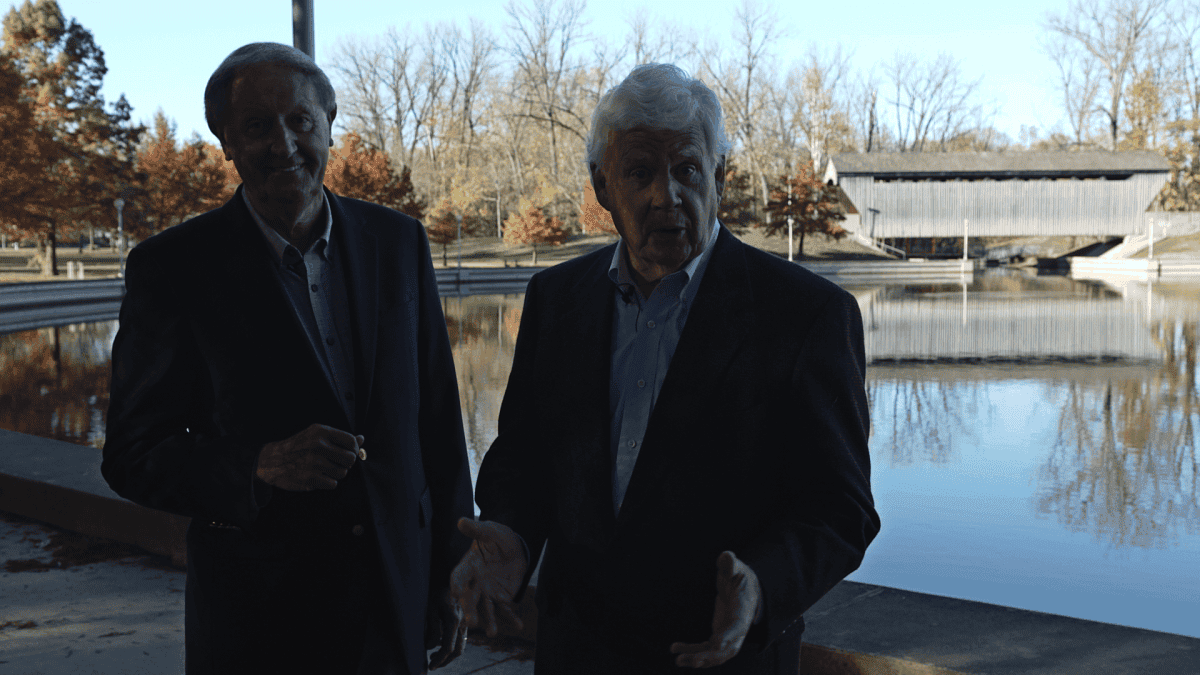
Sometimes things do go quite as you had planned on a shoot- unexpected lighting issues, impromptu locations, or even a battle with time and the setting sun. No matter what its good to know both how to adjust for these things during the shoot AND in post. Color correction is one of the most important tools in fixing some of these shooting issues that are sometimes inevitable. In this article we will talk about how to color correct the below frame, essentially relighting the scene in post. More importantly, we will be using tools available right in most NLEs. We’ll be using the Curves tool, masks, and the 3-way color corrector.
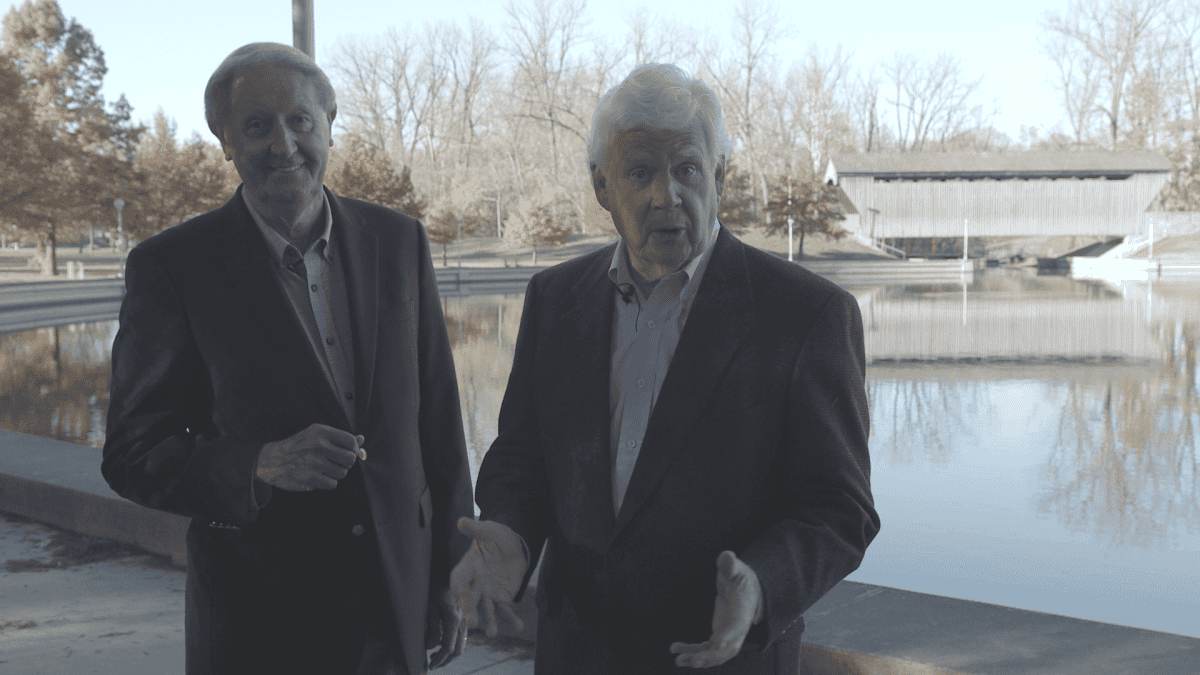
This is a grab from a shoot I was on in Columbus, Indiana. I received the call roughly 18 hours before call time to be in Columbus and I had little time or info to properly plan. For this reason, I chose to record in Sony’s S-log in ProRes 422 on my Atomos Ninja Blade. This gives the most latitude I can get out of a shot. Our talent was standing in the shade of a tree and, as you can see, full daylight was falling on the beautiful background. To get this exposure I knew the foreground and our talent would be under exposed, but I knew with the ProRes 422 capture I could fix it in post. Now I’ll tell you how I did it.
The first thing to do is to apply the Curves and Brightness and Contrast effects and begin adjusting for the foreground. Brighten up the foreground and use Curves to adjust contrast (side note: I don’t pay too much attention to numbers or values, I adjust by eye, making sure to check a parade scope before the final render to verify nothing is clipping). The first thing you’ll notice is that the background quickly begins to blow out in the highlights, relax, we’ll fix it soon.
Next, the skin tones in this image a fairly cool, this is because the camera is white balanced for daylight and the foreground is in the shade. So apply the 3-way color corrector and warm up the mid tones and the highlights by bringing the indicator on the mid and highlights wheels into the yellow/orange sections. Again, adjust by eye, but remember a little goes a long way, so don’t over do it.

At this point the background is almost entirely blown out, even the edges around their hair. But now we’re going to correct it. I probably should have mentioned at the beginning that you’ll want to duplicate the video layer. Do that now but make sure to reset or clear the effects, we’re starting fresh with this layer.
Since the background was pretty close to perfectly exposed all we’re going to do is increase contrast and bump saturation up a bit.
The foreground in this layer should be looking pretty dark. So to bring these two layers together into one good image, you need to use a mask. Using the pen tool, draw a mask on the top layer the cuts the foreground out of the image, in other words cut around the talent. Once the mask is complete, you should see a rather harsh line that separates the talent from the background. Play with the feathering on the mask to blend these two layers together. I ended up with a pretty extreme feather on mine, then I backed it off as it was spilling onto the faces and bringing the exposure back down.

At this point I strongly recommend giving your eyes a break- staring at the screen for extended periods during grading, your eyes can begin to adjust and you can easily end up with a pretty extreme color grade. Take a break; look outside, whatever you can to give your eyes a rest. Then come back and compare the corrected image to the original, flip back and forth between the two. At this point you can make whatever tweaks you might find necessary- this is more of an aesthetic preference step.
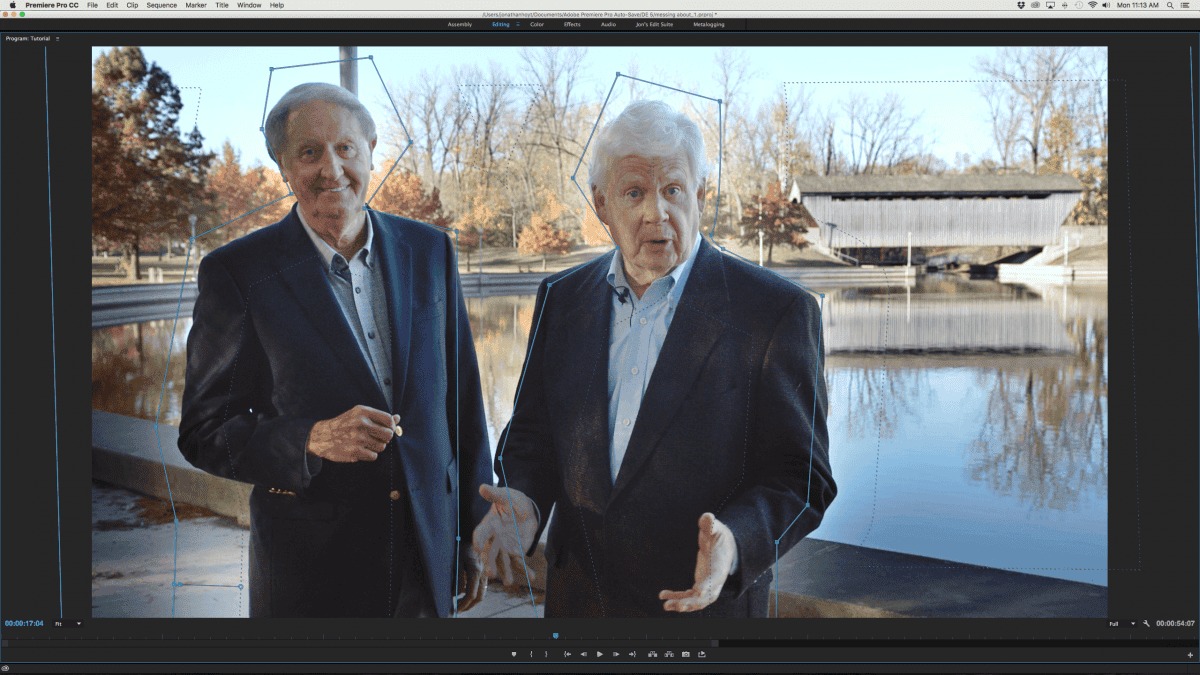
Some ending notes: this technique works in most NLE’s. I use Premiere Pro CC. I tend to do these in Premiere just to save time jumping back and forth between Premiere and After Effects. But adding layers in Premiere does slow down final render time, so it’s up to you if it makes more sense to do this is an NLE versus After Effects or some other color grading software. Good news is, like I said in the beginning, all these methods I described here work in just about any editing software.
One (last) note on masking from color correction- masking can be tricky. This particular scene was simple and the talent doesn’t move much so the mask could be static. If you use this technique to color a shot with more movement, pay close attention to how the mask interacts with layer(s) below it. A poorly animated mask can quickly betray the grade, which when done properly, shouldn’t be very evident.
