Miguel Quiles
Miguel Quiles is a New Jersey-based commercial wedding and portrait photographer as well as a speaker and educator.
In this episode of The Breakdown Sony Artisan Miguel Quiles walks you through all of his settings when shooting with off camera flashes using Sony cameras! He’ll walk you through setting up your white balance, focusing mode, as well as how to avoid screen blackouts when using an off camera flash.
Related Products at Adorama:
Sony a7RII
Sony 100mm 2.8GM STF Lens
Profoto Air Remote
Profoto D2 1000 Watt
Profoto 5ft Octa
Savage Lakeside Collapsible
Atomos Ninja Flame (newest model)
Model:
Noel Moore
https://www.instagram.com/noely1224/
Photos by Miguel Quiles
https://www.instagram.com/miguelquilesphotography/
https://www.facebook.com/miguelquilesphotography/
https://twitter.com/miguelquilesnyc
Snapchat @MiguelQuilesNYC
Hey what’s up everybody? Miguel Quiles here and in this episode of The Breakdown I’m going to walk you through how I set up my Sony cameras to shoot off-camera flash.
[Intro Music Plays]
Hey what’s up everybody! Miguel Quiles here. Welcome to The Breakdown. One of the questions that I get most often, whenever I’m teaching workshops, or I read the YouTube comments that you guys leave on my videos and one that keeps popping up all the time is, “Miguel how do you setup your Sony A7 cameras to shoot off-camera flash?”
So what I’m going to do today is to walk you through every single one of my settings to make shooting with off-camera flash very, very simple. So I’m going to be using mySony A7RII and I’m actually using a brand new lens from Sony, which is the 100mm 2.8 STF lens. I’m going to do some demo shots with you with that but we’re really going to be focusing primarily on the settings. So we’re going to go ahead and I’m going to take you into the camera’s menus and show you how I do that.
Alright, so let’s go ahead and dig into the menus here. So I’m actually going to go ahead and start by hitting the “Function” button on the back of the camera. And so, when you hit the “Function” button on the back of the Sony camera, you have very fast access to a variety of different settings. So the very first thing that you want to do is go over to your “Flash Mode” and the menu there. You want to make sure that it’s set to WL or Wireless. Many times whenever people try using off-camera flash for the first time and it doesn’t work, chances are they have it set to either Fill Flash or they’ll have it set to one of the other flash options. So you want to make sure that it’s set to Wireless. That’s the first thing. We’ll hit the Flash or the Function button one more time.
The next thing that I do is the “Focus Mode” and this is another question that I get quite often as far as what modes do I use for focusing when I’m shooting portraits in the studio. So I typically will use Single-shot Auto Focus if I’m shooting a static subject. From trying to focus on anything that is fast-moving, I may actually change it to Continuous Autofocus but typically, 99.9% of the time, I’m in Single Shot Autofocus. So we’ll dial that in and then as far as the focus area, this is what’s very important because you want to make sure that when you’re focusing on people, when you’re doing portrait, you want to make sure that their eyes are in focus. Far too often I see portraits where people use the wrong focusing mode or the wrong focusing area on these Sony cameras and they’ll get portraits where the eyes are out of focus and it’s very off-putting for the viewer. So getting the eyes in focus, of course you have Eye autofocus, which I talked about that in a prior video of The Breakdown, but let’s just pretend like you don’t have Eye Autofocus or maybe it’s just not your thing. What I will end up doing for the focus area is one of three things. So primarily I will either use the Center focus area so if I’m focusing at, let’s say f/8, f/9, f/11, (or) any of the higher f-stops, what I’ll do is, I’ll actually use the Center focus and I’ll focus and recompose. Which means and I’ll actually show it to you here in a few moments but you take the Center focus dot, you place it over the person’s eye, you push the shutter halfway down until you hear the beep that it’s confirmed, that’s in focus.
Recompose your shot and then finish pushing the shutter the rest of the way down. So that’s typically how you use that but you have to use it at a high enough f-stop because if you shoot it wide open, let’s say at a f/1.4, the focus recompose method will end up giving you portraits that are out of focus. We don’t want that. So Center focus if you are doing any aperture, whether it’s wide open, or a higher f-stop. The one that I really like to use is Flexible Spot and you actually get three different flavors of Flexible Spot. So you get kind of a small, medium and a large setting. And the nice thing about this is that, you can move the box, the focus area, anywhere around the screen. So one of the cool advantages to shooting with Sony is that you have, on say the A7RII, you have many focus points. It basically covers almost the entirety of the frame. As to where with some other DSLRs, it’s really kind of centered around the center of the screen. So here you could actually move your focusing point anywhere within the frame which is kind of nice. You could change the size of it. So if you’re trying to focus on, let’s say, a person’s eye, I might actually want to use “focus area small” and place that right over the iris, push halfway down to get it in focus, and then take the shot.
So you can choose whatever size the situation calls for, but the other one that you can use it, for example, on the A7RII is Expand Flexible Spot and this particular option will basically work very much like the Spot Focusing, but it also sometimes will pick other areas that are nearby. So this could be something that could come in handy as well, but again, same theory, you want to place this box over the person’s eye. So the biggest difference between Flexible Spot and Expand Flexible Spot and let’s say Center is that, with Center you have to focus and recompose. With the Spot Focusing features you actually will compose your shot. You’ll frame it the way you want it and then you just move the focusing dot over to the person’s eye and they get them in focus that way. All right so we’ll hit the Function button one more time to go back into the menu and the next thing is, if you’re shooting with off-camera flash, one of the big advantages is that you get to shoot at a very low ISO. That gives you the best quality images. So you want to shoot at whatever the lowest ISO is on your camera. Which on the A7RII is going to be 100ISO and your metering mode is not really going to matter so we’re not going to talk too much about that.
The other question that comes all the time, I mean I get this often, “Miguel what white balance are you using for shooting your portraits whenever you’re using off-camera flash?” Really I only use one of two. I’ll either have it on Auto because, again, if you’re shooting raw you could actually change your white balance in post. So even if you shoot with Auto and let’s say you want it to be sunlight, or rather daylight, or a shade, or tungsten, or whatever, you could actually set that up in post afterwards. So typically, 99% of the time, I’m using Auto White Balance. There will be some times when you shoot Auto White Balance and the image comes out looking kind of blue. So in those types of scenarios, even though I can change it in post, it makes it a little bit difficult for me to show someone the back of my screen because they don’t get to see the post result; they’re looking at the back of my camera. So any time it shows up blue, I will go to daylight and that’s really the only two that I will use.
If I’m using off-camera flash is to either set it up to daylight, or to Auto White Balance, unless I’m trying to go for some sort of artistic effect which, again, I tend to do that in post. But if you want to see it out of the camera the way that you’re hoping it’s going to look, you can choose one of these other White Balance options but for me Auto White Balance, that pretty much gets the job done.
All right, so now those are all the settings that I really play around with, as far as the fast menu options that you get by pushing the Function button on the back of the Camera. Now I’m actually going to go ahead and press Menu to go into the camera’s menu and I’m going to show you guys how I set it up from here. So in the very first menu you have your “Quality.” Again. You want to shoot these in raw, because this gives you the most flexibility to be able to manipulate your images in post. If for some reason, let’s say, you are shooting an event where somebody says, “Hey I need these photos right away,” Then what I will often do is shoot raw and JPEG so that way have the option afterwards to post-process an image further if I need to, but I’ll still have the JPEGs being saved on the card so that I can deliver that to my client. But most of the time it’s going to be raw.
Your raw file type, it can be uncompressed, it can be compressed.
To be honest, for off-camera flash, for most portrait work you’re really not going to see the difference. I’ve never been able to see it but there are certain scenarios where you may want to choose one or the other. I will tell you that the file size is much much bigger when you’re shooting uncompressed. It’s almost double the size so you’re not really seeing that big of a difference to really warrant having double the hard drive space being taken up. So oftentimes I’ll shoot compressed but I’ll just leave it for uncompressed for now and from there everything is set up. My camera is ready to go as far as for shooting off-camera flash. So I’m going to go ahead and actually demo this for you. We’ve got a little studio light setup here and I’ll talk you through the setup and show you the results using these menu options.
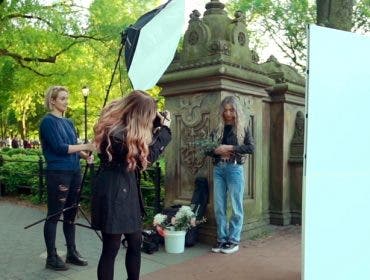
OK so we set up everything in the camera. I’ve walked you through all of the different settings for being able to use your off-camera flash and so I’m going to go ahead and just demo this here for you. So I have my A7RII like I mentioned before, got the newly announced 100mm 2.8 STF lens. I’m actually going to shoot wide open for these shots so that you guys can get an idea for what this lens is capable of producing, when shot wide open. For my off-camera flash lighting I’m using a ProPhoto Air remote which gives you high speed sync in TTL which is really awesome and I’m really excited because I actually just upgraded my lights here in the studio so I have a ProFoto D2, one of the brand new 1000 watt strobes and that also offers high speed sync in TTL. So make sure that you check that out. I’ve got it paired up with a 5ft ProFoto octa which is one of my favorite modifiers to use in the studio. For my backdrop I have a really awesome collapsible backdrop from Savage. It’s called the Lakeside Collapsible, so it’s double-sided: one side is green, and one side is kind of a beige color. Looks really, really beautiful, and if you’re seeing this on the screen so that’s really what I’m using for the shooting part of it.
What I wanted to do is I wanted to actually show you what I see through my electronic viewfinder as I’m looking to take these photos. So I’ve also connected this here within Atomos Ninja Assassin and this is basically just hooked up through HDMI to record what I’m seeing through the electronic viewfinder. So this isn’t part of the shoot, in so much as it is just the record, and show you guys what I’m actually seeing through the viewfinder. Hopefully this gives you a little bit of an almost like a POV perspective of what I’m seeing when I have the camera up to my face. So we have all of our settings dialed in and I’m going to go ahead and take a couple of shots and show you guys how this looks.
Okay so I mentioned before that you have a couple of different options when it comes to using your focus areas and one of the ones that I really like using is the Flexible Spot where you actually will frame yourself up, so Noel, stand very still right there. It’s perfect.
I frame the shot up the way I want it, and what I’ll do is I use the joystick on the back of the camera to move this over her eye, I push down half way and we’ll do one more… Perfect. So that’s how I’ll go ahead and basically frame up all of my shots. Now you guys are seeing it here through the recorder, so it’s a little bit slower but we’ll go ahead and do that one more. Very nice, excellent stuff. Just like that. So you’ll see that if I keep it around the area where her eye is going to be, you really don’t have to do very much in terms of framing it. I just follow her around and the shots will come out really nice and sharp and in focus. Now I mentioned before, using Expand Flexible Spot, which is another one and do the same thing there. You’re going to notice that you’re going to get results that are very, very similar using both options.
Very nice, excellent. One more. There we go. Perfect. Awesome! So very simple, very easy way.
You notice every single one of these shots, All I’m doing is, I’ll find her eye, frame up the shot, and then take it. Or I could leave it like this, move the box, and then take the shot. So it just all depends, you know. I’m shooting this at an aperture to where I could, kind of, follow her around and I’ll be assured that I’ll get a shot nice and in focus. But really the easiest way is just to compose a shot in the camera, move the box over to where you’re trying to focus and then take the shot. Very quick, very easy. We have the Flash set up right now in manual mode. I have the Profoto D2 set up to a power of 3.2 and that’s pretty much it. I’ve got the lights feathered a little bit forward so that, it’s actually not pointing directly at her, and that’s what gives you this really soft, beautiful quality of light. There we go. I think we got some pretty awesome shots.
[Music Plays]
Alright everybody, hopefully you found that helpful. These settings are the ones that I use all the time for shooting all of my portraits. So anytime you see a video, if you’re wondering what White Balance I’m using, or what Focusing Mode, again, 99% of the time it’s going to be what I just showed you in this video. So if you have any friends that use Sony and they’re struggling with their portrait work, make sure that you share this video with them.
Also, while you’re here on AdoramaTV, subscribe! Lots of videos. I come out with videos
every other week. But every single day there are amazing videos being dropped on this channel, so make sure you subscribe. Also, check out the Adorama Learning Center where there’s more amazing content for you to read.
Thank you guys so much for watching The Breakdown. If you guys enjoy the video leave a comment in the comment section below and again if you have any questions, make sure you leave that in the comments as well. Thanks for watching The Breakdown. Oh! And before I go follow Noel, make sure that you follow her as well on Instagram.
Miguel: What’s your Instagram?
Noel: It’s Noely1224
There you go. Follow me on instagram as well @miguelquilesjr. I knew you guys were wondering (if) am I going to forget about her. No I’m not going to forget.
Noel: not again!
Miguel: It’s not ever going to happen. So hopefully you guys enjoyed the video today. I will see you in the next episode of The Breakdown. Bye everybody.
[Outro Plays]
Miguel: That’s really awesome. Just like that, yes perfect! Work it girl, amazing, oh my gosh! That’s what really goes on.


