One of the goals in photography is to obtain the correct exposure when capturing an image. Mastering this can really take a lot of practice, but the great thing about digital cameras these days is that it doesn’t cost you anything extra to test for proper exposure – as much as you need to for getting it down.
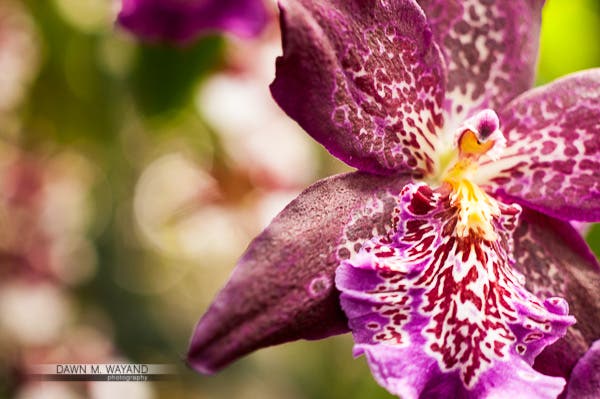
Example of correct exposure. Orchid at the NY Botanical Gardens.
Shot at ISO 250, F/4.5 at 1/50 of a sec.
So what is exposure? The technical definition of exposure is that it is a process by which light that reflects off of a subject hits the camera sensor through an opening in the camera lens (aperture) for a specific duration (shutter speed). The sensitivity of the sensor (ISO) determines how large the lens opening should be and how long the light can pass through. The proper combination of these three factors results in a properly exposed image and is often referred to as the Exposure Triangle.
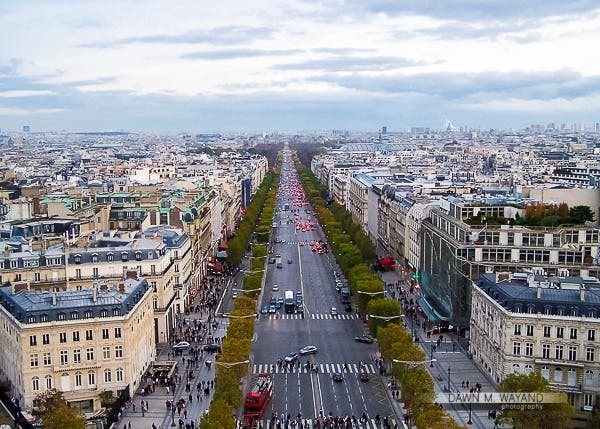
Correct exposure just after sunset as twilight has a cooler hue.
Top of Arc du Triomphe in Paris, France
The Exposure Triangle
The Exposure Triangle is made up of aperture, shutter speed and ISO, as exhibited in the detailed diagram below. Let’s discuss now what each of these elements specifically are and what they do.
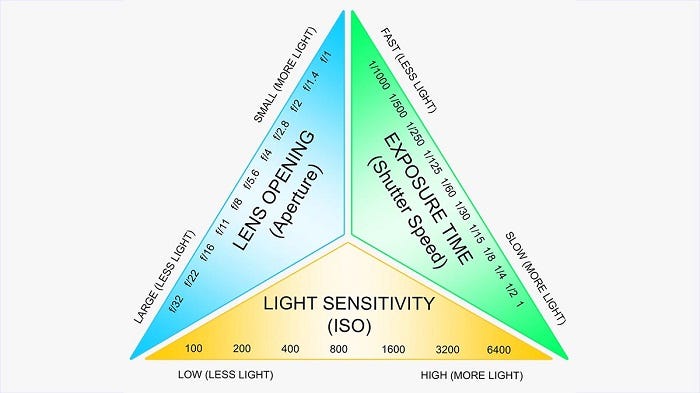
The Exposure Triangle.
Image courtesy of Google.
Aperture
As I mentioned before, aperture is basically how large the opening of the lens is when a picture is taken. The aperture is what controls the amount of light that enters the camera. The smaller the opening (the higher the number), the less light will come into the camera. The larger the opening (the lower the number), the more light will come into the camera.
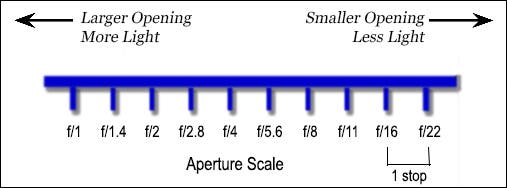
I created this aperture diagram as an easier way of understanding aperture.
When Aperture Priority is Best Used
Aperture Priority is best when you are wanting to control the Depth of Field. When shooting things like landscapes, cityscapes and seascapes, you will most likely want everything sharp in focus, so you will need the maximum aperture (a higher number). When you are photographing people, whether it’s portraits or headshots, you will most likely want your subject to be the only thing in focus with things behind your subject out of focus so as to avoid mergers and distractions in the portrait or headshot.
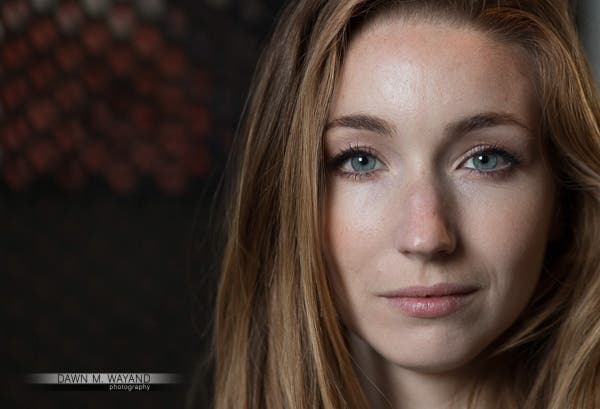
Shooting with the focus on aperture allowed me to create a shallow depth of field, blurring the background behind my subject.
ISO 200. Shot at F/2.5 at 1/50 of a sec.
Model/Actress: Valery Lessard
Shutter Speed
Shutter speed can best be described as the amount of time that the shutter stays open when a picture is taken. The longer you leave the shutter open, the more light that gets onto the sensor. This is a good setting for when you are trying to capture motion, however, you run the risk of introducing noise/grain into the image. It’s also a good way to control freezing motion and to make everything in the image sharp.

My simple diagram of what shutter speed is and what it does.
The less time the shutter stays open (a slower shutter speed), the less light will hit the image sensor. This is good for when you are trying to freeze motion. You are less likely to get noise/grain into your image when using a fast shutter speed.
When Shutter Priority is Best Used
-
To Capture Motion. Shutter priority can be used when you want to capture motion, such as in a sports game, a moving river or even trailing car lights at night.
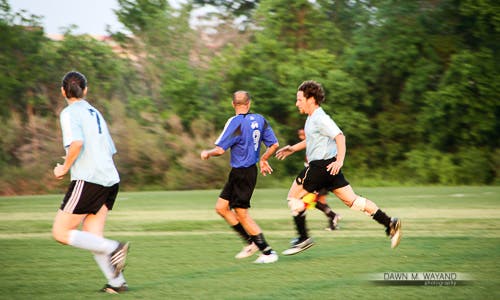
Capturing motion with a slower shutter speed.
ISO 400. Shot at F/6.3 at 1/80 of a sec.
-
To Freeze Motion. You will also want to focus on shutter speed more when you want to freeze motion for a sharp image such as capturing the water in a fountain or someone on the move.
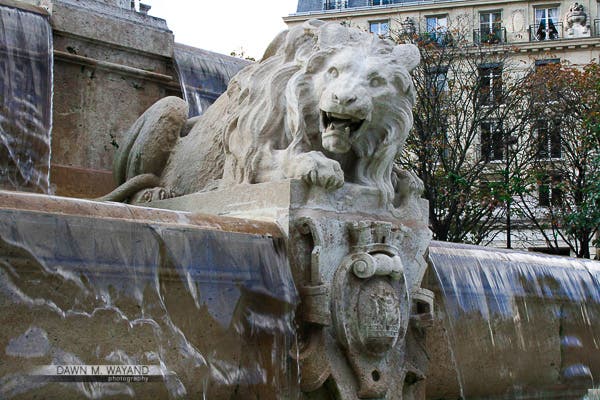
A faster shutter speed will freeze motion.
Paris, France
ISO
ISO is the measure of sensitivity your camera has to available light. The lower the ISO setting, the less sensitive your camera will be to light. The higher the ISO setting, the more sensitive your camera can be to light. The part of your camera that needs this input to make an image is the image sensor. The image sensor is what takes available light and creates the image.
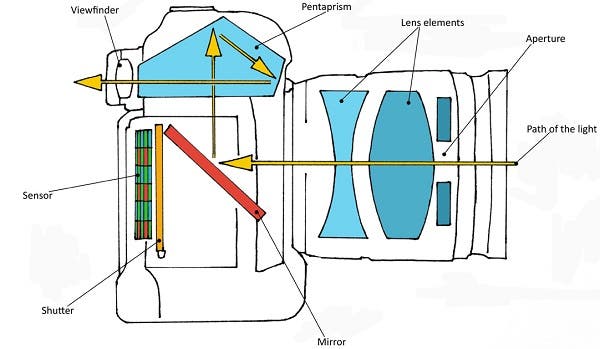
Diagram of a camera demonstrating light’s path to the image sensor.
Image courtesy of Google
ISO starts at 100 or 200 and progresses in increments by doubling its number (ie. 100, 200, 400, 800, 1600, etc.). As a rule of thumb, you want to try and keep your ISO as low as possible to obtain the best image quality. This number will usually be either 100 or 200 depending on how low your camera model’s setting will go. That being said, when trying to capture an image in low lighting conditions you will have to increase your ISO setting because you want your camera to be more sensitive to that low-light environment. However, the higher you adjust your ISO, the more likely grain will be introduced into your image. There are ways to compensate for this though.
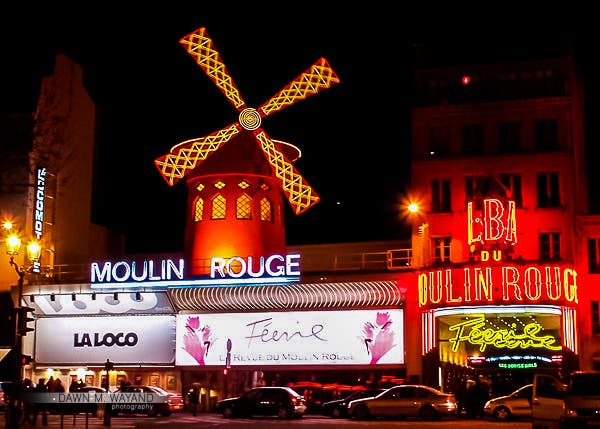
There was a lot of light emitting from the Moulin Rouge so a lower ISO was needed here.
Paris, France
When a Low ISO Setting is Preferred
You want to use a low ISO setting when there is plenty of available light to satisfy the sensor sensitivity to make the image. The workaround to use a low ISO setting in a low-light environment would be to stabilize your camera on a tripod or sit it on a stable surface and set a longer shutter time to allow more light onto the sensor. Note that anything moving within the frame may disappear or become blurred in motion.
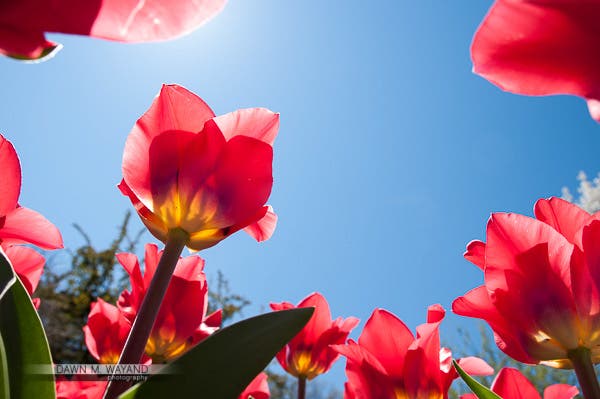
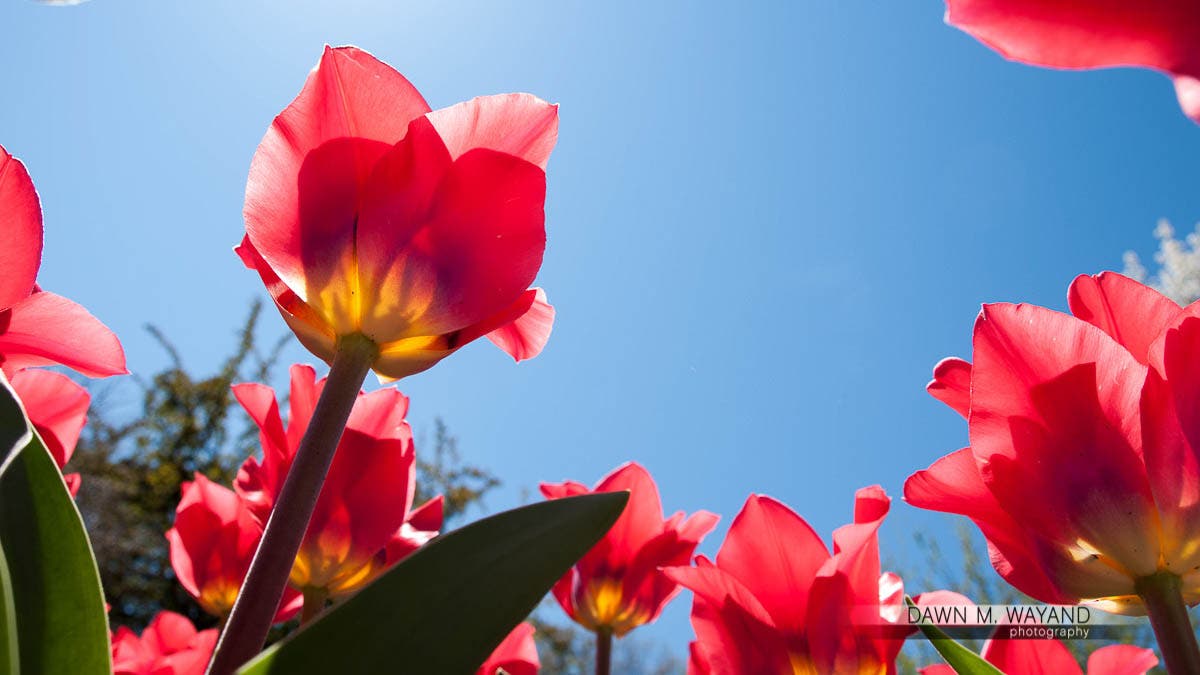
ISO 200. Shot at F/7.1 at 1/320 of a sec.
Bug’s eye view of tulips at the Brooklyn Botanical Gardens Cherry Blossom Festival.
When a High ISO Setting Might Be Necessary
You may want to use a higher ISO when you are in a low-light environment but want everything captured within the frame and/or are limited in time to capture the image. Again, you may have to compromise image quality (introduction of grain) to get that low-light shot quickly. A ceiling of no more than 800 ISO helps to maintain image quality when dealing with a low light setting.
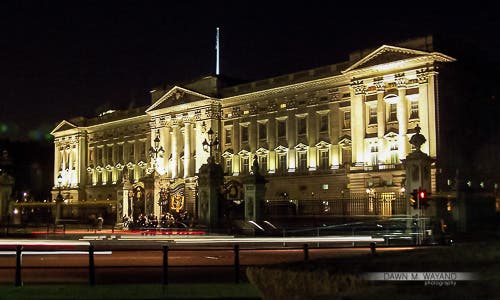
I did go above ISO 800 for this image but it was very dark so it was necessary.
London, England
Learning the Exposure Triangle
Years ago, I overheard the an explanation of the Exposure Triangle as an analogy of using a garden hose filling a bucket with water. Think of the width of the hose as the aperture. The duration that the hose is turned on for to fill the bucket is shutter speed and the pressure of the water is the ISO. This same mentor also provided us with a great exercise for understanding the relations between settings. Try practicing this with your camera. For a base to work from, the top row of numbers makes a correct exposure of a certain scene. The goal is to figure out how each row will give you the same exposure as the top row of numbers by figuring out the value of the missing element.
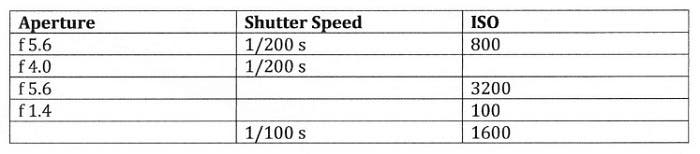
Chart courtesy of Emerson Wu
It’s important to keep in mind that changing one setting will impact the other settings so you always have to think about all of the settings.
Exposure Compensation
Exposure compensation is really an entire article in itself, so I will mention it briefly here. In some cases, when you use the aperture priority or shutter priority modes on your camera, the exposure you end up with may not be exactly what you intended. You can adjust your exposure by using exposure compensation. Raising exposure compensation will make an image brighter whereas lowering exposure compensation will make an image darker.
White Balance
To top off a good exposure, you want to also make sure that you have the proper white balance in your photo. As you can see in the first image below, tungsten lights tend to produce a warm yellow-orangish hue while a typical fluorescent light might produce a little bit of a greenish hue. If you look at a scene on a cloudy day or if it is in a shady area, the image might have a slight cool cast.
Your Camera’s White Balance Settings
As you can see in the second image below, using the incandescent setting (usually a light bulb symbol) on you camera’s white balance settings for an image where there is tungsten lighting present will add blue to the image to color correct the orangish-yellow to a near correct white balance. Using the fluorescent setting adds a magenta hue to the green environment when in the presence of fluorescent lighting. For those cloudy and shady environments, use the cloudy setting (to add a little yellow) or the shade setting (to add a little orange), respectively, to get a near perfect white balance.

The Kelvin Scale and examples of what your camera does on certain White Balance settings.
Image courtesy of Digital Camera Magazine
Using The Kelvin Scale
If you really want more control to get a little more accurate, use the Kelvin setting. Since the goal is correct white balance, you want to match the Kelvin number to the environment lighting. When using tungstens, for example, you’ll want to set your Kelvin number to somewhere around 3000 to get a proper white balance.
Other Tools
The easiest way to get your white balance correct is to use an 18% gray card and correct your images in post-production. You can also use the same Lastolite Gray Card or an ExpoDisc 2.0, snap a photo using one or the other and use that photo to set white balance under the Custom White Balance setting in your camera.
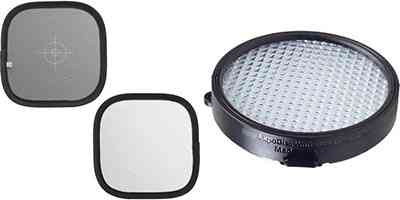
Lastolite Gray Card (left) and ExpoDisc 2.0 on the right.
If you don’t have a 18% gray card or an ExpoDisc, you can still get your white balance close to accurate by using the white balance settings in your camera.
When You’ve Got the Right Exposure…
We want to get as much right in camera as we possibly can. Getting correct exposure, including white balance, can take some practice to get right. Thank goodness we’re in the digital age! It’s all about pouring over the relationship between aperture, shutter speed and ISO settings in manual mode, additionally and optionally using exposure compensation when using aperture and shutter priority modes and getting that white balance right. If you miss the mark just a little, know that you always have the fallback of fixing some of these things in programs like Adobe Lightroom though!