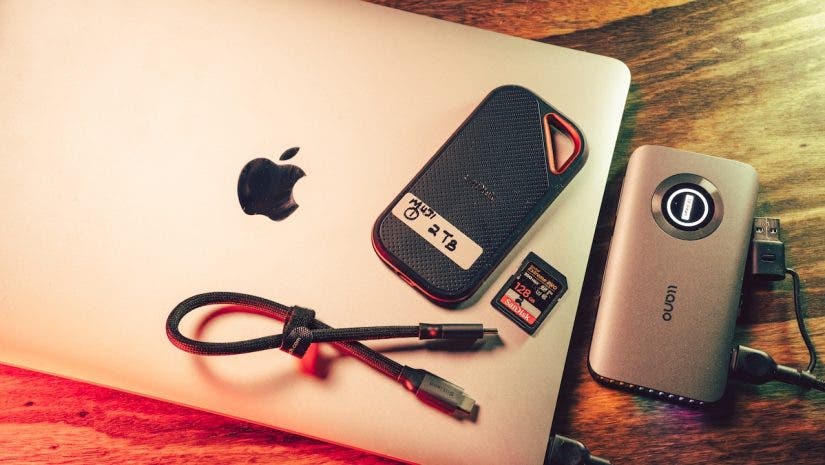
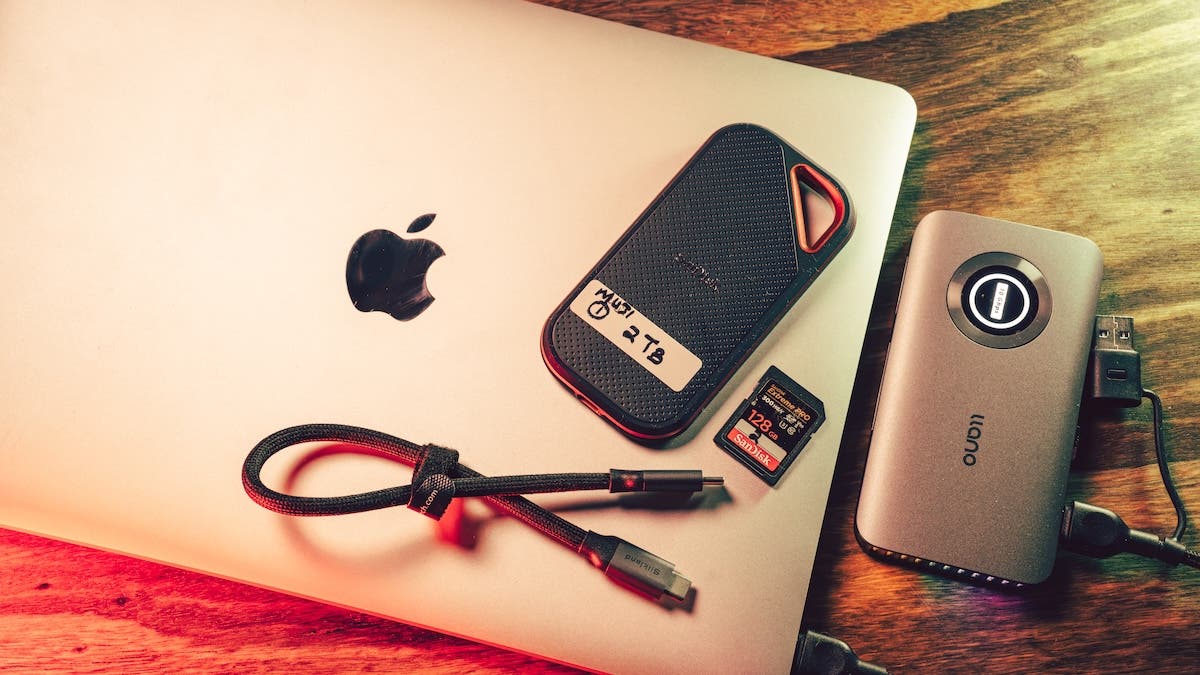
As a photographer and a filmmaker, I travel frequently for photo and video expeditions. I take backups after each shoot during my journey, a non-negotiable routine developed after an incident in which I lost a memory card some years back. Because I also record behind-the-scenes footage of my work for social media and courses, the volume of data captured is large on multiple memory cards. A single shoot thus requires an on-the-go travel backup system that is fast and reliable, so less time is spent, and fatigue is avoided, while giving peace of mind.
There are travel backup solutions that allow you to transfer data directly from memory cards to a hard drive, usually built in a single unit, without a laptop. However, if you are someone like me who wants to download, look, correct and learn from any mistakes made during the shoot, a laptop-based system is superior.
We will cover the following in this article:
- The hardware required for a high-speed data ecosystem.
- The technical pillars of a brand-agnostic setup.
- A simple two-tiered backup strategy.
- Bonus tips for field organization.

Watch what the weakest link in a backup system usually is
The Hardware: Core Components of My Travel Backup System
The brands in my camera bag are personal preferences developed through marketing research and also years of experience using them. The technical specifications, however, I would consider are non-negotiable. Below is the gear I currently use to manage my data on the road.
| Component | Salient Features |
| Apple MacBook M1 | The central mobile workstation is used for data transfer, on-the-go basic editing, administrative tasks, and communication. |
| SanDisk 2TB Extreme PRO Portable SSD(plus an additional 2 TB SSD, similar specs) | A high-speed NVMe drive (up to 2000MB/s) with a ruggedized, heat-dissipating aluminum chassis for heavy workflows. |
| Silkland USB4 / Thunderbolt 4 Cable | A high-bandwidth cable supporting 40Gbps transfer speeds, ensuring a stable and fast connection between the Mac and peripherals. |
| Llano CFexpress Type A/B Card Reader | A professional-grade dual-slot reader that enables rapid offloading of media from both Type A and Type B CFexpress cards. It is USB Type-C and supports 10 Gbps (USB 3.2 Gen 2) high-speed transmission. |
| SanDisk 128GB Extreme PRO SD Cards | High-speed, reliable storage media optimized for high-bitrate video recording and fast data retrieval. |
| Lexar 64GB High-Speed MicroSD Cards | Reliable, fast storage used specifically for drone and action camera footage. |

Travel Backup Gear: specifications must not be compromised
The 5 Pillars of a Professional Travel Backup System
Any system is only as strong as its weakest link. When building your own, look for these five pillars regardless of the brand you choose:
- A High-Performance Laptop: Your central workhorse must have a processor capable of handling your video playback and enough RAM to manage large photos as well as high-speed ports, such as Thunderbolt or USB4, to enable fast data transfer.
- Thunderbolt 4 / USB4 Data Transfer Cables: Do not settle for charging cables. Look for certified 40Gbps cables for reliability. This ensures that high-bandwidth transfers remain stable and never drop out, which is a common issue with standard USB-C cables when moving large files.
- High-Bitrate Media Cards: You need cards with professional-grade read/write speeds. Look for high-speed SD (V90) or CFexpress cards that will not choke during bursts or long recording sessions.
- High-Speed NVMe Working Drive: To use an external drive as Hot Storage, it should be an NVMe SSD with speeds of at least 1000MB/s to 2000MB/s. We will discuss Hot Storage shortly in our backup workflow.
- Professional-Grade Card Reader: Your card reader should match the speed of your cards. A high-bandwidth, multi-slot reader allows you to offload multiple media types simultaneously, eliminating the one-card-at-a-time bottleneck after a long day of shooting.
My Post-Shoot Travel Backup Workflow
When I am out in the field, the staggering amount of data generated from one shoot usually exceeds the MacBook M1’s storage capacity. Between the 61-megapixel sensor on my Sony a7R IV, which can easily eat up 60MB per RAW file, and the heavy 10-bit Log footage from the Sony a7S III, I often end up with more than a hundred gigabytes per shoot. So, instead of relying on the laptop’s storage, I use a tiered redundancy strategy:

You must devise a workflow that has backups on at least two devices.
1. The Direct-to-SSD Transfer
I connect my SanDisk 2TB SSD to the MacBook using the Silkland Thunderbolt 4 cable. I use this specific cable because, with 10-bit video, any drop-out in the connection can corrupt a file. I then plug my Llano reader into the second port and copy-paste everything directly to the SSD.
2. Data Redundancy: The No-Format Strategy
I do not format my memory cards once the data is on the external SSD. Having a reserve of cards ensures that if the SSD is lost, damaged, or stolen while traveling, I still have every single shot on the original media. It is, however, a personal and expensive choice that requires more investment in cards, but the peace of mind is worth it when you are dealing with high-stakes work.
This means you now have two tiers of backups:
- Cold Storage: The memory cards where the data will live in its original format, untouched.
- Hot Storage: The SSD where data is frequently accessed, saved, and even edited while in transit.
3. The Format Strategy: Adding a Cloud Tier
If you do not have extra memory cards, formatting the card before the next shoot is the only option. Failing to format before a new session is a recipe for frustration; you will likely run out of space mid-shoot, forced to scroll through the camera’s LCD to delete files manually.
Reality catches up with me, and I do face this situation from time to time when my cards run out. Because formatting a card means the data will be on the SSD only, I add a third layer of protection whenever possible. If there is access to a fast internet connection, uploading the most critical files to any cloud-based storage service is the safest avenue. I maintain an extra storage subscription on Google Drive. This ensures that even if I format the physical card and something happens to the SSD, my work is still safe in the cloud.
Performance Review of the Setup
Before upgrading to this travel backup system, it would take 45 to 60 minutes to transfer 116 GB of data from a fast 300 MB/s SD card to the SSD via the laptop. 116 GB is a random amount of photos and videos I chose to perform the test. The bottlenecks were not the memory cards, the laptop, or the SSDs, but the card reader and the cables.
After upgrading to a Thunderbolt cable and a Llano multi-card reader, I can transfer the same amount of data in under 7 to 9 minutes.

Based on the test of transferring 116 GB from the SD Card only, here is the breakdown of the efficiency gains:
The Stats
- Time Reduction: Reduced backup time by 84%.
- Speedup Factor: The new system is 6.25x faster than the previous setup.
- Data Velocity:
- Old Setup: Approx 39 MB/s.
- New Setup: Approx 240 MB/s. This is finally utilizing the near-maximum potential of my 300 MB/s memory card.
- Time Reclaimed: 42 for every 116 GB transferred.
Bonus Tips for Travel Backup Eco Systems
As a creator, you are part of the system and the main driver; the management of data and the physical items is in your hands. Here are a few pro-level tips for your next travel adventure:
Organization & Labeling
- Never throw a naked SSD in your bag; use a hard case to protect the fragile USB-C port.
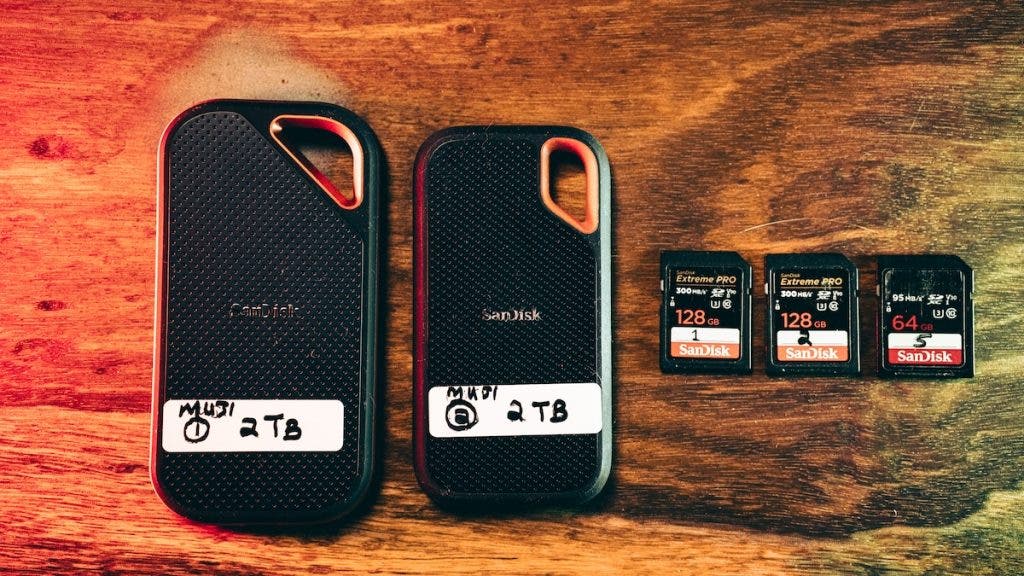
- Label the outside of your drives so you do not have to plug them in to see the contents. Paper and tape work easily. I even label them in the computer, for example, 128 GB ONE, 128 GB TWO, 128 GB THREE, and so forth.
- Use a permanent marker to number your cards (01, 02, etc.) for easy troubleshooting.
The Two-Pouch System
- Keep empty, formatted cards in a pouch/card case labeled “Ready”.
- Put used cards in a pouch/card case labeled “Archive”.
- Slide the physical write-protect tab on SD cards to lock them immediately after they leave the camera.
Field Maintenance
- Avoid formatting cards on your laptop to prevent file structure errors.
- Label your 40Gbps cables so they do not get mixed up with slow charging cables.
- Save a simple .txt file on every SSD with your name and phone number in case the drive is lost.
- Make sure to enter your name and email in your camera’s setup. This information will automatically get included in the EXIF data of your photos so that if someone finds your memory card, they can contact you. EXIF (Exchangeable Image File Format) is embedded metadata that captures technical details of each photo.
Final Remarks
A robust travel backup system is an investment in your creative endeavors. By eliminating the anxiety of data and financial loss, and ridding the friction of slow hardware, you clear the mental path for what actually matters: capturing the shot and telling the story.
Read more: A Beginner’s Guide to Photo Storage