Seascape photography is one of the most satisfying branches of landscape photography. Because of the rugged natural elements found along the coastline, there are endless permutations for how you can capture the moving water. The creative challenge of shooting long exposures to reveal sweeping, ethereal vistas, sending up a drone for a top-down perspective, and using fast shutter speeds to freeze high, crashing waves is what makes seascape photography my favorite.
The true excitement of seascapes lies in testing your compositional skills, gear prep, mastering location scouting, judging the best time of day, and analyzing weather systems.
In this article, I will break down all of the above, sharing tested tips and tricks to elevate your coastal images.
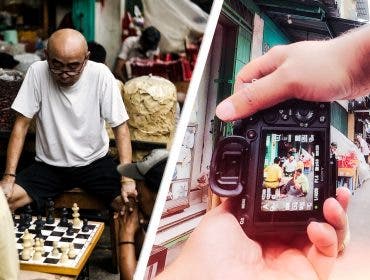
Gear Preparation
I suggest utilising a camera that allows you to manually control your aperture, shutter speed, and ISO. The ability to swap lenses is highly preferable, as is the capability to shoot long exposures, from a few seconds up to 30 seconds or more, using either a self-timer or a shutter release cable.
Lenses
For seascape photography, I recommend using a wide-angle lens, such as a 16-35mm, to capture the ocean’s atmosphere: sand, rocks, the ebb and flow of water, golden-hour light, and the drama of the clouds. However, if you want to shoot massive waves and compress the ocean’s patterns, a telephoto lens like a 70-200mm f/2.8 or longer is ideal.
Filters
- Circular Polarizer (CPL): It is useful for cutting through reflections on wet rocks or tidal pools.
- Neutral Density (ND) Filters: Not a must-have, but I do advise investing in a ND filter. Go with 3-stop, 6-stop, or 10-stop, for long exposures.
- Microfiber Cloths: Ocean mist and sea spray are constant factors, so bring multiple cloths to keep your front element clean.
- A Sturdy Tripod: While a light travel tripod might suffice if you are on a strict budget, a heavy, sturdy tripod is required because tripod legs sink into wet sand, and you stand in moving currents.
- Shutter Release Cable: This lets you shoot past your camera’s 30-second limit in Bulb mode. Plus, it gives you precise timing when the water hits the rock or beach in your composition.
- Apparel & Accessories: Shorts and waterproof shoes are highly recommended to wade into the surf comfortably.

Here’s why you need a sturdy tripod. Remember to keep an eye on big, unexpected waves
Caution and Safety
Seascape photography is thrilling, but a surprise “sneaker wave” can easily claim your equipment, or worse. If you are visiting a spot with volatile waves and slippery rocks, go with a buddy. I have seen many unsteady tripods tipping into the surf, my own included, and unexpectedly powerful waves knocking photographers off their feet. Avoid getting too close to the danger zone – safety first.
Composition and Choosing a Location
Composition is the soul of any photograph, but when utilizing a wide-angle lens, it needs to be particularly deliberate. This is because a wide field-of-view requires anchoring your image with an interesting foreground subject to draw the viewer’s eye seamlessly through the middle ground and into the background. However, sometimes the natural elements combine so powerfully that a traditional, distinct foreground element isn’t necessary.
A great composition is only possible if you are in the right location.
- Digital Scouting: Use Google Maps to find interesting coves or rock formations. Use apps like PhotoPills to check whether the location aligns with sunrise or sunset, and, critically, to check the tide charts. A beautiful beach at low tide might be completely submerged and inaccessible at high tide.
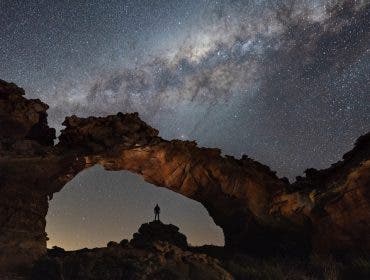
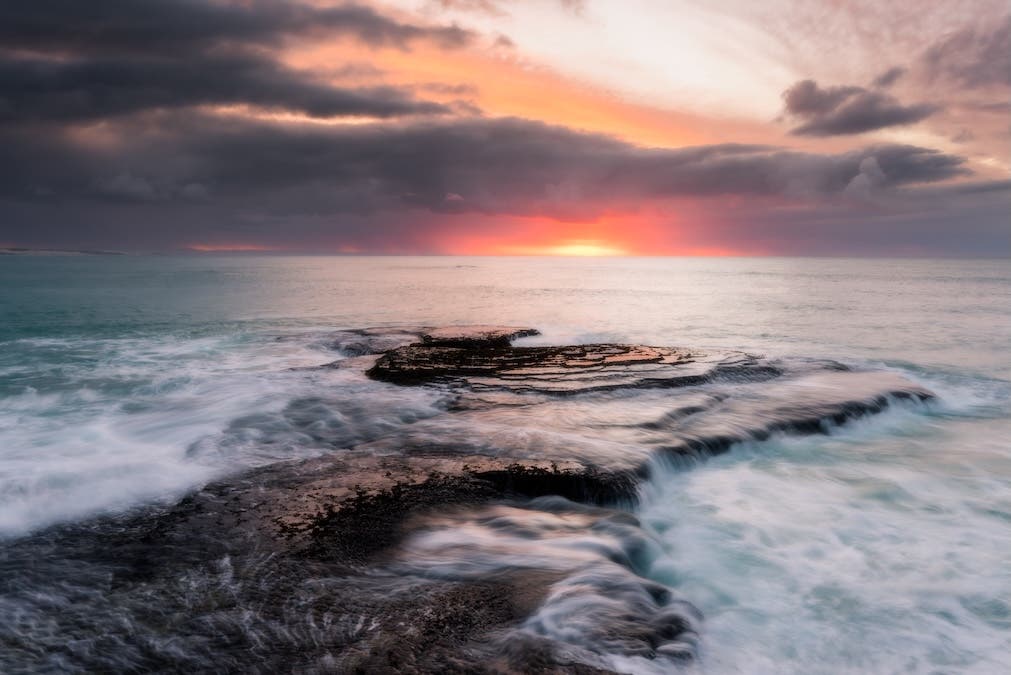
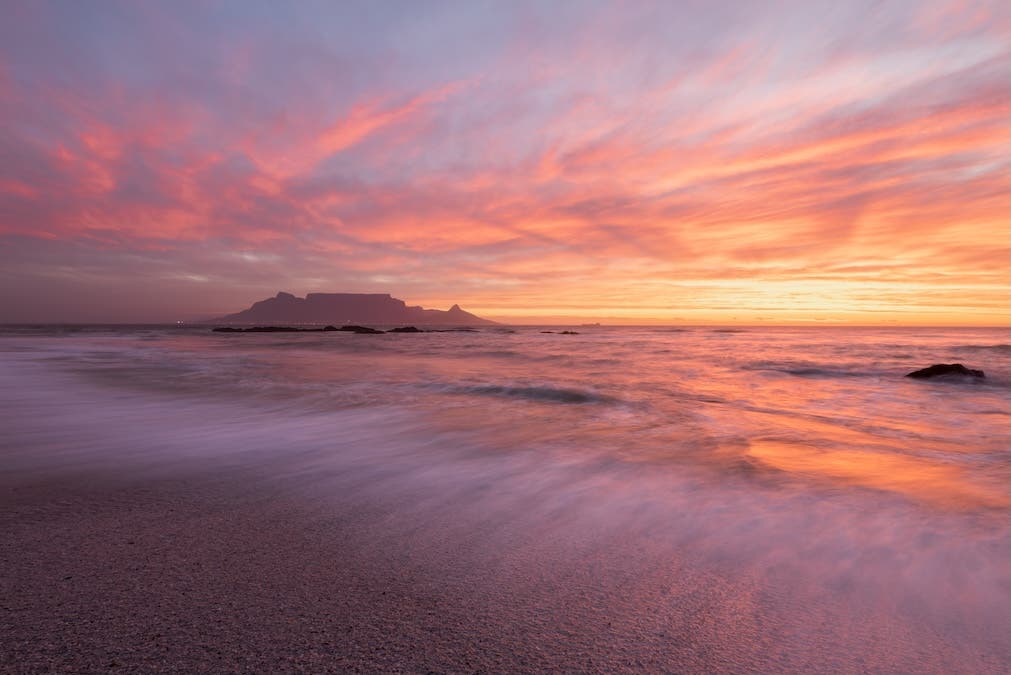
- Time of Day: Shoot during the Golden Hour for warm, directional light that highlights the textures of the rocks and waves. The Blue Hour (twilight) is perfect for ultra-long exposures, offering soft, moody, and even lighting.
- What to Look For: Train your eye to spot leading lines in the sand, jagged sea stacks, reflective tidal pools, or interesting pebbles. Look at the sky, dynamic clouds are just as important as the water.
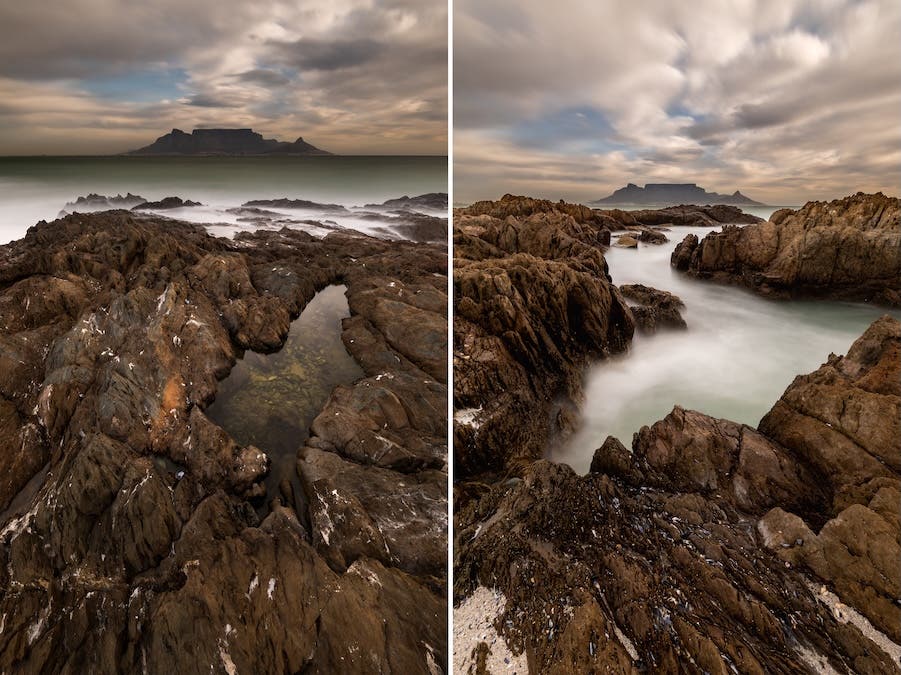
- Tripod Height: A low tripod angle exaggerates foreground elements such as leading lines or rocks, making them feel monumental. A higher angle compresses the scene slightly, allowing you to shoot over immediate obstacles to reveal the wider patterns of the water and the middle ground.
Camera Setting Guidelines
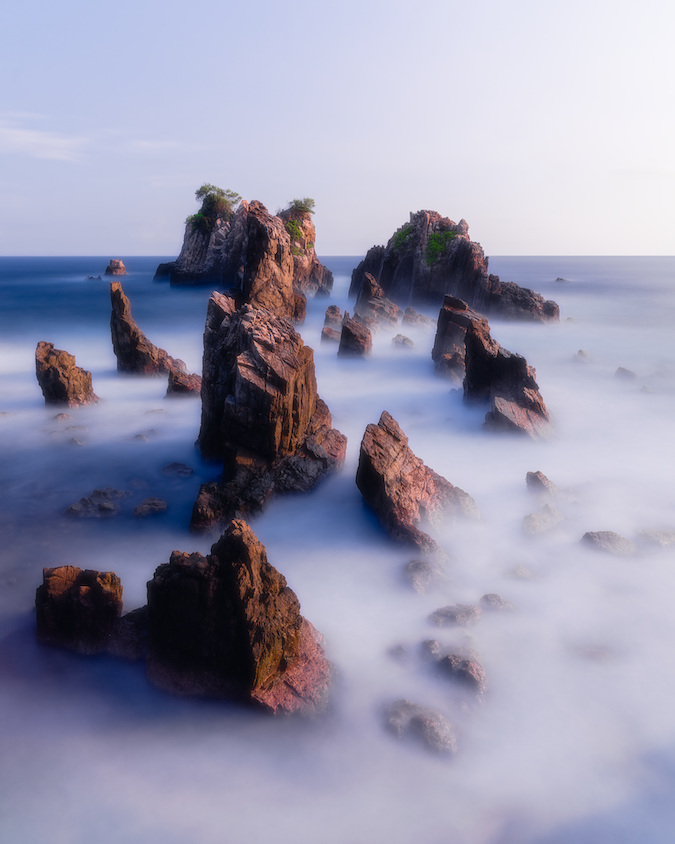
The camera settings, especially your shutter speed, depend on what you want to achieve. If you want to create silky smooth water with no waves or ripples, long exposure with ND filters is the answer. For water patterns or textures, I find that sometimes 1 second can be a bit too long.
Rather than relying on strict numbers, use these conceptual guidelines to dial in your settings:
Aperture & Depth of Field
Use a narrow aperture such as f/9 or f/11 to ensure everything from your immediate foreground to the distant horizon is in sharp focus. Learn your specific lens’s “sweet spot” for sharpness. Conversely, if you are shooting massive waves far out at sea with a telephoto lens, you will need a wider aperture paired with a fast shutter speed to freeze the action.
The ISO Balancing Act
Keep your ISO as low as natively possible to retain maximum detail. However, don’t be afraid to raise it slightly to achieve your desired shutter speed.
Shutter Speed for Water Textures
During golden hour, a shutter speed of around 0.5 – 1 second is generally ideal for capturing the beautiful, streaking “veins” of water as it retreats over sand or rocks. For ethereal, flat water and streaking clouds, you will need to enter the realm of long exposure, utilizing your ND filters and bulb mode to shoot for 30 seconds or even many minutes.
Increase or decrease the ISO to get your desired result. For example, if your long exposure is rendering at 1 second and you prefer a 0.5-second exposure for better water texture, increase your ISO slightly to reduce the shutter speed.
Timing is Everything
For me, seascape is about timing the water. Press your shutter right as a receding wave begins to pull back over the rocks, or exactly a split-second before a wave crashes into your main subject, to capture the most dynamic patterns.
Shoot Voluminously
I shoot many frames of the exact same composition. In Lightroom, I choose the best from the variety of wave patterns to see which one perfectly reflects my vision.
Nailing Focus
Focus on the most interesting element in the composition in the foreground, for example, a rock formation over which the water is splashing. I usually switch to manual focus so that during low light, the camera does not hunt back and forth to focus each time the shutter is pressed.

Editing Priorities
When editing a seascape, establishing a visual hierarchy is your top priority.
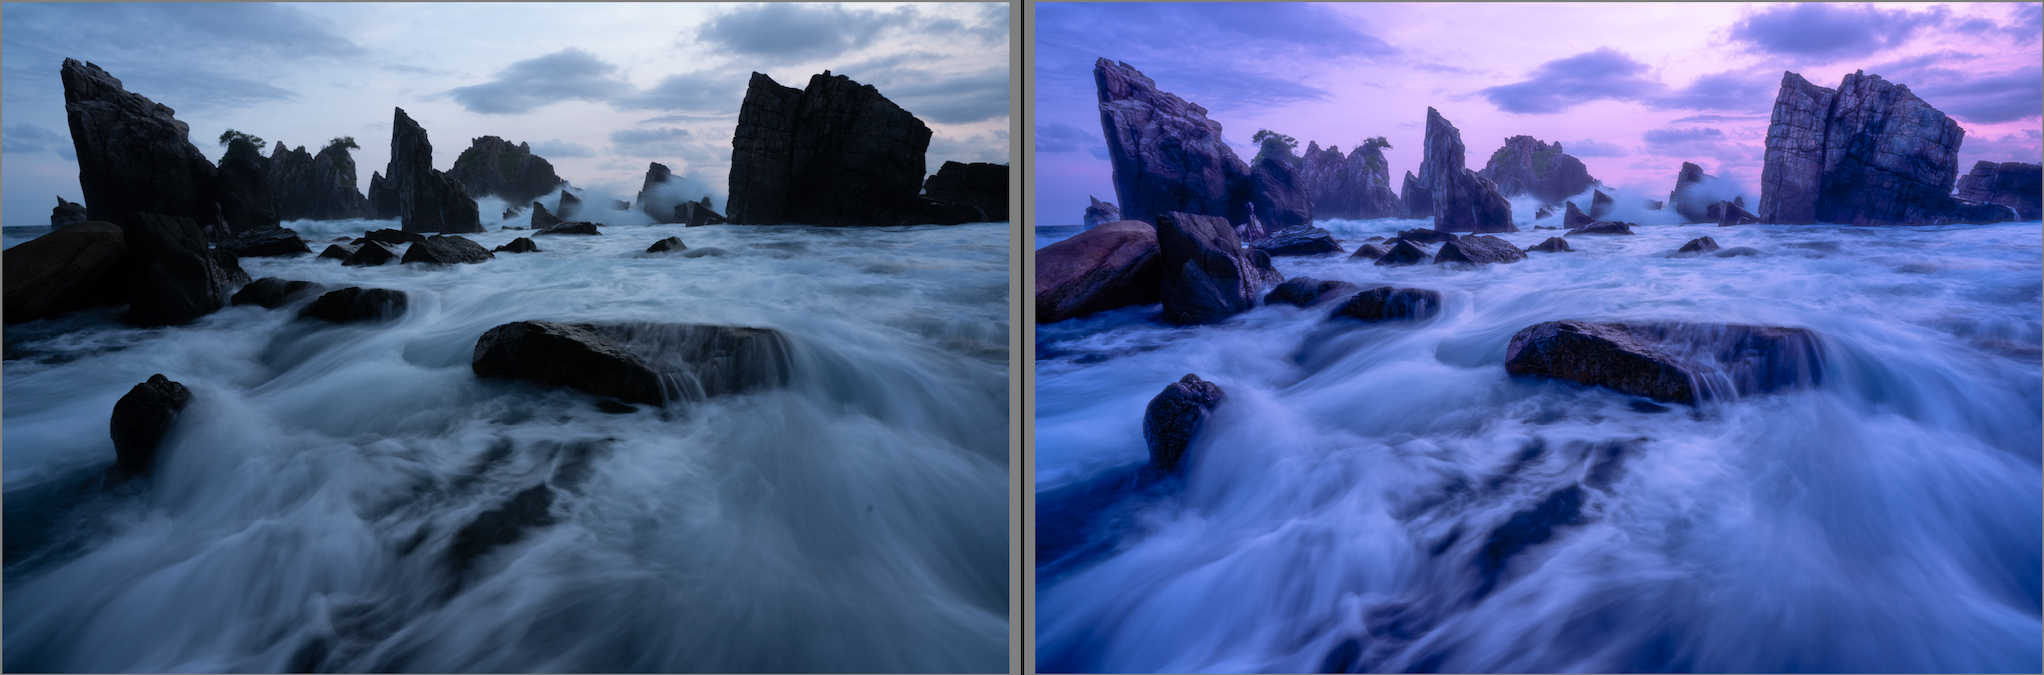
- Global vs. Local: Start with global adjustments to recover your shadows and tame your highlights, then move to local adjustments. This is where RAW files are essential.
- The Sky: The sky should be dramatic, but shouldn’t overpower the ocean. Control your highlights and add contrast to the clouds.
- The Foreground & Middle Ground: Use dodging and burning (lightening and darkening) to emphasize leading lines, water trails, or interesting rock textures in the foreground.
- De-emphasize Distractions: Darken the edges of your frame slightly using a subtle vignette or drop the exposure on cluttered, distracting rocks on the periphery.
Bonus Tips for the Field
- Cover Your Viewfinder: If you are shooting long exposures on a DSLR, light can actually leak in through the optical viewfinder and ruin your image. Cover it with the provided eyepiece cap or black tape.
- Post-Shoot Gear Care: Saltwater and sea breeze are highly corrosive. When you get home, wipe down your camera body, lenses, and wash your tripod legs with fresh water to prevent rust and salt buildup.
Final Remarks
Seascape photography demands patience and a willingness to get a little wet. For me, it is more than just shutter-speed calculations; it is about enjoying the creative process of taming the tide through your lens and fostering respect for the ocean through your images.