Picture does not represent the actual item
See what's in the box
This item is no longer available.
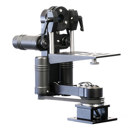
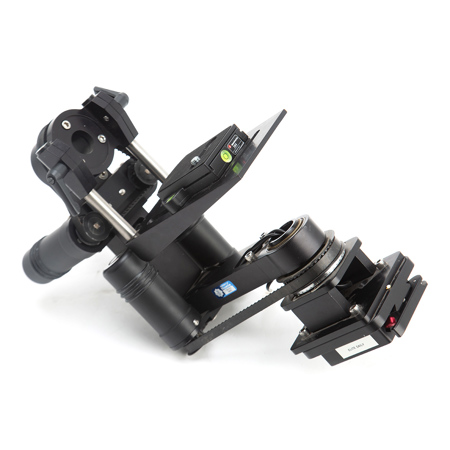
Originally, when Kessler designed version one of the Kessler REV 2 Revolution 1000 Series Pan and Tilt Head without Oracle Controller, it has to be used in the under slung position on cranes. However, because of the ability to use it for shooting a time-lapse, many operators started to use it in the over-slung position, where the centre of gravity is higher. However, this arrangement forces you to ensure your base is secure because as your setup gets higher, the more unstable it becomes. In order to make the head more suitable for shooting in the over-slung position, Kessler have made a few modifications. The first thing was the motor position. The Pan axis motors are now inverted, which enabled the mounting area to be lowered by 3.75" to 1.75". If you are wanting it even lower and do not need the cables to pass through, you can lower it to a 1/4" by removing the stand offs. To do this, you need to remove the four screws on the base plate and then remove the four screws on the mounting plates. Once you have done this, you can attach the base plate directly to the column on the head to achieve the 1/4" configuration.
Another modification made was an adjustable Tilt support arm so you can lower the camera platform by 4". This helps you fine tune the height you desire. To lower, simply loosen the screw on the tilt arm and fine tune the height. In its lowest configuration, it is about 8" shorter than the height of version one, which is almost half the height of version one. However, if you are wanting to have access to the original size, if you are using a larger setup, such as a long lens or matte box, you simply loosen the screw and adjust to the height you desire. By raising the height, you can gain access to more movement if desired when shooting with a larger camera configuration. One great feature of this system is the ability to order the 1000 series motor. It is a good all around motor, however, if you are either shooting on a long lens or primarily shooting time-lapse, you may want to look at getting the 1000 series motor. Basically, the difference is that the 1000 goes at half the speed.
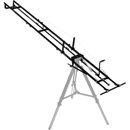
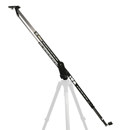
It is to use the Kwik Release System. The second is to mount directly to your sliders and cranes. Use the bolts provided in each case. For the CineSlider, use the four screws included with CineSlider . To mount to the KC-Cranes, use the bolts and wing-nuts provided with the Rev 2. You can also use a ball mount to attach it as well. You can then mount the head to anything with a ball mount, such as a tripod, Pocket Jib or Shuttle Pod.
It is to use the Kwik Release System. The second is to mount directly to your sliders and cranes. Use the bolts provided in each case. For the CineSlider, use the four screws included with CineSlider . To mount to the KC-Cranes, use the bolts and wing-nuts provided with the Rev 2. You can also use a ball mount to attach it as well. You can then mount the head to anything with a ball mount, such as a tripod, Pocket Jib or Shuttle Pod.