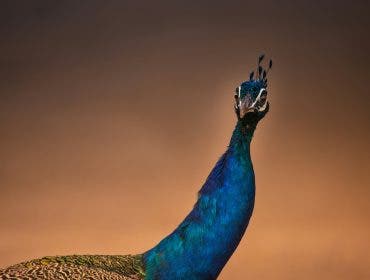
I think most of us with a garden and an interest in wildlife photography have tried to photograph birds in our gardens, only to give up after a couple of attempts, thinking that there is not enough space, that the scene is too cluttered, or there is a feeder in the way, which makes the image look less natural. However, with a little preparation, you can build a small setup to capture high-end bird photography right in your own garden.
Problems
Let’s begin with the problems you might encounter when photographing garden birds.
Firstly, by walking around, you immediately make most birds fly away or at least take shelter, where they feel most protected, which is the most obvious nightmare for high-end bird photography. The birds will seek cover in a tree, bush, or a hedge. Even when they are out in the open, you will likely find that your otherwise favorite tree is adding to the clutter in the background.
It is rare for birds to land on a beautiful perch with an uncluttered background, and the light is just perfect. However, there is a simple approach we can take to create the perfect conditions for this to happen, while helping the birds find what they need to make it through the day. Feeding garden birds is widely accepted, and we can use that to our advantage.
Step 1: Gear
Before you get started, here’s what I use for this kind of photography.
I’m using a Nikon Z 400mm f/4.5 lens on a Nikon Z8 camera body. However, less can definitely do it. A focal length of around 200-600 can work, as the setup is fairly flexible. And since garden birds are active throughout the day, you aren’t depending so much on shooting early mornings as is usual in wildlife photography.
Full-frame, crop-factor, or micro 4:3 sensors don’t matter much here. You do get an advantage with noise and depth-of-field roll-off with a full-frame camera, but it is not needed by any means.
Don’t forget a sturdy tripod. Birds have their own rhythm — sometimes they’re everywhere, sometimes they vanish for a while. Even a quick shadow or a sudden move can clear the whole scene for ten minutes. The less you move, the better your chances.
Step 2: Look for optimal spots in your garden
If you’re already feeding birds, that’s great. But it might be worth rethinking where you’ve put the feeder.
Try to put it close to where you want your perch.
Consider where the light hits specific spots in your garden, and whether you prefer front, side, or backlighting.
You also need to consider the background. It should be far enough away from the feeding station and perch so that the background is smooth when using a shallow depth of field. At least 6 meters is preferred for a smooth background. However, it depends on the camera-to-perch distance, the focal length, and the aperture.
Place the feeder at your chosen location, and fill it up with seeds.
It usually takes a couple of days for the birds to find the seeds if you haven’t fed birds in your garden before. They need to learn that this is a reliable spot and that they should begin visiting your feeder regularly.
From inside your house, take a look at where the birds rest and how they fly towards the feeder. From which branches do they take off, and do they fly directly to the feeder?
Step 3: Finding the Perch
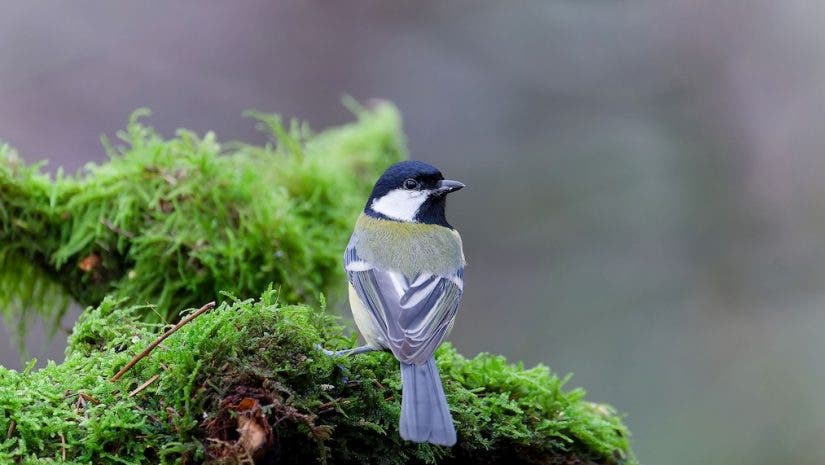
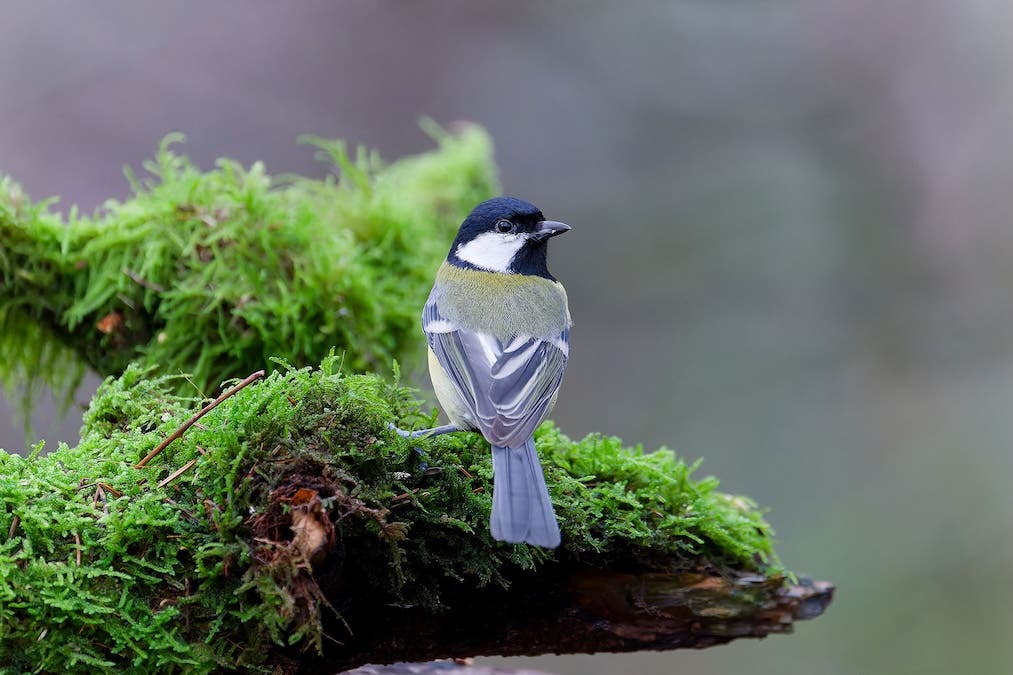
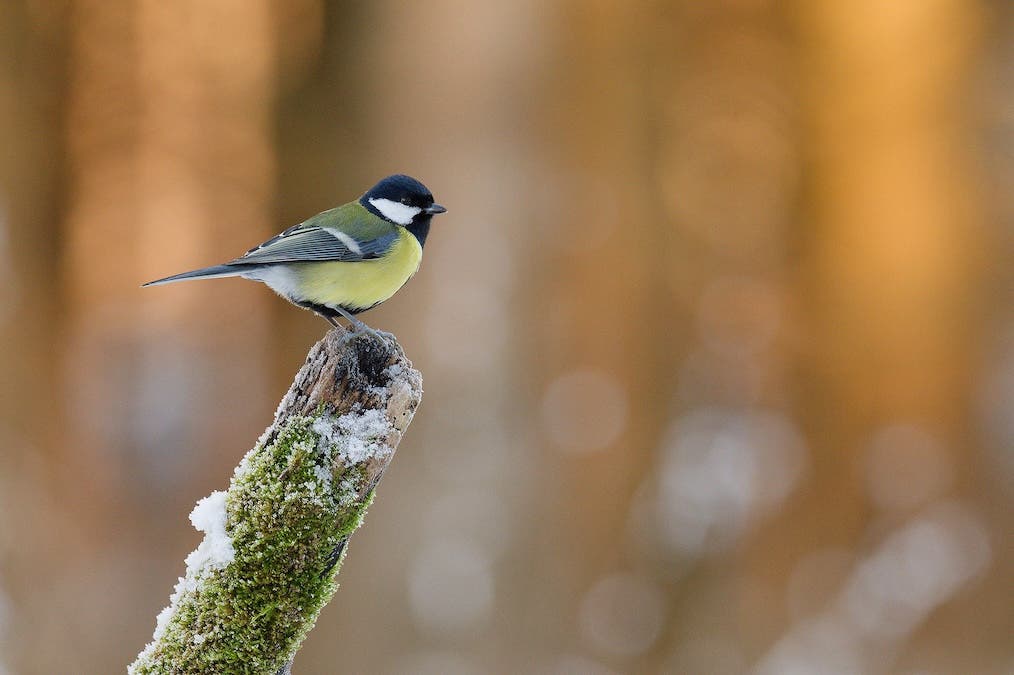
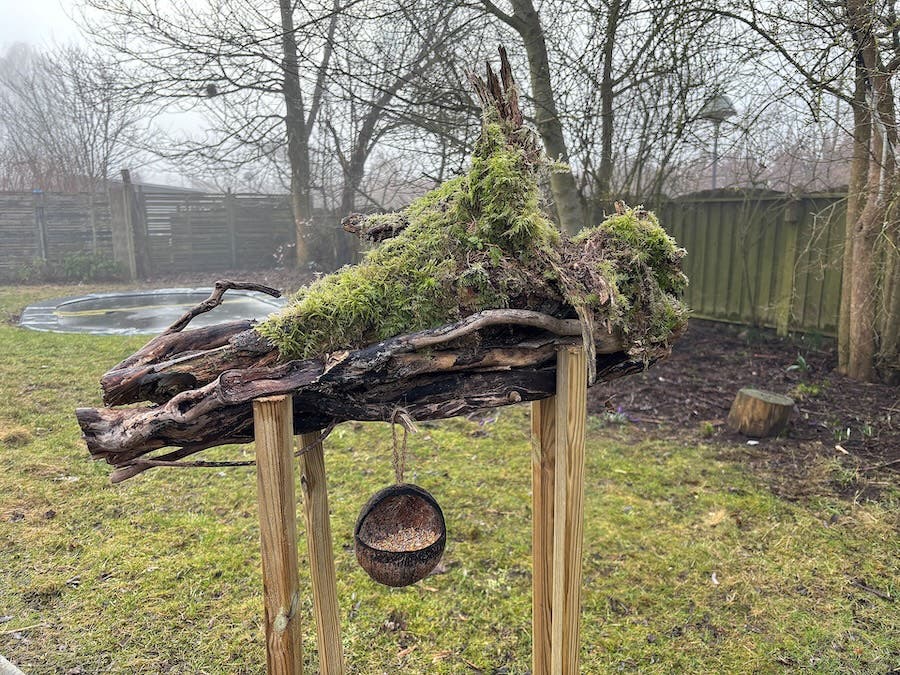
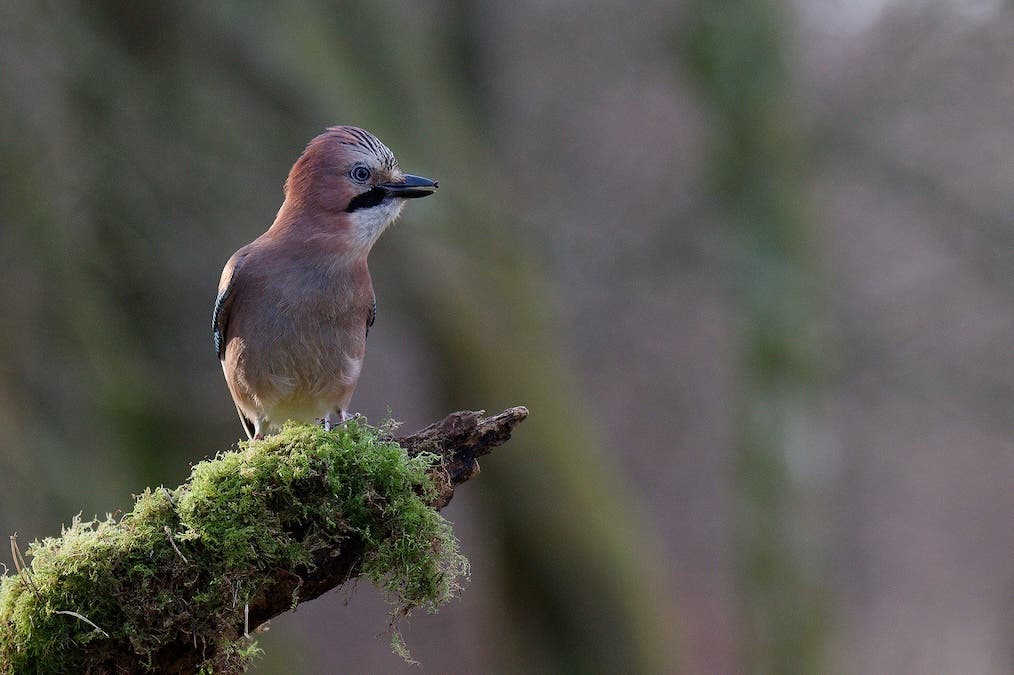
Finding a suitable perch can be as easy as looking around your garden or going to a nearby forest to pick up a mossy, worn branch that can make the setup look more natural.
I usually avoid branches with cutting marks or fresh signs of being broken off a tree. Look for mossy branches on the forest floor, preferably a bit crooked or gnarly. You want the opposite of flat.
Step 4: Positioning the Perch and Camera
Now we come to the crucial part: making the birds land on the perch instead of flying directly to the feeder.
I have had success with two setups.
The first one: you create a sort of middle station, positioned between the trees where the birds rest and the feeder. The middle station needs to have the perch higher than the feeding station. You can use a small table, or hammer some sturdy poles into the ground.
If possible, you can also lower the feeding station a bit, because you don’t want the middle station so high in the air that you will be shooting too much upward from your camera position. I usually set the perch at 1,20 meters, as I will be sitting in a chair with my camera on a tripod.
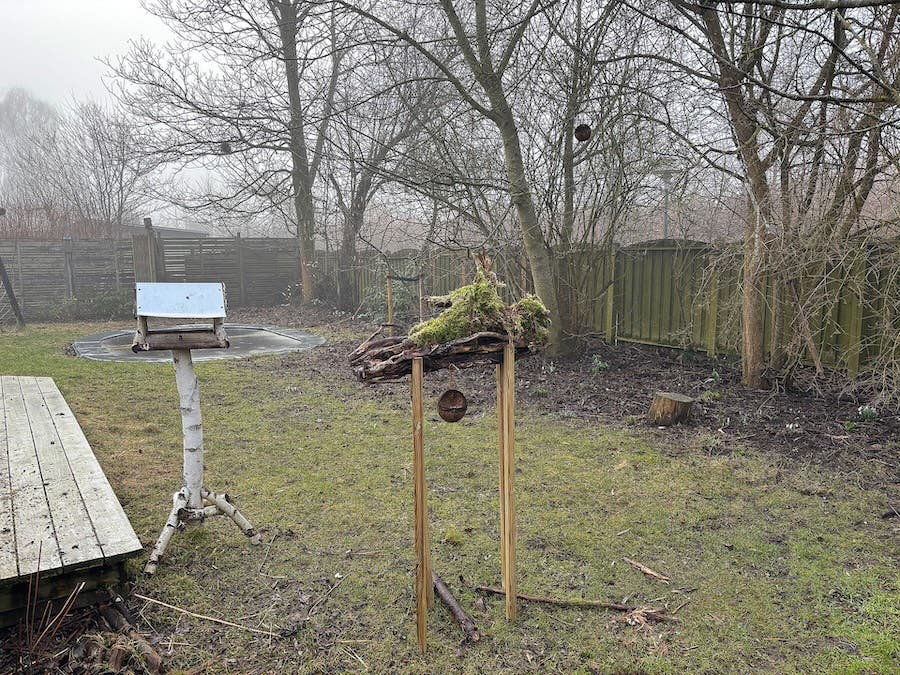
The second setup is similar, but with the feeder hanging just below the perch and out of sight. Usually, the birds use a small roofed board, but when I want to photograph them, I place the seeds in a hollow coconut on a string and use that as the feeder. Remember to remove all other feeding spots in the garden for the photo session so the birds fly to the one you want.
I feel that it is much easier to get the birds to land on the perch this way, and you solve the height issue with the feeder.
Wait in the queue
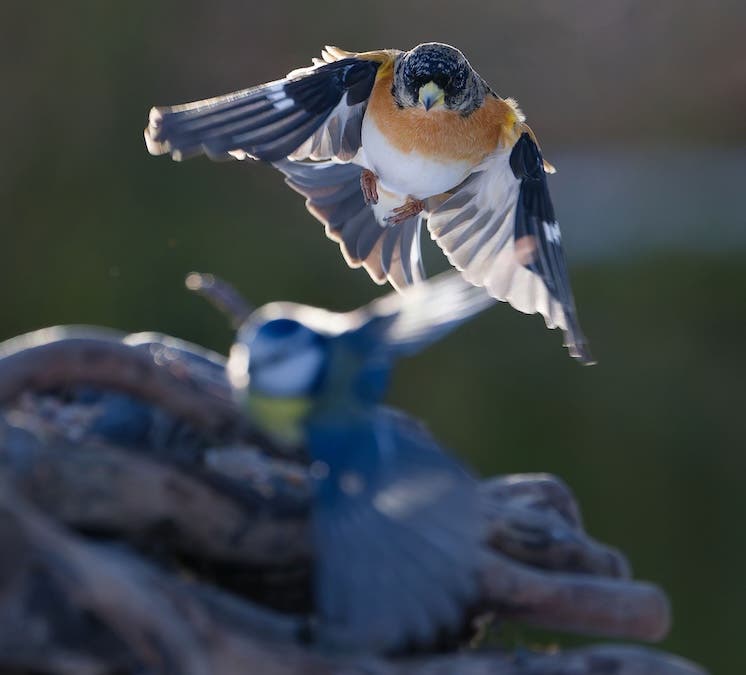
With this setup, birds will find the easiest route to the feeder is to land on your chosen perch, pause for a few seconds, then jump to the feeder. With only one feeder, they might even form a small queue on the perch until it becomes available.
This is when you should press the shutter and take your burst of shots.
After photographing, refill any other feeders you were previously using.
Camera Position
One of the things that mostly determines the look you get is where you position your camera relative to the perch setup and the background.
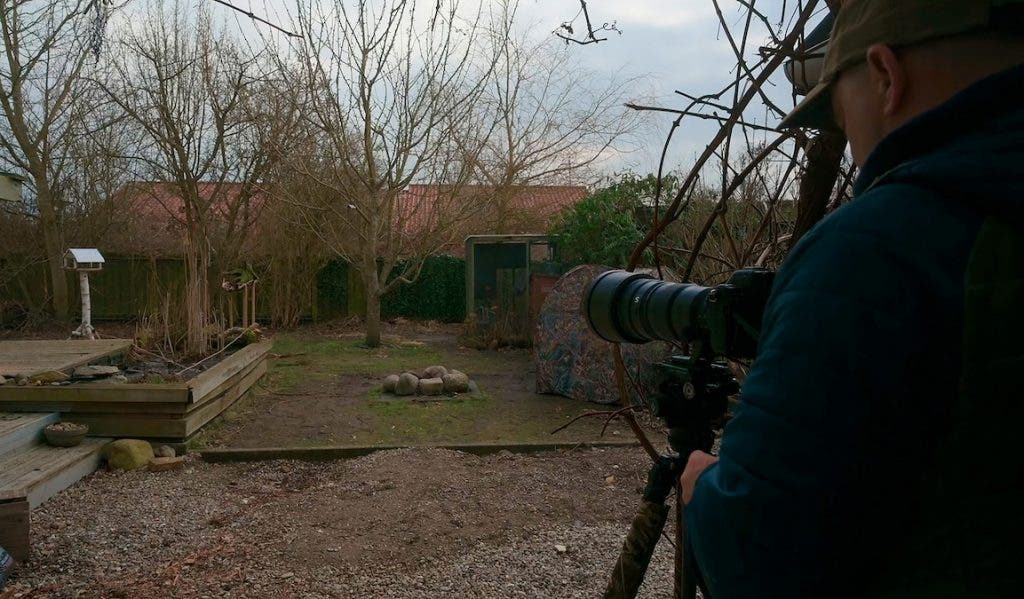
If you are without a hide, you need more distance than when using one. Without any cover, I would suggest a distance of 8-10 meters to the birds and the feeder as a starting point. See how the birds react; you might be able to move closer. However, a little bit of cover (for you and your camera) will go a long way in making the birds comfortable. Even just wearing green and earth colored clothes will help.
I prefer to use a hide because it allows me to place it approximately. 5-6 meters from the feeder.
Step 5: Settings
The settings for high-end bird photography in your garden are pretty straightforward, as you control almost everything, from the setup to the positioning and the light conditions you choose. So the settings fall into two categories: Portrait settings and Action settings. By the way, I always shoot in manual mode with Auto-ISO for any wildlife.
For portrait shots, you can use as wide an aperture as your lens permits, and a shutter speed around 1/400 for stationary subjects. You can use subject detection mode for focusing on stationary subjects. This is usually fast enough for these types of shots.
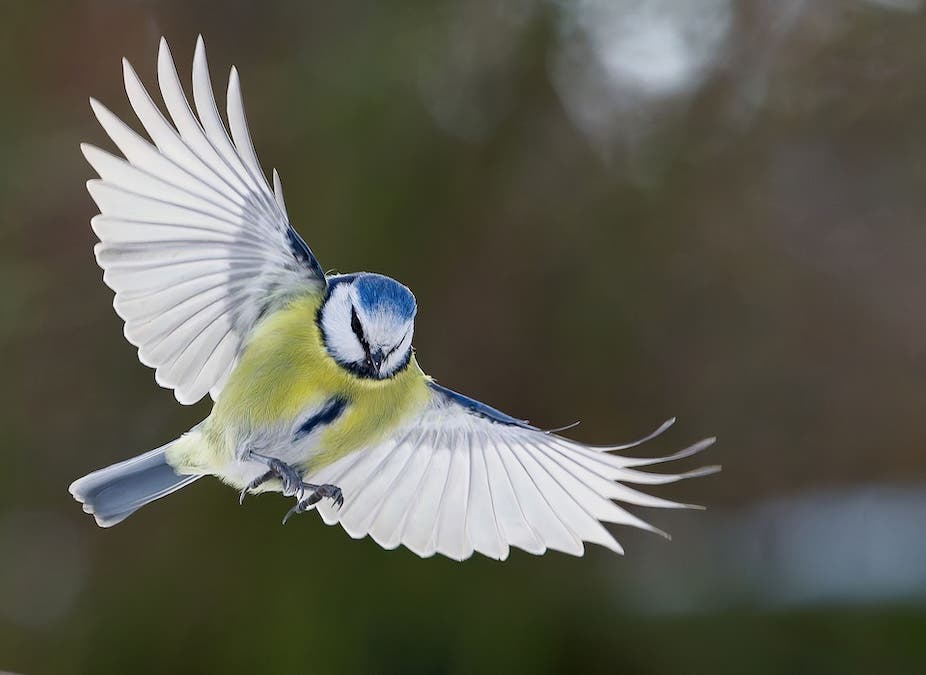
For action shots, you need to raise the shutter speed to around 1/2500s-1/4000s. Because the birds will also fly towards the perch, a little extra depth of field will help you nail shots with the wings in focus. I suggest you bump the aperture to around f/8. When shooting backlight, I also use a little bit of negative exposure compensation around -1 to -2 stops, which helps make the rim light stand out.
With action-type shots where the subjects fly in from outside the frame, even the fastest auto-focus motor will fail. The only way to capture a bird mid-air is to pre-focus on an area the bird is likely to fly through on its way to the perch. Press the shutter button early and hope to nail a shot of the bird with its wings fully stretched as it moves through the prefocused zone.
Concluding words
There are several ways to adjust the setup, so you can get a wide range of high-end bird photography from a single location. You could change the perch or hide position to get a different background or light direction. However, simply changing the seeds you use can attract other species, giving you a chance to catch truly special high-end bird photos.