Time to get off Auto. A better understanding of f/stops, depth of field and aperture.
By Adorama Learning Center Editors
February 1, 2015
Make 2015 your BEST photography year yet! #AdoramaU is a year-long tour through twelve essential photography topics. For the first edition of AdoramaU, we take an in-depth look at your camera’s aperture to get you off Auto Mode and start getting creative!
An aperture is defined simply as an opening or hole, but when referring to your camera’s aperture, it requires a more thorough examination to understand its role in creating an image. The amount of light received by your camera’s sensor or film is controlled by the aperture in your lens, a continuously variable diaphragm that works much like the pupil of the human eye. Unlike the irises in your eyes, the iris in your lens consists of multiple metal blades arranged to form a circular opening known as the aperture. This variable aperture is calibrated in a sequential series of numbers known as f/stops. By opening the lens to a wider f/stop (lower f/number), more light is allowed to reach the image sensor, and by closing it down to a smaller opening (higher f/number), less light reaches the sensor. This concept is illustrated in the Figure 1.1 below. F/stops work hand in hand with shutter speeds to control the amount of light reaching the sensor, enabling you to achieve the proper exposure.
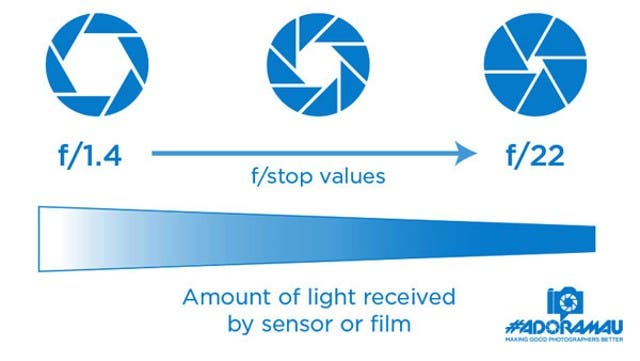
Figure 1.1 – Illustrates the progression of decreasing aperture sizes and the corresponding loss of light
What is an f/stop?
If you’re ready to get your camera out of its Auto Mode setting, then it’s important to be familiar with these numbers. F/stops can begin at f/.7 and go all the way to to f/64. Going from a higher f/number to a lower one is commonly referred to as “opening up” the lens, as the hole is actually opening to a larger diameter, and choosing a higher f-number is “closing” or “stopping down” the lens. Going down from one whole stop to the next allows exactly half as much light to reach the sensor as the previous f/stop. Since the opening of the aperture diminishes by one-half so will the amount of light reaching the sensor.

This cross cut of two images illustrates the use of f/4 and f/22 on the same subject at a 120mm focal length
Intermediate f/stops
Many lenses have maximum apertures like f/3.5 or f/4.5 or variable apertures like f/3.5-5.6 that decrease gradually as you zoom the lens to longer focal lengths. These f/stops do not correspond to the full f/stop sequence. Most digital cameras let you set exposures in half-stops or one-third stops that vary the light in 50% or 33% increments. Provided in Figure 1.2 below, is a list of commonly used whole f/stops and their corresponding 1/2 and1/3 f/stops for reference. These settings are very useful in achieving precise exposure adjustments and controlling the depth of field.

Figure 1.2 – This f/stop chart shows commonly used full stops between f/1.4 and f/22 with all corresponding ½ and 1/3 stop increments
Depth of Field
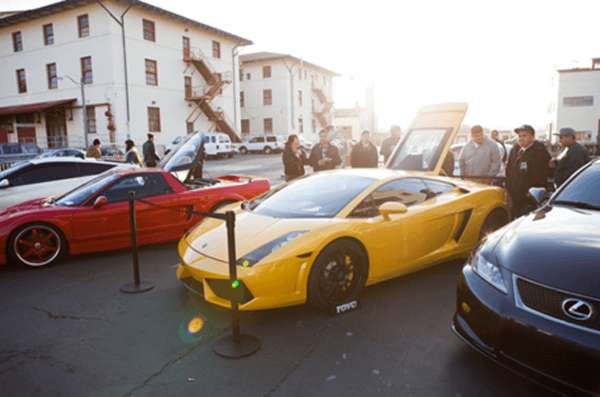
Depth of field, or DOF as we’ll refer to herein, is the distance between the nearest and farthest objects appearing sharp in the image. Lenses can only focus precisely at one distance at a time, and that gradual decrease in sharpness is influenced by the f/stop you choose. In Figure 1.3 we’ve illustrated how choosing a lower f/stop such as f/1.4 or f/2.0 will proportionately decrease your depth of field. When shooting portraits this is excellent for emphasizing the subject, de-emphasizing the background and causing the subject to “pop,” a classic portraiture technique. With scenic images its preferred to choose a higher f/stop number such as f/16 or f/22 to achieve depth of field. This will show everything from foreground to background details in sharp focus. These are just two examples, and experimenting with the creative use of depth of field by trying different f/stops is one of the most effective ways to take your photography to another level.
Other factors that affect DOF are the focal length of the lens, the distance of the ubject from the camera, and the size of sensor in use. All things being equal, DOF decreases with longer focal lengths and as you get closer to the subject. This means that images shot with 70-200mm lens at f/2.8 will have shallower depth of field than a 24mm lens at f/2.8. The pictures shown in the figure below are shot on a full-frame Canon 5D Mark III with an 80-200mm f/2.8 Land show the creative effects possible by shooting at longer focal lengths with various apertures.
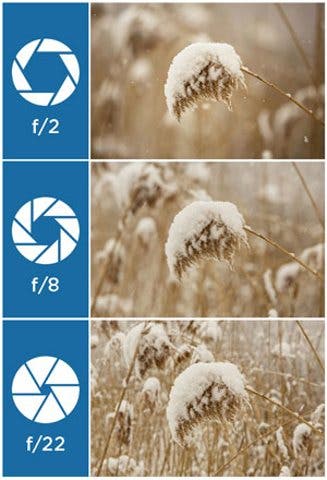
Figure 1.3 – Illustrates the aperture opening corresponding to the actual f/stop used for each image
Creating Bokeh
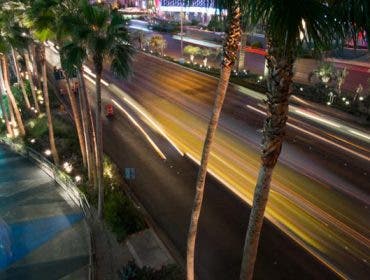
One phenomenon caused in the background of images with shallow depth of field is known as bokeh. Pronounced “bo” as in bow and “keh” as in kettle, this term refers to the circles that form in the out of focus areas and can vary in quality from lens to lens. These often appear in night images when points of light in the background turn to soft, pleasing, out of focus, illuminated circles. Higher quality lenses with rounded aperture blades will produce softer, rounder and more pleasing bokeh than entry-level lenses with fewer and straight aperture blades. Producing this effect is much easier with lenses that offer smaller f/stops and longer focal lengths, such as a 50mm f/1.4 or a 70-200mm f/2.8 lens.

Canon 50mm f/1.2L – Image settings: f/2.2, 1/200 shutter speed, ISO 100
Move Off the Green Box and Get Creative!
Many beginning photographers, even those using sophisticated DSLRs and mirrorless cameras, tend to shoot in P (programmed auto-exposure) mode or the green “Auto”-pilot mode, essentially using their cameras as an advanced point-and-shoot. This may be a good strategy for shooting unpredictable subjects like kids in a playground where you don’t want to bother with camera settings; however, if you really want your photography to evolve, it’s as easy as the turn of a dial.
Why Aperture Priority Rocks
So, you’re ready to move away from full Auto and start choosing your own f/stops, but still want the convenience and accuracy of your camera’s metering system? Aperture priority or “A” Mode allows you much more control over you camera’s settings, including aperture and exposure without abandoning you in full manual mode. To select “A” mode, just turn your camera’s main mode dial from “P” or “Auto” Mode to “A.” The setting readouts on the LCD and in the viewfinder will now include your current f/stop and exposure scale, usually at the bottom or side of the viewfinder. One of the great developments of digital cameras is they let you see the image as soon as it’s captured and most let you preview the way the image will look before you press the shutter release. If the captured or previewed image looks too dark or too light, correcting it is as simple as setting your camera’s exposure compensation control. Look for the +/- logo on your camera’s controls and press this button to bring up the exposure compensation scale. This is just as simple as rotating the back dial or pressing the up and down arrows to decrease or increase the exposure. A small adjustment is often all that is needed to create a perfect exposure in camera.

Canon 24-70mm f/2.8L II – Image settings: f/5.0, 1/100 shutter speed, ISO 100
Now that you have a better understanding of what apertures are and how they affect your pictures, by all means use this knowledge to good effect in upgrading your images. It will take some practice before it sticks as muscle memory, but much like everything in life, practice makes awesome. Now go out, get creative and remember to have fun!
Put what you learned to the test. Here are your #AdoramaU assignments:
- Week 1: Use your camera’s aperture priority mode to get familiar with depth of field. Shoot one subject with different aperture settings and share your favorite with hashtag #AdoramaU.
- Week 2: Set your aperture to the lowest setting for beautiful bokeh. Share your favorites using #AdoramaU or upload your photos here.