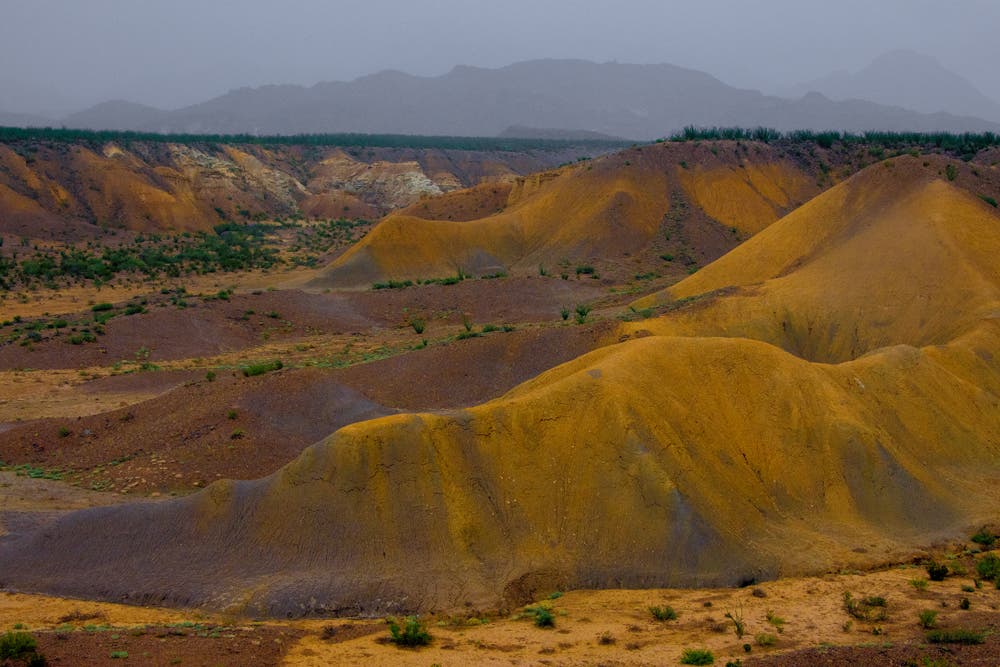
The bright overcast light following a patch of rain was a blessing, bringing out the lush colors in the badlands of Big Bend National Park. I minimized the sky but kept it in the picture to show the shape of the distant mountains.
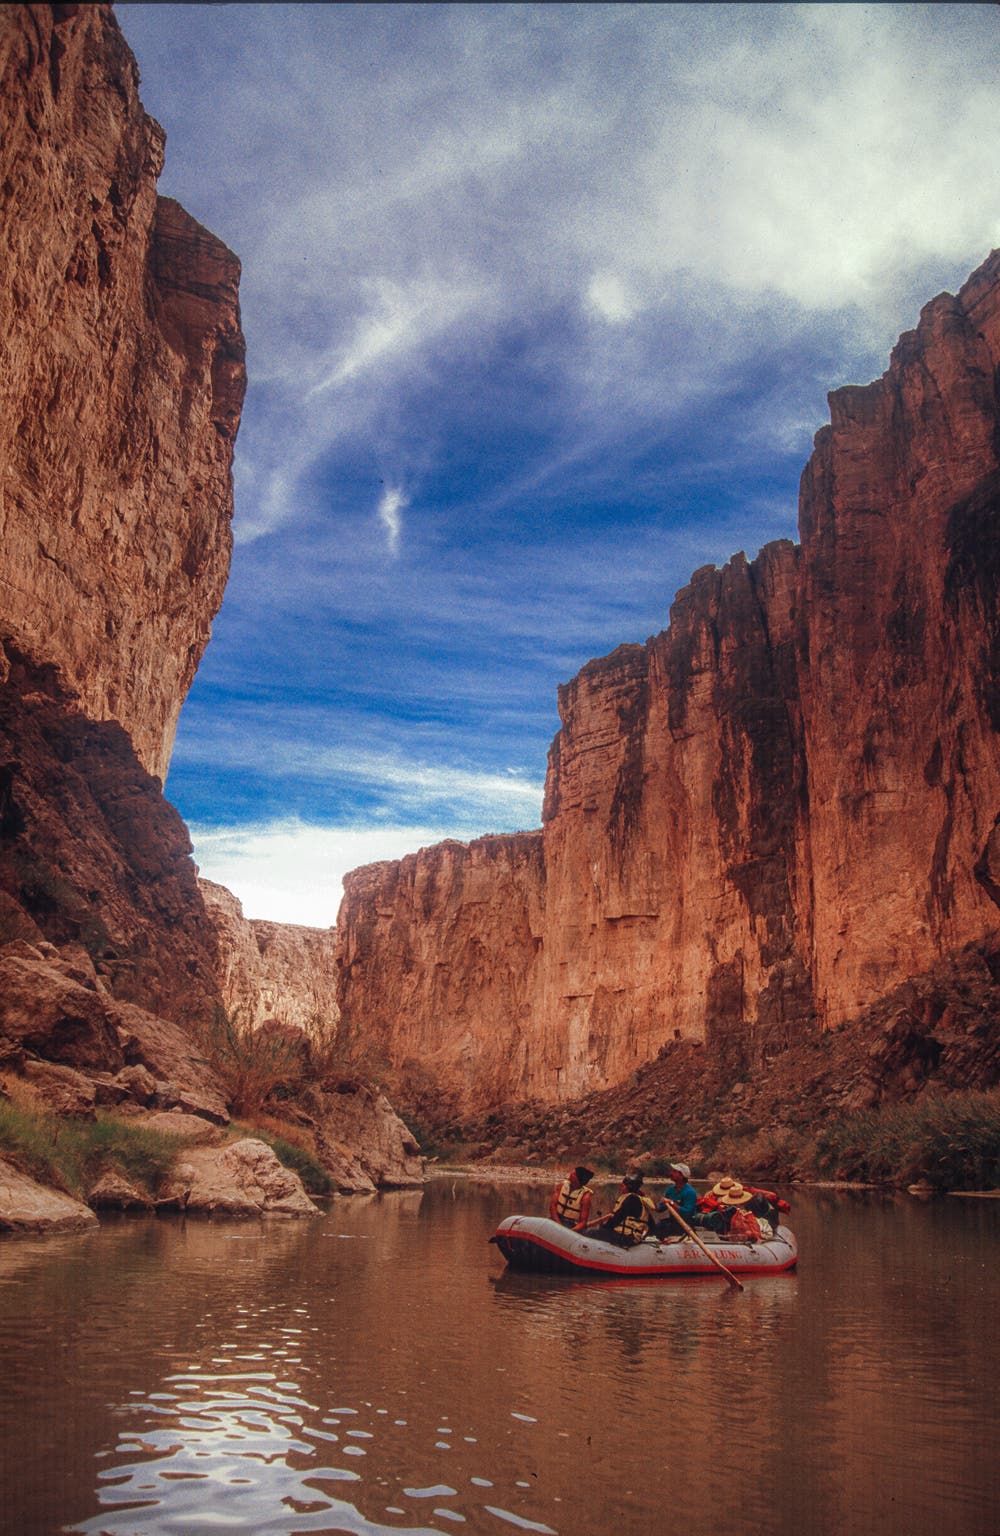
To get a true sense of the steep canyon walls in Big Bend National Park, there’s no substitute for getting on a dingy and floating on the Rio Grande. I included the people in a nearby boat as a foreground elemenbt to give the canyon scale and a human touch.
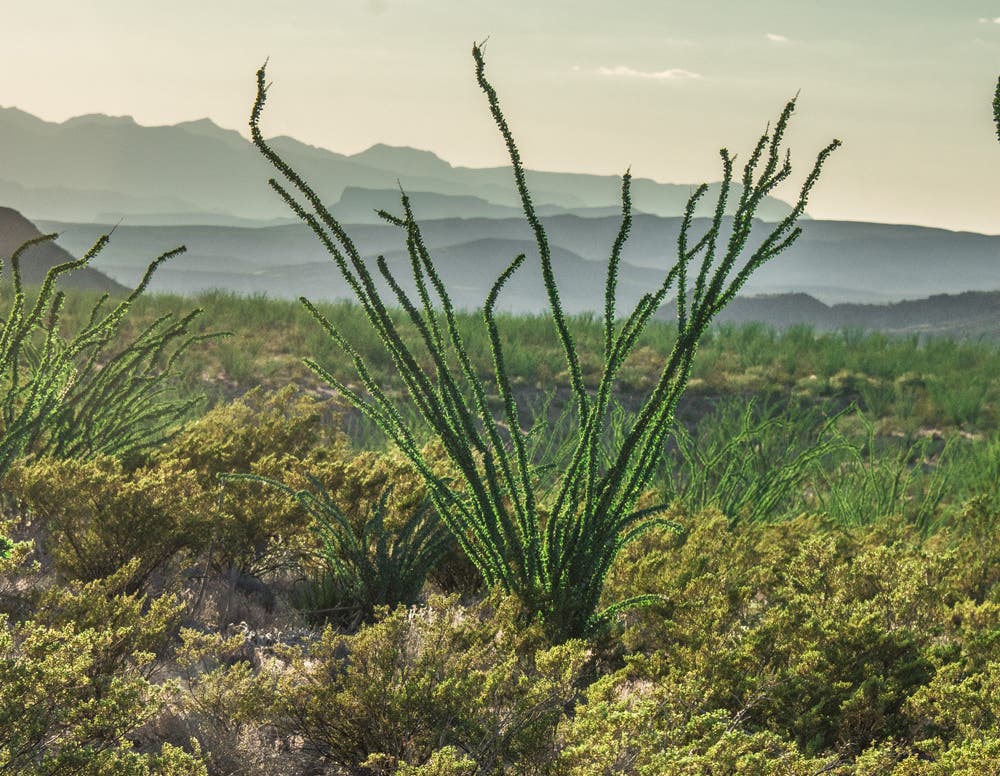
I was intrigued by the soft light on these hills in Big Bend National Park. I took some shots of the hills but then decided to include in the foreground an ocotillo plant typical of this region to create a better sense of place.

The West is dotted with geologic formations like this butte. Capture these iconic forms when the light makes them glow. In this shot, I wanted to go beyond the norm so I came back in the morning after a downpour and shot the same butte reflected in a nearby puddle. To get this shot, I got down low, focused on the reflection and used f/16 for maximum sharpness.
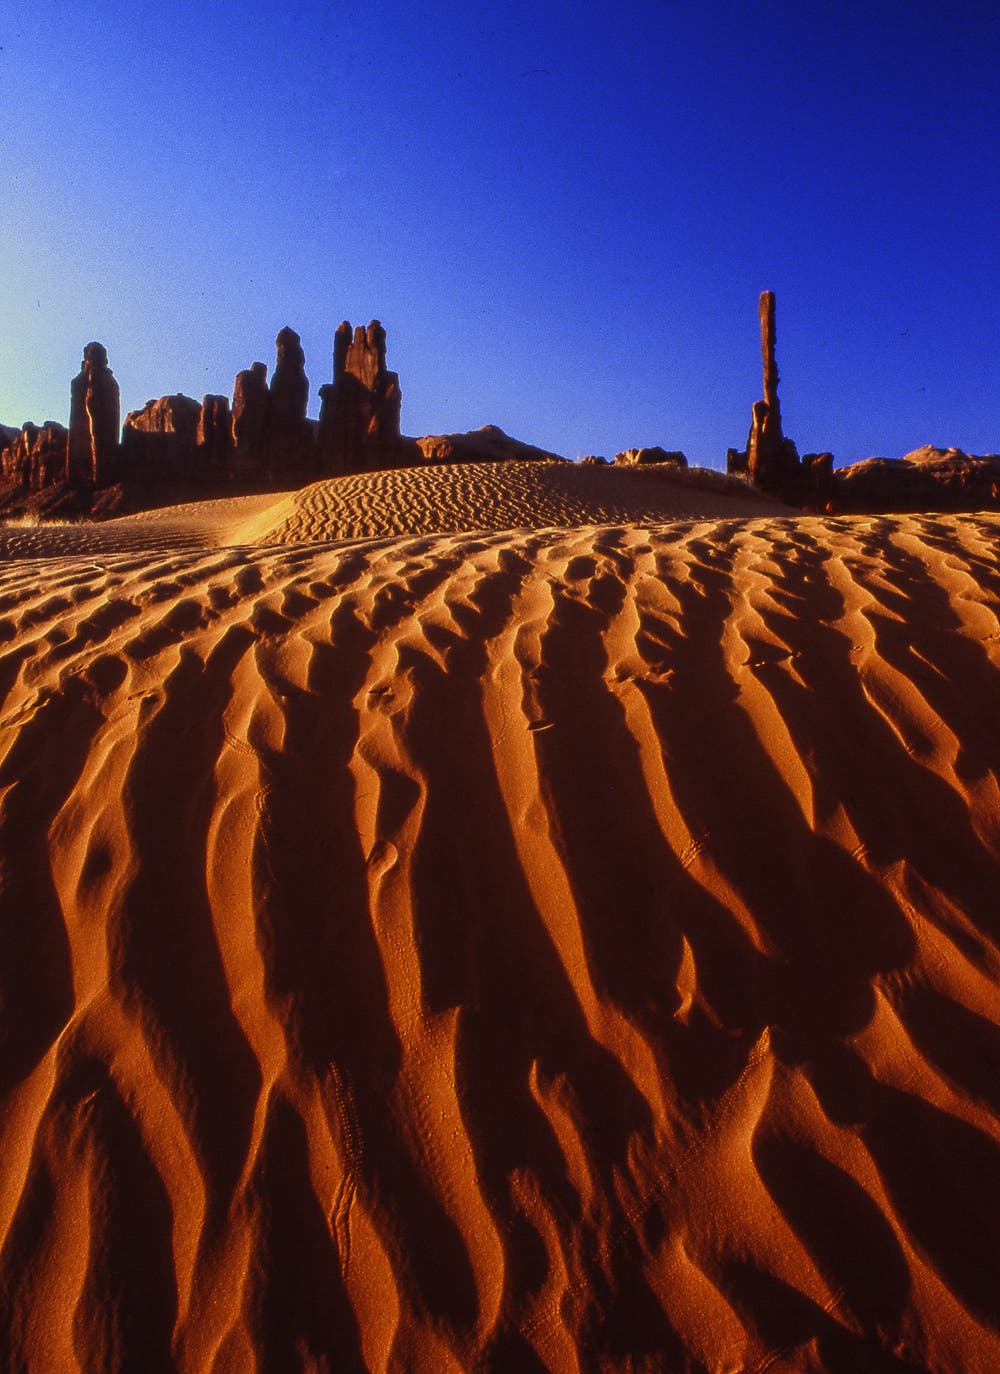
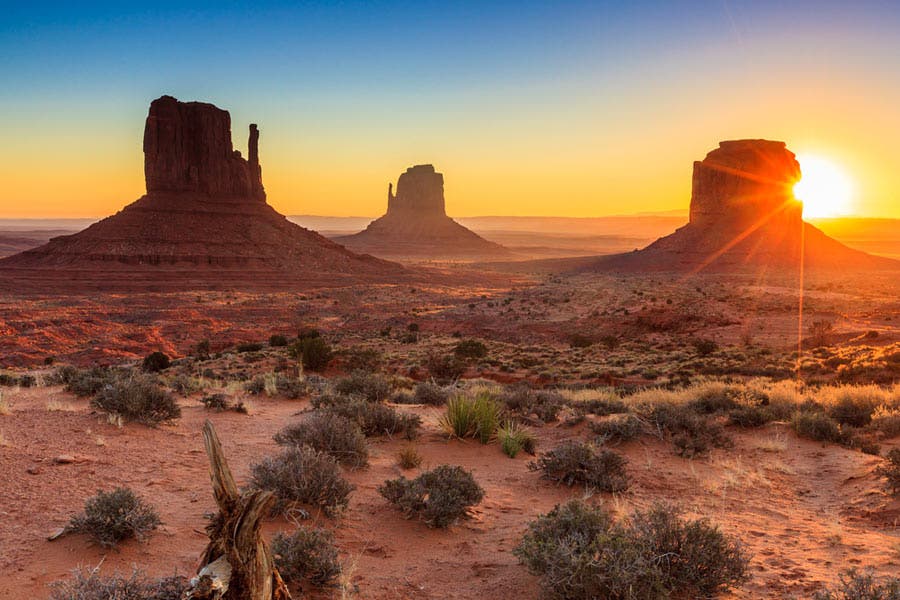
Here I combined the rippled sand dunes in the foreground with the needle-like rock formations further back into a simple abstract composition based on two color blocks: earth and sky. Shot in Monument Valley with a moderate wide-angle lens (35mm) at dawn and polarized to deepen the blue of the sky.
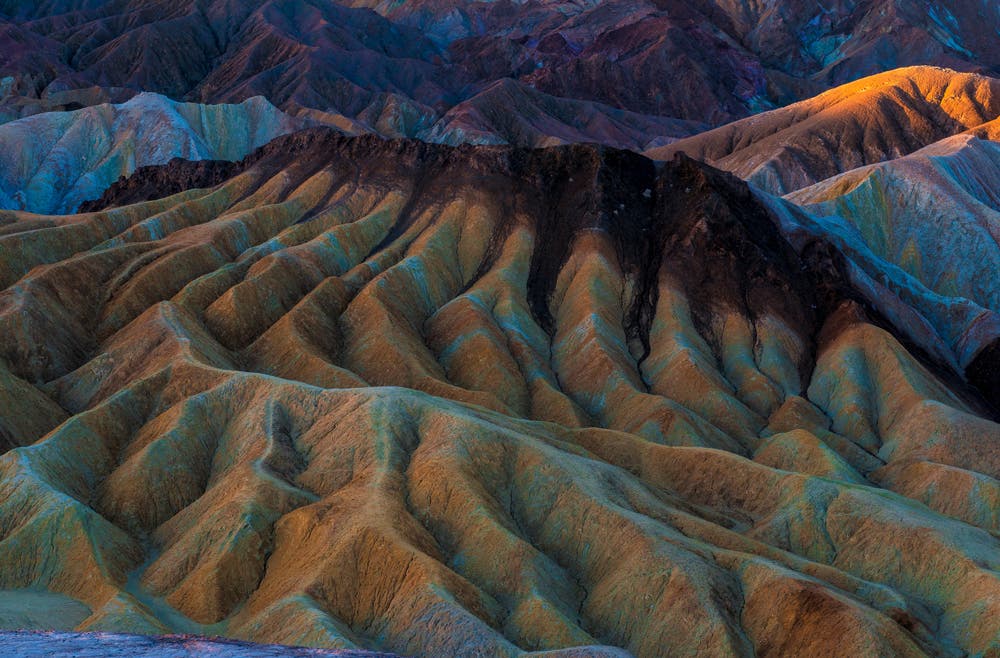
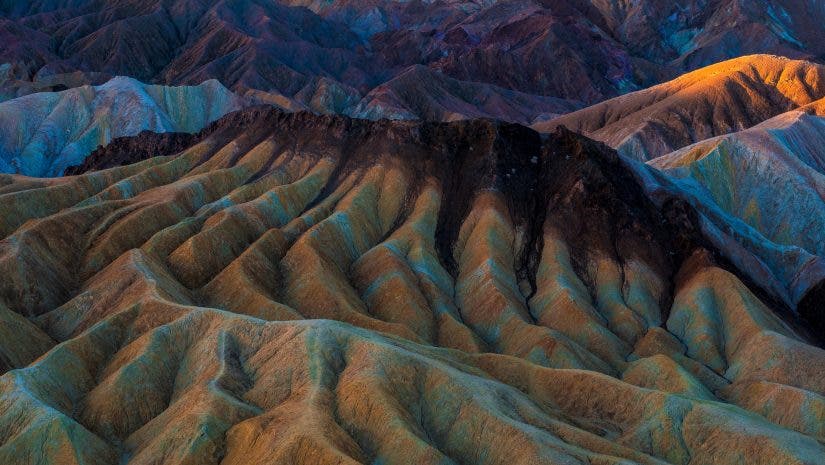
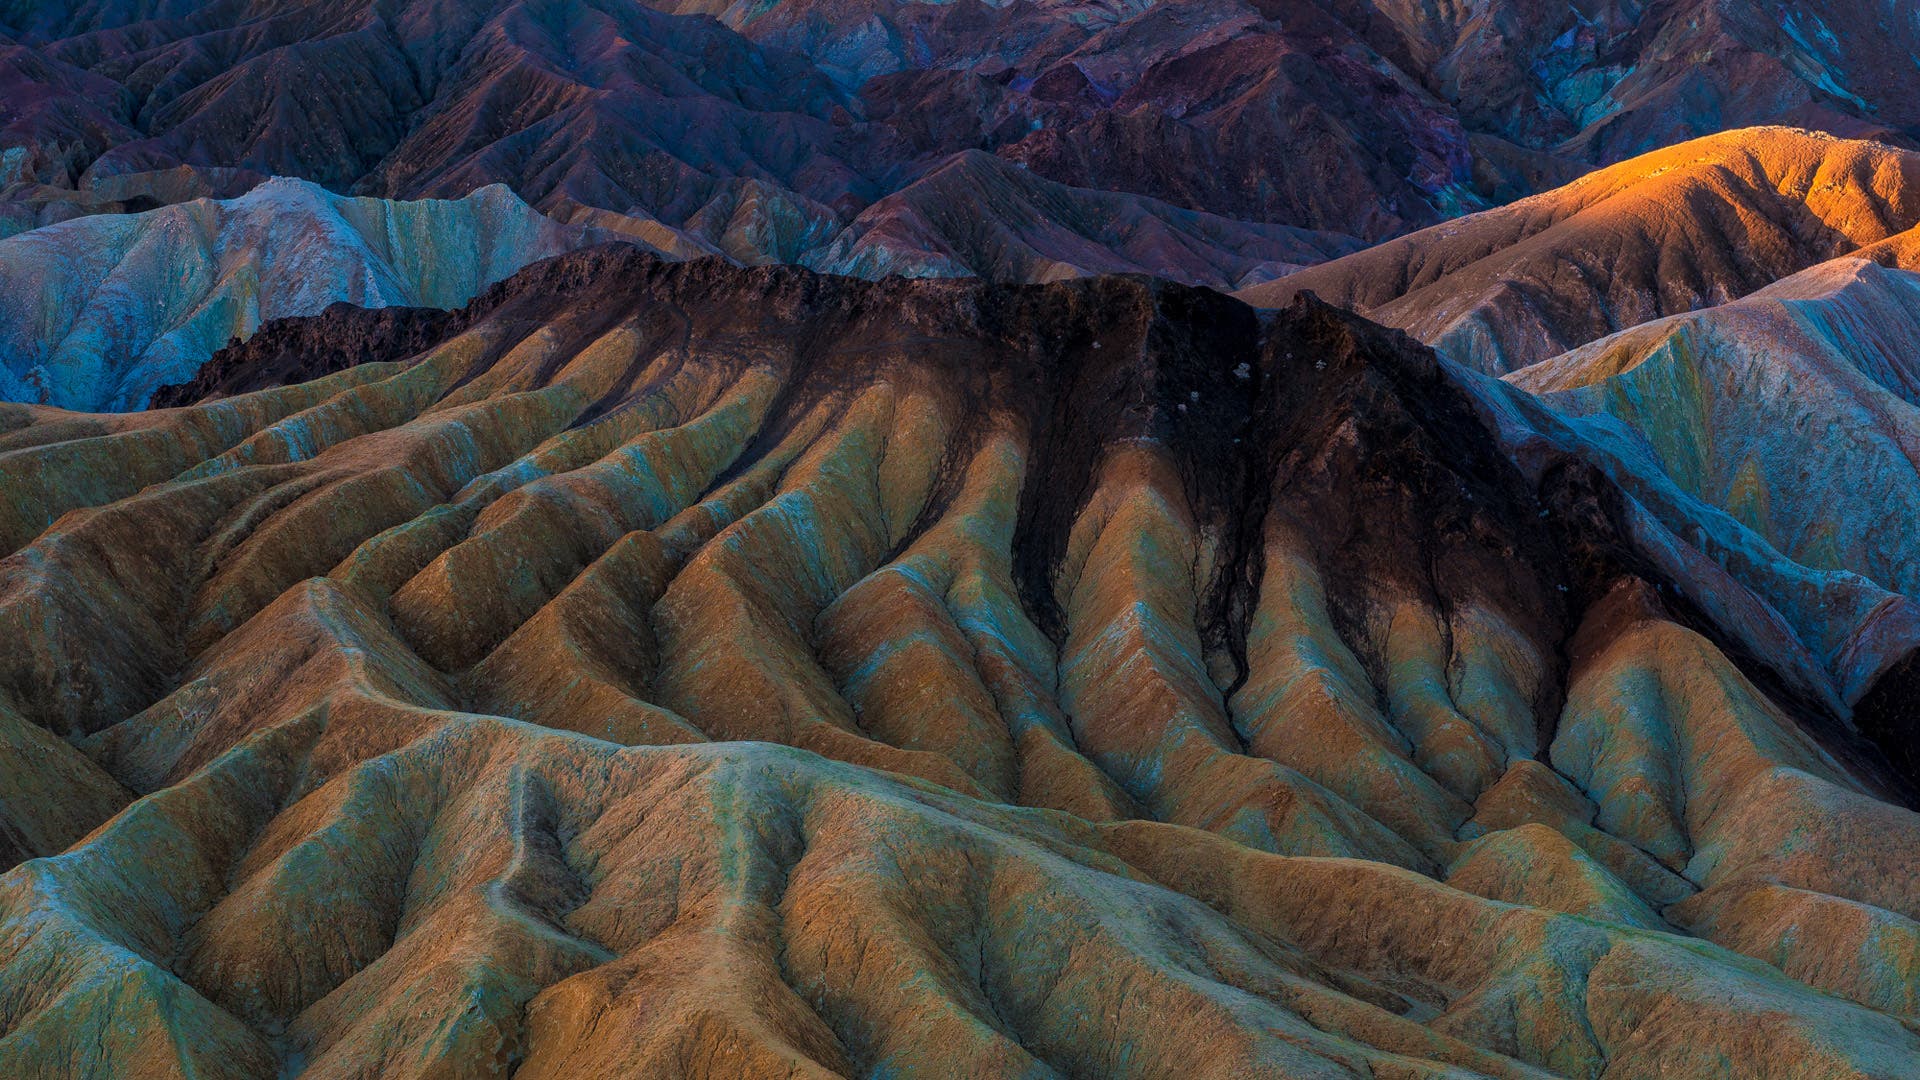
I was at Zabriskie Point in Death Valley at sunrise but there were clouds in the sky that cast a shadow over some of the eroded badland formations the area is known for. By eliminating the sky completely, I was able to put them in the perfect light to show their shapes and subtle colors. Shot at 60mm with my 24-70mm zoom lens at f/30 for sharpness.
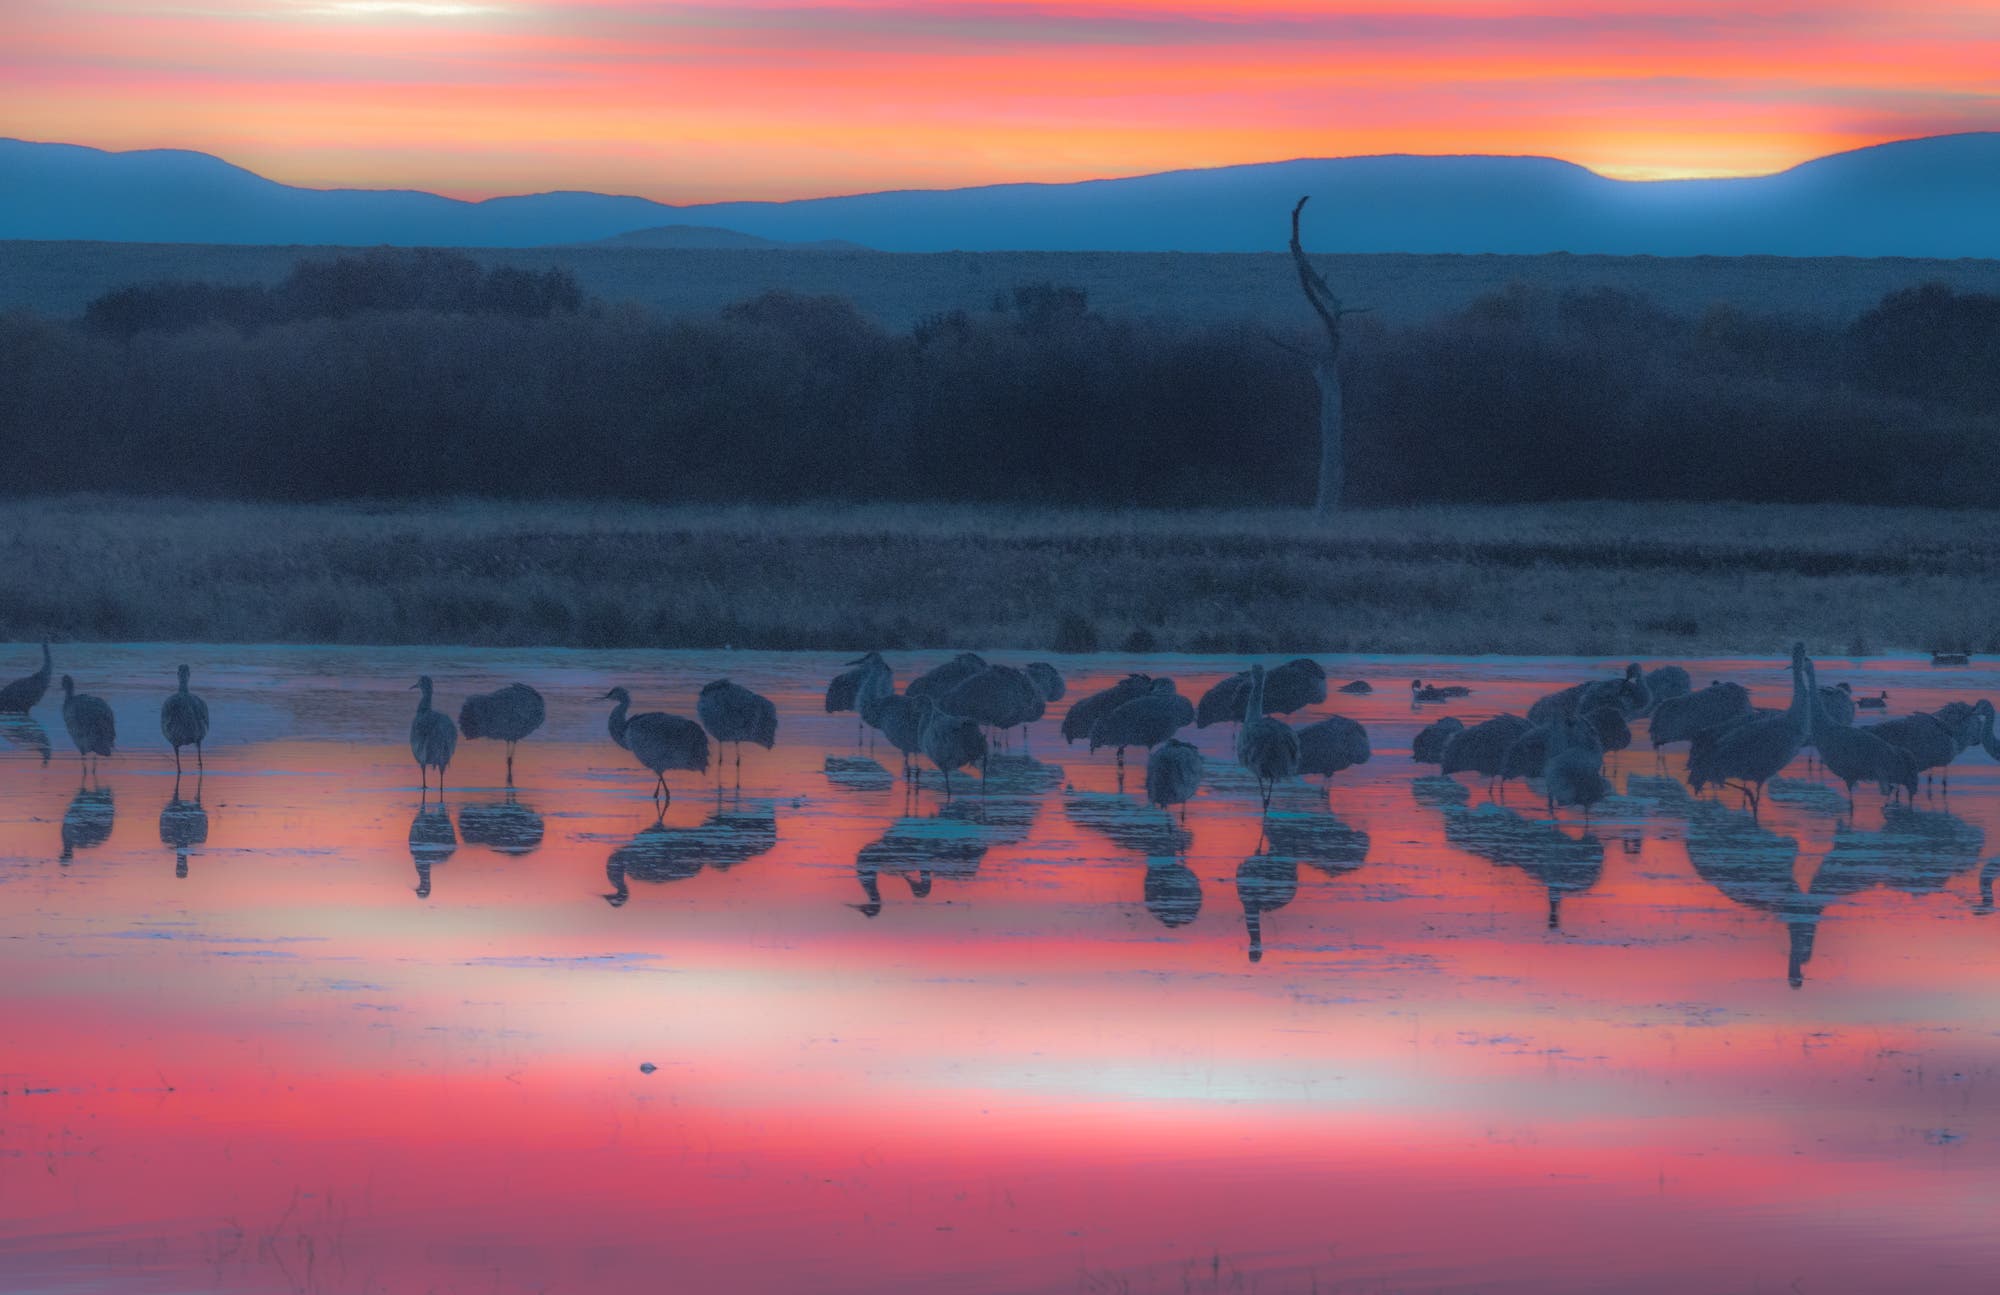
I arrived at this wetland area in Bosque del Apache Wildlife Refuge before sunrise and saw the Sandhill Cranes wading in the water. The sun was about to rise over the hills and the cloud cover, reflected in the water, turned brilliant colors. My dilemma was how to avoid a mass of black silhouetted against the bright sky. I decided to expose for the land to retain some detail on the birds and background. This would overexpose the sky and water, but I knew I could correct that in after-capture. Not only was I able to restore the colors that were originally overexposed, but I also decided to add a wash of bluish cyan and then diffuse the image a bit to soften the scene.
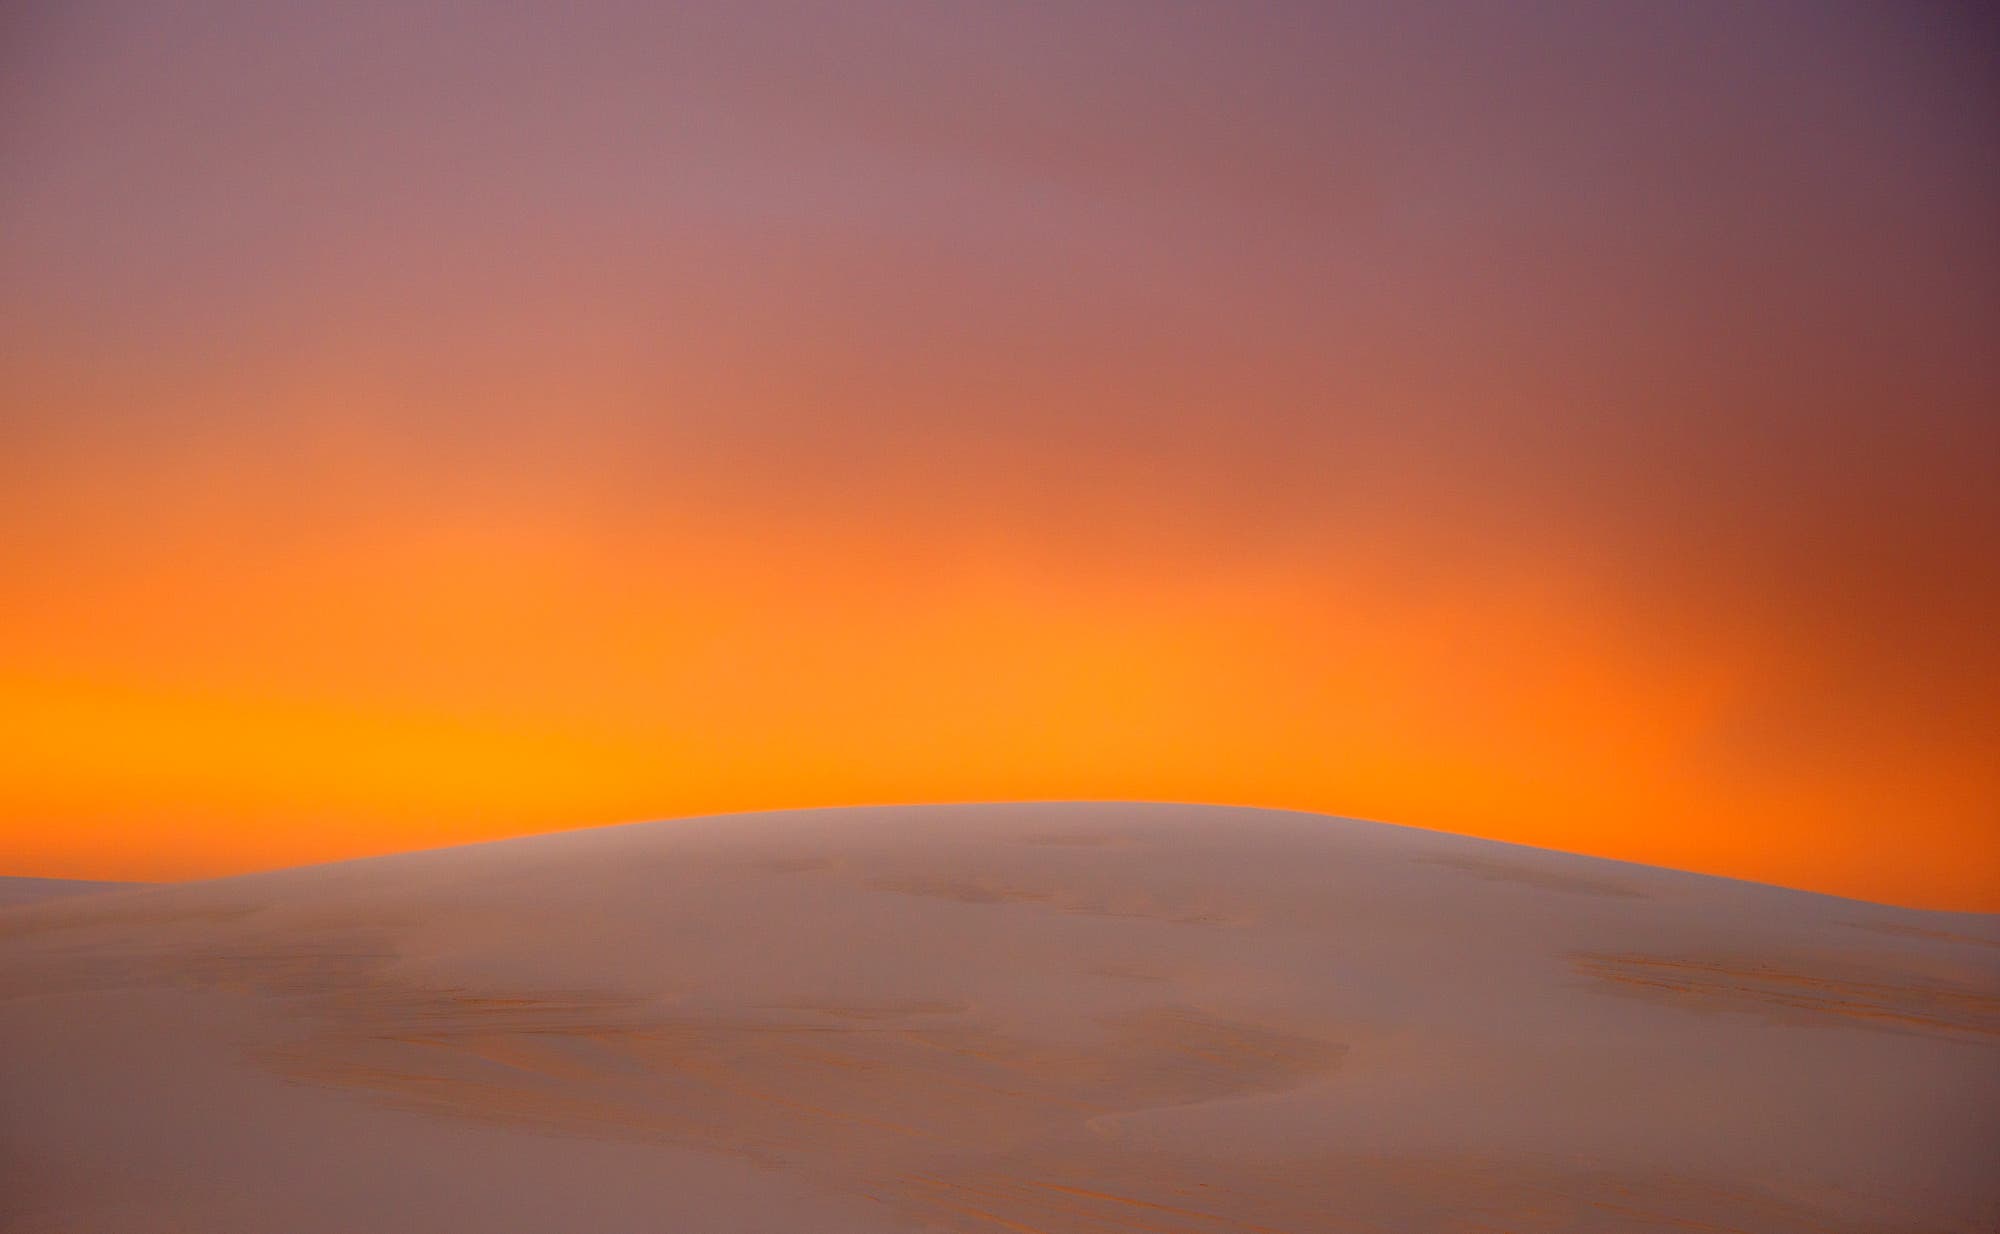
For this sunset image taken at White Sands National Monument, I was mainly interested in creating an abstract composition based on color. I was especially intrigued by the glow of light and chose a very simple dune for the foreground. I metered the sky, then overexposed by 1 1/2 stops to brighten the golden color. In after-capture, I reduced sharpness to soften the sand dune and finish with two bands of lush color.
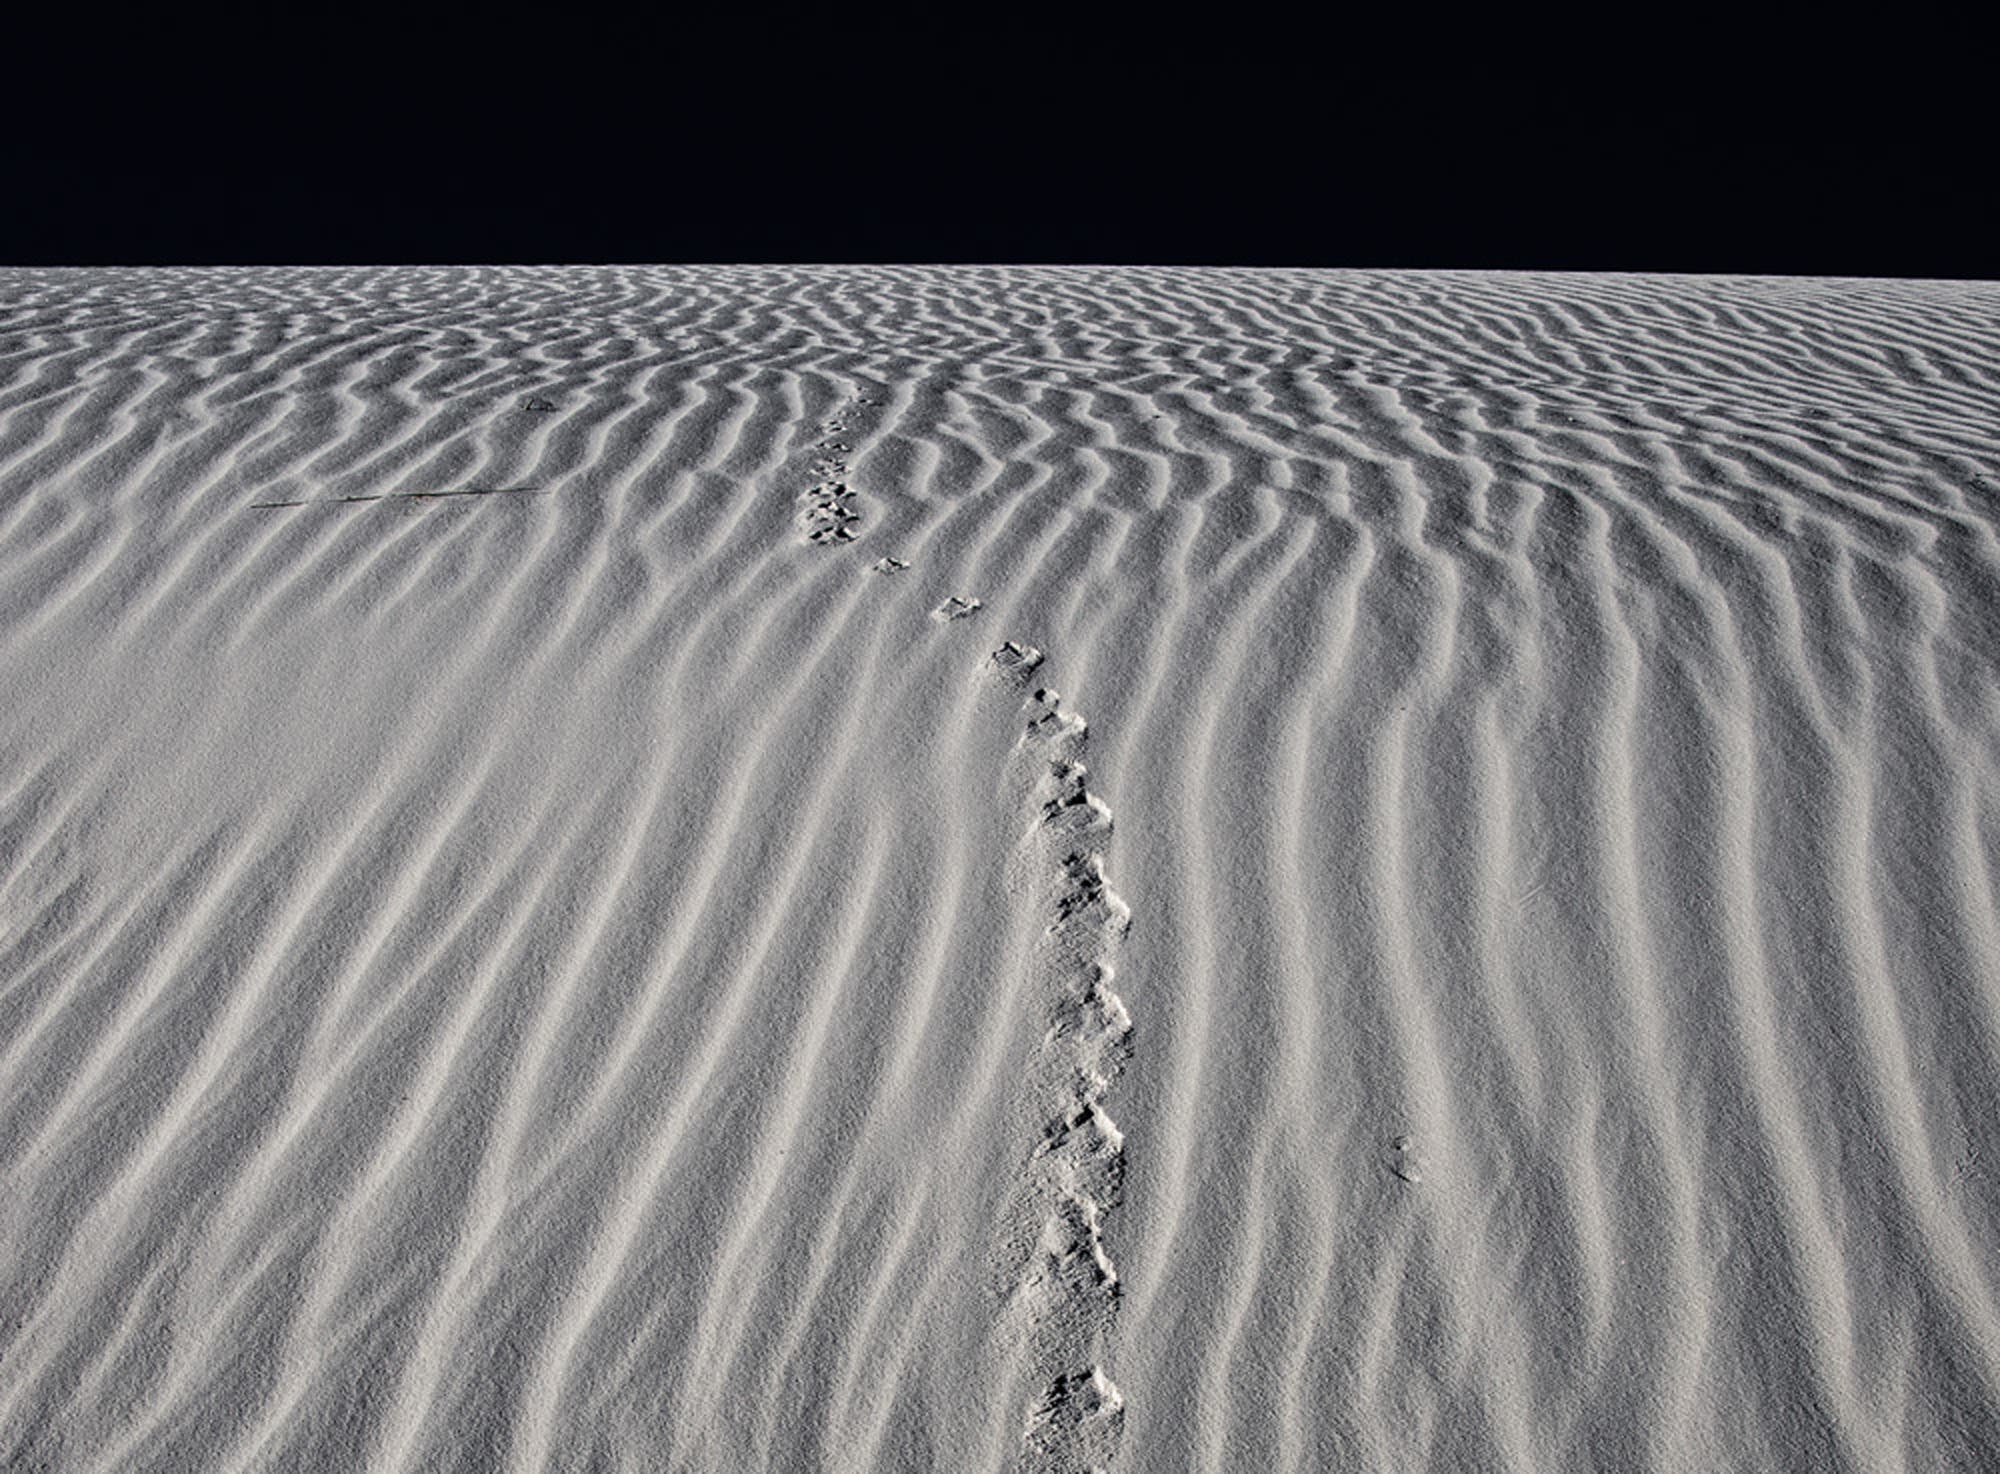
For this shot taken in White Sands National Monument, I was using the workings of nature -- the ripples on the dune, the insect trail and a cloudless sky -- to create a very abstract composition. A small aperture of f/16 gave me the sharpness I needed to render the surface textures. Then in after-capture, I stripped out the color, for an even starker, black-and-white abstract image.
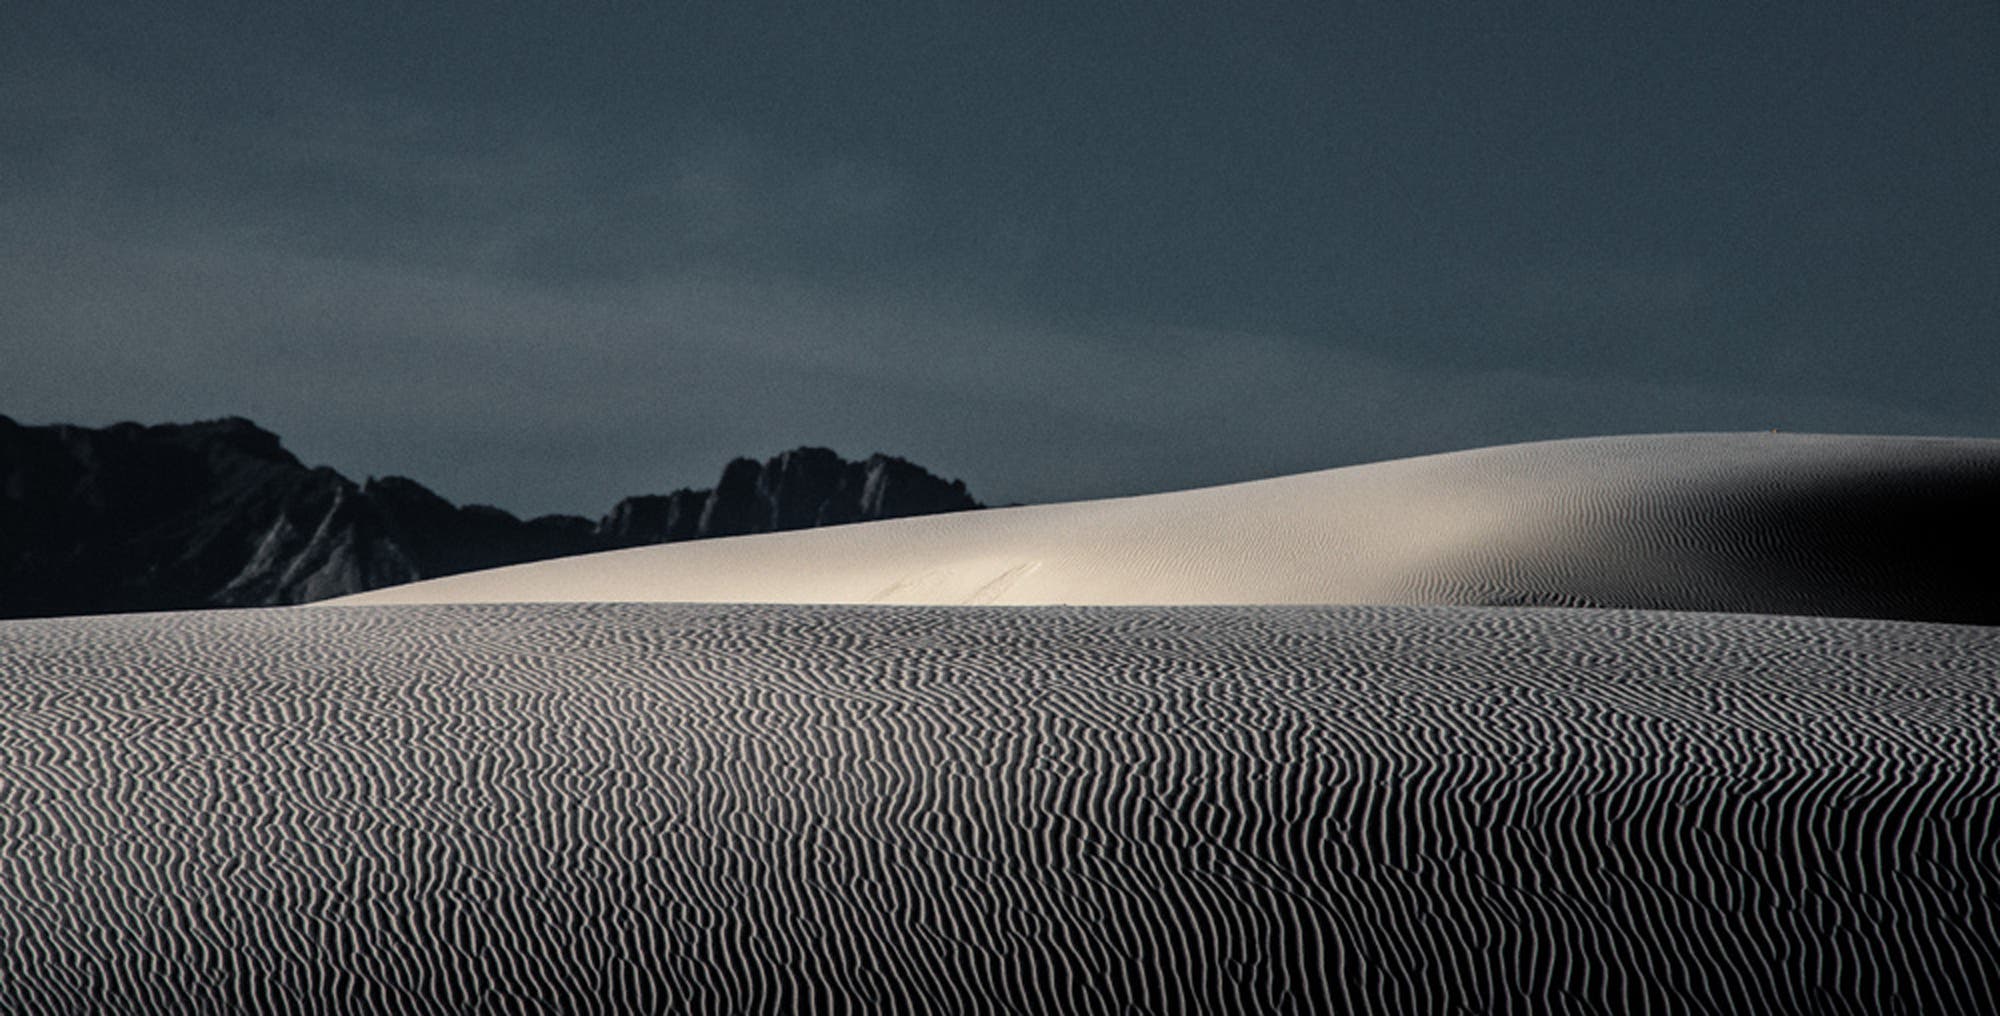
The low-angled light of the late afternoon sun casts the kind of shadows that bring out surface texture, as on these gypsum dunes in White Sands National Monument. I watched as the clouds let the sun through in some places more than in others and took the shot when the second dune was highlighted while the closest dune was less brilliantly lit. I metered the brighter dune to maximize the texture on the first dune. Taken at 300mm with my 28-300 zoom lens at f/16 for sharpness.
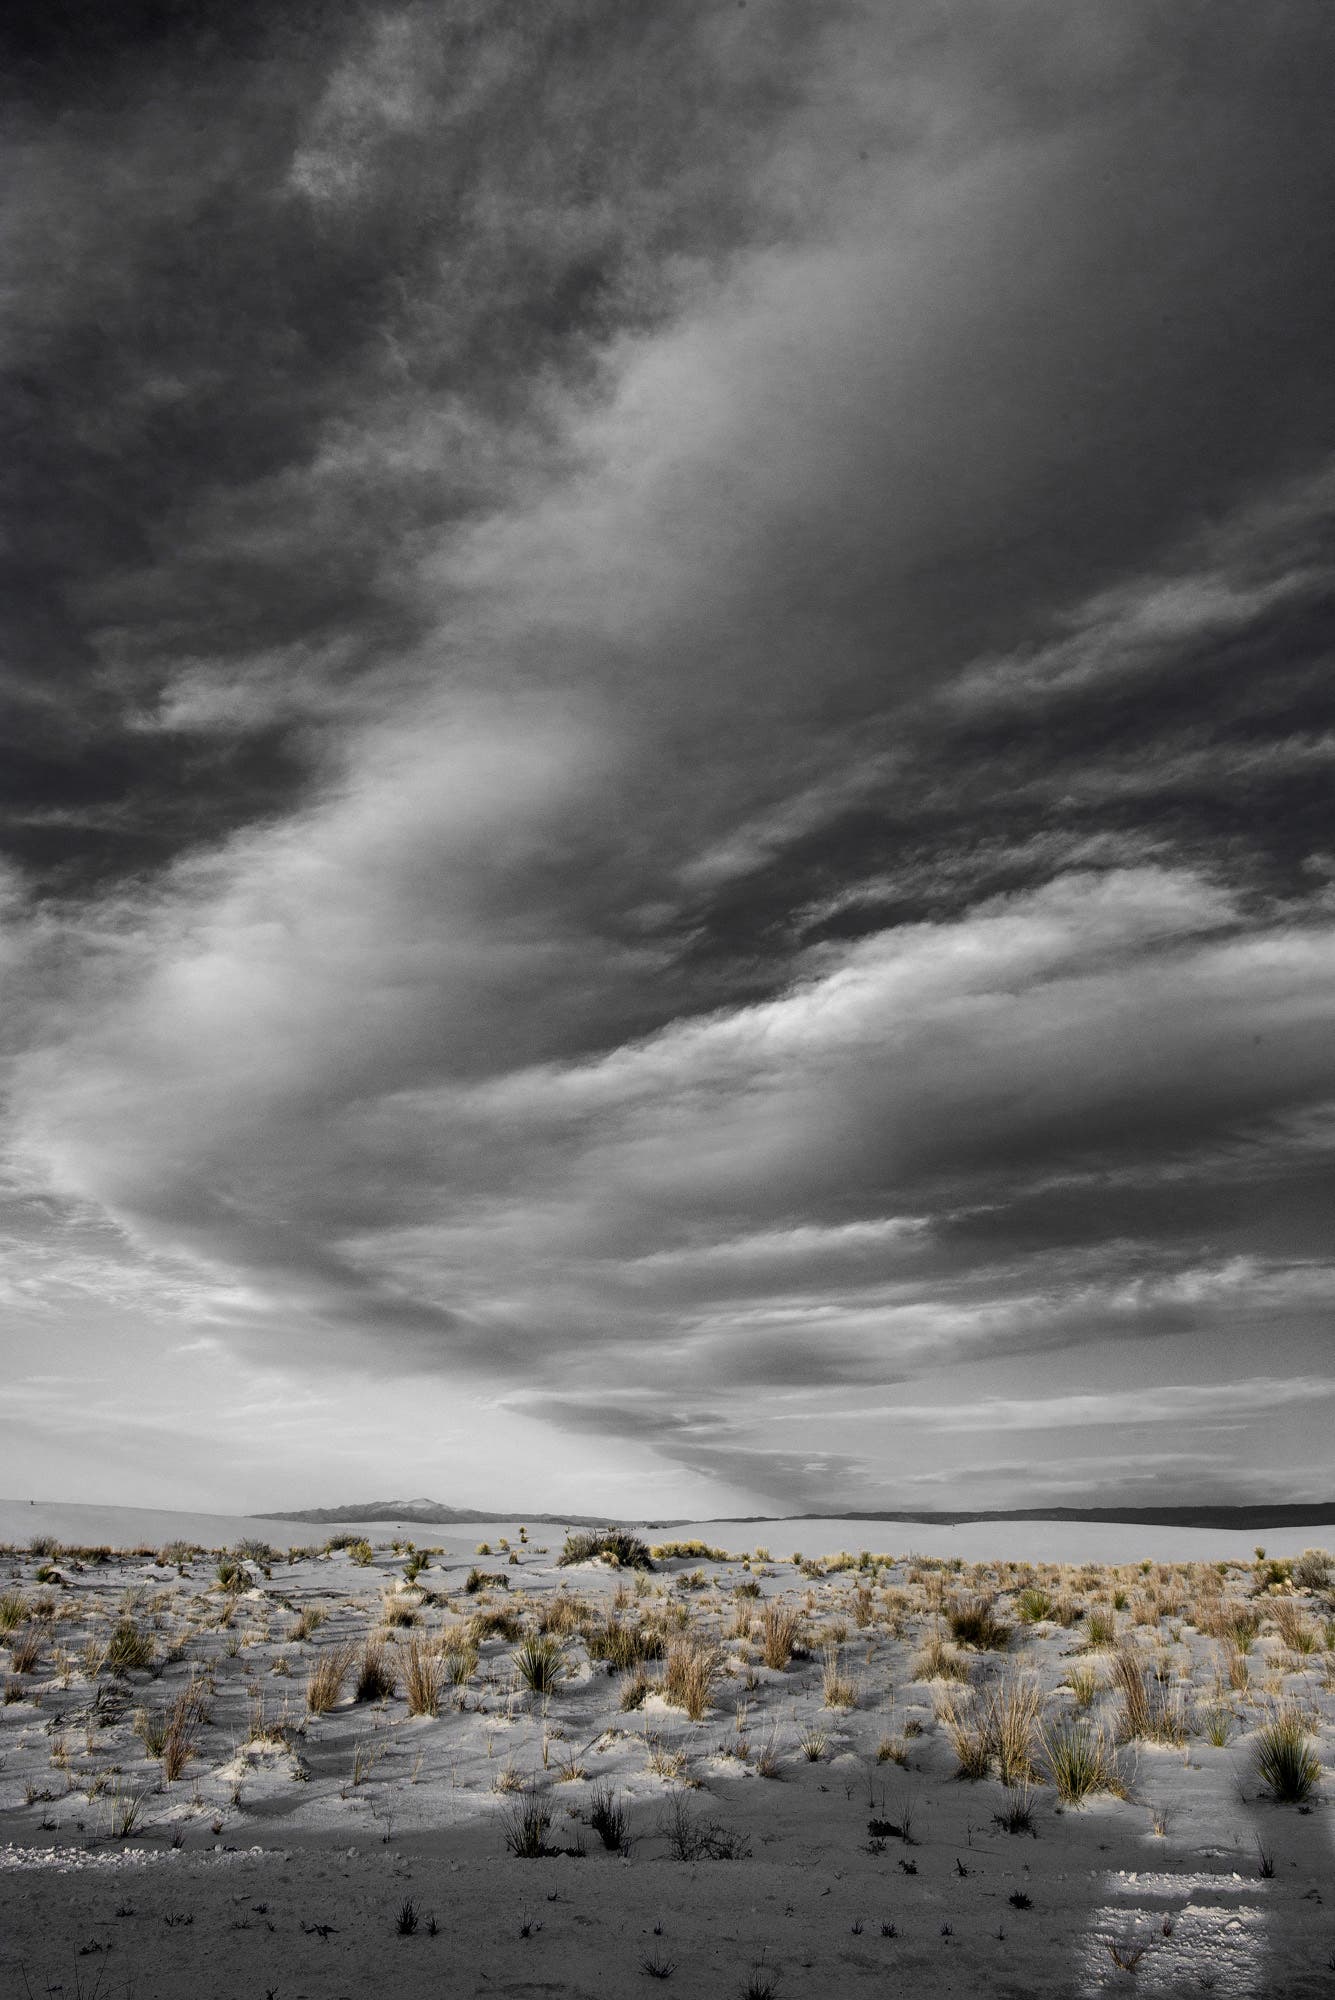
The two elements that most attracted me at this location in White Sands National Monument were the yellow tufts of dry grass and the dramatic cloud formations. I chose a vertical format that showed much more of the sky than the land to give the clouds star billing. And in after-capture, I removed the blue of the sky to bring out the yellow color against black-and-white surrounding.
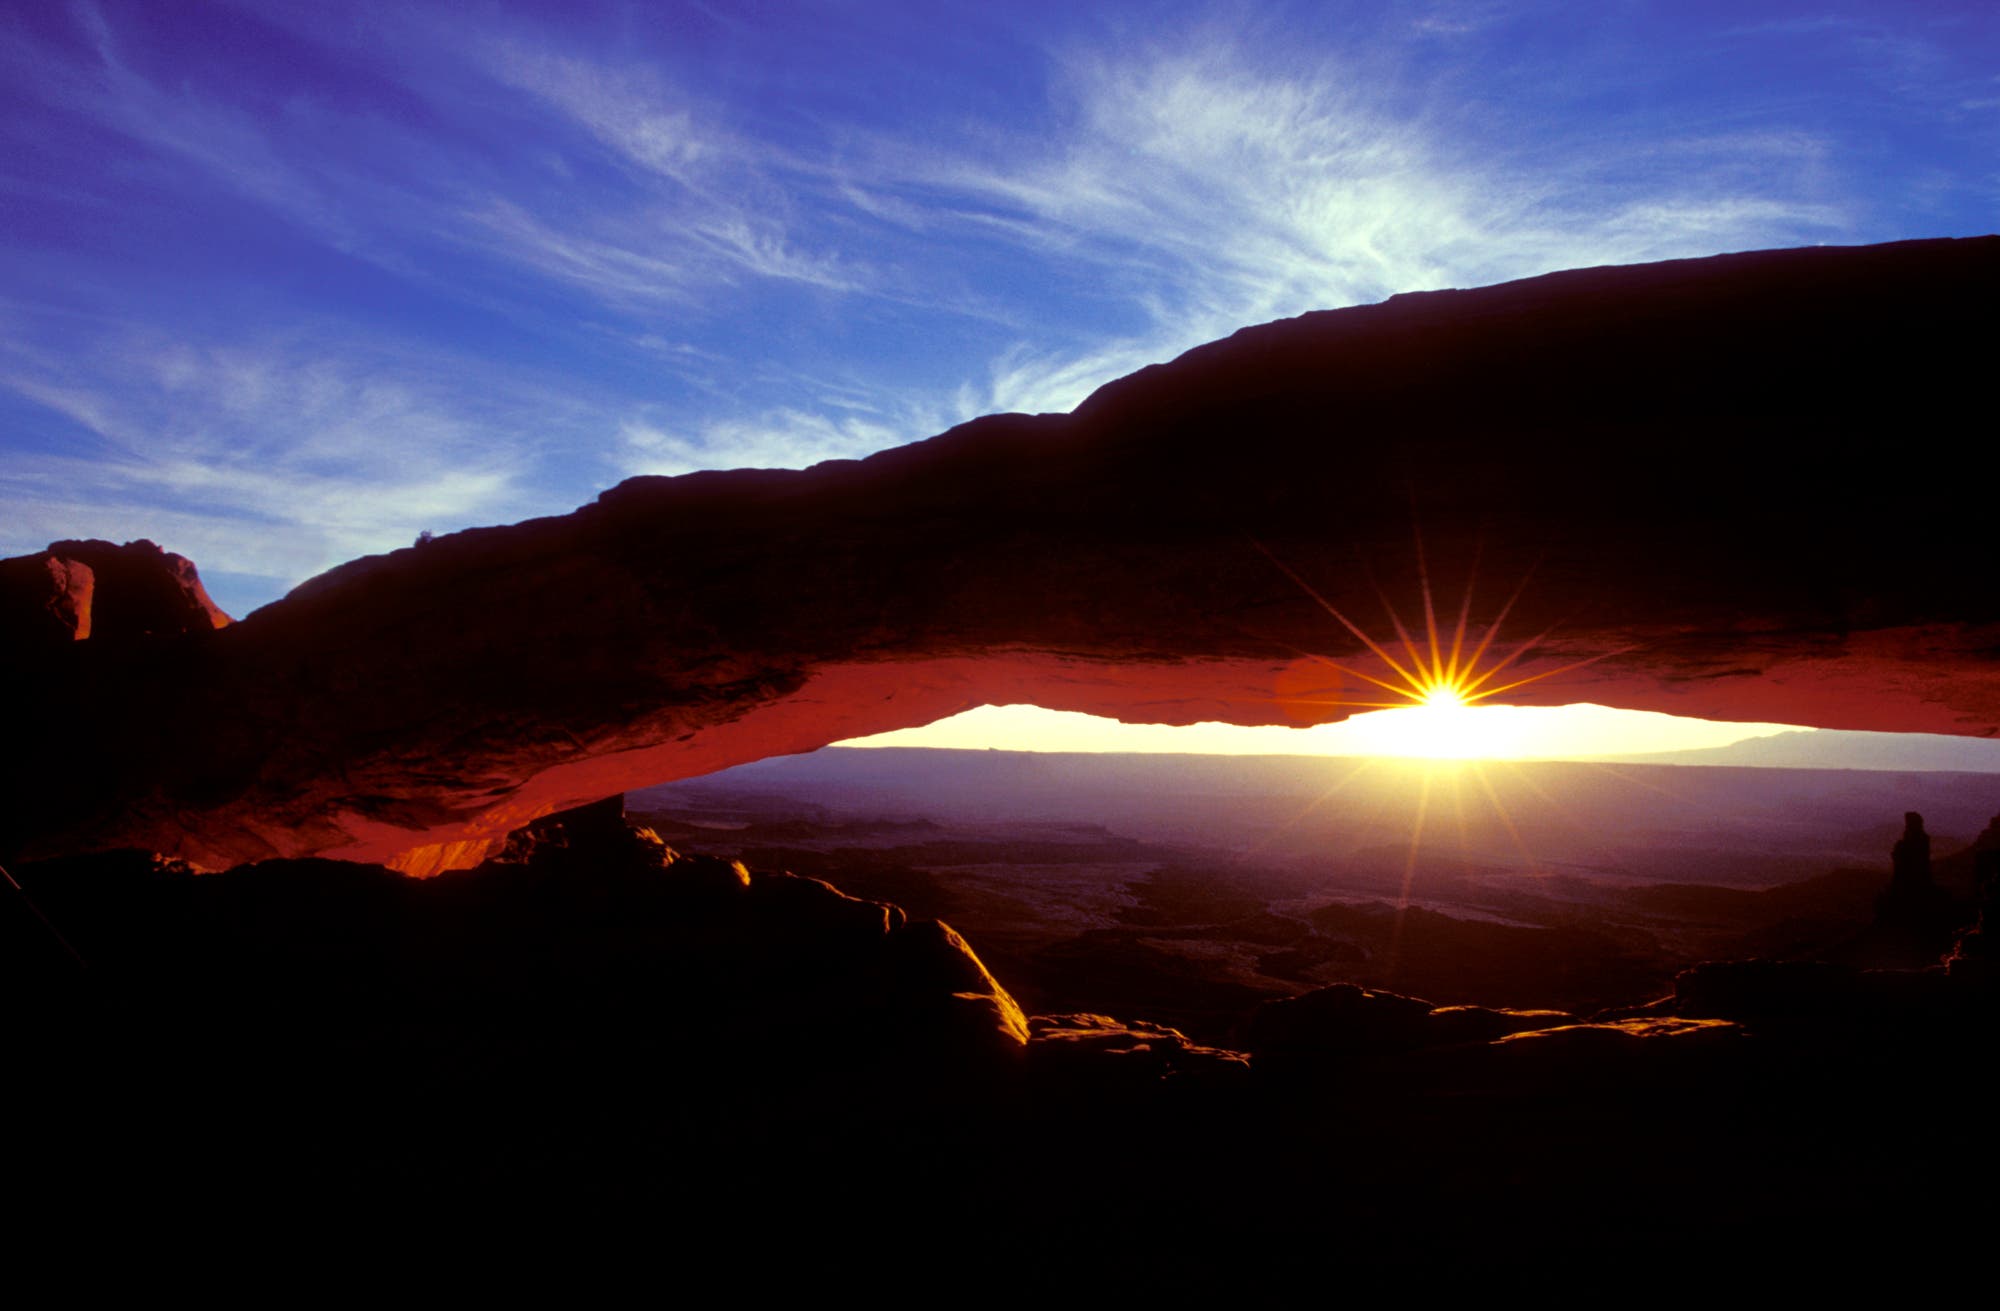
I bring students to Mesa Arch before dawn so they are all set for getting spectacular shots of this iconic location in Arches National Park. I took a series of pictures, including this one at the moment when the sun was partly hidden by arch and washing the surrounding in rich color. I was able to maintain sharpness and create the star effect by stopping down to f/32 and checking through the viewfinder using my preview button.
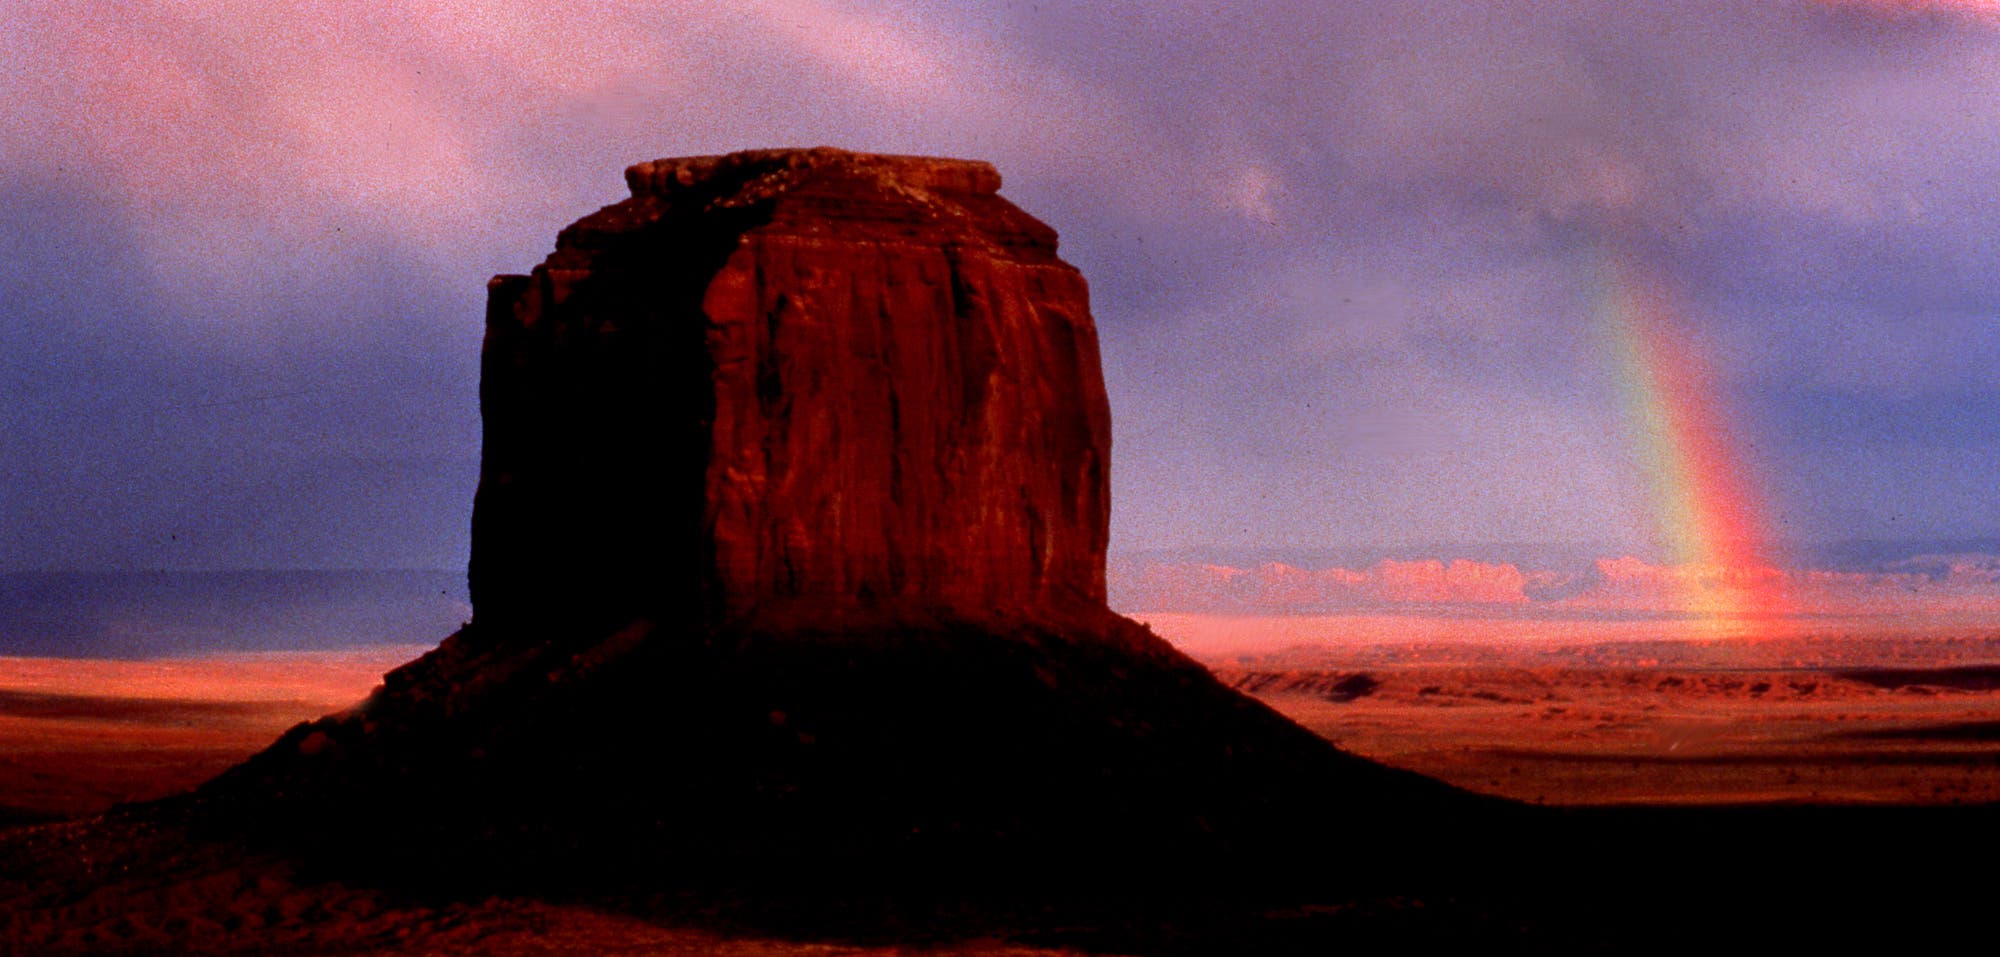
Thunderclouds swept over Monument Valley one late afternoon but our Navajo guide urged us to stick around despite the chance of rain. We watched as a downpour hit nearby (luckily we were spared) and then saw a fabulous rainbow in the distance where sunlight had returned. I found a vantage point that would show one of the buttes together with the rainbow, used a 300mm lens and polarized to concentrate the colors of the rainbow.
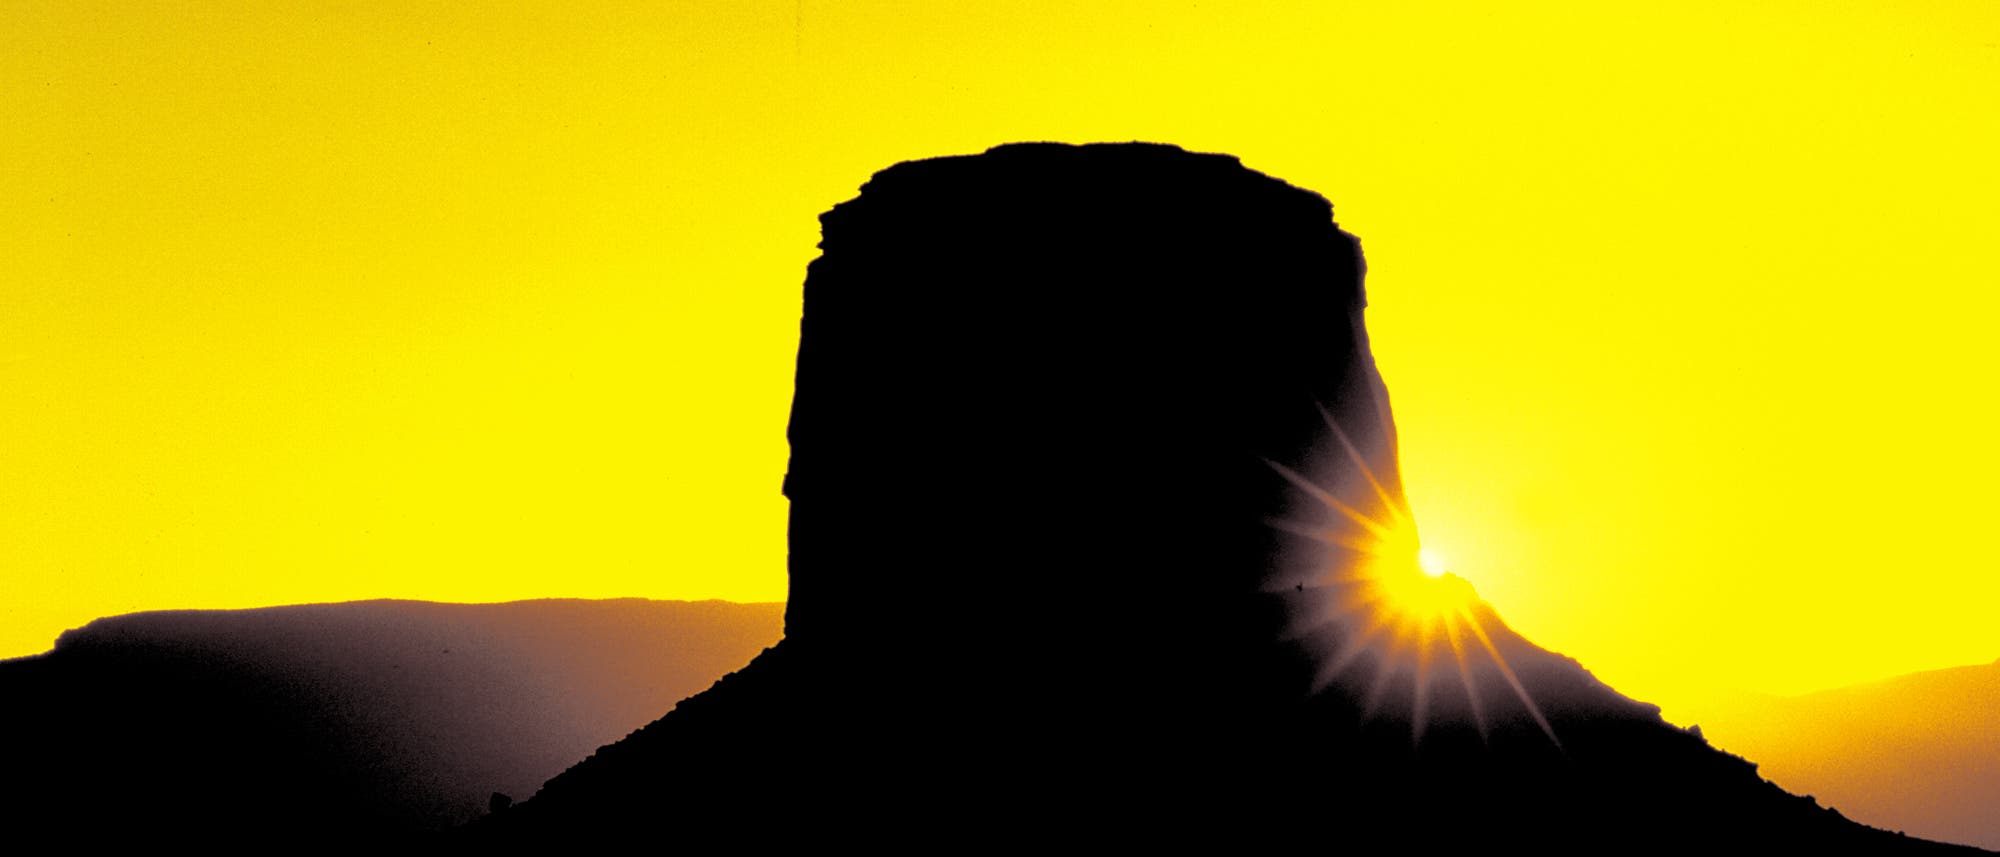
For a dramatic star effect in this image taken in Monument Valley, I arrived before sunrise and positioned myself facing the sun with my camera on a tripod. Using my 300mm lens and a small aperture (f/22), I began shooting as soon as the sun came up. (You should be able to see this star effect using your camera’s preview button.) The long lens concentrated the yellow color of the sunlight at dawn.
The bright overcast light following a patch of rain was a blessing, bringing out the lush colors in the badlands of Big Bend National Park. I minimized the sky but kept it in the picture to show the shape of the distant mountains.
To get a true sense of the steep canyon walls in Big Bend National Park, there’s no substitute for getting on a dingy and floating on the Rio Grande. I included the people in a nearby boat as a foreground elemenbt to give the canyon scale and a human touch.
I was intrigued by the soft light on these hills in Big Bend National Park. I took some shots of the hills but then decided to include in the foreground an ocotillo plant typical of this region to create a better sense of place.
The West is dotted with geologic formations like this butte. Capture these iconic forms when the light makes them glow. In this shot, I wanted to go beyond the norm so I came back in the morning after a downpour and shot the same butte reflected in a nearby puddle. To get this shot, I got down low, focused on the reflection and used f/16 for maximum sharpness.
Here I combined the rippled sand dunes in the foreground with the needle-like rock formations further back into a simple abstract composition based on two color blocks: earth and sky. Shot in Monument Valley with a moderate wide-angle lens (35mm) at dawn and polarized to deepen the blue of the sky.
I was at Zabriskie Point in Death Valley at sunrise but there were clouds in the sky that cast a shadow over some of the eroded badland formations the area is known for. By eliminating the sky completely, I was able to put them in the perfect light to show their shapes and subtle colors. Shot at 60mm with my 24-70mm zoom lens at f/30 for sharpness.
I arrived at this wetland area in Bosque del Apache Wildlife Refuge before sunrise and saw the Sandhill Cranes wading in the water. The sun was about to rise over the hills and the cloud cover, reflected in the water, turned brilliant colors. My dilemma was how to avoid a mass of black silhouetted against the bright sky. I decided to expose for the land to retain some detail on the birds and background. This would overexpose the sky and water, but I knew I could correct that in after-capture. Not only was I able to restore the colors that were originally overexposed, but I also decided to add a wash of bluish cyan and then diffuse the image a bit to soften the scene.
For this sunset image taken at White Sands National Monument, I was mainly interested in creating an abstract composition based on color. I was especially intrigued by the glow of light and chose a very simple dune for the foreground. I metered the sky, then overexposed by 1 1/2 stops to brighten the golden color. In after-capture, I reduced sharpness to soften the sand dune and finish with two bands of lush color.
For this shot taken in White Sands National Monument, I was using the workings of nature -- the ripples on the dune, the insect trail and a cloudless sky -- to create a very abstract composition. A small aperture of f/16 gave me the sharpness I needed to render the surface textures. Then in after-capture, I stripped out the color, for an even starker, black-and-white abstract image.
The low-angled light of the late afternoon sun casts the kind of shadows that bring out surface texture, as on these gypsum dunes in White Sands National Monument. I watched as the clouds let the sun through in some places more than in others and took the shot when the second dune was highlighted while the closest dune was less brilliantly lit. I metered the brighter dune to maximize the texture on the first dune. Taken at 300mm with my 28-300 zoom lens at f/16 for sharpness.
The two elements that most attracted me at this location in White Sands National Monument were the yellow tufts of dry grass and the dramatic cloud formations. I chose a vertical format that showed much more of the sky than the land to give the clouds star billing. And in after-capture, I removed the blue of the sky to bring out the yellow color against black-and-white surrounding.
I bring students to Mesa Arch before dawn so they are all set for getting spectacular shots of this iconic location in Arches National Park. I took a series of pictures, including this one at the moment when the sun was partly hidden by arch and washing the surrounding in rich color. I was able to maintain sharpness and create the star effect by stopping down to f/32 and checking through the viewfinder using my preview button.
Thunderclouds swept over Monument Valley one late afternoon but our Navajo guide urged us to stick around despite the chance of rain. We watched as a downpour hit nearby (luckily we were spared) and then saw a fabulous rainbow in the distance where sunlight had returned. I found a vantage point that would show one of the buttes together with the rainbow, used a 300mm lens and polarized to concentrate the colors of the rainbow.
For a dramatic star effect in this image taken in Monument Valley, I arrived before sunrise and positioned myself facing the sun with my camera on a tripod. Using my 300mm lens and a small aperture (f/22), I began shooting as soon as the sun came up. (You should be able to see this star effect using your camera’s preview button.) The long lens concentrated the yellow color of the sunlight at dawn.
With the 100th anniversary of the national parks, this is a great time to visit some of the amazing landscapes found in the American West. Between us, we’ve spent time and photographed in every national park in the system and we can definitively say that few landscapes—in the national parks and beyond—are as awe-inspiring as those found in our western states. And who can resist taking lots of pictures?
Here are some pointers to help you bring back images you’d be proud to share.
Landscape Photography Tips
Take the Iconic Photos, Then Go Beyond
Everyone wants to capture those iconic images we’ve all seen in books and postcards. So give it a try and you’ll probably realize it’s not as simple as it may seem. Many of those images were taken from high up on a mountain trail or from down below in a canyon. Rarely will you get those signature shots from a pullout on the road so go ahead and hike in.
But even if you’ve got that iconic image, push yourself to something beyond. Move around and go higher, lower, closer, farther away to find a different perspective — one that reflects your personal vision. Don’t forget to vary your format from horizontal to vertical and to try out other landscape photography lenses. Such simple changes can often redefine your image. Also, think in terms of an establishing overview shot, a closer vignette and some details to give a more complete sense of the place. Finally, look at the scene in terms of abstract shapes and lines, which will often be brought out by contrasts in light and shadow.
Include an Interesting Foreground Element
One problem with many landscape shots is that the subject is far away and there’s nothing to look at in the foreground. That gives landscape images a flat sameness that we want to avoid. As you look at some stunning vista, pay attention to nearby rocks, plants or even puddles of water that can add interest to your image and also create a stronger sense of the third dimension.
With a wide angle lens, you can get quite close to the foreground subject and still keep everything sharp, but you’ll also make the background less prominent. Try stepping back from your foreground subject enough so the landscape remains an important feature.
Work with All Kinds of Natural Light
You’re bound to encounter all kinds of natural light throughout the day and from one day to the next. Learn how to make the most of whatever light you have so you don’t find yourself sitting out huge chunks of the day.
Of course, early morning and late afternoon are the choice times to photograph, so find out what time sunrise and sunset will occur and be at a key location before and after those times. You’d be surprised how soon light may be terribly bright after sunrise, so be on location before dawn if you want dramatic results. Also, don’t pack up and leave as soon as the sun sets. Some of the more gorgeous effects come after the sun is down, especially if there are well-placed clouds in the sky.
If you’re faced with a coming rainstorm, you’ll have some great opportunities to get beautiful light on the landscape and in the sky. Take along some plastic bags, shower caps, and a poncho to protect yourself and your gear in case you get caught in the rain, but your payoff will be some unusual images.
Even dull overcast days can work wonders with landscape photos. Such days bring out natural colors and eliminate what can often be annoying shadows. Take advantage by getting a high perspective so your image is mostly land with very little sky. Or, go for more intimate shots of the landscape where color plays such a critical role.
Pay Attention to the Sky
Composing a landscape means making decisions about how to deal with the sky. Finding the right balance between land and sky is often what makes of breaks a landscape image. A lot depends on what the sky looks like in any given situation. A blue sky or one with beautiful white clouds or threatening dark ones can be an asset to your image and you may want to include more sky and less land. You may even want to use a polarizing filter to deepen the blue and increase the contrast with white clouds.
But if the sky is a uniform dull gray, you’re better off minimizing the sky or eliminating it completely. Nothing spoils a landscape photo more than a swath of white where the sky would have been.
Sharpness is Paramount
One of the great advantages of landscapes is that they don’t move, so you can take your time to compose and get optimum sharpness. What is optimal depends on the image you have in mind, but certainly you want the foreground and middle ground as sharp as possible.
For maximum control over sharpness, use a tripod. That allows you to take several shots of the same location with different settings so you can decide later which works best for you. Also, you’ll get a sharper image with a higher f-stop, and we recommend using at least f/11. If you’re shooting just the landscape, a slow shutter speed should not pose a problem. But if you’ve got your eye on some wildlife in the landscape or want to capture grasses bending in the wind, vary your shutter speed to get either a sharp image (1/250 seconds) or an interesting blur (up to a few seconds) and check your LCD monitor to see if you have the effect you wanted.
After-Capture Techniques
Today’s digital photography offers us an incredible number of options for improving or rethinking our images in the computer. One simple tool lets you crop your image in case you were unable to keep an unwanted element out of the frame during shooting. In fact, it’s sometimes wise to include a bit more when you’re taking a shot, then crop afterward. Remember, you can always cut something out, but you can’t add something you didn’t include in the rush of shooting.
Using the white balance slider, you can adjust color, if that’s what’s needed. There are tools that let you correct exposure overall or selectively in highlight or shadow areas. As a last step, it’s always a good idea to use the tool that fine-tunes sharpness.
If you’re adventurous, you can go creative with these applications and come up with landscapes that truly look out of this world.
To learn more about landscape photography, check out these full courses on creativeLIVE:
You can also check out the tutorial featuring the use of neutral density (ND) filters for beautiful landscape photos in the episode of AdoramaTV below:
GuruShots Photography Challenge: Big Nature
Nature and landscape photography gives us all the perfect excuse to head outdoors and showcase how we make up just a small fraction of the world around us. If you have any stunning nature and landscape photos that show scale, share them with us win as much as $400 worth of prizes!
Join Adorama and GuruShots.com’s Big Nature Photography Challenge! As long as you’re 13 years old and above, you can submit up to four (4) entries. Who knows, your shot of amazing forests, mountains, deserts, and lakes might just win you the following:
- Top Photographer Award – $200 Adorama Gift Card
- Top Photo Award – GuruShots bundle with 20 Swaps, 15 AutoFills & 10 Keys
- Guru’s Top Pick Award – GuruShots bundle with 20 Swaps, 15 AutoFills & 10 Keys
Join the GuruShots Big Nature Challenge!
- Interested participants can send up to four (4) photo entries only.
- The photo challenge runs until February 26, 2018.
- Photos submitted should be in JPEG format with a minimum resolution of 700 x 700 pixels and a maximum file size of 25MB.
- Images must be distinct in subject, background, foreground, and location. Thus, multiple cropped or edited images will not be accepted.
- Entries must be strictly your own or else you will be disqualified.
- Non-relevant entries will be disqualified.
- Obscene, provocative, defamatory, sexually explicit, objectionable or inappropriate images will be disqualified.
- GuruShots will use a “blind voting system” method to keep the voting as fair as possible.
- Entries will be ranked as follows:
- All Star – 1950 votes
- Elite – 1200 votes
- Premier – 600 votes
- Skilled – 250 votes
- Popular – 50 votes
Check out GuruShots for more photo challenges and stay tuned for more photography tips!
Allen Rokach spent many years as a magazine and commercial photographer and now runs photo workshops around the world, including to Cuba, the American West, and India. Go to www.allenrokach.com for details. Anne Millman has written countless articles on travel, culture, science and photography, including 8 books on photography with Allen Rokach.