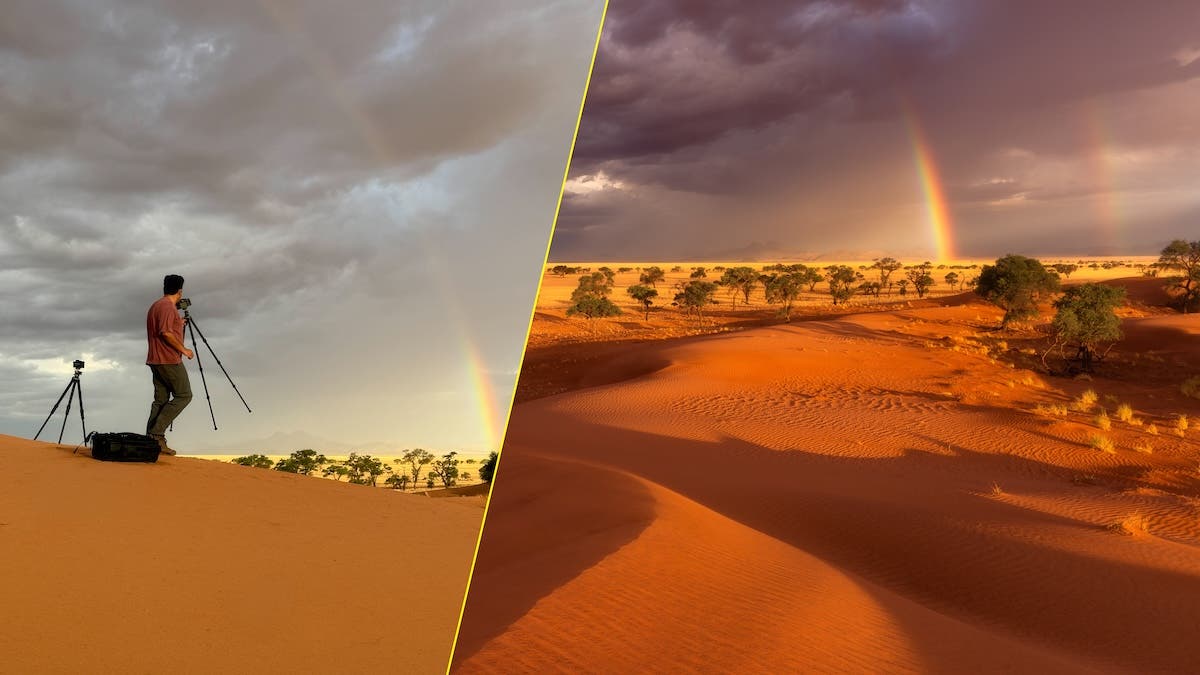
Some landscapes leave a profound impression long after your departure. Standing in the NamibRand in its red sands with scattered golden grasses and Camelthorn trees, the mountainous backdrops across wide vistas, I vowed to return again to the rolling dunes. A conservation area in the Namibian Desert. Setting out to create some stunning desert landscape photography, you discover life here in the most unexpected and arid conditions.
I fulfilled my promise 4 years later and have just completed another landscape photography adventure here, with its breathtaking storms, massive rainfall, lightning, and rainbows.
The desert has a way of demanding its price. The road to this area is a brutal gauntlet of corrugated earth and razor-sharp rocks. The familiar vibration of our 4×4 turned into a heavy, rhythmic drag on a burning hot day; our rear tire had been completely shredded. Looking at other off-roaders with their vehicles jacked up at regular intervals, I realized that adrenaline and some sweat in the blistering heat were simply the entrance fee to this area.
With the late arrival and no remaining spare tire, we were left with a narrow window of one sunset and one sunrise to shoot.
In this article, I want to share how to make every shutter click count when time is against you. We will cover composition and desert light, the technical edge of a dual-body camera setup, and my workflow for recovering those almost-perfect shots where the focus has just missed the mark.
Mastering the Essentials of Desert Landscape Photography
In crafting a captivating landscape photo, several key elements come into play. The following are the considerations as part of your planning, and also learning to be successful as a landscape photographer:
| Location | Helps craft awe-inspiring compositions with a range of natural elements. |
| Light | Generates shadows and highlights, resulting in contrast: a prime quality of an appealing image. |
| Camera Settings | Values used to capture light: aperture, shutter, and ISO. If the light is good, but the camera settings are not right, those shadows and highlights will not be captured properly. |
| Techniques | Techniques such as focus, bracketing, focus stacking, and the use of ND or graduated ND filters, etc. |
Location and Composition: Chasing Rainbows in the Desert
When approaching desert landscape photography, I always begin by scanning the environment for specific compositional features that will hold the frame together even before the light arrives:
- Patterns and textures on the sand
- Natural curves of the dune
- Interesting elements in the middle-ground: trees and grasses
- Background anchors: clouds and mountains
I chose to go to the location in the stormy season. Luck is a big factor in landscape photography, but planning to be in the right place at the right time is like buying 90% of the raffle tickets. The best moments often require both preparation and a little bit of luck.
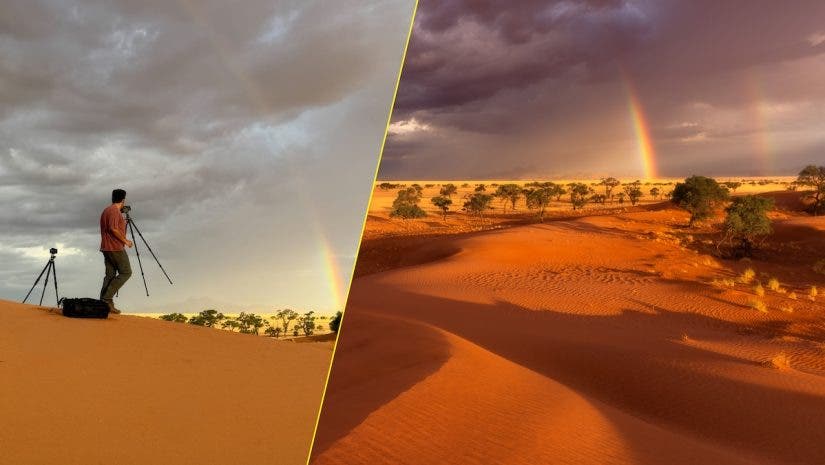
Here is an image of my composition. There is no light, but I am all set up for the moment when soft light from an angle brings everything together on the location:
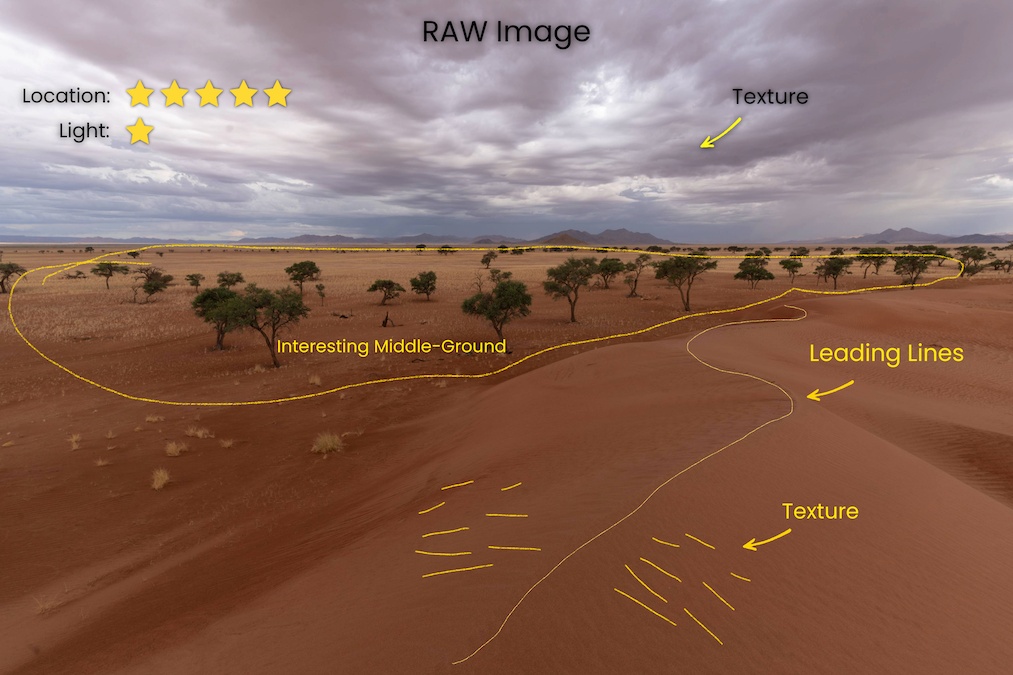
The above was my composition idea for the sunrise shoot. I scouted through near the end of the day before, hoping for some action to occur here at sunset, with the sun behind me lighting the scene.
Light, Camera Settings and Technique: Preparation Meets Opportunity
The true challenge of desert landscape photography is maintaining your technical readiness during the dull moments so that you are prepared when the elements finally align.
I was patiently set up and waiting when it started to drizzle, and a small gap in the clouds let sunrays illuminate the scene. The textures in the sand suddenly became apparent, as the monotonal scene transformed into light and shadows; inapparent yellow grass suddenly glowed, trees became visible, and the sky became dramatic. Nature gave her magical offering as a rainbow emerged in our field of view. I had to make slight adjustments; the rainbow was not in the wide-angle frame.
Distraction: I was recording behind-the-scenes and somewhat rushed to change the composition. Also, these were moments of awe; what should a landscape photographer do? Enjoy the scene, do his job, or both? I had the right camera settings dialed in: Aperture Priority mode at f/11, ISO 100, and letting the camera calculate the shutter speed. However, I missed the technique when I recomposed: “focus”. Later in the article, I will share how I rescued the image.
This is how it all unfolded on location. I hope you enjoy these visuals and learn from them.

Dual Camera Setup in Landscape Photography
I carry two cameras. One is a landscape photography beast, a Sony a7r IV with 61 megapixels, and the other is a video king, a Sony a7s III. I do, however, make a deliberate preference of using both for photography at times, omitting shooting video footage.
Here is my setup when both are being used for photos:
- One has a wide-angle and the other a telephoto, a 70-200mm f2.8 lens. The telephoto helps break down the scene into smaller, tighter compositions and compresses it, i.e., it makes distant objects in the background appear closer because of its inherent optical design.
- One has a wide-angle and the other a mid-range 24-70 f2.8 lens. Depending on the scene, I choose one for time-lapses at a fixed location while I move around with the other.
On this occasion, I left the a7r IV with a wide-angle lens and quickly mounted a telephoto lens on the a7s III to take a close-up of the hills. Time was of the essence, light mutating and disappearing in minutes if not seconds.
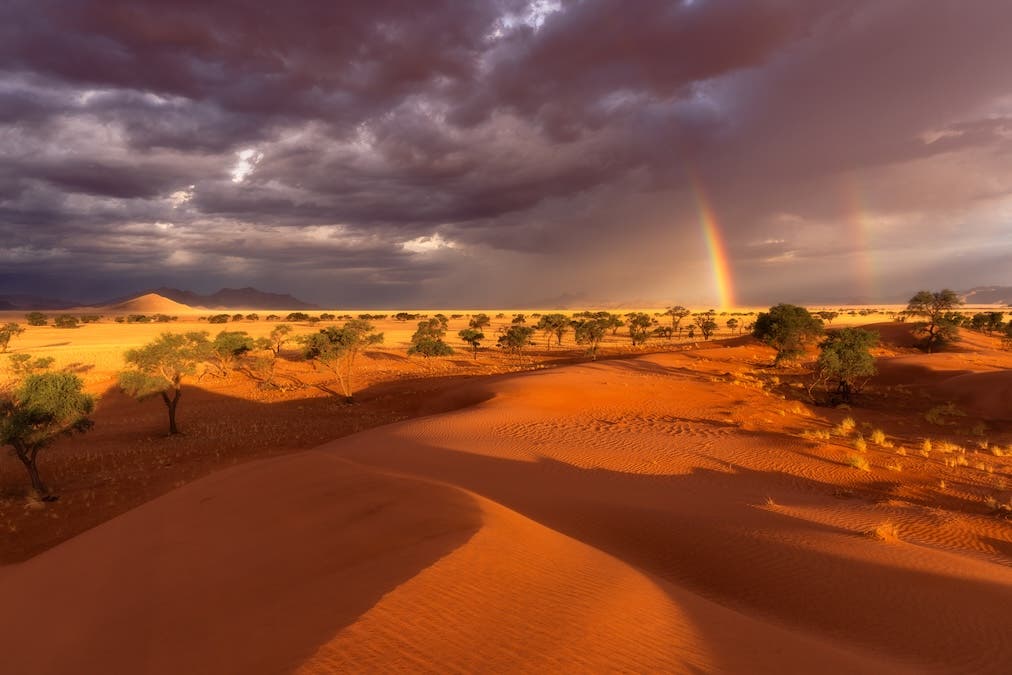
Pro tip: After taking a shot with good results, avoid lingering in one spot to retake the same photo. Keep moving, and don’t forget to look right behind you.
Here are the results of the telephoto lens shots.
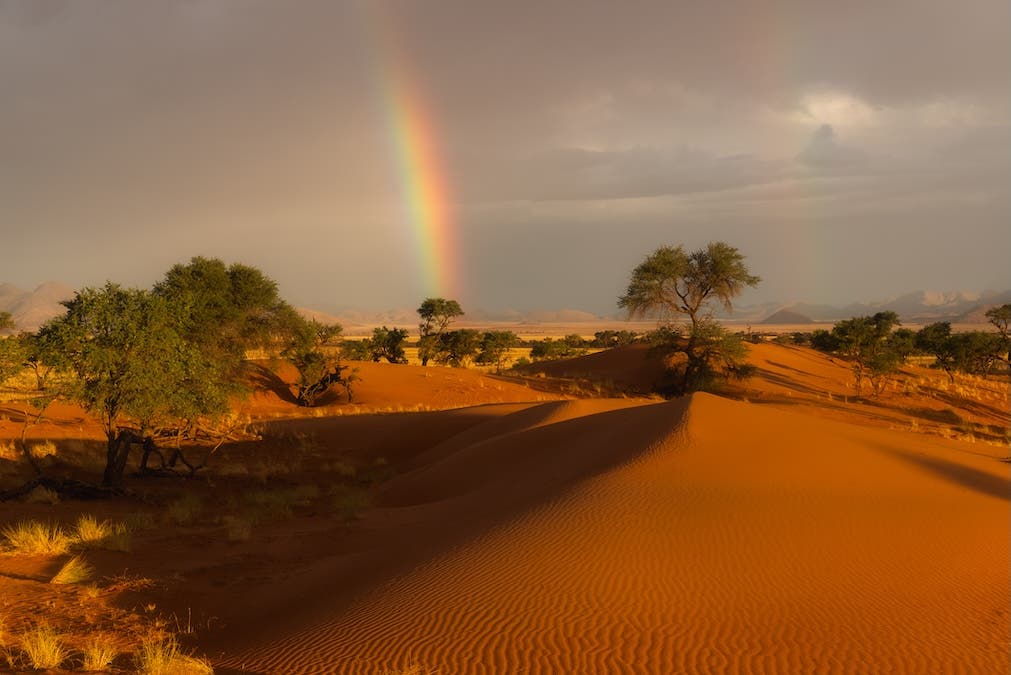
If possible, take a vertical shot as well for two reasons. Firstly, it offers a different perspective in a horizontal format; secondly, it is a good format for magazine printing.
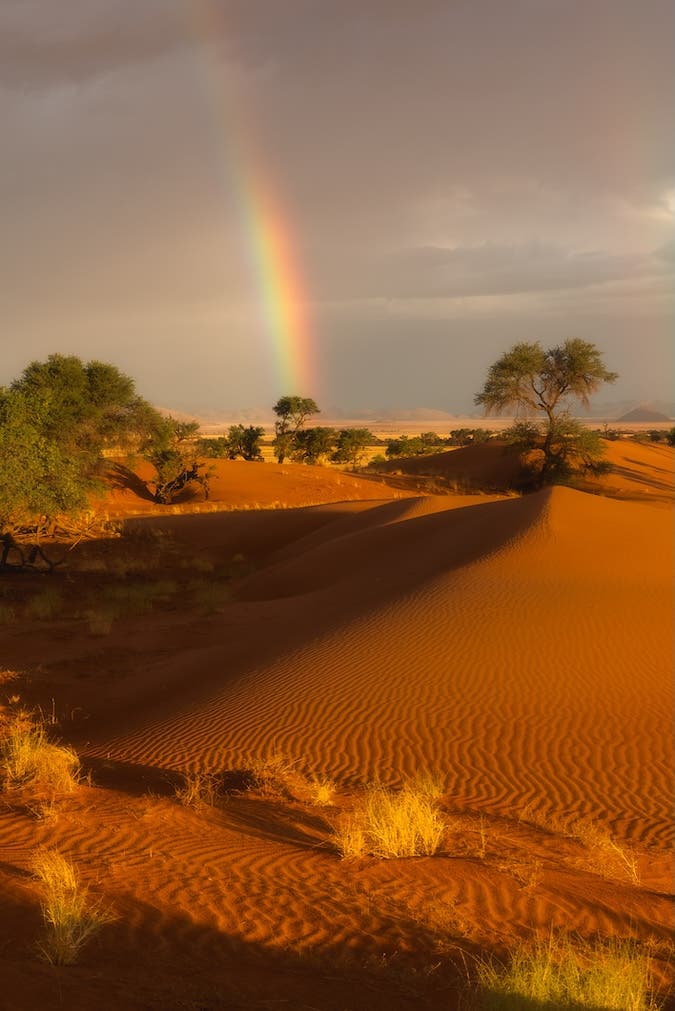
How to Fix Focus in Post-Processing
Software like Topaz Photo helps photographers fix crucial on-location mistakes, such as focusing. I use Adobe Photoshop, and they now use Topaz AI to sharpen the images. Fortunately, I did not miss the focus entirely, and if you did not zoom in, everything would have looked fine at a glance. The image below shows a side-by-side comparison of before and after sharpening.
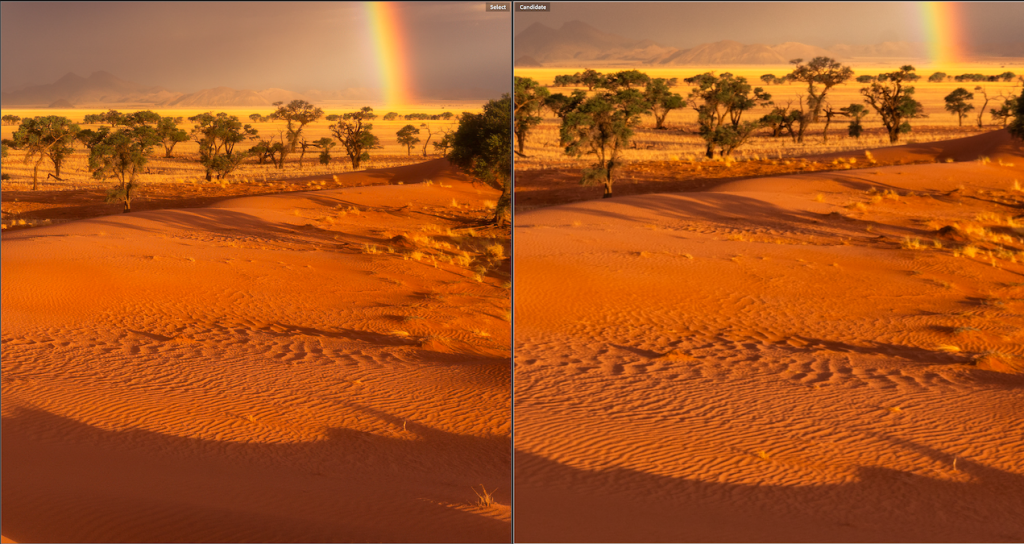
The image on the left is sharpened using Topaz AI in Adobe Photoshop. Additionally, the image on the right is soft and lacks focus.
Final Remarks
Standing on that dune that evening made me realize that beautiful things do not ask for attention. Nature would have put on its display quietly even if I were not there. It is the very transience of the moment that is what makes it so perfect. Only experience can teach a landscape photographer the fine balance between enjoying the moment and capturing it. Prioritizing location, composition, camera settings, and techniques as part of your learning curve is the only way to ensure that, when rainbows appear in the desert, you are there and ready to press the shutter without hesitation.