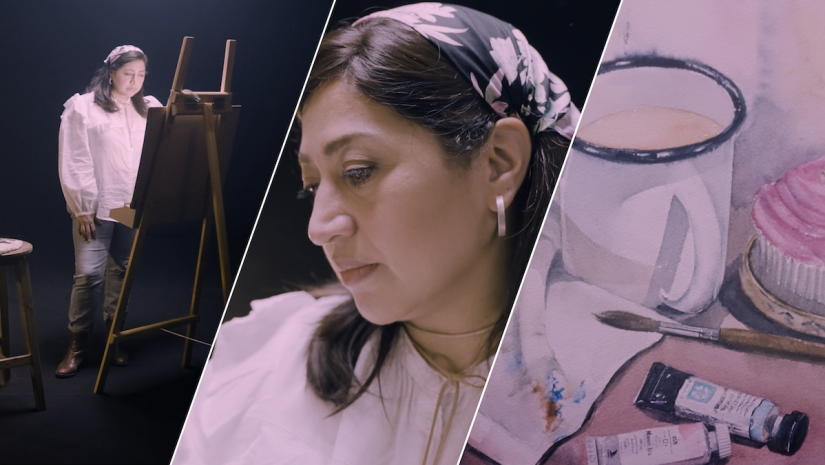
The Three-Shot Rule is a filmmaking practice that makes your scene dynamic and engages your viewers’ interest. This is achieved by varying your focal length or distance from the elements in the scene, or the subject, and capturing three different types of shots.
I faced a dilemma when making a short film about my journey to creative independence, a story that was important to me and that I had given much thought to in the pre-production phase: where to shoot the opening scenes and how to shoot them. I wanted the opener to be an immersive experience for the viewer through the visuals, sound effects, dialogue, and music.
My confusion cleared one night when I had a dream in which I was standing on a mountain top, looking down at myself on a beach below. I knew exactly where that beach was, and decided to follow the three-shot rule in video production to establish the opening scenes.
Let’s watch the opening minute of this video illustrating the rule in action.

The Three-Shot Rule in action as an opening sequence of a film
What is the Three-Shot Rule?
The guideline that I follow in my videos has the following three shot types, which broadly speaking are employed in that order, but could be shaken up:
- The wide shot
- The medium shot
- The tight or narrow shot
1. The Wide Shot (The “Where”)
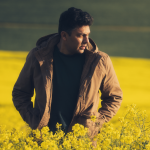
Start wide. The wide shot is also known as the Establishing Shot. It provides a bigger picture of where the event is taking place. It sets the scene and also helps shape the viewer’s mood.
- The Goal: To set context.
- Why it matters: The viewer needs to see the subject’s world before they can care about the details. Additionally, knowing where the subject is connects the person with the next scenes, which are medium and tight shots.
- Pro Tips:
- Using a drone can help make the scene engaging.
- Choose unique angles, such as the top-down shot in my video clip above.
- If the location is unique, try showing the elements that make it distinctive.
- On location, if time permits, record the same scene/action from various wide angles and perspectives.
Video editing tips:
- If your wide shot is static, i.e., there is no camera movement, you can scale the video up or down ever so slightly using keyframes to make the scene dynamic. If the viewer does not consciously feel the scaling up or down, that is a job well done for the editor.
- The sound design should have distinct characteristics that indicate a distant source. Incorporating an echo or an underlying drone can elevate tension or induce calm.

Wide shots give us context and help us see the bigger picture.
2. The Medium Shot (The “Who & What”)
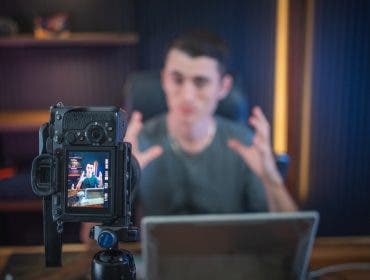
The medium shot brings us one step closer to the action or the subject. It also reveals more details about the environment.
- The Goal: To show the relationship between the subject and what we established in the wide shot.
- Why it matters: This is your opportunity as a filmmaker to solve one piece of the puzzle for the viewer: the “who”. By revealing the main character, you move the story forward. The medium shot is close enough to also see what the subject is doing, but far enough to see their place in the bigger picture, as shown in the wide shot.
- Pro Tip:
- The environment, the lighting, and what the viewer watches in the wide shot must match what you show in the medium shot; otherwise, the context will be lost.
- Let the subject complete their action from a medium shot to a tight shot. For example, if in the medium shot, the subject’s hand is moving towards the stove with a lighter, in the next shot, i.e., the tighter shot, they must start the fire by striking the lighter; the stove must not already be on..
Video editing tips:
- In addition to environmental and lighting factors, the color grading of the two scenes must also match.
- The sound design must now have raised audio levels that make you feel closer to the subject or action taking place.

Medium shots help identify the subject in their environment without getting too close to the details.
3. The Tight Shot (The “Soul”)
Also known as the Narrow, Close-Up or Detail Shot, this is where the emotion and the texture live.
- The Goal: To isolate or reveal an object or information that gives your subject and his action granular detail.
- Why it matters: Tight shots create intimacy and close the loop from the wide to medium to narrow details. From here, you move the story forward, as the audience is now fully aware of where they are, who the subject is, what they are doing, and the details of that important object in their possession.
- Pro Tip:
- As a filmmaker, you have the choice of how much to disclose to create suspense. For example, if you want to reveal the artist’s final painting at the end of the movie, keep the tight shots focused on brushstrokes or parts of the painting that create curiosity but do not reveal everything.
- The more texture you can show in these shots, the more engaging your video will feel.
- Just like the wider shot, keep in mind that the close-up shot can be the beginning of your sequence as well and not necessarily the end. Plan this ahead of time.
Video editing tips:
- As stated earlier, the cuts between medium and tight shots must be consistent, as should the color grading and sound effects.
- A narrow shot requires audio levels that make you feel as if you are standing there.

Tight shots give details but not the context.
Effects and uses of the Three-Shot Rule
- Pacing and retention: In editing, if you cut at regular intervals from a wide to a narrow angle, it keeps the eyes engaged.
- Controlling emotions: By revealing crucial storyline details, you can evoke feelings of relief or even anxiety.
- Error correction: During interviews, people usually stumble over words. In the edit, you can cut to a tight shot of their hands or the environment to mask the jump-cut in their dialogue.
- Additional considerations: The rhythm of the movie extends beyond the visuals to the voice-over dialogue, music, color grading, and sound effects; make sure the editing process keeps everything in harmony and that these elements complement each other.

The Three-Shot Rule is a guideline and not a rigid structure.
Final Remarks
Filmmaking is more than just hitting the record button and capturing scenes at random. It is essential to first write a script and create a shot list, keeping the three-shot rule in mind. Even if you are vlogging on the go or recording scenes for an unidentified future use, establishing a clear pattern for capturing the environment makes your footage more likely to be usable. Start by establishing the location, then narrow your focus by moving in closer to the details. This approach will prove invaluable when you are ready to craft a compelling story from your experiences.