Natural light is the light most of us start with. Indeed, it is one of the simplest ways to approach lighting for a headshot or portrait. However, being easy and available does not instantly amount to great light. In this article, I will discuss the use of natural light to create successful portraits. For this article, the terms headshots and portraits will be used interchangeably. This is because, lighting-wise, a headshot is a kind of portrait. Natural light portrait photography has as many approaches as there are photographers. I will discuss what works for me, but as always, do what works best for you.
Challenges of Natural Light Portrait Shooting
Natural light is almost always there and can be beautiful. Plus, it can be used outside or inside with windows. Additionally, It has the advantage of being free and readily available. It is easy to visualize since we see it every day, and what you see is what you get. However, it is not without challenges.
If you have the right time of day and the weather cooperates, natural light can be absolutely amazing. However, if the time of day isn’t flexible or the weather is bad, it can be pretty difficult to get a good result with natural light.
Finding good light is critical for success with natural light portraits. If I am indoors using window light, it is fairly straightforward; the light is either direct or indirect. If I am outside, then the time of day is important. However, that is not something that we can always control. That is, if a client is only available at noon, then we must shoot at noon. Of course, cloud cover and or the lack thereof also has a big impact.
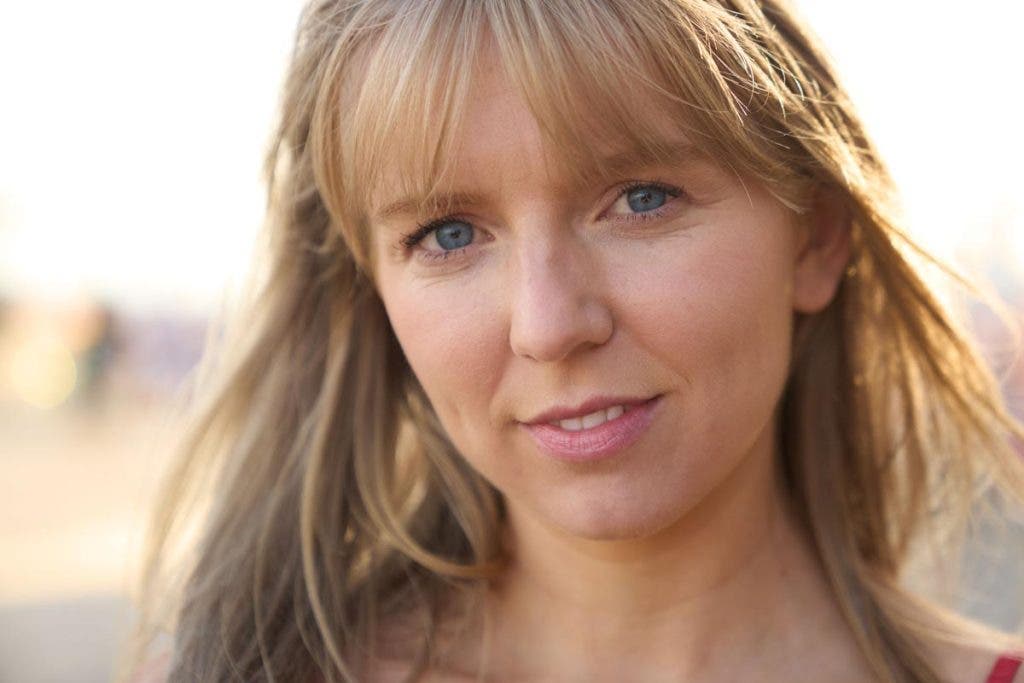
One of the things I will typically do when I am scouting and getting prepared is pull out my phone and, with the front-facing camera, spin around. That makes it easy to see how the direction of the subject (me in this case) changes how the light looks so I can pick the angle with the best light. One of my favorite ways to use available light outdoors is to find something to go underneath: an overpass, a bridge, a porch, or something similar. With my subject under that overhang, I get nice indirect light that is often very flattering. This is sometimes referred to as “open shade.”

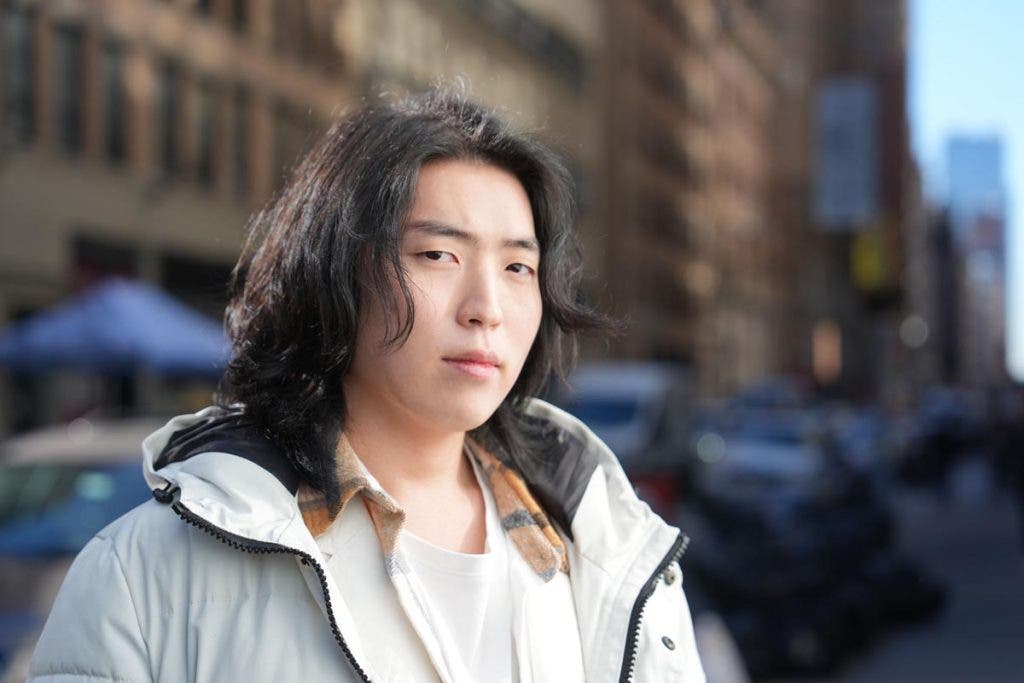
If you have the luxury of photographing later in the day with the sun low in the sky, the light can be quite flattering. Winter in New York City tends to have more good light because the sun is low in the sky most of the day. If you do use direct sunlight, it can be touchy as it moves, but it is very cool and dramatic. Backlighting can be a nice look as well, where the sun is behind your subject.
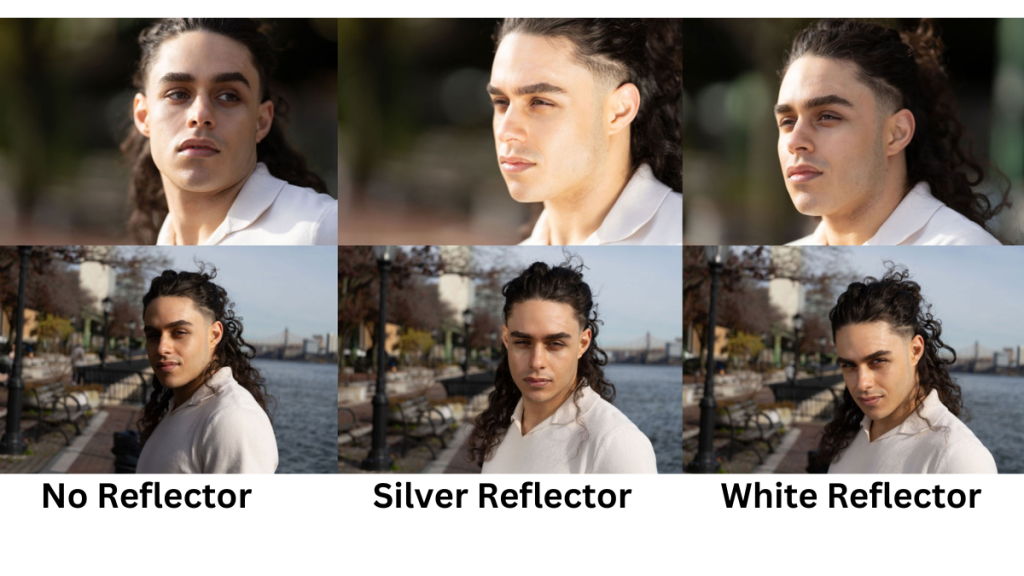
Of course, the best light may not be good enough, and that is where a light modifier comes in. You can modify the light with just about anything that will reflect light. Generally, it should be something white or a light-colored neutral. Everything from Seth Miranda’s “Brooklyn Pizza Box” to the Manfrotto Halo. I am a big fan of the Halo and the Manfrotto tri-grip. The Halo is great because it is rigid and packs up super small. The tri-grip has a handle, and the 5-in-1 version has several options for modifiers. There are a ton of other reflector options from other brands as well. Go with what you like! Depending on the reflector, you can add light with a white side, silver gold, or soft gold. With some, you can do a negative fill with black to add contrast or use diffusion to soften direct light.

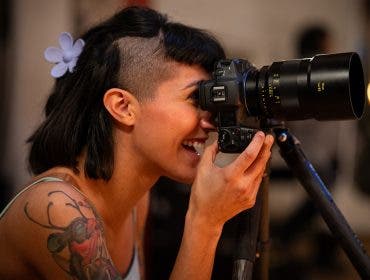
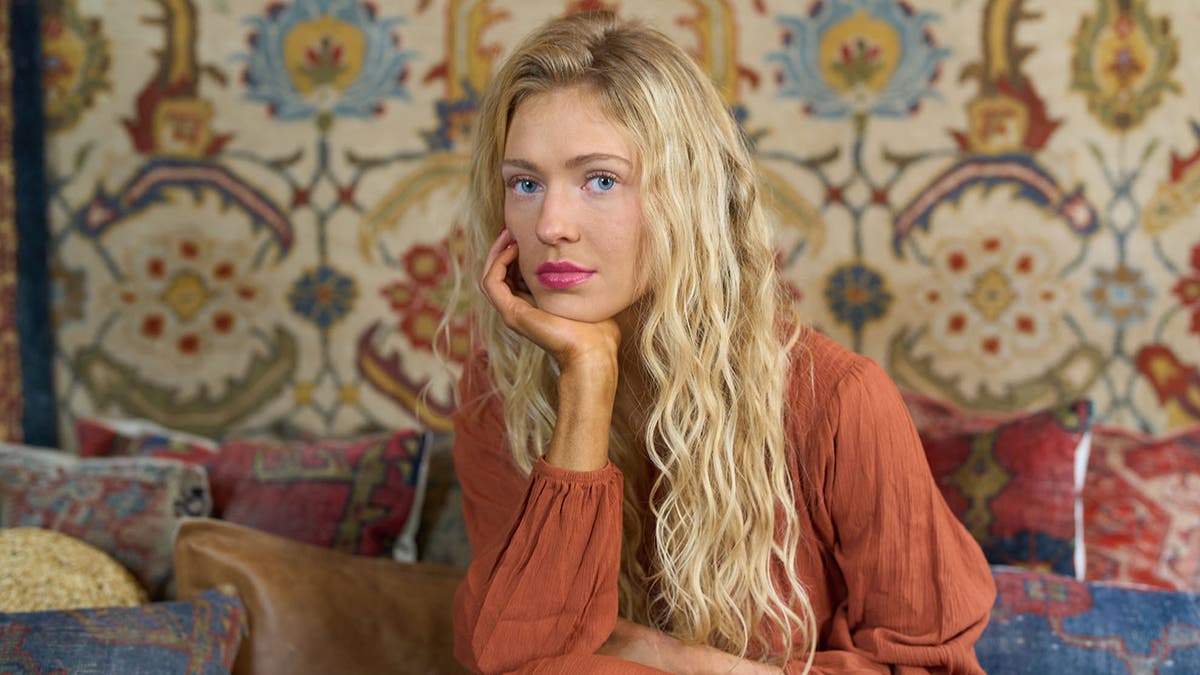
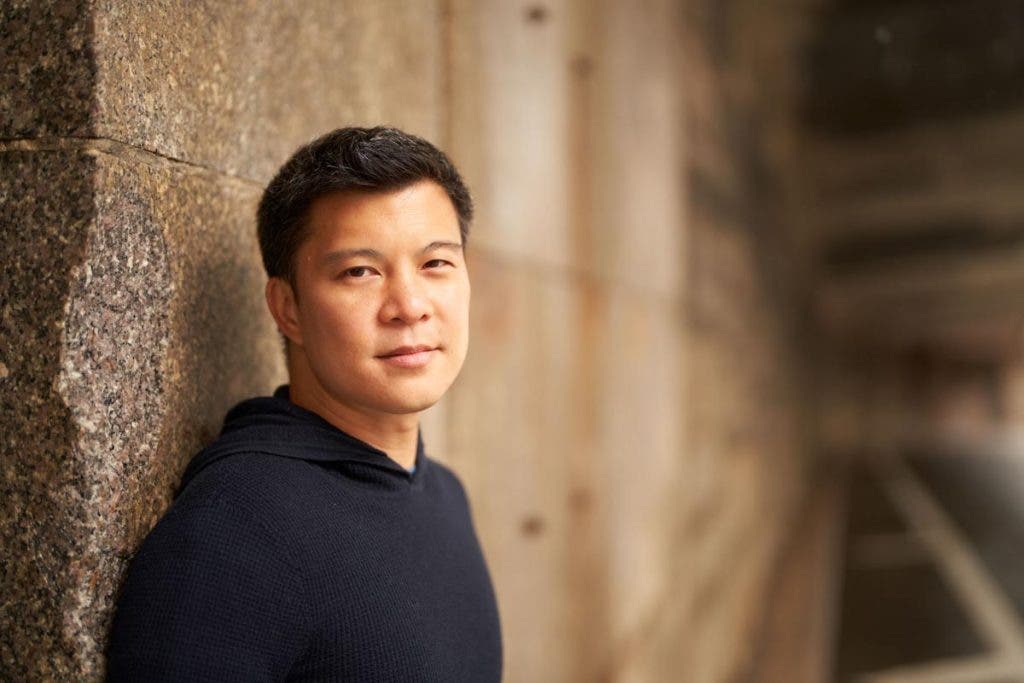
Gold reflector used for natural light portrait (Photo by Tony Gale)
Sometimes something in the environment can work as a reflector as well. If there is a white wall nearby I will sometimes use that as a reflector.
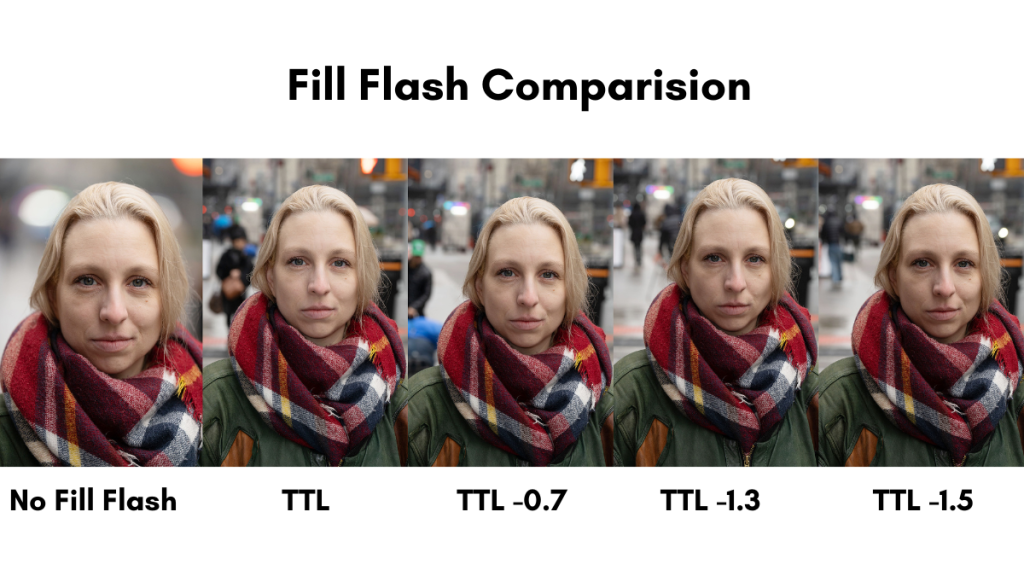
If a modifier isn’t giving the results you want, fill flash may be the solution. Fill flash is using a little bit of flash to fill in the shadows. If your camera has a pop-up flash, that may work, or a hot shoe mount flash will do the trick. Typically, with fill flash, I use TTL and dial the flash down. It can be anywhere from -.7 to –1.3, although every situation is different. If the flash is too strong, the flash can feel too harsh, and if it is too low, there may be no visible difference.
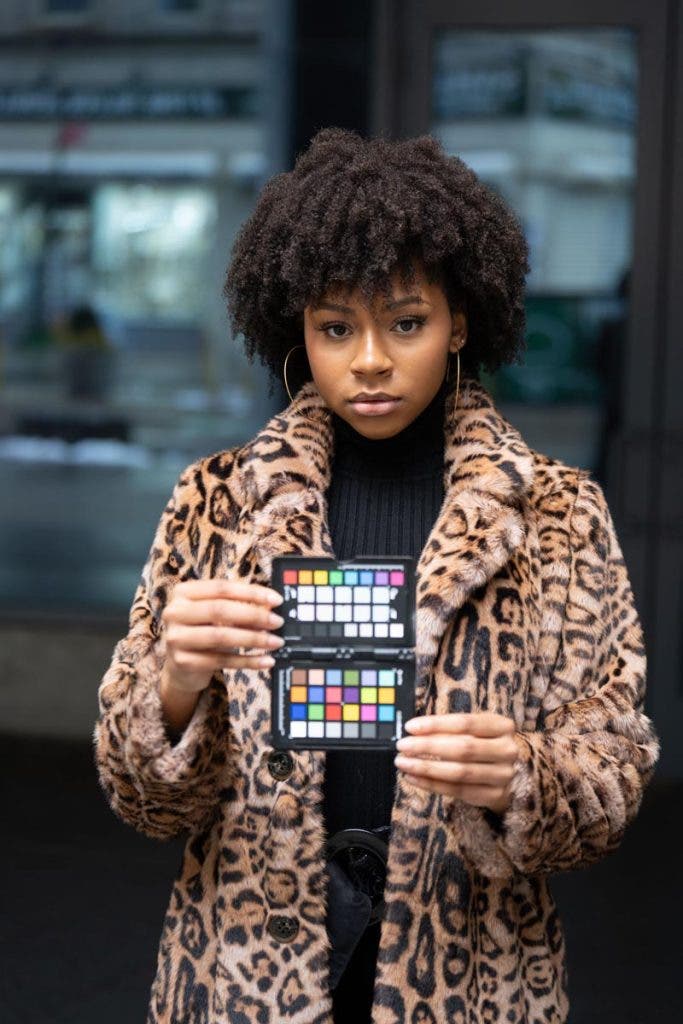
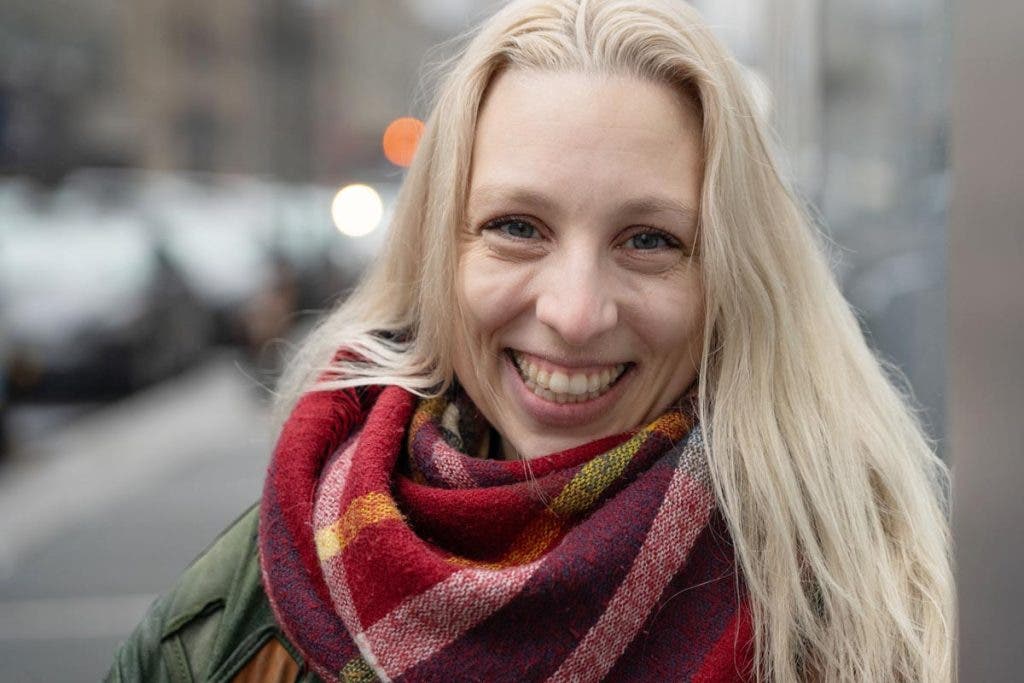
Color balance is essential in photography, especially with portraits. The last thing anyone wants is a weird tint to their skin. Because natural light color can vary so much, I use a Calibrite color checker; a gray card will work as well. Not an 18% card for exposure, but a grey card for white balance. The card gives your photo editing software a reference point when processing the file. I always capture in RAW, so it’s easy to adjust with the color checker. If you shoot in JPG, I encourage you to do a custom white balance in camera, as you will have less editing flexibility. RAW is more forgiving on exposure as well.
Your camera settings will, of course, depend on the situation. I try to keep the shutter speed reasonably high to eliminate the risk of camera shake. However, the in-camera stabilization on most current cameras is incredible and can help a lot if needed. If I am using the Sony FE 85mm f/1.4 GM II Lens, I will try to stay above 1/125. These settings will help with the possibility of camera shake and freeze a subject that is moving a bit.
Note that camera stabilization helps with camera movement but not really with subject movement.
Now the question becomes, “How much depth of field do I want.” Usually, I prefer a shallow depth of field so the background isn’t distracting, but that needs to be balanced with having everything sharp on the face. I will occasionally shoot wide-open 1.2/1.4/1.8, depending on the lens. However, that will get sharp eyes and a slightly out-of-focus nose and ears. It can be a cool look, but for many clients, it’s too much. So, typically, I will do headshots around f/4. That just leaves the ISO, and if I am specifying the shutter and aperture, then I have to live with whatever the ISO is. The days of needing to be at a lower ISO are thankfully behind us, so I don’t worry when setting ISO up to 1600 or even 3200.
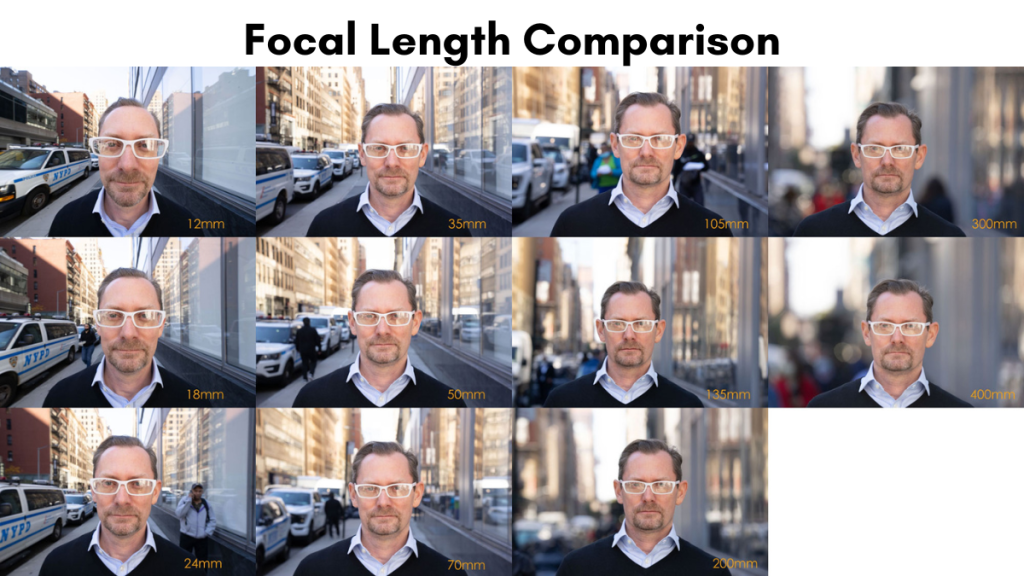
For a camera and lens choice, I am a Sony Artisan, so I obviously use Sony. For headshots and portraits with natural light, I will use either the Sony Alpha a7R V Mirrorless Camera or Sony a1 II Mirrorless Camera because of their excellent resolution and subject recognition autofocus. Lens choice depends on the situation and environment. My two favorite prime portrait lenses are the Sony FE 135mm F1.8 GM Lens and the Sony FE 100mm f/2.8 STF GM OSS Lens. The Sony FE 85mm f/1.4 GM II Lens is also excellent. If I need more flexibility, I will use the Sony FE 70-200mm f/2.8 GM OSS II G Lens. A telephoto lens tends to give a more flattering image with a tight portrait like a headshot and gives good subject separation from the background.
In the end, I will use natural light for portraits and headshots when I need to move quickly and with minimal gear or when the light is just beautiful.