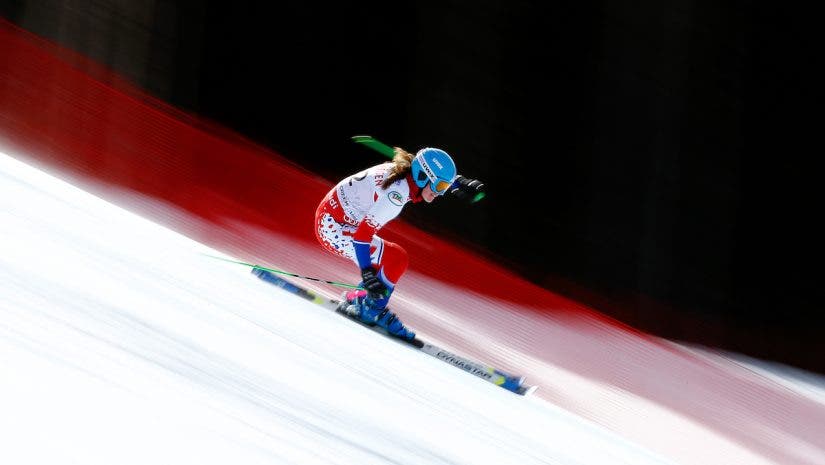
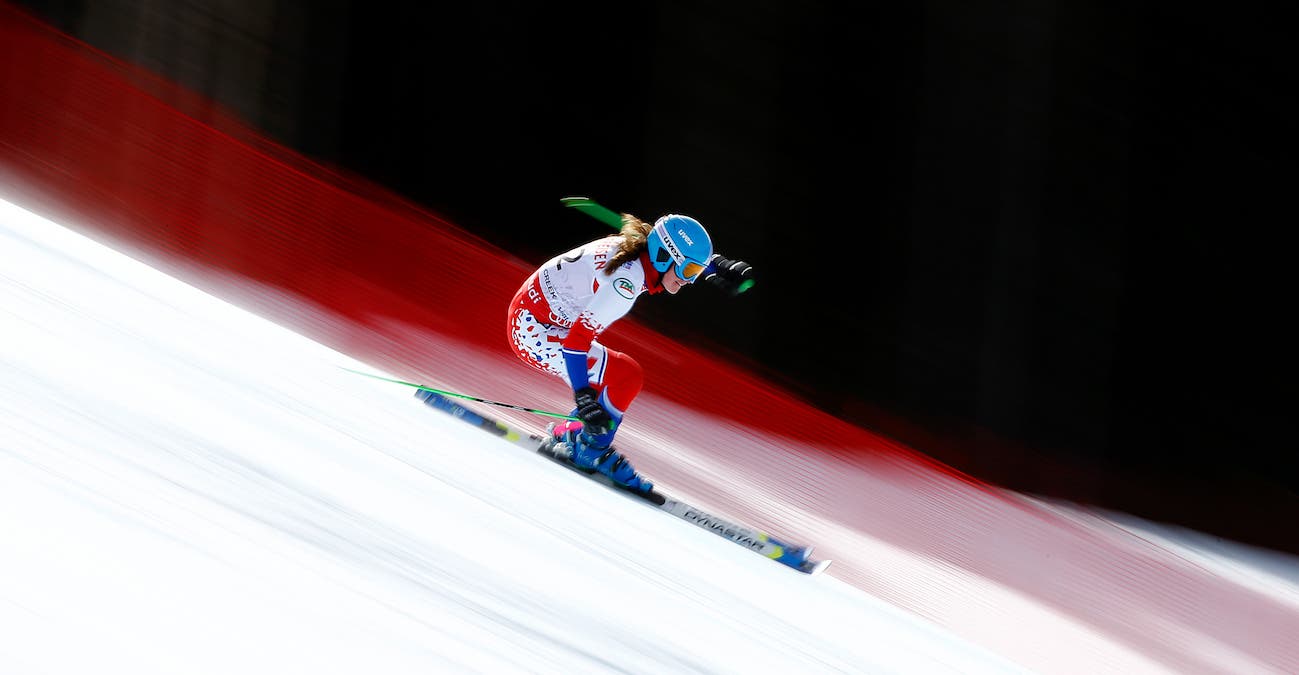
Featured image: BEAVER CREEK, CO – FEBRUARY 12: Erla Asgeirsdottir of Iceland races during the Ladies’ Giant Slalom on the Raptor racecourse on Day 11 of the 2015 FIS Alpine World Ski Championships on February 12, 2015 in Beaver Creek, Colorado. (Photo by Al Bello/Getty Images)
In the 35 years I have been a sports photographer, I cannot think of anything harder to capture than photographing a downhill ski racer coming off a blind jump at 80 mph. I started shooting back in college by photographing my friends while playing sports. I knew then that photography was what I wanted to do. Today, I photograph many different sports for Getty Images. In this article, I’ll be sharing everything I’ve learned during my time shooting ski photography.
Shooting Positions for Ski Photography
Half the battle in covering ski photography is figuring out how to place yourself in a safe position on the mountain. Most of the time, you need to be able to ski to your position. Prior to the event at hand, there are training days that will give you an idea of where the skiers may be at certain turns and jumps.
There are many different areas on the racecourse that the skier goes through. Your job is to find the right angle that you can shoot safely with a pleasing background. This is best on a clear sunny day — either backlit or front lit with a blue sky, or a dark background behind the skier.
Along the Racecourse
You need to be in position for a photo at least an hour before the event starts. Ultimately, you are looking for a turn, jump, or gate that will put the skier in a dynamic position. A member of the governing body skis down the mountain to certify the safety of the people in position along the racecourse. If you are in a danger zone, or in the fall line of a skier, then you need to move. No questions asked. You then need to find another position quickly. If not, you are unfortunately unable to shoot the race from where you want to.
Finish or Starting Line
If you choose, you can also shoot from safer spots like at the finish line area. This is where you will get reactions from the skiers after their race. You can also shoot from the starting area. This is where you will get the skiers coming out of the gate on their way down the mountain. Once you find yourself in position, it must also be approved an hour before the race. Once you are in place and approved, you cannot move until the event is over. It is not safe to move around during the competition.
Off Course
An alternative to finding a spot on the course is to find a shooting position off course. This gives you leeway to leave an event before it is finished. You can also move freely outside the racecourse. It is more difficult to find a good vantage point from a position outside the racecourse — but not impossible.
Shooting “Blind”
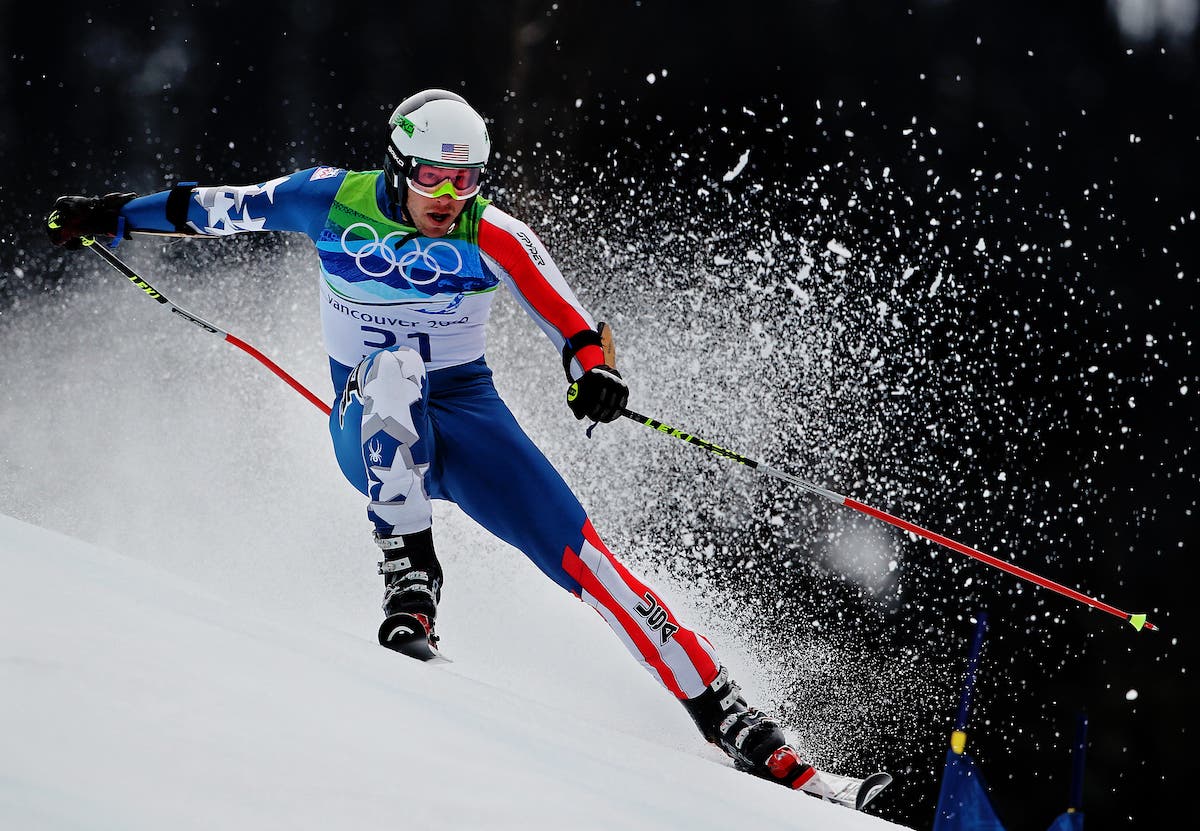
There are a few ways to approach what angle you want to photograph your ski racer. If you were looking for an action shot straight on with the skier coming off a jump, then you may find yourself shooting blind into the jump. This means you cannot see the skier coming down the mountain and you are waiting for them to appear in your frame. Chances are they are skiing around 80 mph. This is extremely difficult, especially if you can’t see them coming. It takes years of practice and experience to be able to do this.
Sometimes you can see them coming down the mountain from a higher gate and get a photograph of them twice. It’s all about timing.
Catching the Mistakes
Sometimes a skier goes off their line, loses their edge, and comes off their skis. There is no way to tell when this will happen other than being an experienced ski photographer who can notice a very difficult turn or jump. This is why it is important to shoot training days. The skiers are not familiar with the jumps and turns on the mountain and make the most mistakes on training days.
Sometimes mistakes also happen at the very end of the race. This is because the skier is trying to get the best time they possibly can and are tired by the end of the race.
Best Gear for Ski Photography
Cameras and Lenses
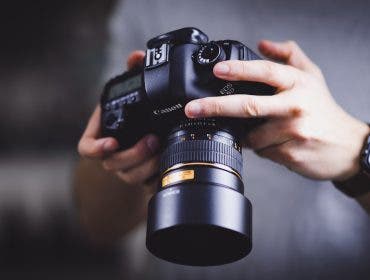
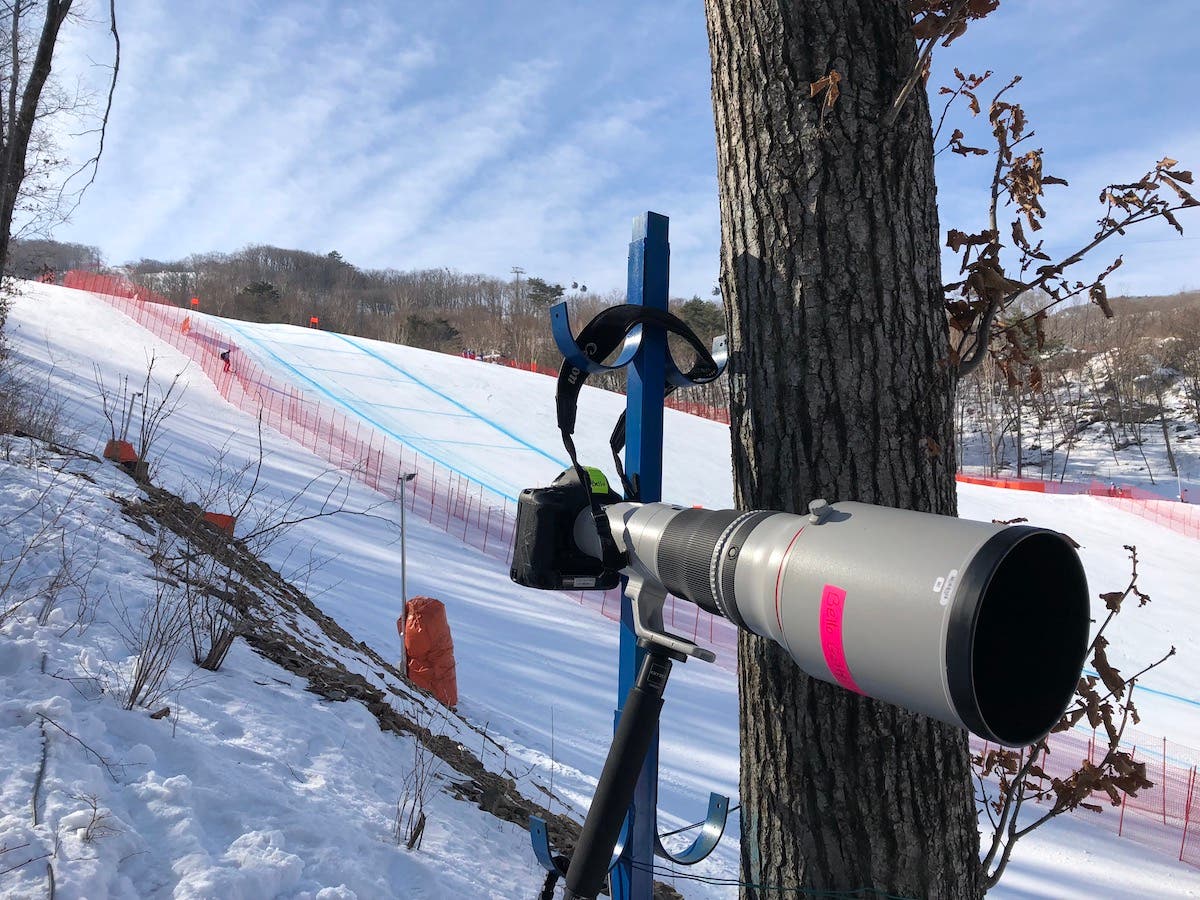
Normally, ski photography is done with a very long lens, like a 400 or 600mm lens. I use a Canon RF 600mm f/4 L IS USM Lens or Canon RF 400mm f/2.8 L IS USM Lens when I am shooting long. Sometimes, I also need to use a Canon Extender RF 1.4x.
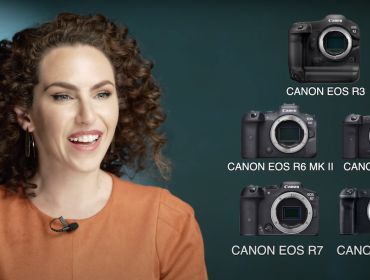
I also carry with me a Canon RF 70-200mm f/2.8 L IS USM Lens and a Canon RF 24-105mm f/4 L IS USM Lens. My camera bodies are the Canon EOS R3 Mirrorless Camera and Canon EOS R5 Mirrorless Digital Camera.
Staying Warm
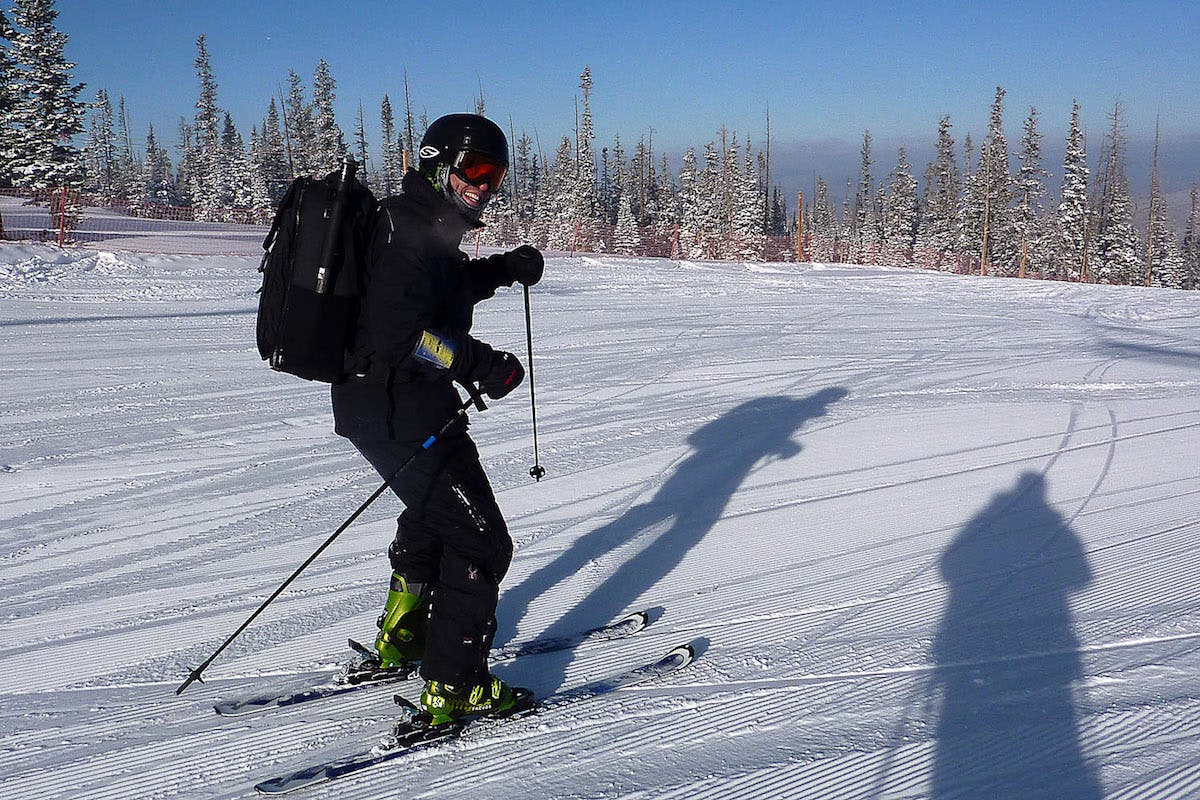
You must be able to put this gear in a backpack and ski the mountain with the gear on your back. If you are not experienced skiing with the added weight, I would suggest practicing before you do this. It can be quite dangerous. The course normally is iced down ahead of time, and sometimes feels like skiing on a sheet of ice.
I also suggest you have a set of crampons to go with your ski boots. Crampons are a robust frame with metal spikes that you attach to your boots to give you increased traction on hard snow and ice. You can put them on your ski boots after you ski to your position. I would not be on the mountain without them.
I also suggest wearing proper winter gear in layers. Once you are in place on the mountain, you are stuck there for sometimes hours. If there is a weather delay or a crash, it holds up the race and leaves you standing there, not moving, in very low temperatures. I suggest having hot packs, a heated vest, and even battery-powered heating devices for your boots, gloves, and body. I also pack something to eat in my bag and water.
Best Camera Settings for Ski Photography
Depending on what you want to do, there are a few ways to set up your camera for shooting. If you are trying to stop the action, then I would have a shutter speed of at least 1/2500 of a second. I prefer to shoot at a wide-open aperture to blur the background. For ISO, I try to keep as low as possible to keep out the noise in the image.
If I decide to do a pan, then I will drop my shutter speed from anywhere between one 1/125 of a second and 1/15 of a second. This technique is a low success/high fail way of shooting. Having said that, if you get one sharp and the skier is in a good position, then the photograph can be quite dynamic.
During the day, the weather may change multiple times and you must adjust your exposure accordingly. Keep in mind that, on a sunny day with all the snow around your frame, you need to adjust your exposure because of the very bright conditions of the snow reflecting on the skier. I am constantly checking my LCD screen or looking in my camera to check if my photo is exposed correctly.
Tips for Ski Photography
Learn from a Pro
If you are just getting started in ski photography, I suggest first going with somebody who knows more than you. I have been lucky in my life to have mentors that have helped me, especially early on when I was learning how to photograph skiing.
Be Ready for the Cold
I would, again, be prepared for the weather. There is nothing worse than working in a snowstorm and you’re not allowed to move. Once the cold sets in, it is very hard to get rid of it in your body.
Check out these tips for staying warm when shooting in cold weather.
Don’t Get Discouraged
You also must be ready to fail. This is a sport that humbles many people, including myself. There are many images that you miss because the skier went by too fast, or was not sharp, or for whatever reason you cut out their head, legs, or ski poles. The key is not to get discouraged and keep trying.
Do Your Research
I would suggest researching the discipline you are photographing. There are many types of ski racing, and each one has its own nuances.
I would also check with the client to see what they are looking for and how fast they need the images. It is a challenge to get images transmitted off a ski mountain. Having said that, it is not impossible with good Wi-Fi. You may also be able to tap into a wireless signal provided by your company or the event space. The alternative is to wait until the race is over and you get back to the pressroom to transmit your photos.
The beauty of photographing the sport is that you never really know what you are going to get until you get it. You only get one chance with each skier. Once they are gone, you don’t see them again until the next event. You must make peace with yourself that you will miss some skiers as they go by. As you get more comfortable with ski photography, your images will improve. The best feeling is when you get a couple of good ones after putting all that work on the mountain.