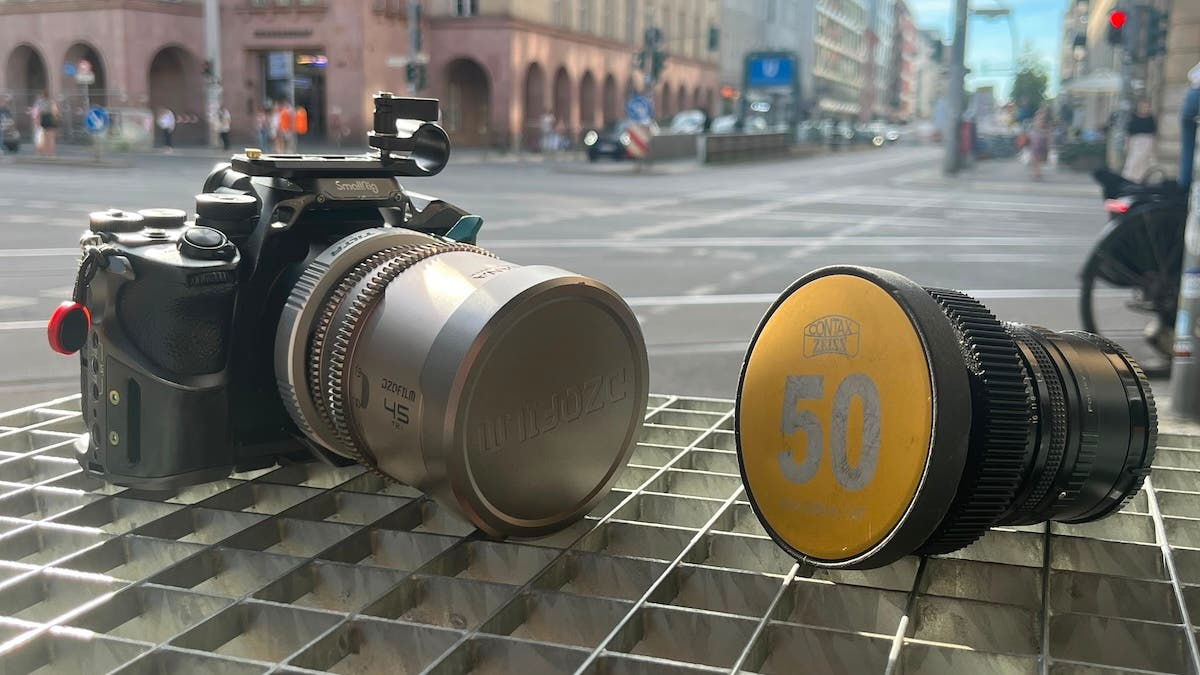
I took a set of anamorphic lenses to a friend’s wedding. Not as the photographer. I was a guest, but I had a loaner set of the new DZO Arcanas, and I wanted to know if a format I love in cinema had any place in still photography. I first made sure the bride and groom would be ok with me taking photos with these very large lenses, and as it was a small group there wasn’t a paid photographer. Otherwise, I would have made sure to speak to them as well to let them know I wasn’t there to get in their way or compete for their shots.
I’m not going to go over what anamorphic lenses are. You can find a really good article from Adorama’s own Leigh Diprose, Anamorphic Lens for Video: What You Need to Know that will help you if you need a primer. I am going to discuss my experiences as well as some tests that I ran.
Using these lenses on my Sony A7RV presented an initial challenge: the camera lacks the internal desqueeze feature found in the FX line. I avoided using a bulky external monitor so I wouldn’t disrupt the natural vibe of the wedding guests. Instead, I relied on imagination and quickly developed an intuition for framing the squeezed image. If you plan to use these for paid work, I highly recommend doing practice tests first to ensure you understand exactly how the final frame will look.
The Gear
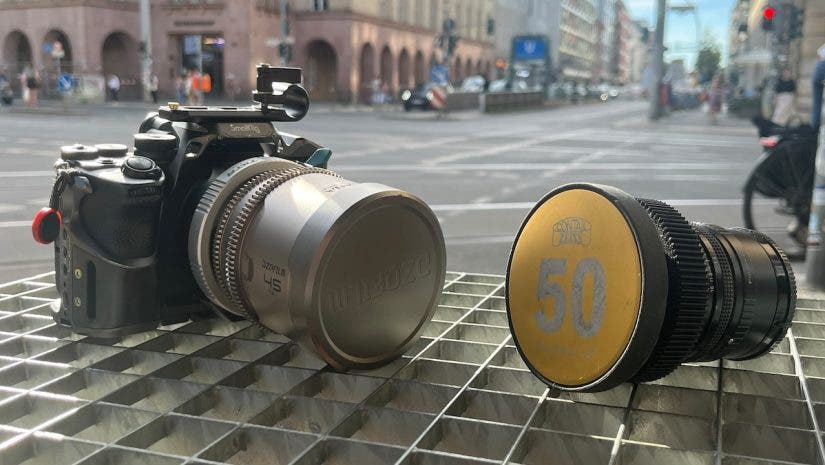
For this experiment, I used the DZOFilm Arcana 45mm T2.1 anamorphic lens on my Sony a7RV, paired with my Contax Zeiss 50mm f/1.4 as my spherical reference. The Contax Zeiss is a vintage lens, but one with relatively clean rendering — it isn’t modern sharp, which puts it in a similar playing field to the Arcana rather than trying to compare it to a very sharp modern Sony lens. While the focal lengths aren’t identical, 45mm versus 50mm, they are close enough to make a reasonable comparison. The Arcana is a fully manual lens with no autofocus, which on static subjects is manageable but requires real discipline on anything moving through frame. Also, the Arcana is a PL mount lens, so I used a PL-to-E-mount adapter to mount it on my Sony.
The price of these lenses, even including the needed adapter, is modest compared to most anamorphic lens alternatives. The three-lens DZO Arcana set costs at the time of this article $2,899. Individually, they are $1,099, and either individually or with the set, they currently include a DZO Octopus PL adapter with the choice of several different mounts for free. The PL adapter I used also unlocked an unexpected workflow advantage: by keeping the lens in the same orientation and rotating the camera 90 degrees, you can shoot vertical frames while maintaining consistent bokeh and flare characteristics, something I’ll be covering in an upcoming article on shooting 9:16 anamorphic video for vertical reels.
Field Workflow & Desqueezing
When I do event work, I often send off a few images to the client right away. This little unexpected extra makes them very happy and is always worth the minimal effort. So, as usual, I also wanted to deliver a few images to the bride and groom immediately after the wedding, on my train ride back. The workflow in the field was simpler than expected. Blazar makes a free app that batch desqueezes anamorphic images directly on your phone. I offloaded select shots from the Sony to my phone on the train ride back home, ran them through the Blazar app, and had desqueezed images to edit with Snapseed, and then sent these to the bride and groom the same night — not final edits, but good enough for immediate sharing.
For full resolution work, unfortunately Lightroom does not yet handle anamorphic desqueezing, so I had to go the Photoshop route. I looked up a way to batch process the images using a script I found online that automated the Photoshop desqueezing process, which saved me a considerable amount of time, though if you go that route, be careful about the source.
How to Download the Blazar Desqueeze App
Google Play store
App Store for iPhone
The Wedding
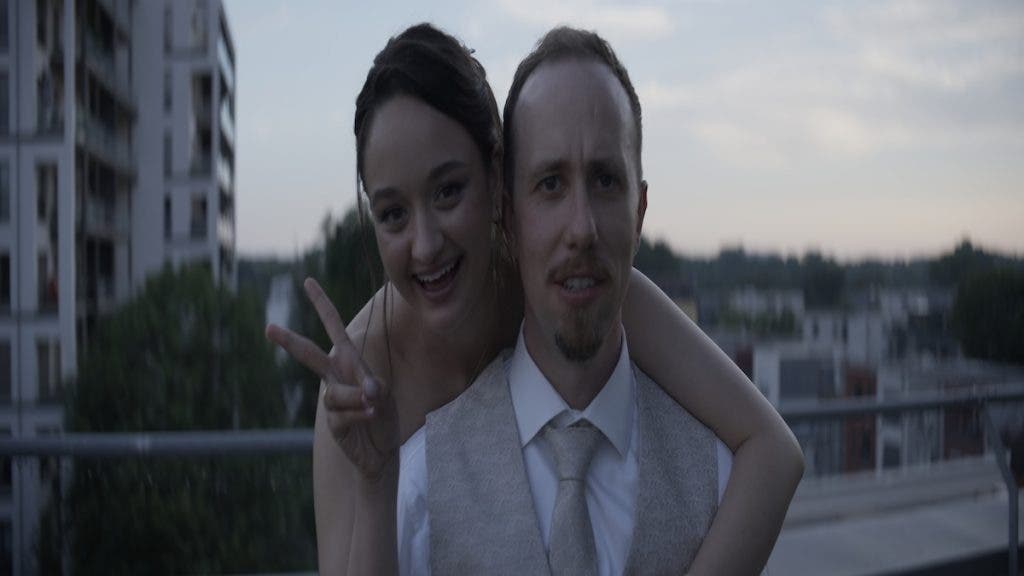
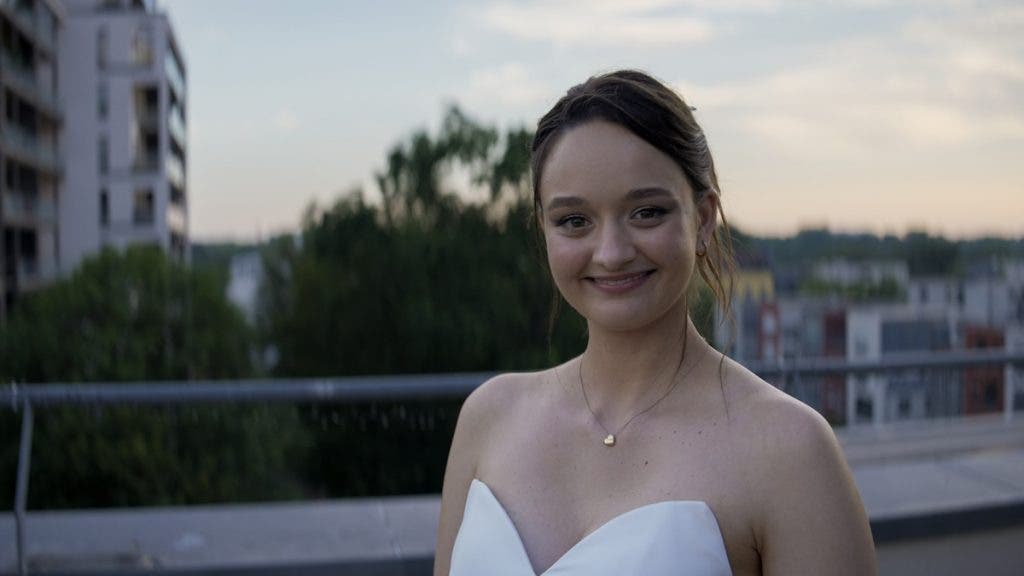
The wedding gave me my first real test of the format on human subjects. Anamorphic is a very specific look. You get great separation between the subject and background, but it still isn’t a format for every subject. Shooting a solo portrait, I found the wide aspect ratio working against me. A single centered subject in an ultrawide frame leaves a lot of real estate on either side that needs to be justified compositionally. I could of course crop in and change the framing, but that would defeat some of the purpose of using this lens. The balance of subject to background feels off to me in this frame.
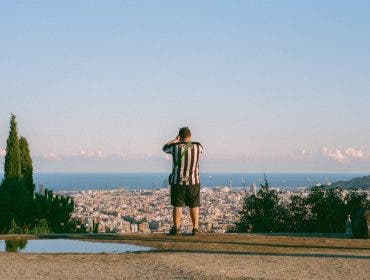
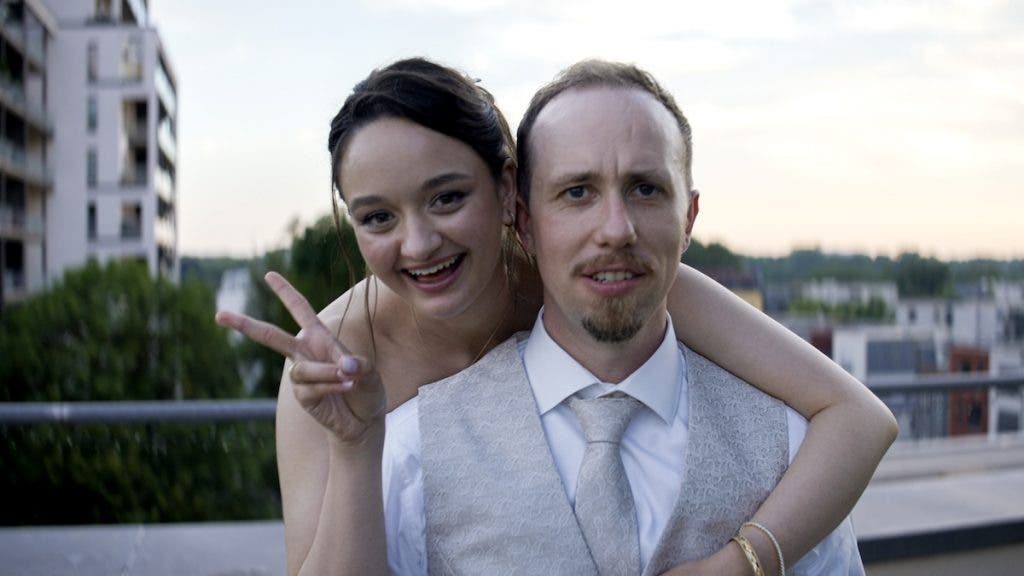
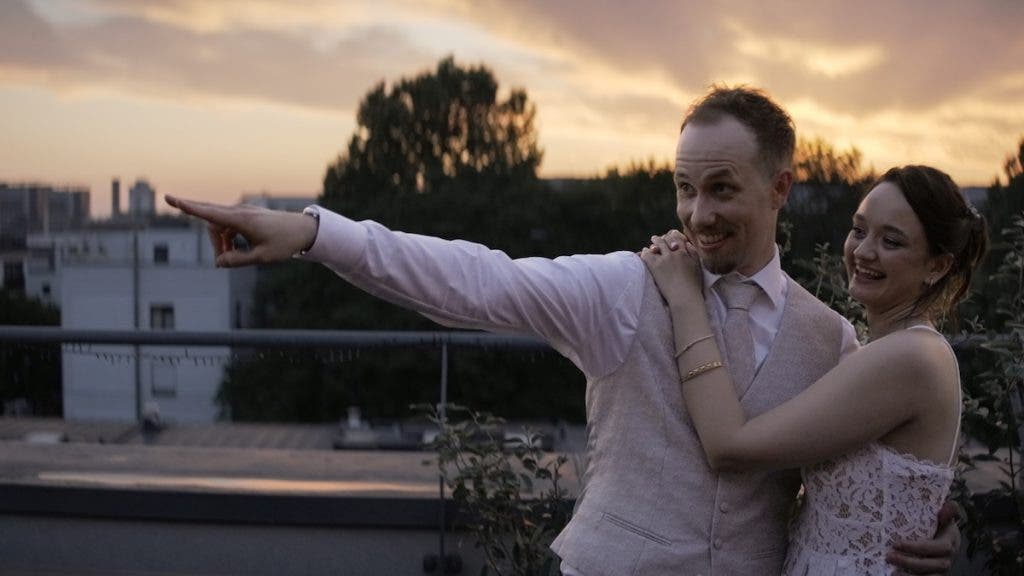
Where anamorphic photography earns its keep is when the environment has something to say. When the sun started to set, I was able to get images where the composition made more sense. In the image below, I exposed for the sky and brought the subjects up in post, which gave the frame a scale that felt proportionate to the occasion. The width of the anamorphic format suddenly had something worthy of it. With him pointing into the empty space to the left of the frame, the city behind both of them, the clouds, the fading light, a standard 3:2 frame would have forced a choice between the sky and the skyline. The anamorphic didn’t.
Anamorphic Against Spherical Comparison
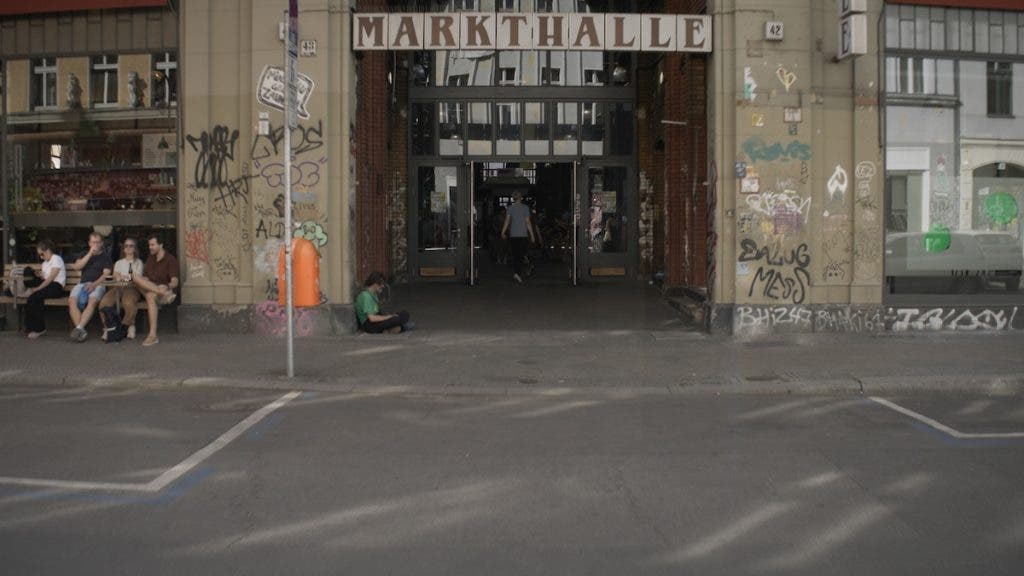
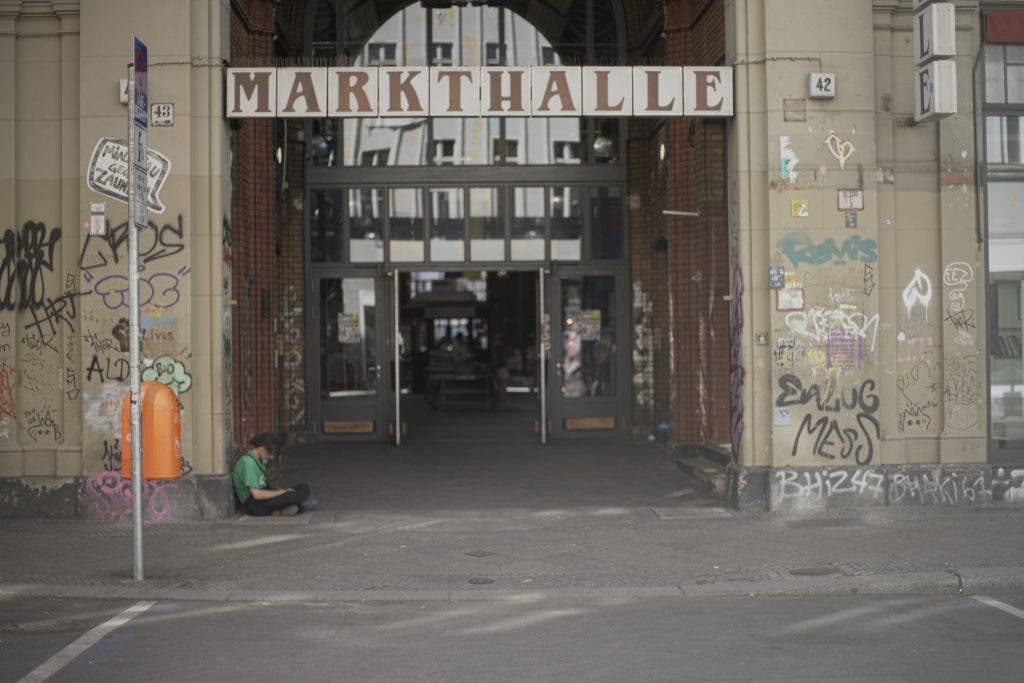
The two images below show the same market, Markthalle Neun in Berlin, from the exact same distance. I didn’t move to compensate for the shift in horizontal coverage. The anamorphic frame pulls in a café seating area on the left that simply doesn’t exist in the spherical image. Not because I cropped the spherical, but because the lens captures a fundamentally wider horizontal field from the same position. Again, there is a difference in the lenses as the top image was the anamorphic lens at 45mm and the bottom shot was at 50mm spherical. I will be honest and say that this is a much larger difference than I was expecting, even accounting for the 5mm lens difference.
I also made an animated gif that shows the difference even clearer. This shows not only the difference in rendering of space, but also what effect anamorphic can have. In this image and with this specific anamorphic lens, you can notice the large amount of barrel distortion and vignetting. While this might be a turnoff for many photographers or filmmakers, I personally find that the quirks of this lens work, at least for this subject.
Matching Framing & Spatial Dynamics
My next experiment was to take the opposite approach. I had to match my anamorphic framing with my spherical lens as closely as possible. I did have to back up quite significantly. I’d say around 5-6 feet. That physical distance changed the spatial relationship between subject and background. In this example, the difference was much more what I was expecting.
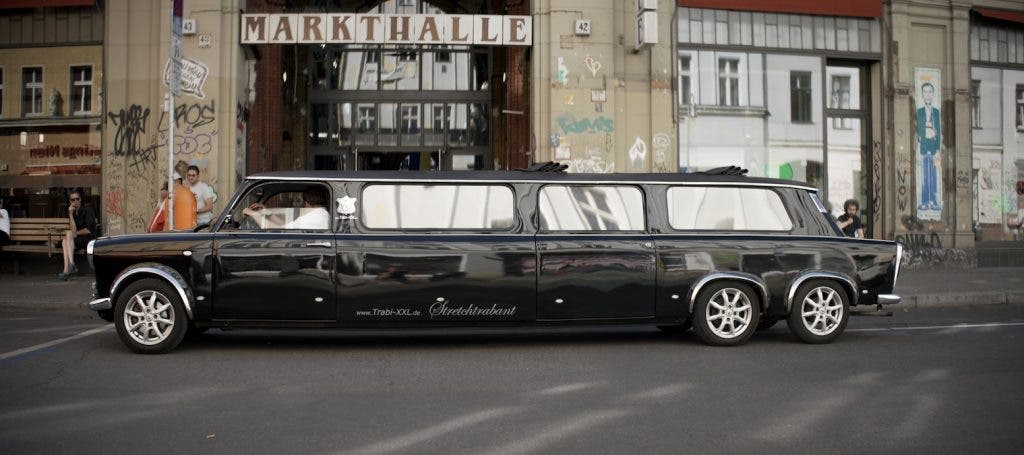
While shooting at Markthalle Neun, a stretch Trabant rolled through the frame. I got the shot on the anamorphic, but didn’t have the time to switch to my spherical lens. Looking at this image afterward, it struck me that some subjects are simply made for this format. The car is inherently horizontal. It fills the width of the frame naturally. Shooting anamorphic changes what you look for. I had a feeling this would be a strong image for this format, and I’m pleased with the outcome. Also, with a spherical I would have had to use a much wider lens to get even close to this framing.
Berlin at 3am
I went out one night specifically to shoot for this article and to scout locations for an upcoming anamorphic vertical video shoot. At around 3 am, I spotted a cluster of construction cranes against the summer night sky. They looked like giants, waiting for their time to work, and the anamorphic frame suited them perfectly. The horizontal arms of the cranes have room to breathe in an ultrawide frame in a way they simply don’t in 3:2. This isn’t a subject you’d reach for with a standard lens. It’s one the format revealed.
The Spätkauf around the corner felt like an obvious candidate, wide, brightly lit, very Berlin. But this is where the format showed its limits. With nowhere further to back up, as there was a bush right behind me, the lines of the sign bend visibly toward both edges of the frame in a way that I don’t personally like. However, I bet some photographers wouldn’t mind this look. Something I learned is that to get solid anamorphic shots you need a bit of distance. In a tight urban situation where you can’t back up, the distortion compounds quickly, and trying to correct it in post kind of defeats the purpose entirely.
The Verdict
Anamorphic lenses for stills isn’t for everyone, and it shouldn’t be. It takes real experimentation to discover whether it fits your style, your workflow, and the subjects you shoot. The format has genuine limitations. It needs distance, it punishes tight spaces, and composing through a squeezed viewfinder takes a lot of practice.
But when the conditions are right, there’s a quality to the image that’s difficult to replicate any other way. A width that doesn’t feel artificially wide. A separation between subject and environment that has weight to it. A frame that makes certain subjects, such as a couple on a rooftop at sunset, construction cranes at 3 am, a stretch Trabant rolling past a Berlin market hall, feel like they were always meant to be seen this way. It’s a specific tool, not a replacement for what you already carry. But for the moments when you want a touch of cinematic weight in a still frame, it earns its place in the bag.