Even in the darkest night, there is light -but sometimes the only way to see it is through yourcamera. This is why night photography is so fascinating. Like black and white photography,night photography allows us to create something by virtue of our tools’ capabilities to capture somethingthat wecannot see with our naked eye. A thirty second exposure changes the way we see the world.
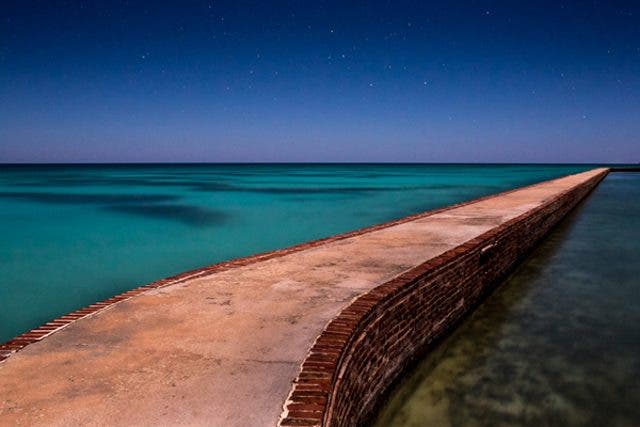
Image Note: ISO 800, 30 seconds, f 8.
Three hours after sunset on an island in the middle of the gulf of Mexico, and a two hour boatride from anywhere with a power-line, the depthof the night’s darkness is intense. On somenights you are assisted by the moon for a few hours, but this kind of darkness requires additional work and skills in exposure. But with a few tips and a little practice,you will be making the night come alive in your photographs.
Exposures at night:
The first thing you need to know when photographing at night isyour exposure, and just like during the day, that exposure willchange constantly based on where you are and what isilluminating the scene. But there is a general guide youcanfollow. You may have heard of the “Sunny 16 Rule”, which isthat at f16, you will get the right exposure on a sunny day if youset your shutter speed as close to the ISO as possible (100 ISO= 1/100 sec / 200 ISO = 1/200 sec). Well, when you areroaming the countryside at night, it is a great idea to bring a fullmoon with you so you can have a little illumination. The basicexposure rule on a moonlit night is described in the “Loony 11 Rule”, which is much like the Sunny 16 rule. You will get aproper exposure of the surface of the moon at f11 when yourISO and your shutter speed’s match (100 ISO = 1/100 sec / 200ISO = 1/200 sec). What you get on the earth is a completelydifferent story as it is based on the phase of the moon and theatmosphere the light must travel through, but because you knowthe exposure of the surface of the moon, you know at leastwhere to start.
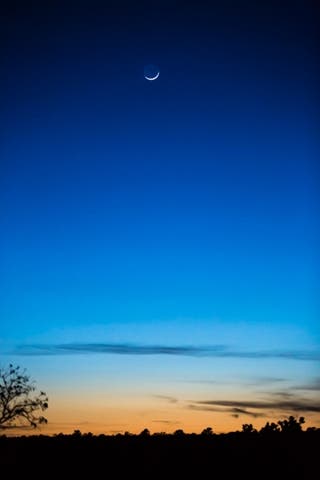
With that basic rule of exposure under your belt, the next thing you should know is thatwhendealing with a cityscapes, the incandescent, cfl and other light bulbs put out the same basicintensity of light, no matter where you are. Which means that once you have found anacceptable exposure for the streetlights or window lights of a given city, you know the basicstarting point for your images. As you find the proper exposure for these lights, make a note of
them so you can use that information as a starting point for the next photo.
Settings and Equipment
It goes without saying that manual exposure mode is the only mode to shoot in at night. And inmost cases you will want a tripod and a shutter release cable to avoid introducing camera shakeinto your images. Even if you think you have a steady enough hand to hand hold a 20 secondexposure (which you can’t),the tripod will also allow you to create HDR (High Dynamic Range)images by photographing the scene in a series of different exposures.
Here is a list of equipment I travel with for the express purpose of night photography:
Camera – I use the Canon 5D Mark III with has minimal noise on long exposures
Fast Lenses – faster lenses give me more light
Tripod – for long exposure work
Shutter Release Cable – for avoiding camera shake even when on the tripod
Flashlight – for focusing the camera, seeing as I walk and adding light to the image
iPhone – for making notes and marking my locations
Starting with Composition:
When you are wandering around during the day, looking for something to photograph, you havethe advantage of being able to photograph something very quickly and review those images forpossible improvements to a concept. During the day, you are shooting well over 1/200th sec.,but when you shoot at night, those exposure times can get into the minutes or even hours.Standing by as you expose a photo for 10 minutes only to find that the images is worthless due
to focus or composition is depressingly inefficient. This is why you must learn and practicecalculating equivalent exposures.
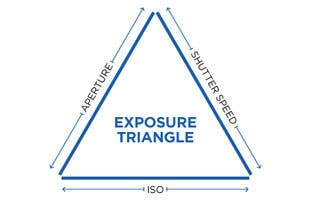
Start by taking your images at an extremely high ISO (6400 ISO) and set your aperture andshutter speed accordingly. If needed, open up your aperture to f 1.4 … anything to get thatshutter speed up to a decently short duration. This will allow you to make a series of quickexposures to find your composition without having to wait 10 minutes for each shot.. Once youhave your composition, bring your ISO down to 100, 200, 400, 800 (these are all acceptablyclean on my camera–the Canon 5D Mark III). However, once you change your ISO from 6400to 100, you have just lost six stops of light. Then, if you need more depth of field in the shot,you need to move the aperture from f1.4 to f8, so you have loose another 4 stops of light for atotal of -10 stops. With the ISO and Aperture settings changed, now slow down the shutterspeed to let 10 stops of light back into the camera. Let’s say it was at 1 sec… slowing down theshutter speed by 10 stops would take us to a 17 minute exposure. You can see why testing at 1second is a much better plan. Remember, you do not always need to make your images at 100ISO. Modern cameras have very clean higher ISO settings.
Ambiant Burn:
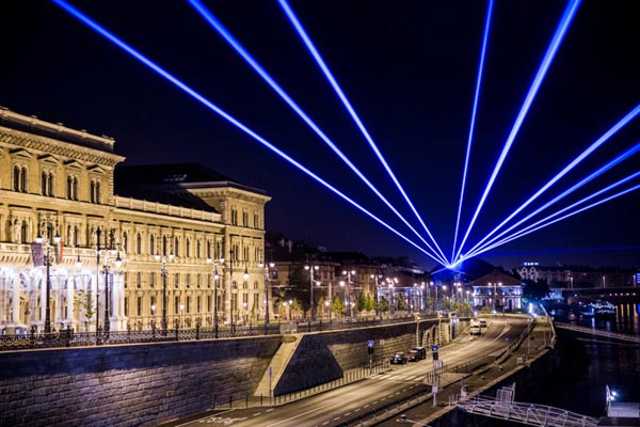
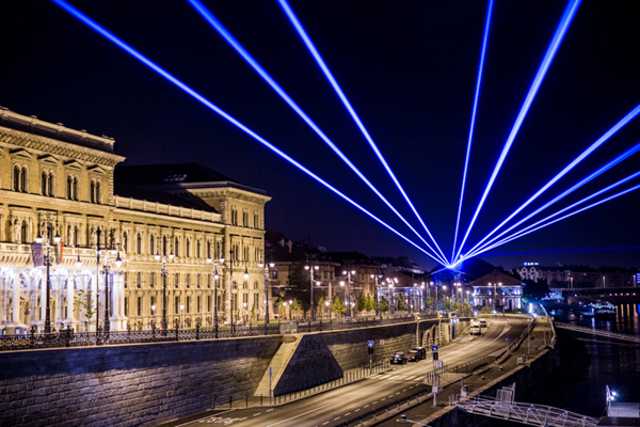
When setting up your exposure, you are looking for the perfect amountof ambient burn and if something is moving, like traffic, lightning orfireworks, you need to determine how long your shutter should remainopen in order to capture those lights. Remember that increasing yourISO or opening up your aperture only gives you more light (brighterlights). Slowing down your shutter speed is what gives you the ability tosee motion over time. This is critical in capturing alightning bolt,cascading fireworks, the motion of traffic, or in the case above, thenumber of lasers in one shot. Remember, you already have yourcomposition, now it is time to slow down the shutter speed and find theright amount needed to record the motion your wish to see in the photo.
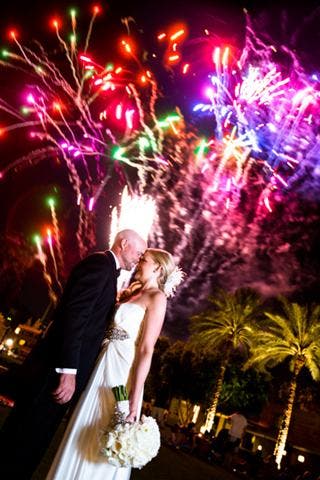
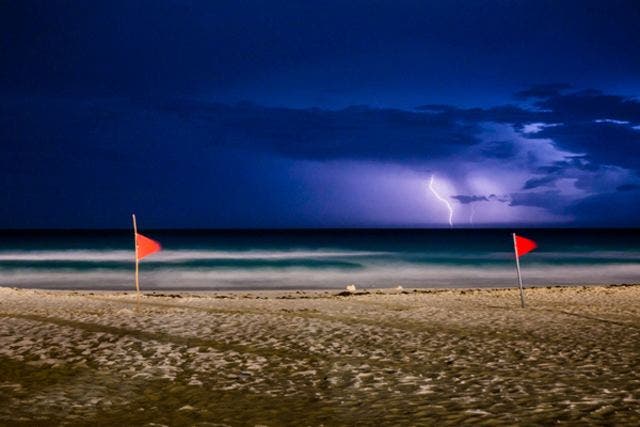
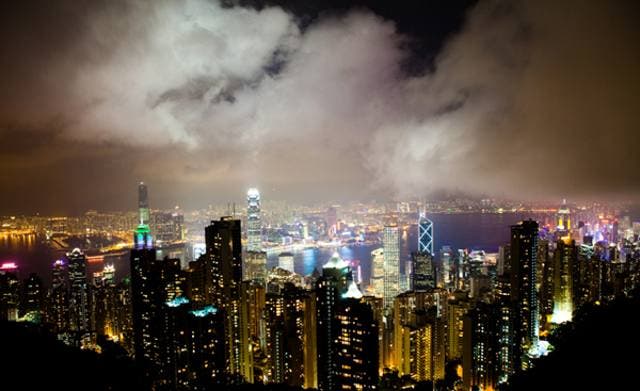
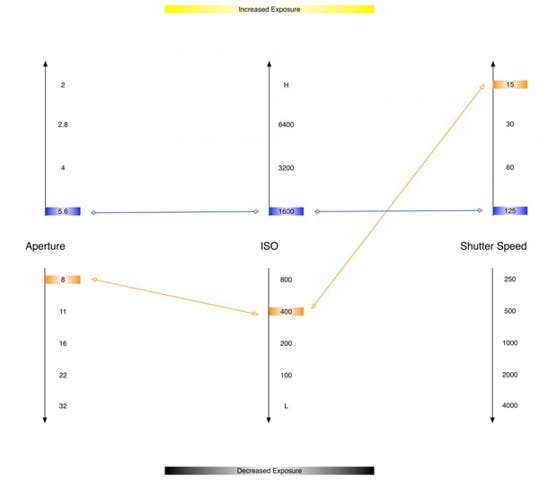
Most city lights can be burned in quickly at ISO 100 at f 8, at a 2 second exposure time. Youcan calculate a new equivalent exposure anytime you need a faster shutter speed, or moredepth of field, etc. Each time you raise one number, you have to choose another setting andlower or raise it to get the same equivalent exposure.
EQUIVALENT EXPOSURE EXAMPLE
Adding People to your Night Photography:
Adding people or other moving things to your night photography will add an additional layer ofchallenge to the photograph. People move! At a shutter speed of 10 minutes, you will find itimpossible to photograph anything but ghostly figures in the night. Consider the following twoimages. One is a self portrait, the other a seascape.
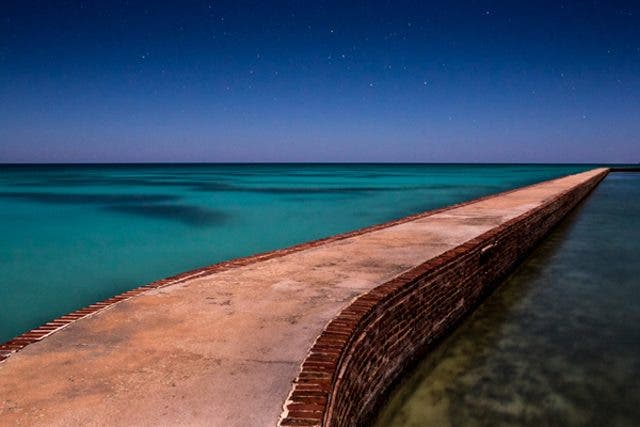
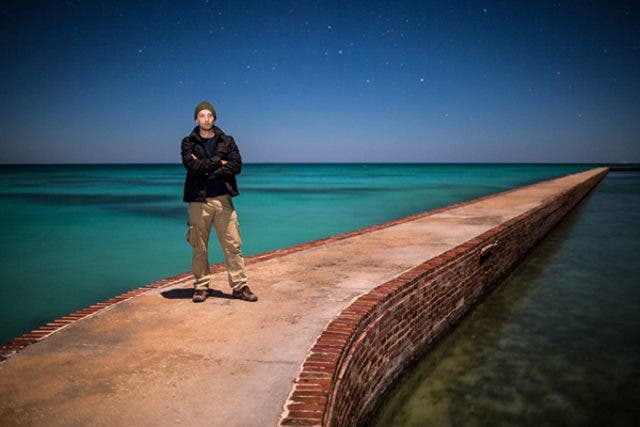
While the sea scape can be shot with anextended depth of field (f8) and a slowshutter speed (30 Sec), the portrait in thesame locationneeded a much faster shutterspeed and a little light on my face, which wasa simple little flashlight which was used topaint light up and down my body from adistance of about 20 feet. So the shutterspeed was changed from 30 seconds to 4seconds. I still had to hold extremely stillthroughout the self portrait. This methodworks if your subject can hold still while youphotograph them, but in most cases, no onewants to or can stand perfectly still for 4 seconds.
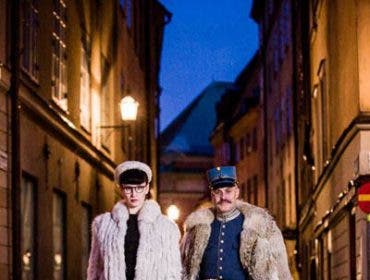
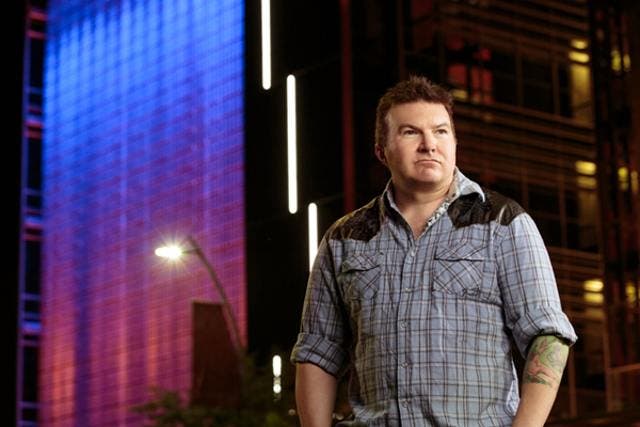
In the following image, the ambient light on the building required ISO 800 at f 5.6 at 1/10 sec.But, because our subject was standing across the street in the darkness, the ambientbackground light had no effect on him. Instead, we employed flash. By introducing a flash, theentire dynamic changes. A flash emits light for a very short duration of time, faster than a 1/200of a second and up to over 1/1000 sec, which means, that the subject will not be a blur in ourphoto even if the camera shutter speed is slow. This is how we separate out the ambient burn(the background) from the flash exposure onthesubject.Withindependent control over thelighting in the background and the foreground, we can create extremely dramatic lightingscenarios. But, it is imperative that we place the subject in the darkness so that the strobe isthe only light source on the human.
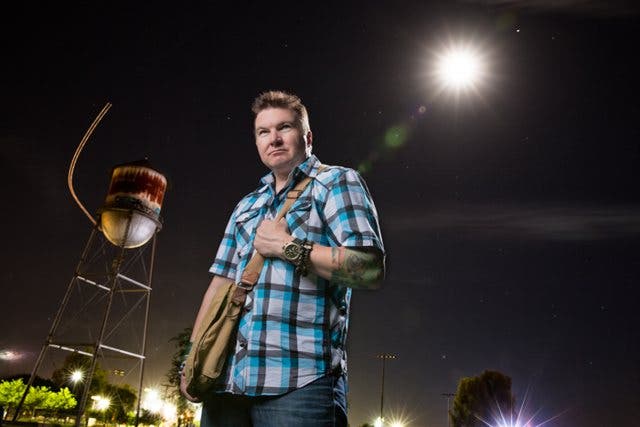
In many circumstances, I have no tripod, no flash, no time,but an amazing image presents itself. When that happens,the answer is to increase my ISO and open up my apertureto allow for a faster shutter speed. In this case, it was ISO1000 at f 1.4, which made 1/40 sec possible.
Use Your Histogram:
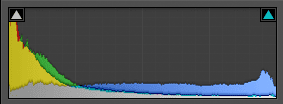
Trusting what you see on the back of your camera LCDscreen is not reliable out in the field, especially whenshooting at night. In your camera menus, set your cameraLCD screen to show you the RGB and Tone histograms.Make sure you have all of the data in your histogram thatyou need in your image. If you have white in the image,you should see that white represented in the histogram. Iknew I would have enough detail in my image because Ipaid attention to the shadows in the histogram.
Compare the histogram below the image above it.Ahistogram should look like its photograph. If your image isfull of darkness, you should see that represented in yourhistogram as piles of shadow and vice cress on thehighlights. Most importantly, watch for clipping on the rightand leftsides of your histogram. Some clipping may beacceptable and some cannot be avoided. But payattention to the histogram, that is the truth about your
image.
When You Don’t Have a Tripod:
When a tripod is not an option, find a bridge railing, a stone wall, a bench or even a lamp postand use it to brace and steady your camera. If your exposure will be a long one and you don’thave a shutter release cable, use the two second timer on your camera to allow you to press theshutter and move away from the camera before it opens and begins exposing. Movement offlags and people and cars is one thing, but camera shake is no good!
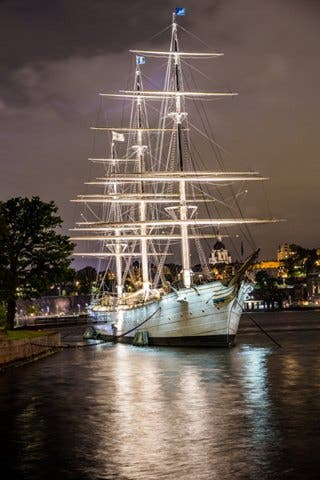
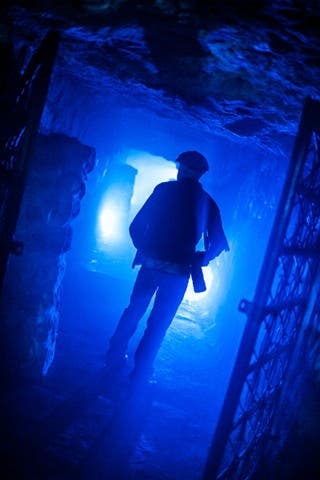
This image was captured off a bridge without the use of a tripod or shutter release cable at ashutter speed of almost two seconds, but because I had firmly steadied the camera to therailing, there is no camera shake.
Conclusion:
Throughout your studies in photography, each concept you have learned has built upon theanother. Photography is a complicated combination of concepts, computations and controls andwhen you use them together, you can end up with an image to write home about! Fortunately,we live in the digital age, when photography is easier and faster to learn than ever, because youcan see your results immediately. Learning night photography relies more upon that immediatefeedback than any other niche. When you go out to practice, do so with the time and patienceto really learn from what you are doing. Start by looking for compositions, then work through theexposure, paying close attention to your histogram. Shoot over and over again. If you don’t feelyour imageswere successful, go back again another night. If you follow the advice I have givenyou, the process will be faster and easier, but you will still fail more than you succeed, and thatis just fine. Learn from each failures and keep trying. You will get something great before youknow it. Oh, and learn from those successes too.
About Jared Platt:
Jared Platt is a Lifestyle, Wedding and Portrait photographer from Phoenix, Arizona. In addition
to running a photography business, he travels the world giving lectures and workshops on
photography, lighting and post-production. Learn more about Jared and his photography and
workshops at www.jaredplatt.com.
Twitter: @jaredplatt
FB: jaredplatt
Instagram: @jaredplatt